Healing Tools in Photoshop: Picking the Right One
![]()
Fixing blemishes is one of the most basic uses for Photoshop, tiresome though it is at times. They vary, these blemishes, whether they’re dust spots on digital images, marks and scratches on film scans, or blobs, stains, and tears on old prints. Other blemishes are the kind that exist on your subject, like skin flaws.
The type of area you’re trying to heal or retouch usually dictates what works best. For instance, which tool would you pick for dust spots over patterned or textured areas? How do you remove awkward flaws along edges? What about detail that is obliterated, whether by photographic error or age?
One thing about writing articles is that it often fills a few gaps in the author’s knowledge, or it dusts off details that once were easily retrieved. I hope the following helps some of you in addition to enhancing my own know-how.
Table of Contents
Healing and Cloning Tools, and Generative AI
Spot Healing Brush Tool
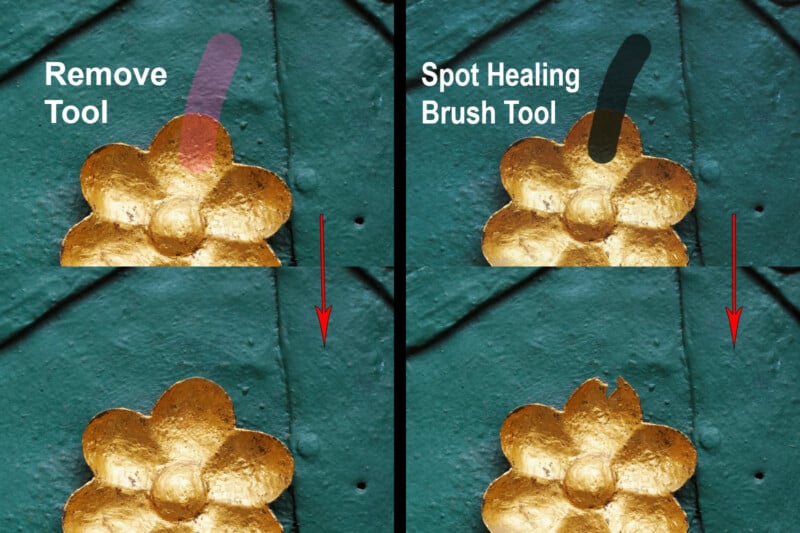
The Spot Healing Brush Tool is good for removing small blemishes in plain areas, such as small skin imperfections or dust spots in the sky. Sometimes this tool works well over repetitive patterns, but it’s unreliable with edges, often deforming them.
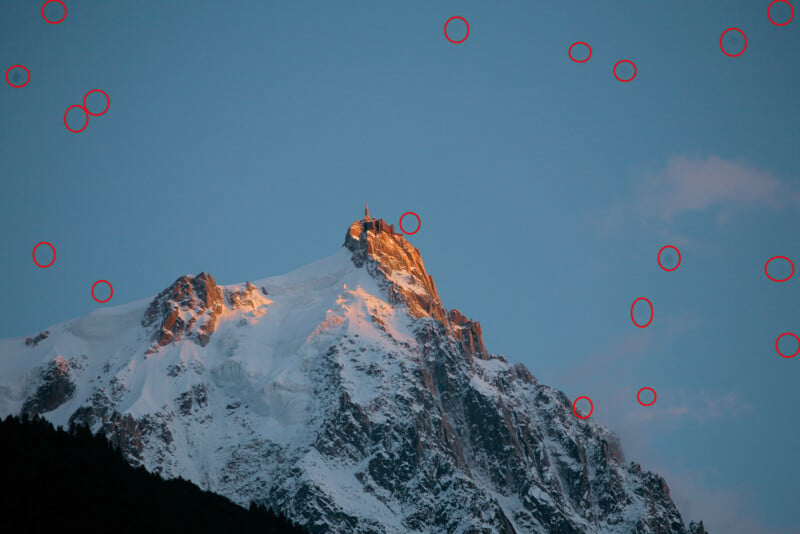
A great benefit of the Spot Healing Brush tool over the newer Remove tool is its speed. It works instantaneously, whereas the Remove tool might keep you waiting for several seconds, particularly on the first use of any session for some reason.
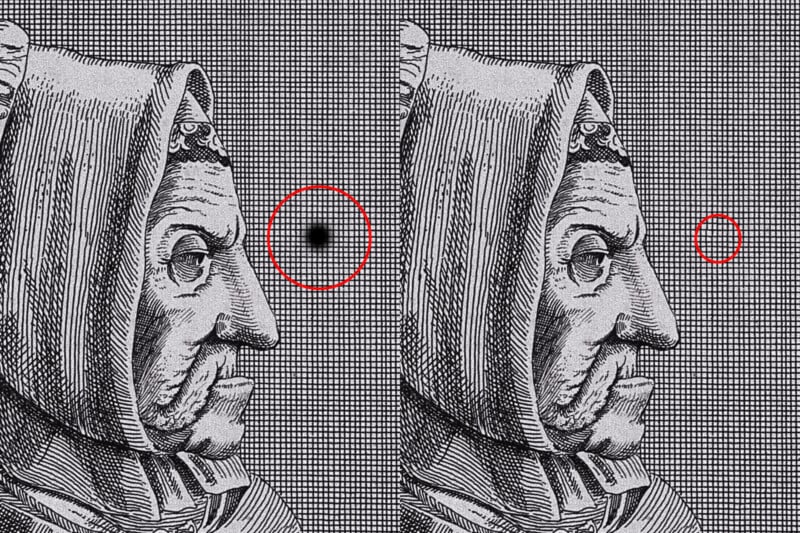
Perhaps because of its speed and suitability for many everyday tasks, the Spot Healing Brush tool sits atop Photoshop’s “J” set of healing tools. (You can rifle through the tools by hitting Shift + J on the keyboard.)
Remove Tool
The Remove tool removes unwanted items or blemishes from the image and replaces them using an advanced algorithm or Generative AI (from version 26.0.0). You won’t need Generative AI provided there is a suitable area in the image to sample from.
Without Generative AI, the Remove tool is still a powerful tool, and skipping AI makes it faster. It only struggles when the detail in the image is ever-changing, or the potential sampling area is too small or narrow. That’s when AI becomes invaluable.
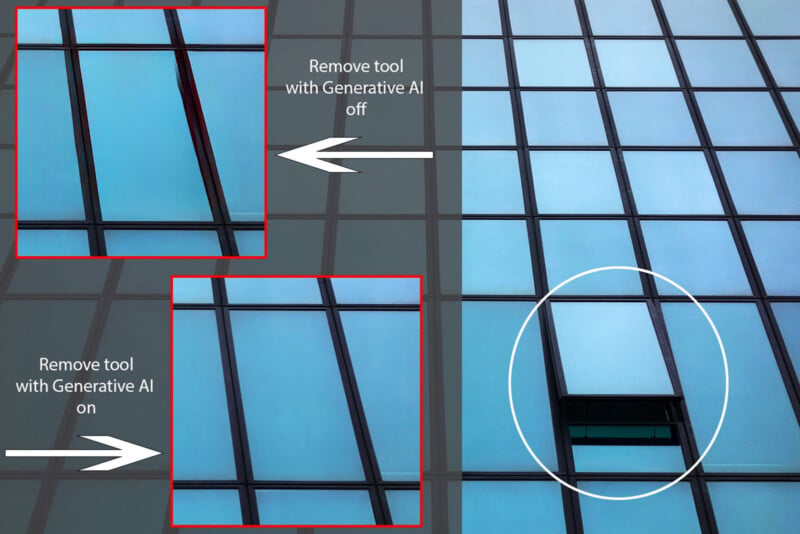
The Remove tool is better than the Spot Healing Brush at maintaining the integrity of edges, even in its non-AI form. It makes smarter decisions about where to sample from and seems able to reorient details to some extent. For instance, the offline Remove tool can rebuild damaged corners if it sees other intact corners.
Remove Tool: Find Distractions
New in Photoshop 2025 is the “Find Distractions” AI function under the Remove tool. This automatically selects wires and cables or people, and in the case of the former, removes them without further ado. Selections of people are editable.
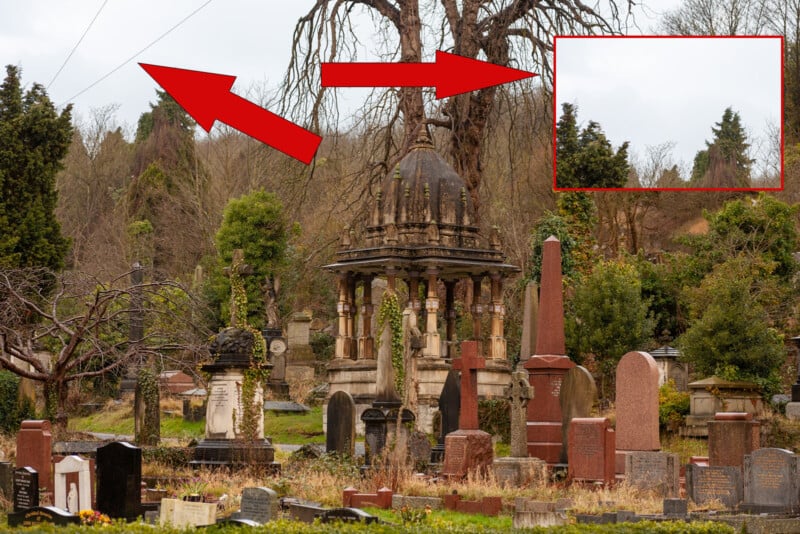
The Find Distractions tool is good at finding and selecting people, but you’ll often need to add their shadows to the selection. There’s a limit to how much detail you’d want to reinvent behind “distractions” in well-known locations, so their position is critical.
Healing Brush Tool
Choose the Healing Brush tool if you want control over where pixels are sampled from. This is the manual version of the Spot Healing Brush. Before healing, you sample a suitable area of the image rather than have Photoshop attempt it for you.
Turn to the Healing Brush tool to accurately maintain texture and shape in the area you want to heal. It will attempt to match color and brightness in the target area. It can work better than automatic tools when you only have a small or narrow area to sample from.
Both Healing Brush tools and the Clone Stamp come with blend modes. Darken and Lighten modes are useful in certain circumstances. They let you target light and dark areas (e.g., distracting specular highlights using Darken mode). You can fade the effect of healing brushes or use them on a separate layer and reduce opacity.
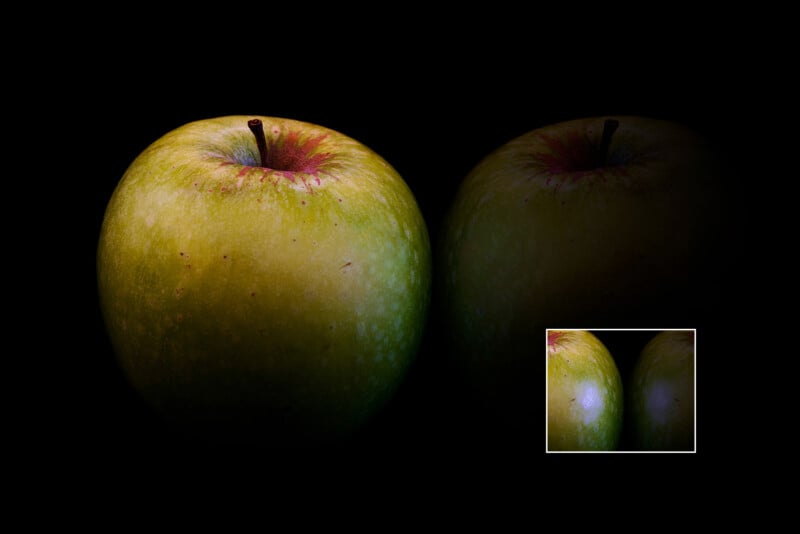
The Healing Brush is also better for larger areas than the Spot Healing Brush as the latter is likely to insert obvious repeated details. When you control the process, this is more avoidable. The name of the Spot Healing Brush is best taken literally.
Patch Tool
The Patch tool is ideal for removing or duplicating large areas or objects using the “Source” or “Destination” settings in Normal mode. You can use other tools to make your selection (e.g., Lasso tools) and then click on the Patch tool to drag this into place.
A Diffusion slider is included with the normal Patch tool, which is a bit like a brush hardness setting, affecting the edge transition of your selection. A high Diffusion setting softens edges for better blending but also causes nearby details to bleed into the result.
If you use the Patch tool in Content-Aware mode and select a low Structure value, you can normally avoid smudging problems caused by sampling near object edges or even over them. The result is seamlessly blended, too, with no Diffusion value to worry over.
Like the Healing Brush tool, the Patch tool lets you choose the source area for sampling and provides a preview as you move it into your target area.
With images in poor condition, you can meticulously fix multiple blemishes with other tools in one area and then graft that area elsewhere using the patch tool. That’s provided the areas are compatible, of course.
Clone Stamp Tool
The Clone Stamp tool duplicates sampled content without trying to blend it into the target area, although you can adjust edge hardness to help merge detail. It preserves the color, luminosity, and texture of the sampled area.
I wondered when I started this article if the Clone Stamp hadn’t become obsolete. The upgraded Remove tool undoubtedly steals part of the Clone Stamp’s usefulness, but it remains a powerful tool that’s unlikely to disappear.
If a background (e.g., sky) is uniform in texture and tone, the Clone Stamp can rapidly remove dust spots from an image. This was once its chief remit, but duplication is its enduring forte. It can fix facial features by transplanting detail from one area to another. You can flip the sample horizontally or vertically if necessary and alter its angle.
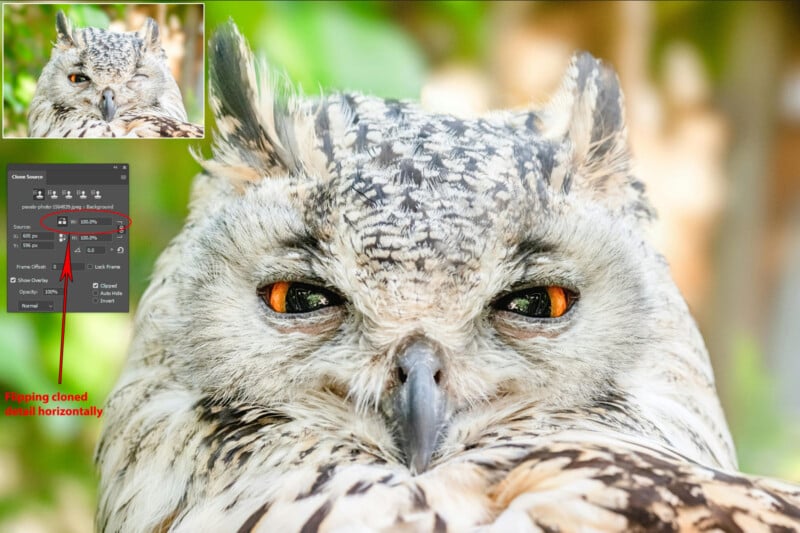
Because the Clone Stamp tool does not attempt to blend the tone or color of the sampled area into the target area, it’s ideal for tidying up edges. It avoids the smudging effect you’ll often battle against elsewhere. A neat old trick is to hold down the shift key to clone a straight line between two points after sampling.
Content-Aware Fill
You can use Content-Aware Fill after selecting an area as a way of healing blemishes. It’s found under the Edit menu, but you can right-click inside the selection to access it.
Unlike the Remove tool, Content-Aware Fill gives you control over the sample area, which sometimes achieves a better result with complex tasks. I’ve used Content-Aware Fill with the Polygonal Lasso tool to fix long scratches on film scans.
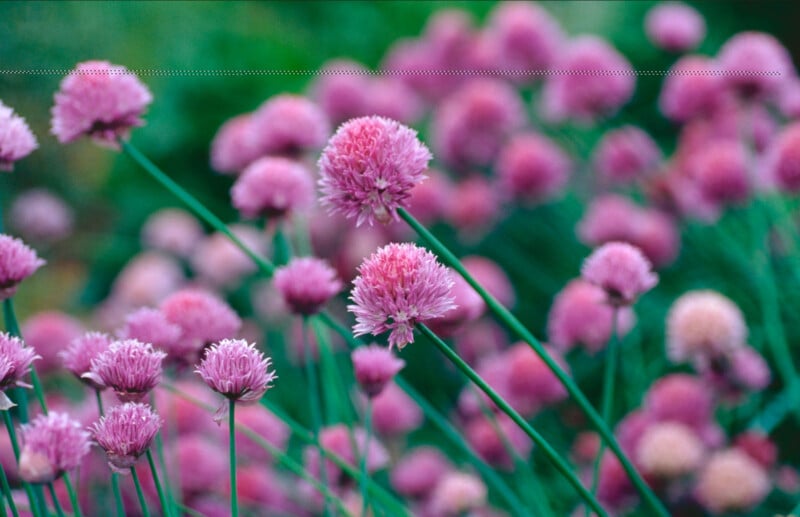
If the area you’re trying to fill is complex, it’s often better to tackle it in several smaller parts. This is true of other healing or replacement tools and methods, also.
Generative Fill
I usually use Generative Fill to recreate an area without entering any prompt. Some of its functionality overlaps with the latest AI-powered Remove tool, but Generative Fill gives you three variations to choose from with each usage.
Generative Fill can be used for retouching skin, removing blown highlights, creating backgrounds, reconstructing edges, expanding images, or creating composite images from scratch (albeit with limited resolution).
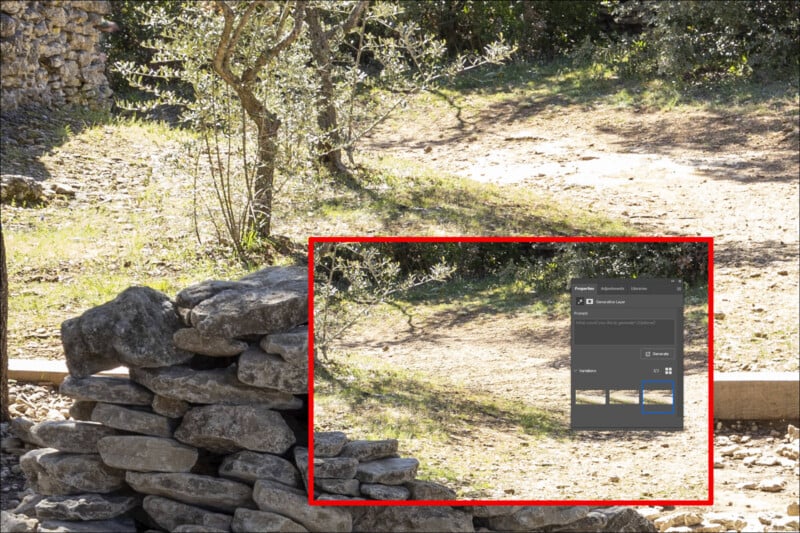
Ethical questions arise when using AI to create content. Secondary details seem trivial, but it’d be anathema to distort the truth in some photographic genres. Adobe Firefly powers Generative Fill, which needs an Internet connection to work.

Quick Takeaway Points
- Spot Healing Brush Tool: Quickly remove flaws over plain or repetitive areas.
- Remove Tool: Remove objects or flaws and fill the space with convincing detail.
- Healing Brush Tool: Manual sampling for fine-tuned healing results.
- Patch Tool: Versatile large-area healing with a handy Content-Aware mode.
- Clone Stamp Tool: Clean duplication without integrated blending.
- Content-Aware Fill: Remove objects or flaws with control over sampling areas.
- Generative Fill: Recreate lost detail, swap backgrounds, add or remove items.
Other Healing/Cloning Methods
Other healing or cloning methods exist utilizing alternative Photoshop tools.
Dust & Scratches Filter
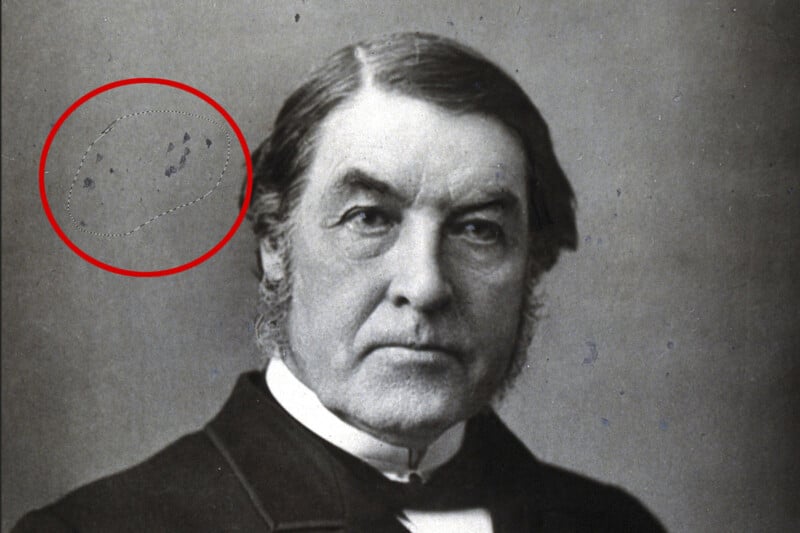
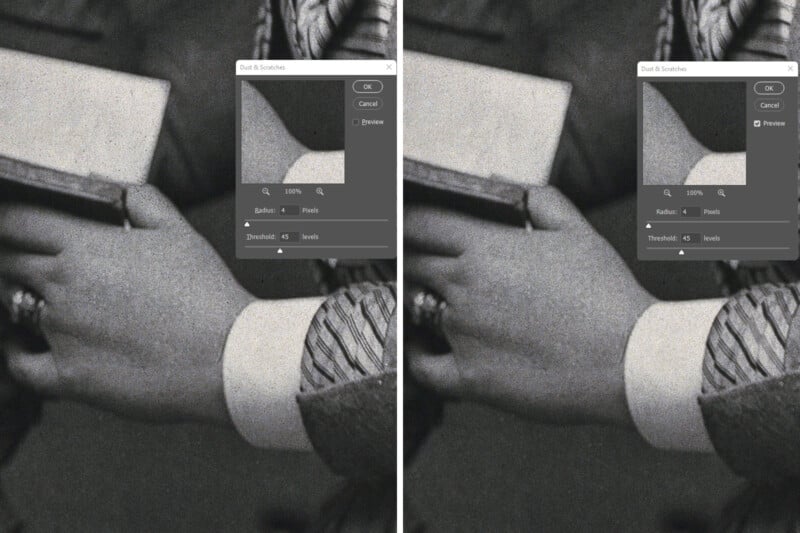
The Dust & Scratches filter found under Filter>Noise in Photoshop is useful for removing multiple dust spots in scanned images. This filter degrades the image, but the effect is barely perceptible when used with care.
To use the Dust & Scratches filter, create a duplicate layer and apply the filter on that layer. A Radius of 4-5 pixels usually works for sharply defined dust spots, but the Threshold setting should be as high as possible while achieving the desired result. Ignore the overall look of the image for now.
Once you’ve found the ideal settings, apply a black mask to the duplicate layer. Then, use the Brush tool set to white to paint out all the dust spots. Avoid brushing over edges or lines as these noticeably deteriorate.
Copy & Paste with Free Transform
Copying and pasting a selection creates a new layer. I do this if I want to transplant one detail on top of another with unlimited scope for adjustment. If you click on Free Transform (Edit menu), you can move the pasted selection to the location of your choice and easily spin/resize it. Reducing its opacity helps you position it precisely.
There’s no automatic blending using this method, so you must remove harsh edges and blend the new detail in, often starting with brushing the edges using a layer mask and soft brush. Further tuning is achieved with opacity, blending modes, and healing tools.
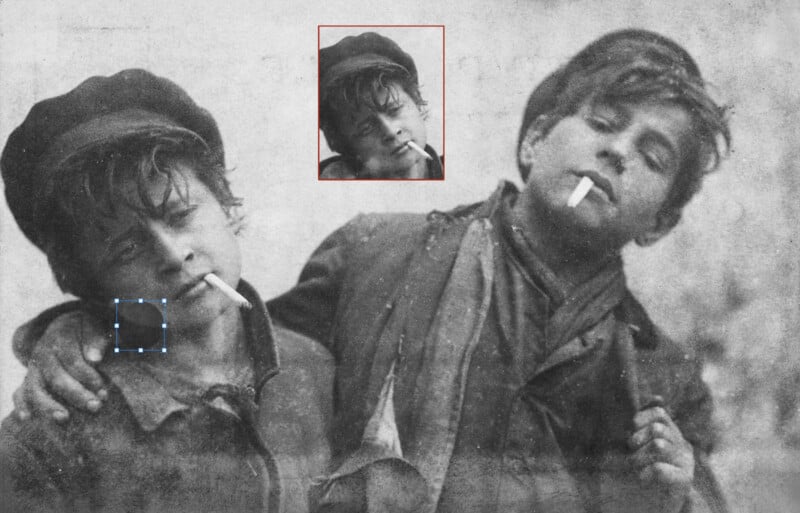
I might occasionally use this method on facial features (e.g., eyes) or architectural elements. It’s almost redundant with the advent of AI, though the precision of the manual process may sometimes let you stay truer to the original image.
This method is like using the copy-and-paste Clone Stamp tool, except I sometimes find it easier to manipulate (note that resizing the selection affects its technical quality, so you’d often want to limit that).
Painting Out Blotches with the Brush Tool
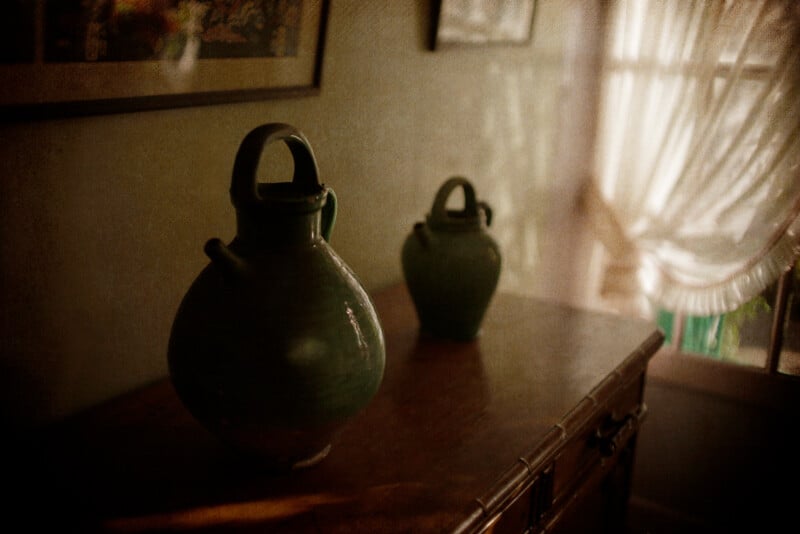
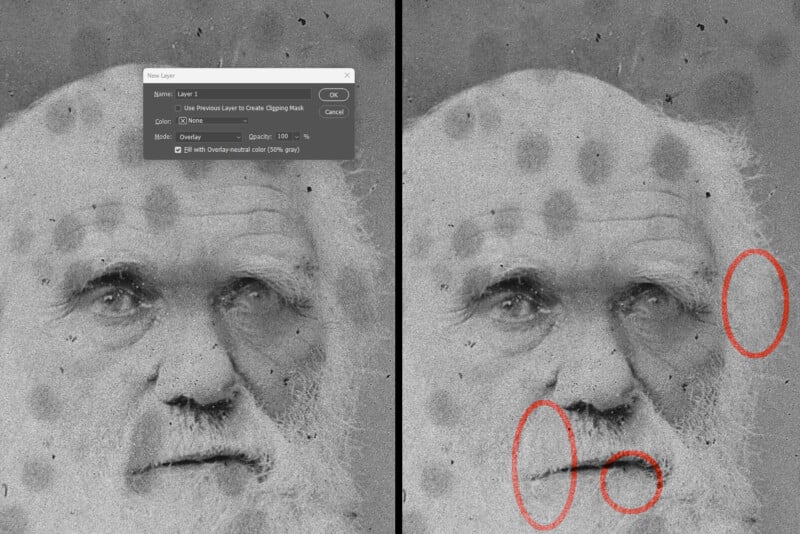
Sometimes with large blotches over intricate areas, I create a new layer in Overlay mode (Alt/Option + New Layer), check the “Fill with Overlay-neutral color (50% gray)” box, and paint over blemishes with the Brush tool set to white at 7-10% opacity.
This method can work well with stains on old prints or oversized semi-opaque dust spots. An area with busy detail is ideal, as any slight flaw in your painting will be hard to discern. Blemishes in plain areas are better dealt with using other methods.
The Final Retouch
Adobe upgraded the Remove tool during the writing of this article, so some of the original text was “writ in water” as Keats once gloomily said.
The upgrade didn’t appear like a proverbial bolt from the blue, as it was in the PS Beta version, but one wonders where the road for AI retouching ends. I’d rather it didn’t destroy the livelihoods of those eminently more skillful at retouching than I am. If it only deals with the mundane stuff that we all do, I’d be okay with that.
![]()
I’m sure some of my methodology is slightly weird, unnecessary, convoluted, whatever. There are usually multiple ways of doing things in Photoshop. Notwithstanding, I’d be glad if any of the above proved useful to a few of my fellow digital healers.