How to Print Photos at Home
Printing your photos at home can get complicated and confusing rather quickly. Between choosing a printer and paper and problem-solving why the colors don’t look like what you see on your display, it can be overwhelming, especially if you are just getting started.
Printing in-house doesn’t have to be a scary thing, though. Below, you’ll find some essential steps to help you get started or get better quality from your prints.
Table of Contents
Choosing a Printer
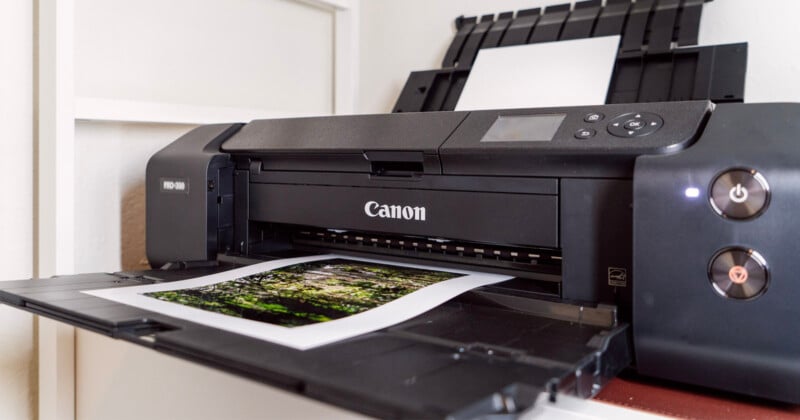
To print at home, the obvious first step is purchasing a dedicated photo printer. Epson and Canon make some of the best available. Focus on their photography lineups and opt for a device with a high resolution. It’s also important to pay attention to how many ink colors the printer has. Broadly speaking, the more ink colors available, the more accurate your colors will be, so opt for one with more than just CMYK colors, if your budget allows.
The printer will determine how large you can print, so think about what print sizes you would like access to. A standard printer will only go up to 8.5 by 14 inches at most. Wide format printers will allow 13 inches wide, or wider for even larger printers. While you may only want small prints now, also plan for the future somewhat, since photo printers are an investment.
Choosing Paper
The printer also determines the quality of your prints, of course, but the paper you choose also has a significant impact. There are a few things to consider when selecting photo paper, but finish is one of the most important factors. There are three primary finishes: Glossy, luster, and matte. Other niche finishes, such as Pearl, exist, but most fall within the three mentioned.
Glossy paper, as the name implies, offers a high-gloss finish. It results in rich contrast and high color saturation. But it is prone to reflections and shows blemishes like fingerprints and dents very easily. Luster paper has some shine, but much less than glossy. It handles reflections better but still offers a nice amount of contrast and color saturation. Matte papers have no shine; instead, they look like art papers, such as watercolor paper. They hide blemishes very well and come in a wide range of thicknesses and textures, from smooth to heavily textured.
Which finish is best entirely comes down to personal preference and each photo. Some images are best printed on glossy, while others will look better on matte. Sometimes, figuring out which one you should use for a given photo takes trial and error.
Epson, Kodak, and Canon all make a range of entry-level and pro-grade papers with a variety of finishes, from matte to highly glossy. For a more high-end alternative, Hahnemühle makes superb papers ideal for fine-art prints. Its matte finish papers are especially excellent. Canson is another fantastic option for high-end quality.
Epson Ultra Premium Luster is an incredibly popular paper among photographers and has been one of my most used papers throughout my photography career. It has some gloss (16 percent at 60 degrees) without distracting reflections. It also has a nice weight and excellent color. And it offers a nice balance of price and quality.
Calibrate Your Monitor
Before printing, it’s important to ensure that your monitor provides accurate colors. Otherwise, you may be surprised by the colors of your prints when they come out. Most calibration tools make the process easy and quick, so you don’t need to delay printing too long.
Prepare the Files
As you get ready to print, there are some file prep steps to prepare the images. First, flatten the image if you’re working in a program that uses layers. The printer will do this automatically, but it may result in changes to the image, resulting in inaccurate colors. Be sure to save a version of the file with the layers and then a flattened version so you can return to the original if you need to.
You also need to verify which color space you are using. Color space significantly impacts the colors in your images, so using the right one for a given situation is key. For printing, use either sRGB or Adobe RGB, depending on your printer. If you are converting your color space in Photoshop, it will flatten the layers, so you can skip the step above if that’s the case for you.
Finally, resize your image. Set the image to whatever size you want the print to be at 300 dpi.
Print Settings
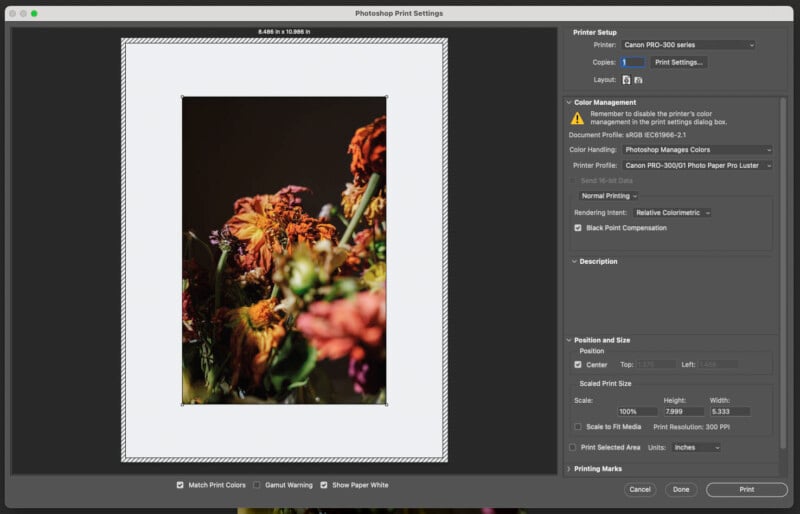
After you dial all the above factors in, it’s time to print. It’s best (and easiest) to print directly from Adobe Photoshop, Lightroom, or your preferred editing program, as they will offer more settings to get accurate prints. Individual settings depend on which program you use; the examples below are specific to Photoshop, but there is overlap with other programs.
The first step is choosing whether Photoshop or the printer manages colors. Typically, your best bet for accuracy is to select “Photoshop Manages Colors.” If you use the same brand of paper as your printer, you can get good results using the Printer Manages Colors setting, though that is not always the case. If you use a third-party paper like Canson, you will want to choose “Photoshop Manages Colors.”
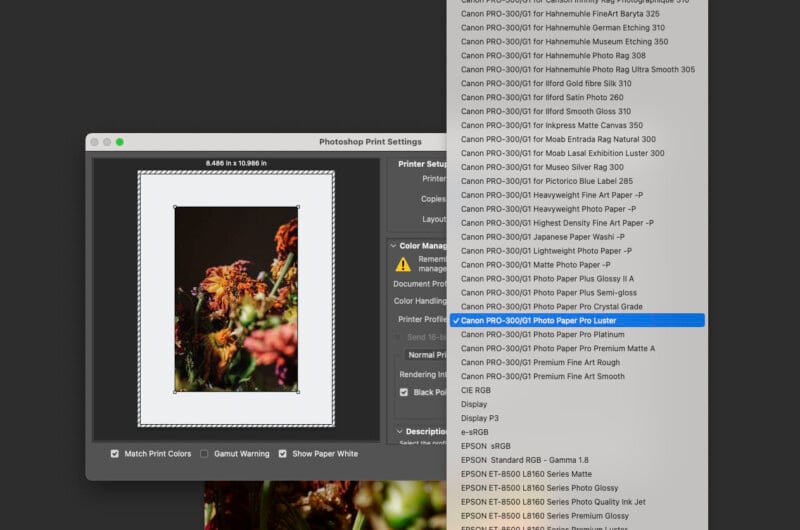
One of the most critical factors in getting accurate colors is using the correct ICC (International Color Consortium) profile for your paper. If you use paper that is the same brand as your printer, those profiles should automatically be installed when you install your print drivers. If you let Photoshop manage colors, you’ll choose the paper profile in the Printer Profile. You’ll find the paper choices in the Media section if you select to let the printer manage colors.
The key here is to select the same type of paper you are using. Otherwise, the colors will be off, potentially substantially. For example, if you use Canon Pro Platinum photo paper, select Canon Pro Platinum in the print settings.
From there, a few additional optional settings may be useful. Rendering Intent determines how the color management system handles converting color spaces. Relative Colorimetric is the default, which adjusts out-of-gamut colors to the closest reproducible color in the destination color space. It preserves more colors than all but Absolute Colorimetric. Select Perceptual for natural colors that may not be accurate to how you edited. Saturation is best for business graphics and charts, not photos, as it produces vivid colors at the cost of accuracy. Finally, Absolute Colorimetric doesn’t adjust colors beyond clipping out-of-gamut colors. It is best used for proofing, not for final prints.
The last optional setting is the Black Point Compensation checkbox. With that checked, Photoshop will preserve shadow detail, simulating the full dynamic range of the printer.

Load the Paper
Loading your paper is straightforward, but it’s absolutely crucial to know which side is the front versus back of your paper. Photo paper has a printing side and a back. The printing side features special coatings that absorb the ink, while the back will not. If you print on the wrong side, the ink will pool up, run, and essentially never dry (speaking from experience here).
Some photo papers have text on the back to help identify the printing side, but some do not. Luster papers can be especially hard to tell unless you look carefully. Also, keep in mind that some printers have you load the paper upside down because of how the paper is pulled through the printer. Pay close attention to how you load the paper and which side is the printing side.
Don’t Be Afraid of Trial and Error
Printing photos is, unfortunately, rarely an exact science. Even those who have been doing it a long time have issues or resort to some trial and error to find the right settings and paper for a given print. Be sure to go into the process with excellent patience and the willingness to try things and problem-solve when your print doesn’t look right.
At the end of the day, printing your own photos can be extremely rewarding. You’ll have tangible copies of your images, which is always special. Seeing a physical version of your photographs can change your perception of your work, helping you grow as a photographer and artist.