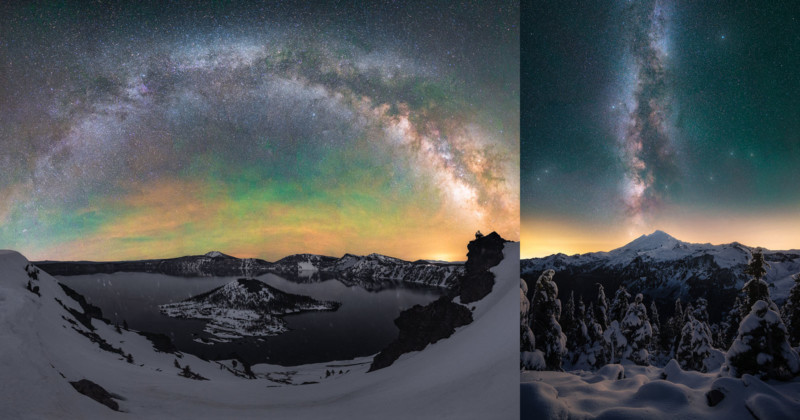
How to Photograph the Milky Way
This guide will be a walkthrough of the basics of Milky Way photography. It is best for beginners, but even intermediate and expert photographers might find something new! Plus, I always find it never hurts to refresh yourself on the basics.
The goal of this guide is to get you through the basics as quickly as possible so you can get out shooting! Think of this guide as the notes you would take during a lecture. When you start out, learning only the most important basics gives you more time to take photos of the Milky Way, which is by far the quickest way to learn and improve your art.
Table of Contents
Camera Equipment
Photographers love to talk about equipment, but it’s honestly one of my least favorite topics. While it is important to know your gear, you will improve your photography much faster by going out and taking shots or viewing other photographers’ work, rather than researching/buying every piece of gear on the market.
Minimum Required Equipment
Tripod: You need a tripod (well built and sturdy). Invest now and it will last for years. A cheap tripod will be unsteady, leading to blurry images. I can’t stress enough how important a good tripod is!
Camera with manual mode: Manual mode means you can manually adjust the ISO, aperture, and shutter speed.
Camera lens with a minimum f/4 aperture (preferably f/2.8 or smaller): The smaller the f-stop (f/4, f/2.8, etc,) the more light your lens can let in. The more light, the more star detail you can capture.
Preferred Equipment
Tripod: A tall, strong tripod with an excellent ball head.
Full-frame camera: While today’s crop sensor (and even some point and shoot cameras) can shoot stars, full-frame ISO performance will perform better.
14-24mm wide-angle lenses with minimum f/2.8 aperture: My favorite lens for milky way photography is a 24mm f/1.4.
Shutter release/Intervalometer: Allows for long than 30s exposure times and reduces camera vibrations when pressing the shutter.
Star tracker: A star tracker is a device that attaches to your tripod. You then mount your camera on the device and it follows (tracks) the stars as they move through the sky, allowing for longer exposure times (greater star detail). Learn more about exposure times in the camera settings section.
This item is definitely not necessary, but it will greatly improve the quality of your star shots. To keep things simple, we won’t be going over star trackers in this guide.
Preparation and Planning
Preparation and planning are two of the most important aspects of Milky Way photography. Knowing the moon phase, how much light pollution to expect, where the Milky Way arm will align, and what the weather will be like are some of the biggest factors to a successful outing. You should also try and scout your destination during the daytime. Finding locations and compositions is extremely difficult in the dark.
Note: I am not paid by or affiliated with any of the brands listed below.
Moon Phase
The moon is very bright, brighter than you probably remember. A full moon will keep most stars from being visible.
When shooting the Milky Way, you usually want to shoot between one week before and one week after a new moon for best results. The closer you are to the new moon, the better.
Tool: You can find moon phases easily online, but I find using either The Photographer’s Ephemeris or the Photo Pills app is extremely useful.
Light Pollution/Dark Skies
Humans give off a lot of light, especially in big cities. The closer you are to a city, the more this light pollution will affect your image, reducing the number of stars in your shot.
Tool: Using a site like darksitefinder.com makes it incredibly easy to see how much light pollution is in your area. The darker the area (blacker), the better it is for Milky Way shots.
Milky Way Alignment
Stars move through our sky as the Earth rotates. The Milky Way arm is no different. You will want to know where the Milky Way arm will be when you’re shooting.
The most common time to shoot the Milky Way in the northern hemisphere is March through October.
Tool: Using an app like Stellarium makes locating the Milky Way arm easy. I recommend that you set the Milky Way brightness to 8+ in the advanced settings.
Weather
Weather might be the biggest factor in Milky Way photography. If it is too cloudy, you won’t be able to see the stars. Knowing if clear or cloudy skies are forecasted can help you plan ahead.
Tool: You can find weather data almost anywhere, but a few of my favorites are cleardarksky.com, weather.gov, or Google weather.
Focusing Your Lens
Ok, you have all the basic gear you need, you’ve done all your planning and preparations, and now it’s time to get out there and shoot! Right? Well…almost!
Without a property-focused lens, it is impossible to achieve any success in Milky Way photography. Because of this, you will need to know how to focus your lens before you go out shooting. Because stars are very far away, one would think you could simply adjust your focus ring to infinity (or the ∞ symbol), but most lenses need to be adjusted slightly to ensure sharp focus. Don’t worry, though, I will teach you two methods: one you can do during the day, and one during the night.
Method One: Preset your focus during the day
Set up your camera with the lens you will be using.
Adjust your lens for the focal length you will be using; e.g. 24mm on a 14-24mm.
Focus on a faraway object using autofocus.
Make any manual adjustments using the focus ring if needed. Today’s autofocus is so accurate that I rarely find that any adjustments are needed.
Take a couple of practice shots at a normal aperture, like f/8. Zoom in on the photo and double-check that the object you’re focused on is sharp.
Once your shot is in focus, you have found your infinity focal point! You can now either tape your focus ring into place or use a marker to mark your exact focus point.
(Keep in mind that your exact focus point will change slightly if you adjust the focal length. If you decide to shoot at 14mm instead of 24mm, you would want to repeat the above steps.)
Method Two: Using live view at night
Set up your tripod with your camera and lens.
Set your focus ring as close to the ∞ (infinity) symbol as possible.
Turn on live view and point your camera at the brightest star or object in the sky you can find (moon, planet, etc).
Find that source of light in live view and zoom all the way in.
Adjust your focus ring until the dot of light is as small as possible.
Congratulations, you have found your focal point and can start shooting!!
Camera Settings
Camera settings can be the most daunting part of learning to shoot the Milky Way. You can get started in most other types of photography with “Auto” and fumble your way through to some okay shots. This doesn’t work at night.
Everything in this settings category is designed around one principle: collect as much light as possible. Stars aren’t very bright, so to photograph them we need to adjust our gear to collect as much light as possible while keeping optimal image quality. The settings below will help you optimize your camera to capture as many stars as possible.
Shooting at night can be especially tricky because it’s dark, making it harder to use your camera. I advise you to practice changing your settings during the day or in your home before you go out in the dark.
Note: Changing settings in the dark can be hard, but PLEASE don’t use flashlights or white lights if you are shooting around other people. If you have a headlamp, there is usually a red light setting, which is more acceptable, but still, be cautious and respectful when using it.
Image Format
If your camera allows it, always shoot in RAW image format.
Aperture/F-stop
A basic review of aperture: The smaller your f-stop, the larger your aperture, which means the more light your lens can capture. This is one of the hardest topics to grasp, in my opinion, because it’s counter-intuitive. To shoot stars, you want a very large/wide aperture, which means you want a lower f-stop.
For example, f/8 is a medium f-stop, it has a normal-sized aperture. f/16 is a big f-stop, which means it has a small/shallow aperture. And finally, f/2.8 is a small f-stop and has a large/wide aperture.
Depending on your lens, it is usually best to go with your widest aperture (smallest f-stop) and then decrease it slightly.
For example, if you are shooting with a 24mm f/1.4, I would set it to f/1.4, then bump it up through f/1.6, f/1.8, and finally settle around f/2. You would do this because pushing your lens to its extremes (biggest and smallest apertures) will tend to result in lower image quality.
If your lens only goes to f/2.8 or f/4, I would recommend skipping the above advice to bump up the aperture.
This is because at f/2.8 or f/4, you need the ability to capture light more than you need perfect image quality.
Shutter Speed
You want a long exposure time to allow your sensor to collect more light. In a perfect world, we would be able to take minute+ long exposures with a low ISO, allowing for a large amount of light collection and a high image quality. Unfortunately, because the Earth spins, the stars move during our long exposures. This means our exposure can only be so long before we get “star trails”. To make things even more complicated, the longer your focal length, the shorter your exposures can be before your stars start to trail.
For example, a 16mm lens can usually shoot an exposure time of around 30 seconds, while a 50mm is closer to 10 seconds.
To prevent star trails and keep your stars as pinpoints of light, we follow the 500 rule. The 500 rule calculates the longest exposure time you can shoot based on your lens’s focal length. Keep in mind the 500 rule is just a rule of thumb and not an exact science. Aperture and ISO have no effect on the 500 rule
For full frame cameras: you simply divide 500 by your focal length:
16mm lens: 500/16 = 31.25 seconds
50mm lens: 500/50 = 10 seconds
For crop sensor cameras it’s a bit more complicated. You will need to know your camera’s sensor size. A full-frame camera’s sensor size is 35mm. A Nikon crop sensor has a 24mm sensor size. Every camera will be a little different. You divide 35 by your camera’s sensor size to get what is called your crop factor. Next, you divide 500 by your focal length times your crop factor
Nikon crop sensor size = 24mm:
35/24 = 1.46 crop factor
16mm lens: 500/(16×1.46) = 21.4 seconds
50mm lens: 500/(50×1.46) = 6.85 seconds
As I mentioned, the 500 rule is just a rule of thumb, so make adjustments as needed (zoom in on your LCD and see if there is star trailing).
ISO
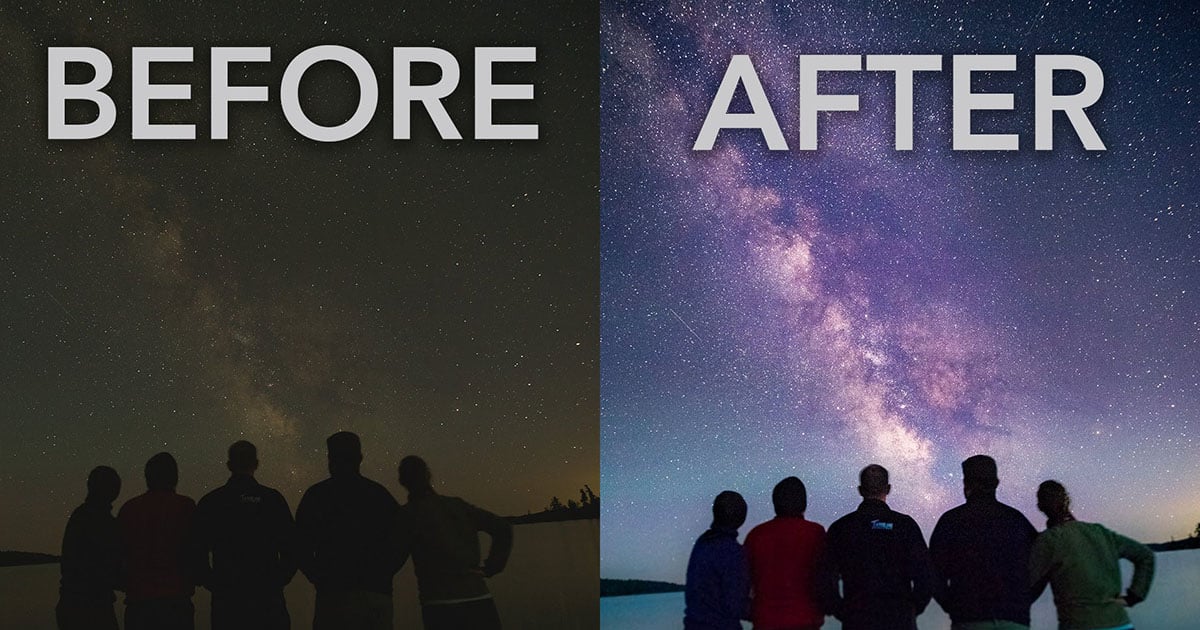
ISO is usually the last setting you adjust once you have lowered your f-stop and found your longest exposure time. Finding the best ISO requires a few test shots. Start with an ISO of around 1600 and take a shot. If it’s too dark, which it probably will be, increase the ISO. Continue increasing the ISO until the Milky Way is clearly visible.
With an f/2.8 lens, around ISO 6400 was usually my sweet spot. Depending on your camera, you will probably notice a lot of noise (grainy specks) in your photo. You might also run into your max ISO and not be able to go any higher.
High ISO capability is the main reason full-frame cameras are suggested for Milky Way photography. They are able to use higher ISO ratings with better image quality.
We won’t go into them in detail, but the main ways to combat noise and increase photo quality besides a full-frame or in addition to a full-frame camera include:
1. Post processing: noise reduction, median image stacking, or shooting a pano.
2. Using a star tracker.
White Balance
If you are shooting in RAW and post-process your images, white balance doesn’t matter since you can manually adjust it in processing. I leave my white balance on auto and adjust later.
If you prefer to have untouched photos, a white balance around 4-5,000K usually works best.
Put it All Together!
Some common settings for me:
ISO 6400, 24mm, f/2, 20s – Using a 24mm f/1.4 lens
ISO 6400, 14mm, f/2.8, 30s – Using a 14mm f/2.8 lens
And there you have it, my intro guide to Milky Way photography!
P.S. If you enjoyed this article please consider joining my newsletter for heaps more great tips like this.