How I Shot Aerial Photos of the Namib Desert from a Helicopter
I’m a desert lover. I’ve always been drawn to the vast dunes, the soft light at dawn and dusk, the abstract beauty hidden in every composition, and the serenity that defines these landscapes.
Full disclosure: This article was contributed by a photographer sponsored by multiple brands, including Fujifilm, Fstopgear, and more. Those brands did not provide any payment, sponsorship, or other consideration to PetaPixel for this article.
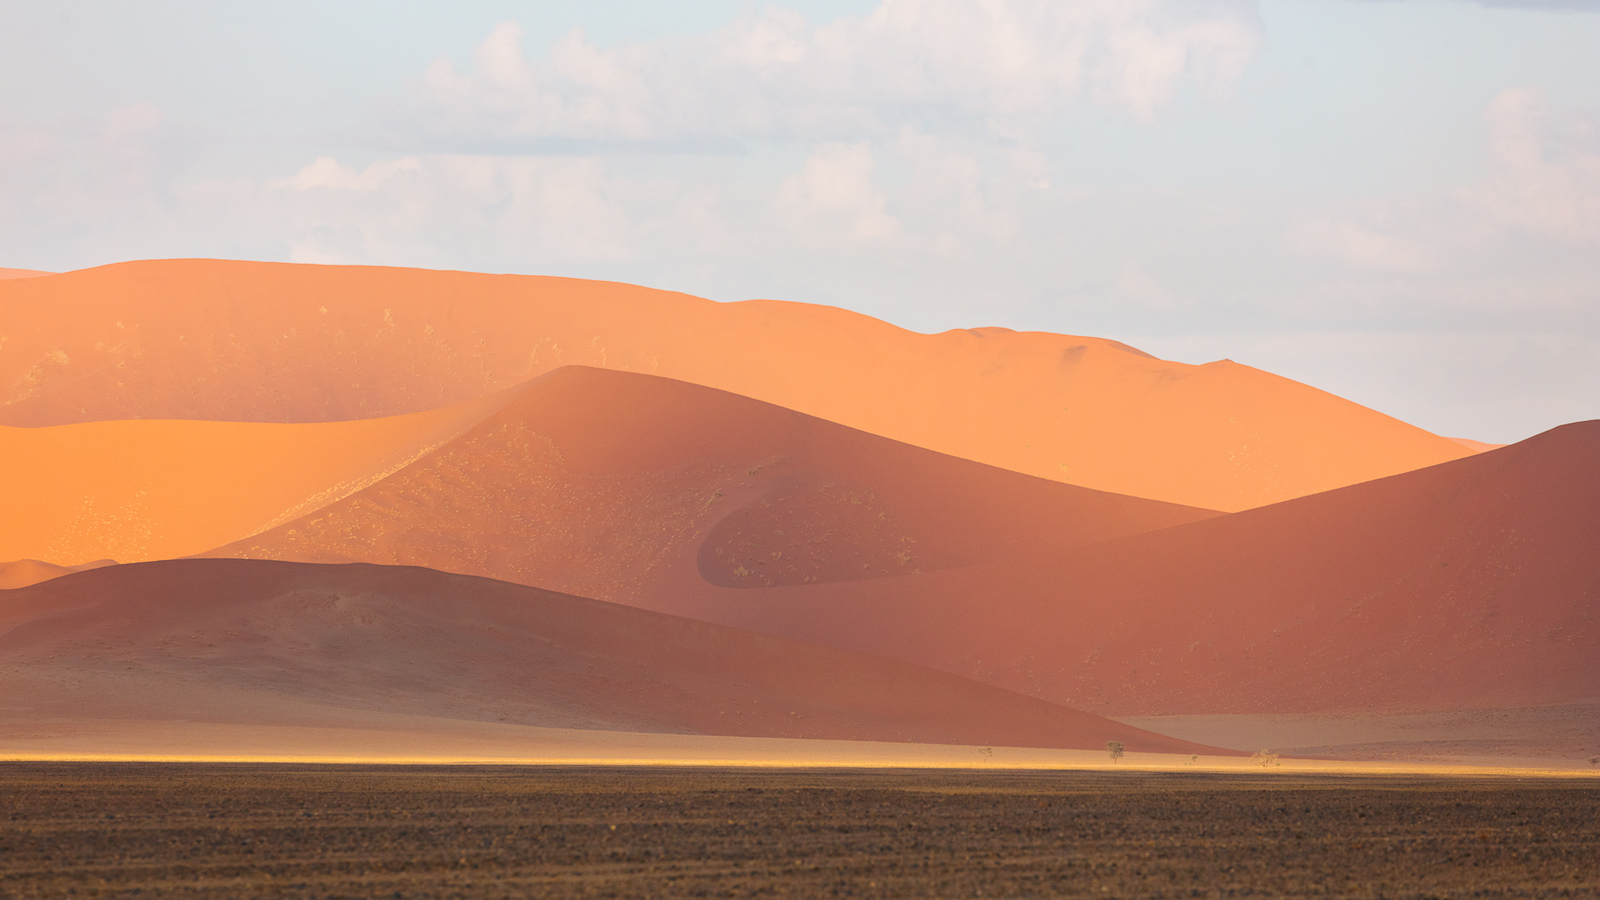
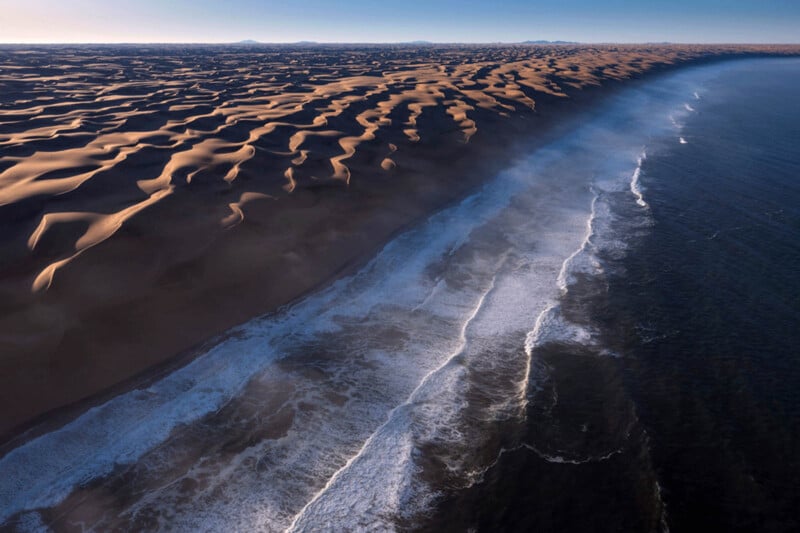
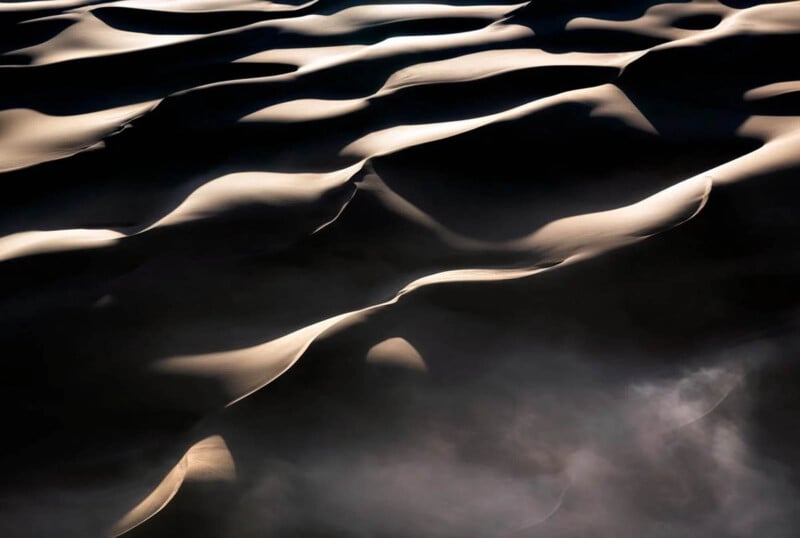
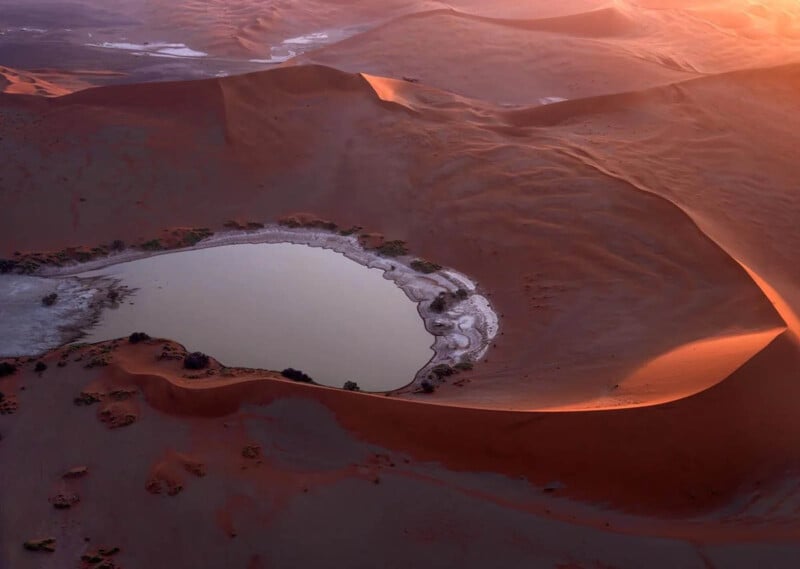
The Namib-Naukluft National Park is especially unique, where the Atlantic Ocean blends seamlessly with the desert. Here, humidity rises to create surreal scenery, with fog drifting inland and transforming the dunes into an otherworldly stage.
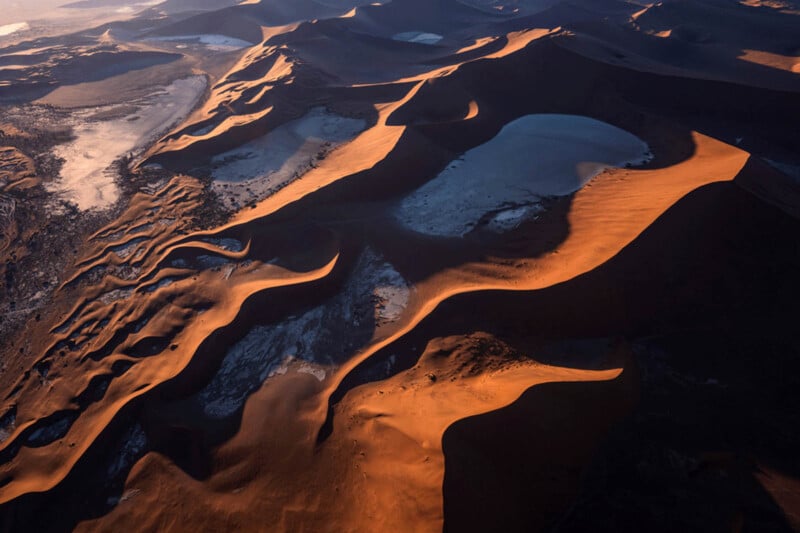
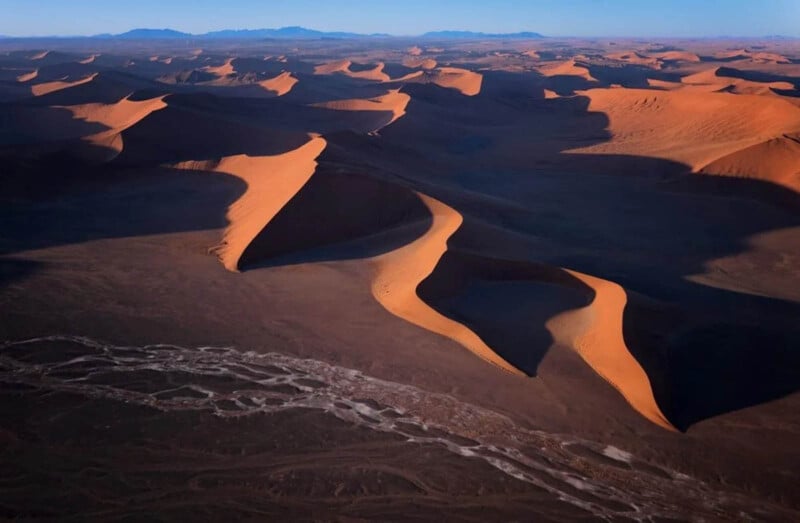
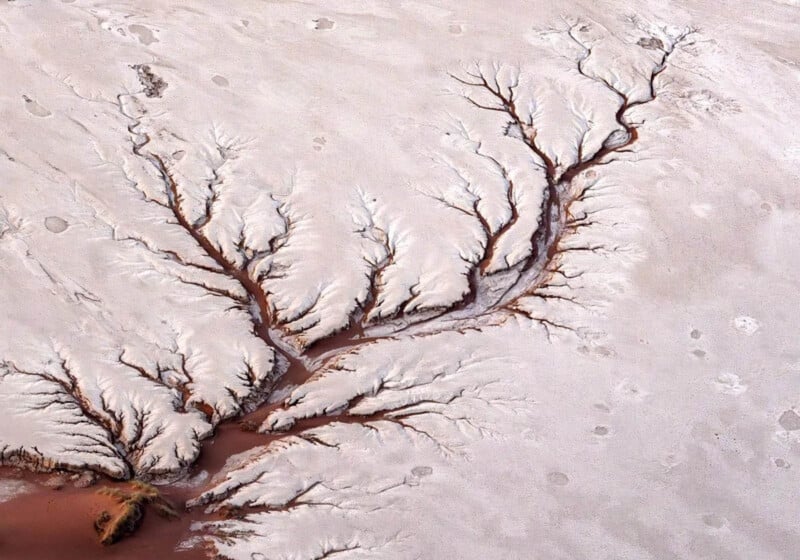
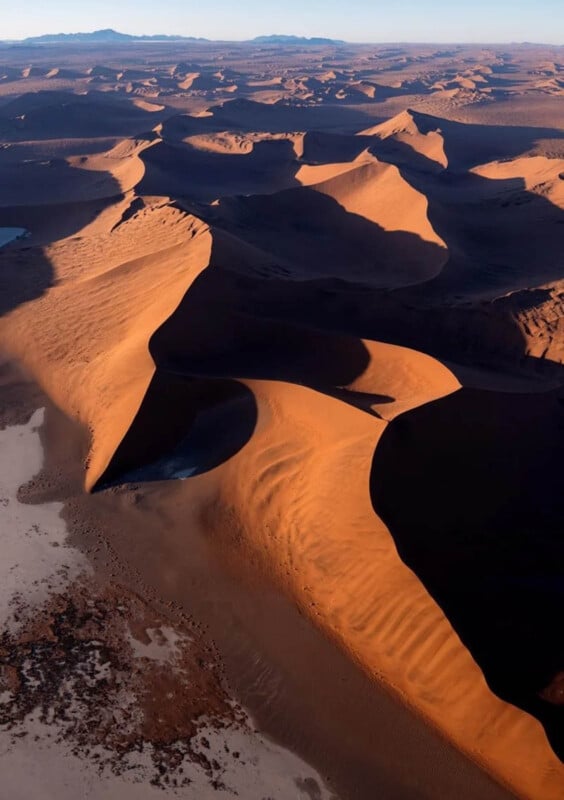
From above, the desert transforms into abstraction — ridges catching the first light of dawn, shadows carving depth and contrast that shift with every passing minute. Salt pans, riverbeds, and ancient coastlines emerge as natural lines and shapes, turning the desert into a living canvas of earth and memory.
From the air, the Namib Desert becomes a living sculpture — shaped by wind, light, and time. Along the Atlantic, ocean and sand meet in an eternal dialogue that transcends geography. To photograph it is to witness scale, silence, and fragility intertwined — a testament to nature’s infinite artistry.
Each flight over this vast and beautiful landscape is both a challenge and a privilege — a moment to reveal what the human eye rarely sees: the poetry of earth and time, written across the land itself.
Why Helicopter and Not Drone?
Whenever I share aerial images from Namibia, one of the first questions I’m asked is: Why not just use a drone? The truth is, in this part of the world, a helicopter isn’t just a preference — it’s the only practical and creative solution. For me, the helicopter is more than transportation. It’s an enabler — a bridge between technical precision and creative vision. It allows me to tell the story of the Namib Desert not just as it appears, but as it feels: vast, infinite, and alive with rhythm and scale that no drone could ever truly convey.
Both helicopters and drones bring unique strengths and limitations, and the choice ultimately depends on the creative intent and the logistics of the location. With a drone, I can fly at lower altitudes and capture true bird’s-eye perspectives — angles often impossible to achieve from a helicopter, But a helicopter offers a level of flexibility that drones cannot match: extended flight time, the ability to cover vast distances in a single session, and the stability required to carry high-end gear such as my Fujifilm GFX medium format system.
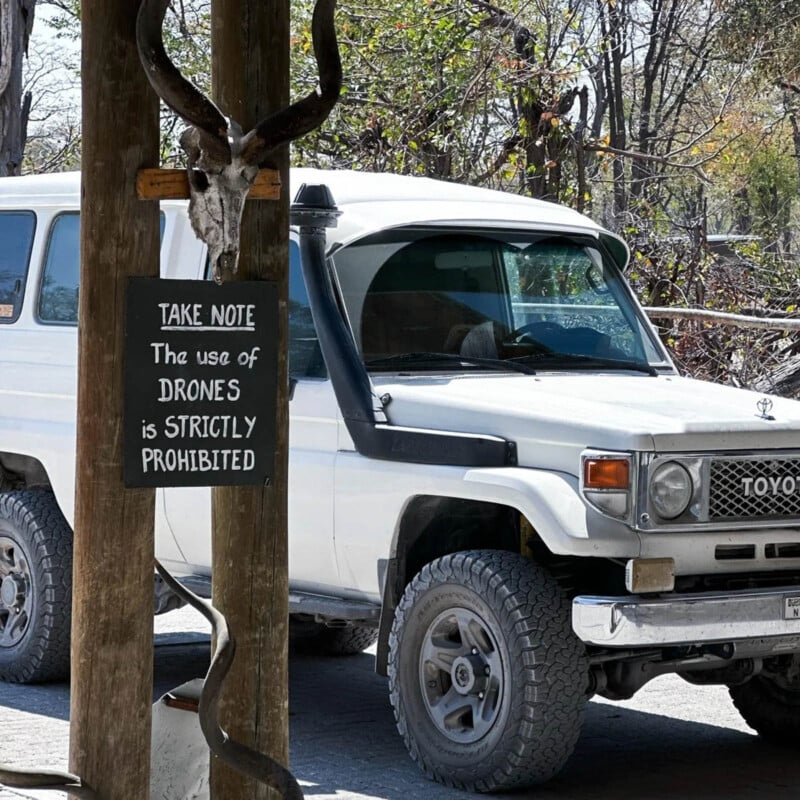
In Namibia, where drones are restricted in many national parks, the helicopter isn’t just an option — it becomes the only way to tell the story at scale.
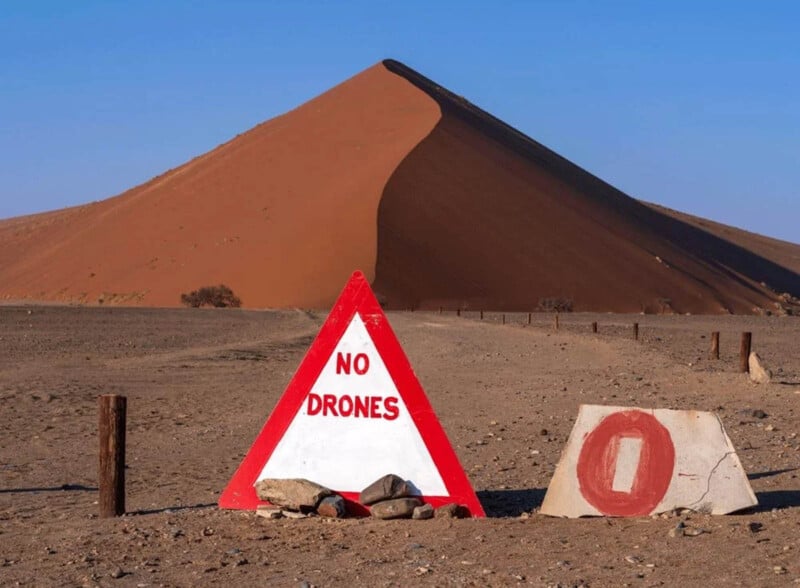
Respecting Airspace and Regulations
Drones are prohibited in Namibia’s national parks, including the famous Sossusvlei region, which also happens to be one of the busiest and most controlled airspaces in the country. Hot air balloons, sightseeing planes, and helicopter tours operate daily, year-round. Attempting to fly a drone here is both unsafe and illegal. Permits are difficult to obtain and time-consuming, and ignoring the regulations can result in heavy fines. For me, respecting the country’s laws and airspace is non-negotiable.
Covering the Scale of the Desert: There’s the sheer scale of the Namib Desert. It stretches for hundreds of kilometers inland and along the Skeleton Coast — an expanse so vast that covering it with a drone is technically impossible. A helicopter, however, gives me the reach to explore this landscape in depth: from towering dunes and salt pans to winding riverbeds and endless coastline, often within a single flight.
Creative and Technical Freedom: A helicopter also offers unmatched creative freedom. Shooting with medium format systems from higher altitudes allows me to create large, high-resolution files suitable for fine art prints, books, and exhibitions. Unlike drones, which are limited by battery life and altitude restrictions, the helicopter becomes a flying studio — a platform that lets me frame the desert on my own terms, whether isolating abstract details or capturing sweeping cinematic horizons.
The Challenges and Preparations
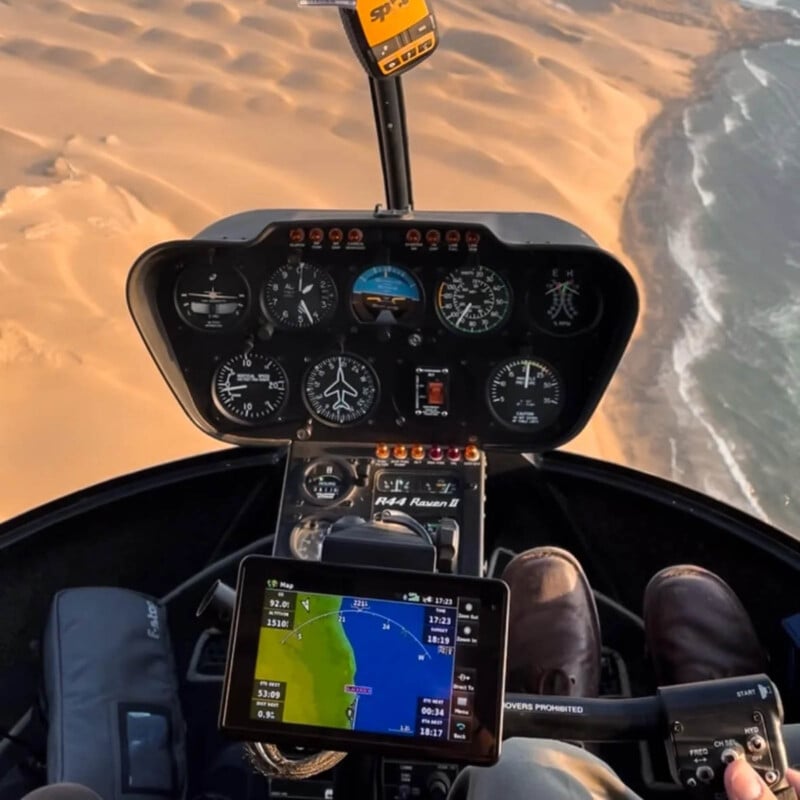
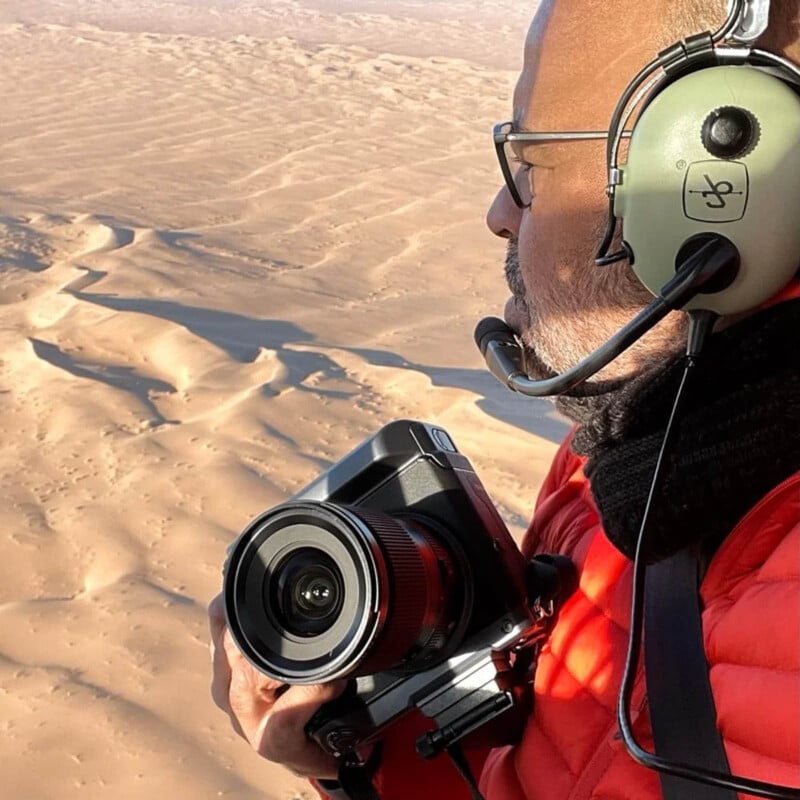
Those early morning helicopter flights above the Namib Desert remain some of the most demanding yet rewarding experiences behind the lens. With sub-zero winds cutting through the cabin, the Atlantic Ocean’s breath rising in the air, and the desert unfolding endlessly below, every second in the sky is both physically and mentally challenging. The light shifts quickly, the aircraft moves constantly, and the window to capture a defining image can be fleeting.
Yet it is precisely within these extreme conditions that I find the essence of my passion. Aerial photography requires more than technical skill; it demands resilience, patience, and the ability to adapt instantly to the environment. The challenge is relentless, but the reward is a perspective that few ever witness — and fewer still manage to capture.
Pre-flight Planning
Before any aerial shoot, I identify my targets and map out a thoughtful flight path. I start with desk research in Google Maps: drop pins, measure distances, and sketch a route that follows the movement of light throughout the day. Once in the field, brief the pilot clearly, then refine timing for altitude, wind, and airspace restrictions.
The Language Between Pilot and Photographer
One of the most overlooked aspects of aerial photography is the communication between photographer and pilot. Every adjustment in altitude, every banking turn, every second of hesitation can determine the outcome of an image. Clear, concise radio communication becomes its own language — one built on trust and rhythm. There is no room for hesitation; every word matters when chasing the perfect light or framing the ideal angle.
Over the years, through countless aerial assignments, I’ve learned that this collaboration is as critical to success as the camera settings.
Safety First in the Air
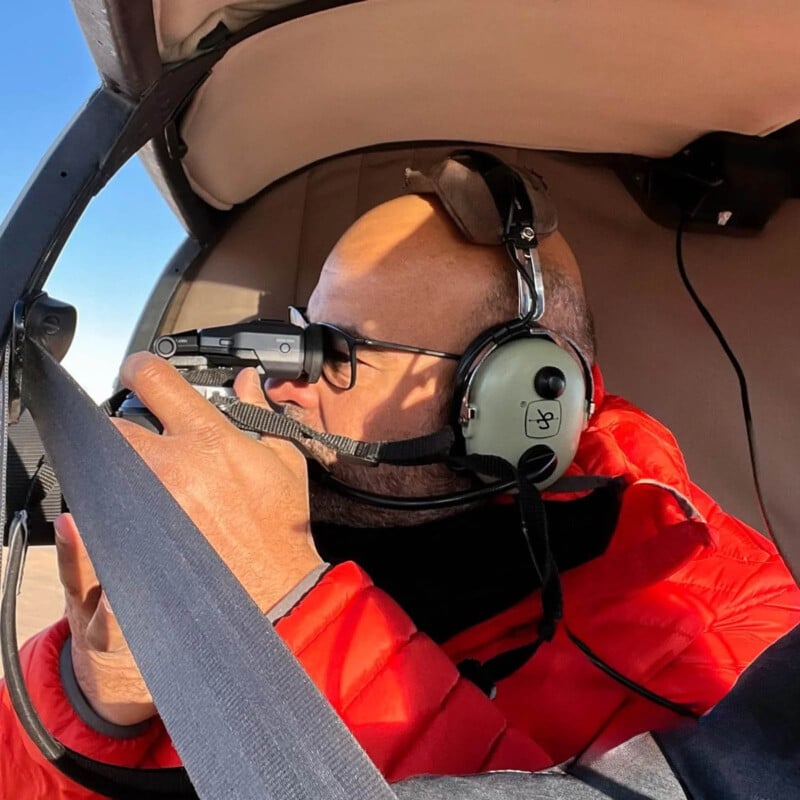
The helicopter company should always prioritize your safety — from thorough pre-flight checks to ensuring your seatbelt is properly secured. Personally, I prefer to fly with a harness. It gives me the freedom to move, lean, or even hang slightly outside the aircraft when the shot demands it, while still providing that critical layer of security.
That said, safety is never something I leave entirely to the crew. Once we’re in the air, I always double-check my harness, seatbelt, and every camera strap. Loose equipment isn’t just a distraction — it can turn into a serious hazard if it slips out of the open door or gets caught in the rotor wash.
To keep everything compact and secure, I avoid flying with a bulky backpack. Instead, I organize my gear inside an Internal Camera Unit (ICU) from f-stop gear. It keeps every camera body and lens neatly arranged, protected, and instantly accessible — exactly what’s needed when working in the confined, vibrating environment of a helicopter.
Weather and Timing
Dealing with weather is crucial, and over the years, I’ve learned to embrace whatever conditions the desert offers. Sandstorms can create an otherworldly mood, though they often reduce visibility across the horizon. Haze and fog may transform the scene into something magical, but much depends on their type and density. At sunrise or sunset, when the skies turn colorful, the desert feels like a surreal painting, and whenever clouds appear, they add rhythm and drama to an otherwise endless expanse of sky.
Namibia’s weather is both an obstacle and an opportunity. Before every aerial shoot, I carefully check the forecast and coordinate with the pilot — planning here is as crucial as in any other assignment. Whenever possible, I prefer to fly at first light, when the sun is still soft and there’s a chance of fog rolling in from the Atlantic Ocean. Those conditions create a magical atmosphere you simply can’t replicate at midday.
But in the end, the desert decides — and in the air, it’s always the pilot who makes the final call, guided by safety protocols and aviation rules.
The Fujifilm GFX System: My Ultimate Tool for Aerial Photography
Hiring an open-door helicopter for aerial photography is a true investment — and preparation is everything. For this kind of work, I rely on medium-format cameras because every pixel counts. Not every scene is perfectly composed in real time, and often a crop is needed in post to achieve the ideal aspect ratio. That’s why I shoot with files large enough to produce high-quality prints without sacrificing sharpness or detail.
The Camera
The Fujifilm GFX system consistently delivers outstanding image quality, making it perfectly suited for my style of work. The large sensor and file size provide the resolution I need for high-quality prints and precise crops, while the dynamic range is remarkable, allowing me to capture challenging light conditions without spending hours correcting files in post.
One of the greatest strengths of the GFX system lies in its color science. The files straight out of the camera carry a richness and accuracy that minimize the need for heavy grading in post. Colors feel natural yet cinematic, delivering tones that are both true to life and visually expressive.
Its high ISO performance is another strength. Even at elevated ISO values, I love the organic character of the medium format grain, which enhances rather than detracts from the image. While the GFX may not be the fastest camera on the market, for the type of photography I pursue — large-scale landscapes, aerials, and architectural work — it is ideal.
Changing lenses mid-air is never an option — not only for safety reasons, but also because the light shifts in seconds and dust can easily compromise the sensor. To stay ready, I fly with multiple Fujifilm GFX medium format bodies, each mounted with a dedicated lens. This way, I can instantly adapt to the landscape below without ever missing the decisive moment.
Choosing the Right Lenses
Shooting aerials requires optically excellent lenses — sharp, fast, and reliable under challenging conditions. During flights, I rely on a carefully selected trio that allows me to cover every perspective.
- For wide, cinematic shots, I turn to the GF 20–35mm f/4 (equivalent to 17mm on full frame). It’s perfect for capturing sweeping landscapes, though ultra-wide angles can sometimes be tricky — it’s easy to unintentionally include the helicopter’s propellers or landing skid in the frame, so careful composition is essential.
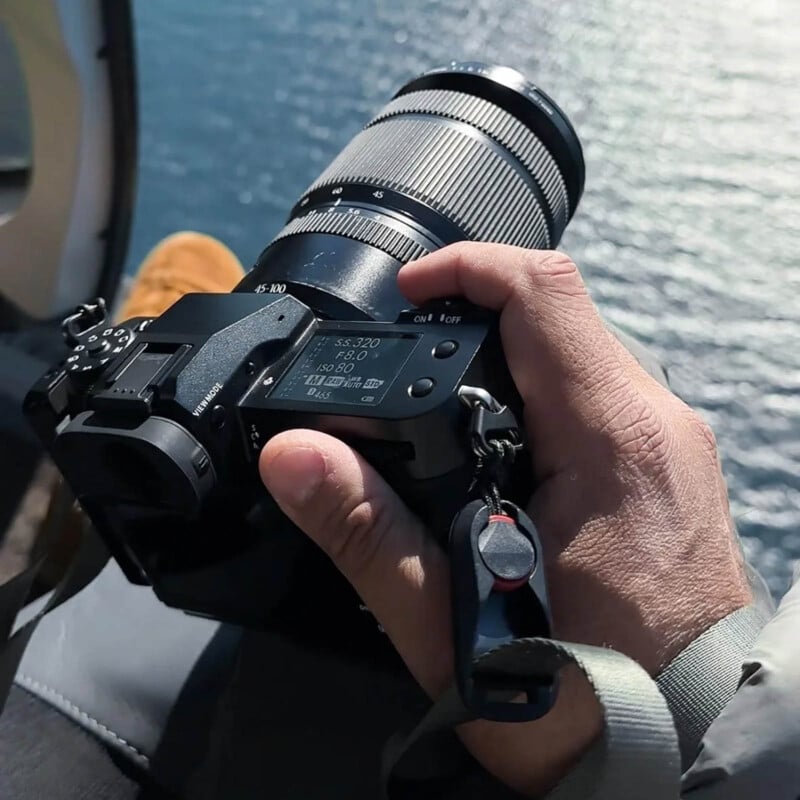
- The GF 45–100mm: My Go-To Aerial Lens. For aerial photography, it is my most trusted lens. Its versatility makes it ideal for working from a helicopter, where framing opportunities change by the second. At the wide end, it captures magical images.
- But in the air, sharpness doesn’t come for free. Helicopters introduce constant vibration, so I never let my shutter speed drop below 1/800s when using this lens — often pushing higher to be safe. At these settings, the GF 45–100mm consistently delivers clean and crisp files.
- When I want to isolate patterns or capture abstract close-ups, I reach for the GF 250mm f/4. This telephoto is superbly sharp and powerful, but it demands discipline. At such focal lengths, every vibration is magnified, so I push my shutter speeds above 1/1600 to avoid blur. It’s a challenge, but when executed well, the results are nothing short of magical.
Gear List
- Fujifilm GFX 100 II
- Fujifilm GFX 100
- Fujifilm GFX 100 S
- Fujifilm GF 20-35mm f/4 R WR
- Fujifilm GF 45-100mm f/4 R LM OIS
- Fujifilm GF 250mm f/4 R LM OIS WR
Essential Accessories
Alongside countless memory cards and spare batteries, these tools are my lifeline in the sky — allowing me to adapt instantly to shifting conditions and never miss the decisive moment. Preparation starts long before takeoff: every battery is fully charged and checked, and every memory card is backed up and freshly formatted. In aerial photography, there’s no second chance, so readiness is everything.
From the sky, reflections can ruin a shot — water turns into a mirror, hiding the textures below. That’s why I always carry with me the NiSi True Color Pro Nano CPL filter. It cuts glare on water, reveals hidden textures, and keeps colors true.
Safety, of course, is paramount. Every camera I carry in the air is secured with a Peak Design Cuff strap, ensuring nothing can slip out of my hand in the wind. It’s a small detail, but in an open-door helicopter, it makes all the difference — protecting both the gear and everyone on board and on the ground.
A dust blower and microfiber cloth kit, always within reach to ensure the front element of my lenses remains spotless from sand, dust, or ocean mist. In aerial photography, even the smallest smudge can ruin a frame.
f-stop gear ICU backpack to fit my equipment for easy access.
Mastering Light in Aerial Photography
Light is the ultimate key to success in aerial photography. Unlike shooting on the ground — where you can move around and adjust angles — once you’re in the air, you’re bound by flight paths, timing, and weather conditions. That makes understanding and working with light absolutely essential.
The sky is never static. Clouds can soften harsh light, storms add mood and drama, while dawn and dusk transform ordinary scenes into extraordinary visions. Planning your flight around these windows often determines whether you come back with a good image or an unforgettable one.
What makes aerial photography even more challenging is that light changes from second to second with the movement of the helicopter. You need to anticipate these shifts, keep a constant eye on your histogram, and pre-visualize the final outcome before pressing the shutter. The ability to imagine how the scene will translate into a finished image is what separates a good aerial photograph from a truly powerful one.
Front Light: When the sun is positioned behind you, the scene is evenly illuminated, and colors appear vibrant and true to life. This setup is excellent for capturing fine details and producing clean, high-contrast images with minimal shadow interference. However, while technically strong, front light can sometimes flatten a composition, especially in vast landscapes where depth, texture, and dimension are crucial to creating a sense of scale and drama. Also, pay attention to avoid having the helicopter shadow in your frames.
Back Light: Shooting directly into the sun is technically demanding but can deliver spectacular results. It creates drama through silhouettes, glowing edges, and atmospheric haze. This is when deserts glow like molten gold at sunrise & sunset.. Managing dynamic range is critical here, depending on the situation.
Side Light: Often the aerial photographer’s best ally, side light occurs when the sun is low in the sky. It stretches shadows across the land, sculpting textures and patterns invisible at midday. This directional light reveals rhythm and geometry, turning dunes into abstract forms and mountains into layered silhouettes.
Composing From The Sky
Aerial photography has taught me that cities and nature speak entirely different visual languages. Flying above cities, I’m often battling distortion — leveling horizons, keeping architecture balanced, maintaining the right distance from the subject, and reaching for tilt-shift lenses to bring order to the chaos below. It’s technically demanding, but over vast landscapes, the perspective changes. From the air, the world flattens; there are no foregrounds or layers, only the natural lines and tones that shape the frame. Rivers, dunes, and coastlines become brushstrokes on a canvas, reminding me that composition here isn’t about control, but about listening to the land’s own design.
One technique I often use is shooting in portrait orientation. From above, this allows me to fit more of the subject into the frame and emphasize depth in an environment that naturally tends to flatten. It creates a sense of scale, guiding the eye from foreground details to the horizon, and turning the aerial view into something more immersive.
Shooting Mode and Shutter speed
During flight, I’m constantly challenged by vibration, unpredictable movement, and rapidly changing light. Capturing sharp, well-exposed images in these conditions requires a very different approach compared to shooting on a tripod from the ground.
The technique is completely unique — precision and speed matter more than anything. The lens you choose directly dictates the shutter speed you can safely use. With wide-angle lenses, speeds around 1/500s often suffice, while mid-range lenses demand 1/640–1/800s for consistent sharpness. But once you move into telephoto territory, things get far more critical. Every vibration is magnified, and shutter speeds often need to exceed 1/1000s — sometimes much higher depending on the focal length — to ensure crisp, usable images.
The “numbers” (1/500, 1/800, 1/1600…) are only starting points. Once you’re actually in the sky, it’s not about rules — it’s about reading the conditions in real time, by taking into consideration the helicopter stability, the pilot’s skills, the light, and the gear.
Burst mode is very important for aerial photography. Helicopters introduce constant micro-vibrations and unpredictable jolts — even with the right settings, one frame can catch the shake while the next is tack-sharp. Shooting bursts increases your odds of nailing that perfectly sharp frame.
Personally, I shoot in short bursts of 3–5 frames, which gives me enough insurance without overwhelming storage or culling later. To keep up with the pace and large GFX files, I rely on CFExpress Type-B cards — their speed clears the buffer quickly and ensures I never miss a moment while the helicopter is in motion.
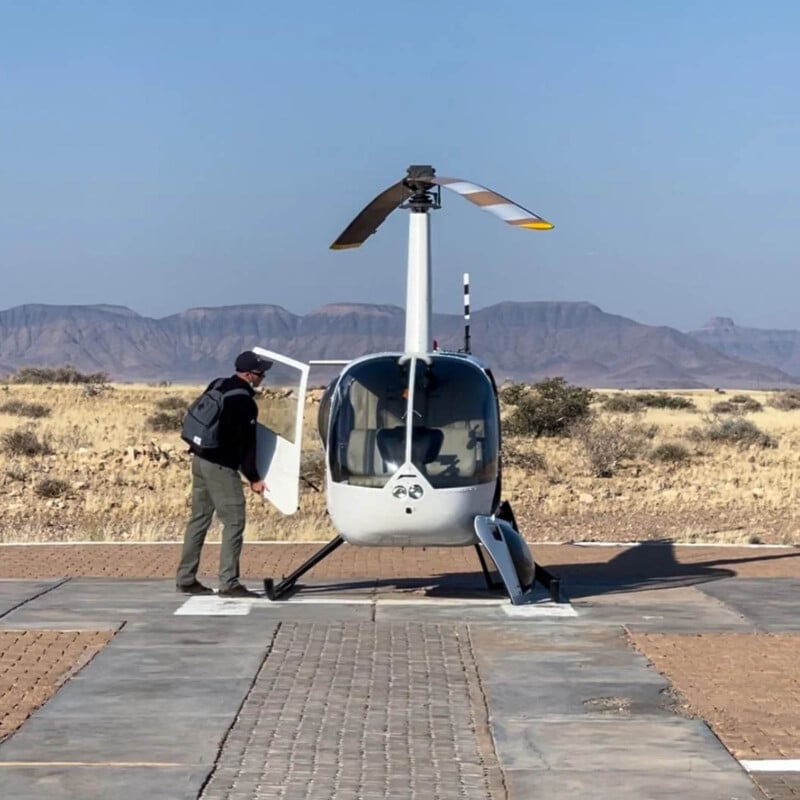
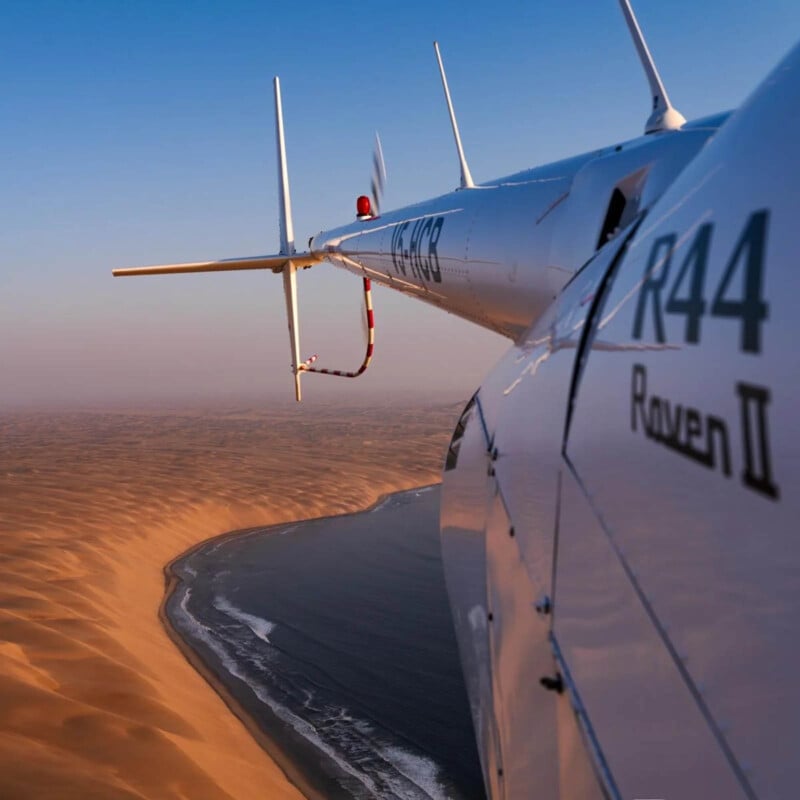
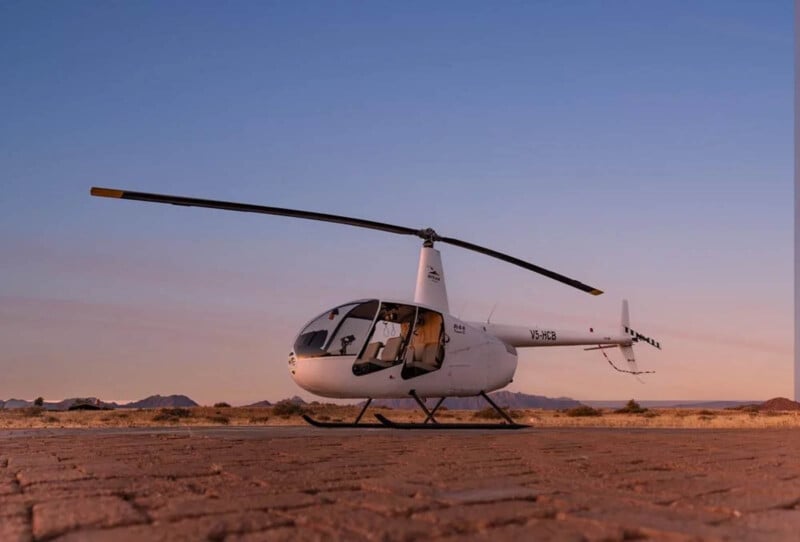
Robinson R44 helicopter used for aerial photography over Namibia’s desert landscapes — showcasing the platform behind Dany Eid’s helicopter photography process
Aperture and ISO
Since I’ll typically be working in shutter priority mode, aperture becomes the next piece of the equation, influenced by the ISO setting and the available light. I usually aim for f/4 to f/11
I set ISO max to 800, but in low-light situations, I may push it up to 1600. I’m confident enough about my camera producing clean files with minimal help in post.
A quick note on IBIS (In-Body Image Stabilization). While the Fujifilm GFX system offers excellent IBIS for handheld shooting, it allows me to drag shutter speeds far lower than would normally be possible, delivering tack-sharp images even in low light. I always apply this technique when the chopper is in hover mode for better results.
Other Camera Settings I Rely On
Beyond shutter speed, aperture, and ISO, there are several other settings that I always consider when preparing for an aerial shoot:
File Quality: I always shoot uncompressed 16-bit RAW files to maximize the flexibility in post-production. These files give me the depth I need for fine tonal adjustments, especially when recovering highlights and shadows. Paired with CFexpress Type B cards, I get the speed and reliability essential for continuous shooting from the air.
White Balance and Film Simulation: I keep white balance on auto — the light shifts constantly in flight, and I prefer to correct nuances later in post. For film simulation, I choose Provia/Standard (Natural), which provides a faithful starting point without overly stylizing the image.
Burst Mode: I do shoot in continuous (burst) mode, but with intention. It’s tempting to hold down the shutter in the excitement of flight, but I remind myself constantly: it’s about quality, not quantity. Controlled bursts ensure I capture the decisive moment without filling cards with redundant frames.
Stabilization: I always keep IBIS (in-body image stabilization) activated, and when possible, I pair it with OIS (optical image stabilization) on the lens. The two systems working together help reduce micro-vibrations — particularly useful when the helicopter is hovering or moving gently. That said, stabilization is never a replacement for speed. It’s a supportive tool, not a solution. In aerial work, the real safeguard against motion blur will always be a fast shutter speed.
Focus Mode: I rely on autofocus, which is fast and accurate on the Fujifilm GFX system. With constantly shifting altitude, speed, and perspective, autofocus gives me the agility I need to stay locked on the subject without hesitation.

About the author: Dany Eid is an architecture, cityscape, and landscape photographer based in Dubai. The opinions expressed in this article are solely those of the author. Eid is an ambassador for Fujifilm, Carl Zeiss, and fstopgear. You can find more of Eid’s work on his website, Facebook, 500px, Twitter, and Instagram. This article was also published here.