Luminar Neo Supercharges Your Photo Editing Workflow
![]()
In the ever-evolving world of digital photo editing, staying ahead of the curve means finding tools that streamline the process without sacrificing quality. Skylum’s Luminar Neo positions itself as a solution for both professional photographers and hobbyists looking to enhance their workflow with speed and precision.
Full disclosure: This article is brought to you by Skylum
With a focus on AI-driven features and a sleek, user-friendly interface, Luminar Neo aims to become an indispensable part of your editing toolkit. But does it live up to the hype? Let’s dive into the features that set it apart and see how it fits into a photographer’s workflow.
User Interface and Workflow: Simplicity Meets Power
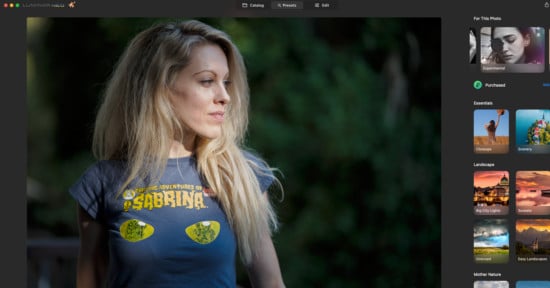
One of the first things you’ll notice about Luminar Neo is its intuitive interface. It’s sleek, clean, and accessible, making it an ideal choice for both beginners and seasoned professionals. The workspace is well-organized, with all the essential tools neatly laid out, so you won’t have to waste time hunting for features. But don’t let the simplicity fool you, as there’s a robust engine underneath.

The software offers both standalone capabilities and the flexibility to integrate into existing Lightroom or Photoshop workflows. Whether you’re working on a large batch of photos or fine-tuning a single image, the software’s performance is smooth, thanks to its underlying AI engine. While Luminar Neo is certainly capable of working independently, its compatibility with Lightroom and Photoshop as a plugin makes it a valuable addition to a broader editing toolkit.
Enhance: The Power of One-Click Editing
For photographers seeking a quick way to enhance their images without diving into detailed adjustments, the Enhance feature is a game-changer. As its name suggests, this tool automatically analyzes your image and applies a series of corrections in a single click. It’s handy when you need to make a fast edit without sacrificing quality.
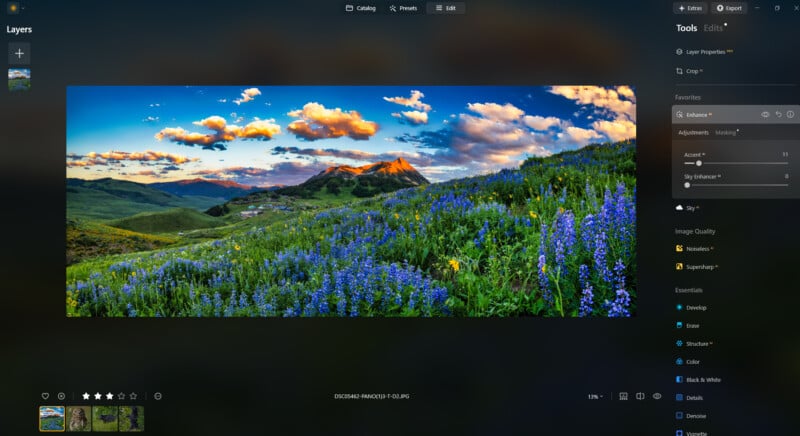
The Enhance feature delivered impressive results, providing enhanced contrast, improved exposure, and more pleasing overall color. For beginners or those working with a tight deadline, this one-click solution can be a lifesaver. However, for more experienced photographers, it serves as a great starting point, as you can always fine-tune it further with other tools.
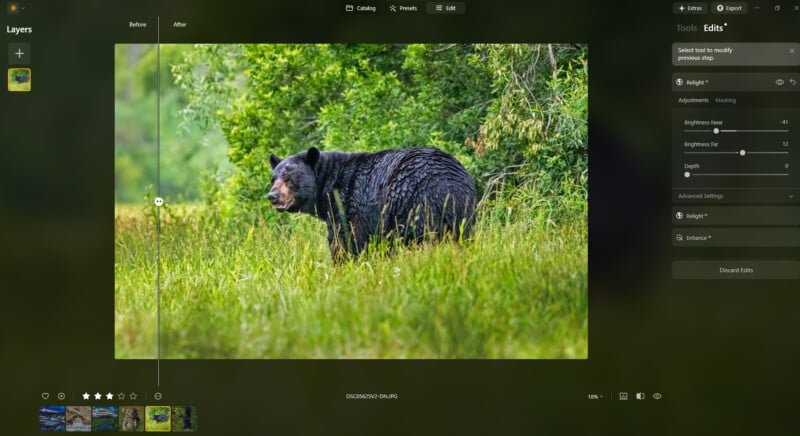
Relight: Sculpting Light with Precision
One of the standout features of Luminar Neo is the Relight tool. While many editing programs offer basic exposure adjustments, Luminar Neo takes things a step further by allowing you to manipulate the light sources in an image in a much more sophisticated way by fine-tuning your lighting with quick select AI masks for subjects, backgrounds, or any area that you brush on.
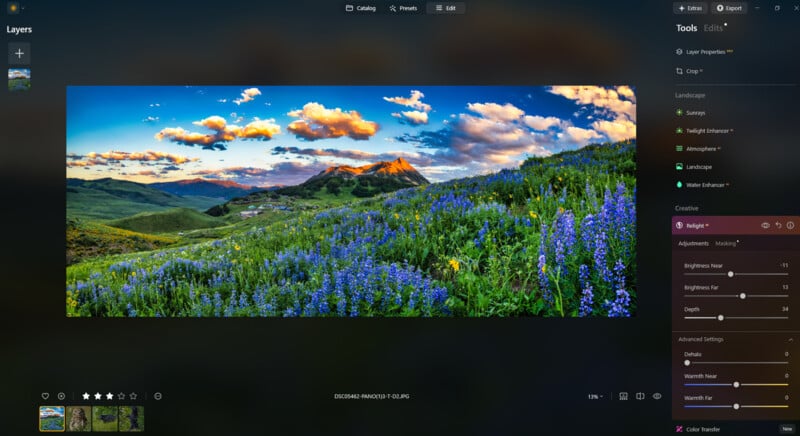
The Relight feature allows you to control both global exposure and local light sources, which is ideal for adding depth and dimension to your photos. Whether you’re working with a portrait that needs a little extra pop or a landscape that requires some nuanced lighting adjustments, this tool gives you the flexibility to fine-tune every aspect of your image’s lighting.
What sets Relight apart is its precision. You can isolate light areas and adjust them without impacting other parts of the photo. The results are natural, and the ability to control light in this way makes it easier to achieve that professional, polished look.
Structure: Unlocking Detail and Clarity
Another feature that photographers will appreciate is Structure, which enhances clarity and contrast without over-sharpening or introducing artifacts. While sharpening tools can often lead to unnatural results, Structure works by intelligently enhancing mid-tones and local details. The outcome is a crisp, detailed image that retains a natural aesthetic.
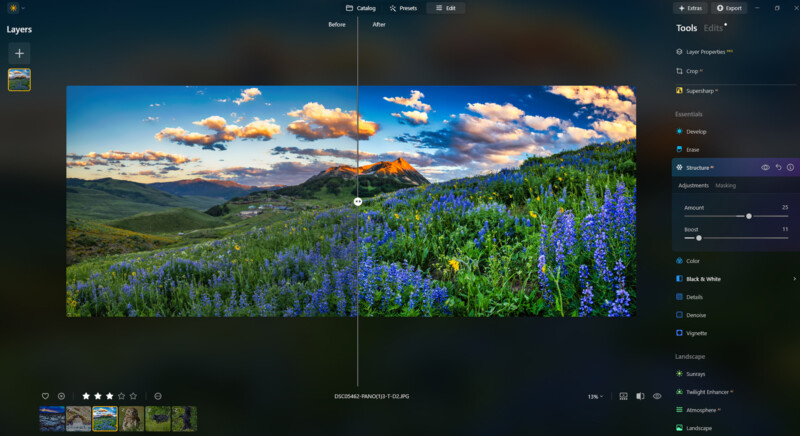
This is especially beneficial for photographers working with landscapes, architecture, or even close-up shots where detail is paramount. The clarity added by Structure ensures that every element of the image pops without making the photo look overprocessed.
AI-Powered Editing: Streamlining the Creative Process
Behind all these tools lies Luminar Neo’s AI-powered engine, which drives features like Enhance, Relight, and Structure. The use of artificial intelligence in photo editing isn’t just a buzzword here; it’s a functional, performance-driven tool that makes advanced editing faster and more accessible.
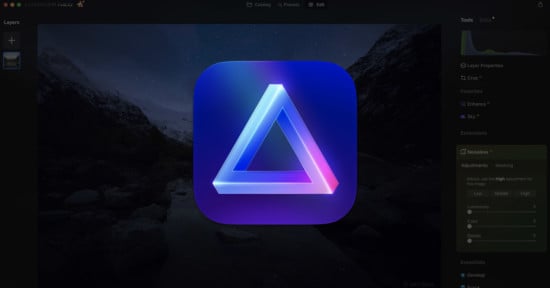
The AI algorithms work by analyzing the image, recognizing its content, and then applying adjustments based on a comprehensive understanding of what the image needs. This makes the editing process more intuitive and less time-consuming. It’s beneficial for those looking to save time on mundane adjustments and focus on more creative aspects of editing. While analyzing your image, a mesmerizing geometric overlay is displayed rather than a mundane bar or spinning icon. It’s a nice touch.
Performance: Smooth and Efficient
On the performance front, Luminar Neo is fast and responsive. The software has been optimized to deliver quick rendering times, even with large files, which is crucial when working on projects that require high-level detail. Whether you’re editing portraits or landscape shots, the software’s responsiveness ensures that you can work efficiently without the lag that can plague other photo-editing tools.
Even my gigantic 10,054 x 4,076 pixel panoramic photograph of Crested Butte, Colorado, breezed through each tool, never once bogging down as I experimented with Luminar Neo’s latest features.
Editing Wildlife and Landscape Photos with Luminar Neo: A Personal Experience
As a photographer who spends a lot of time capturing the beauty of the natural world, I’m always on the lookout for editing tools that can preserve the essence of my shots while enhancing their visual impact. Wildlife and landscape photography come with their unique challenges. Light can be unpredictable, the environment is often harsh, and every shot has a different story to tell. After spending some time with Luminar Neo, I’ve found that it’s adept at quickly tackling these challenges, offering a workflow that’s both efficient and highly effective, all without taking away my creative control.
Capturing the Scene
When I’m out in the field, the conditions can change rapidly. One moment, the sun casts a beautiful golden glow on the landscape; the next, clouds roll in, creating a moody atmosphere. This unpredictability often means that I don’t have the luxury of spending a long time adjusting settings during a shoot. When I bring my images into Luminar Neo, I need a solution that can adapt to these changes quickly while still capturing the nuances of the light and detail.
With Neo’s presets as a starting point, I scroll through the wide variety of styles to find one that suits my specific image, adjusting the intensity to match the photo. The “Long Exposure” and “Forest Stream” are my favorite presets, and despite the titles, I use them on all subject matter.

Next, I click the Edit tab, and this is where the real magic starts to happen, the home of Luminar Neo’s Tool, both AI and standard. For this photograph I captured in Alaska of two bears sparring over salmon fishing grounds, I like the action scene but the bright background and lighting bother me. So, straight away, that is the first thing that I want to fix.

That’s where the Relight feature shines. With wildlife and landscape shots, the lighting often falls unevenly across the scene, especially in tricky environments like forests, deserts, or wide-open fields, or in my case, a river with a steep bank and poor natural lighting. The ability to adjust the exposure of both global and local light sources without overdoing it is a game-changer. I love how I can use Relight to subtly change the light in specific areas, whether that’s brightening the face of an animal or bringing out the details in the shadowed areas of a mountain range, all while maintaining a natural look.
The best part is that I can use Neo’s AI masking to automatically select the subject or background in an instant, with the ability to adjust the mask and apply edits to just the areas that need a touch-up. Neo gives me the control I need without making the adjustments feel heavy-handed. With all the fur and flying water droplets, this would have taken me hours to painstakingly mask out each section. However, with Neo, I adjusted the lighting of the foreground, subjects, and background all separately, and within minutes.
Bringing Out Detail with Structure
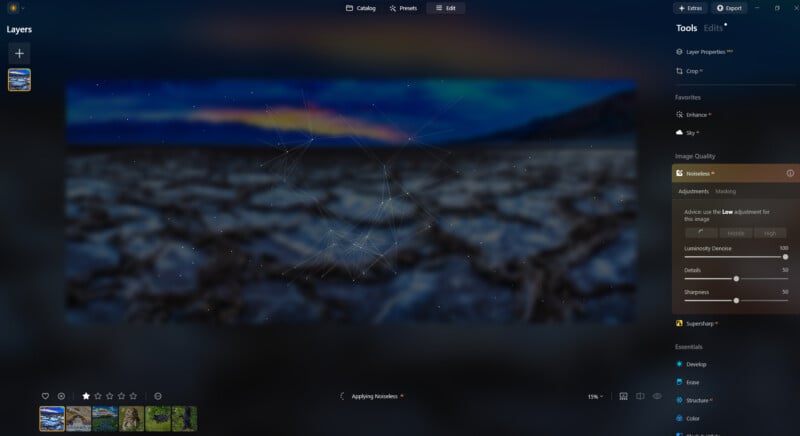
When it comes to landscapes and wildlife, the level of detail is everything. I want every texture, the grain of the bark on a tree, the jagged edges of a cliff, the softness of a foggy morning sky, to stand out. Structure is fantastic for this, adding that sharpness and clarity without introducing the harshness that you might get from typical sharpening tools. I also love to run the Noiseless AI tool in conjunction with Structure to let the AI ensure that my image is both clean and sharp, which can be tricky when photographing in low light or high action. However, Neo helps fix those troublesome areas of my image in seconds.


This is especially important when shooting distant landscapes, where there’s often a lot of atmospheric haze or soft lighting. Structure allows me to pull out subtle details without overprocessing the image. Whether it’s making the clouds more defined or adding texture to the rocks in a mountain range, this feature enables me to enhance the natural beauty of the scene without it appearing artificially sharpened.
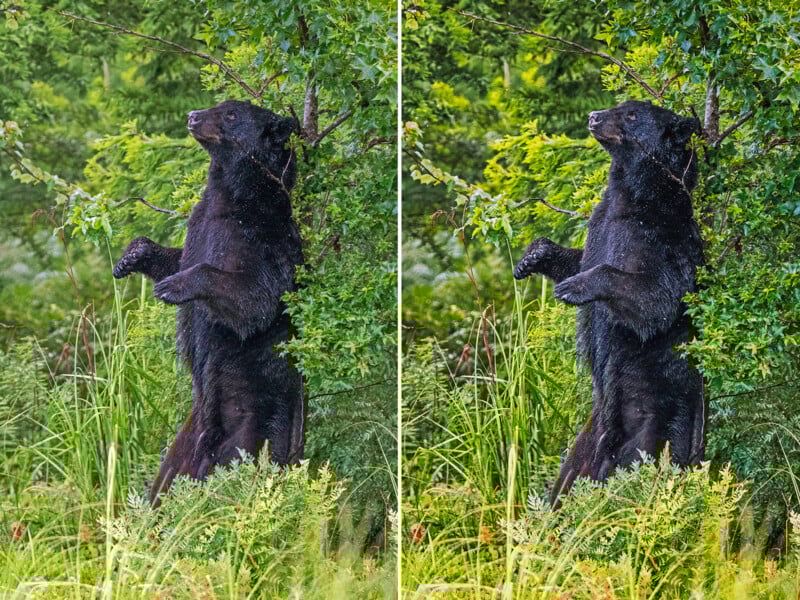
For wildlife, where fine details like fur or feathers can easily be lost, Structure helps retain the richness of textures while ensuring the subject remains soft and lifelike. I’ve found that even in challenging situations, such as a bird perched against a busy background, the tool allows me to make the subject pop without the surrounding details becoming too harsh or distracting.
The AI Touch: Enhancing with One Click
I’ve also been impressed with how well the Enhance feature works on both wildlife and landscapes. In wildlife photography, there’s often a narrow window of time to capture the perfect moment. Having the ability to instantly improve exposure, contrast, and colors with a single click means I can save time in post-processing, especially when I’m working with a large number of photos from a shoot.

The great thing about Enhance is that it doesn’t just make the image “better,” instead it refines it, analyzing the image and optimizing the details and tones in a way that still feels natural. In a landscape shot, it might boost the saturation of the sky or enhance the contrast between the foreground and the background, making the photo pop. For wildlife, it can help bring out the subtle gradations of color in an animal’s coat or the lighting around its eyes, enhancing the image’s overall mood without making it look overly edited.


An Essential Tool for Outdoor Photography
I have used Luminar AI for years to help me color correct, sharpen, and enhance the lighting in my images, with the new Luminar Neo now becoming a key part of my editing workflow for wildlife and landscape photography. Its ease of use, combined with powerful AI-driven tools, makes it a perfect fit for photographers like me who spend a lot of time outdoors creating and would prefer less time doing repetitive editing tasks. The Relight feature gives me precise control over how light behaves in my images, while Structure ensures that every detail is preserved, from the rough texture of tree bark to the delicate feathers of a bird in flight. And when I’m pressed for time or need a quick edit, Enhance is the perfect tool to elevate my photos with minimal effort.
Ultimately, what I appreciate most about Luminar Neo is its ability to enhance my photos without detracting from their natural beauty. In wildlife and landscape photography, the goal is always to capture and convey the essence of the scene as authentically as possible. With Luminar Neo, I can do just that, while still having the creative freedom to make my images stand out.


How Can Luminar Neo Upgrade Your Post-Processing Workflow?
Luminar Neo delivers on its promise to be a powerful, intuitive, and efficient photo editing tool. Its standout features, Enhance, Relight, and Structure, bring significant value to photographers of all levels. Whether you’re a hobbyist looking for a simple way to polish your photos or a professional searching for advanced tools that integrate into your existing workflow, Luminar Neo offers something for everyone.

Its ability to work as both a standalone application and a plugin for Lightroom and Photoshop makes it a versatile option for a variety of editing needs. And with AI-powered features that simplify complex tasks, Luminar Neo is a powerful tool for photographers who want to speed up their workflow without compromising on quality.
If you’re looking to elevate your editing game, Luminar Neo deserves serious consideration. As the software continues to evolve, it will become an even more powerful tool for photographers who want to create stunning, professional-grade images with ease.
Photographers, there’s no better time to try Luminar Neo for yourself, and PetaPixel readers can get 10% off Luminar Neo using the coupon code “PetaPixel10.”
Full disclosure: This article is brought to you by Skylum
Image credits: Photographs by Kate Garibaldi