How I Recreated a John Wick Movie Poster
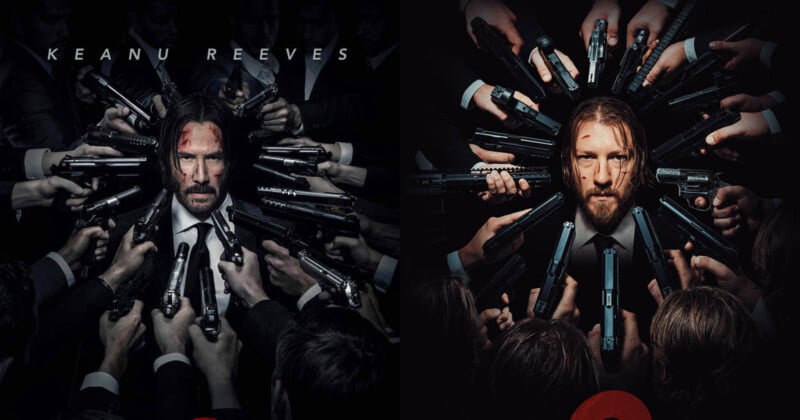
For starters, I love the fast-paced John Wick series, and I think that Keanu Reeves is just a badass in general. Now I don’t use this word often, but everything about these movies is pure cinematic gold — the lighting, composition, camera movement, etc. (But, that’s just my opinion.) So, I decided to recreate this cinematic John Wick Chapter 2 movie poster, and show you exactly how I did it!
Analyzing the Original Portrait
Let’s analyze the original portrait before we get started. It’s a pretty straightforward shot with butterfly lighting. You can tell this by the little shadow under Keanu’s nose, meaning a single, hard light source above, and slightly in front of his head. I don’t see any rim, fill, or additional lights. However, when I started taking test shots I added a small bounce card and diffused my light source, which was a touch too hard. You can see exactly what I did in the video.
Also, if you look closer, you’ll see there are no shadows on Wick from the other arms, meaning they were photographed separately and composited in later. We’ll do the same thing, using the magic of Photoshop, because I only have 2 arms, unfortunately, not 20.
Gathering Photo Elements for the Poster
So what do we need to make this movie poster? For starters, we need a portrait on a black backdrop. Additionally, we’ll need about 20 arms holding guns. Easy day!
So I’m a big fan of making lists. They help keep me organized, especially when there are a lot of moving parts to a photo shoot. Here’s the gear we’ll need before we start taking any photos:
- Camera
- 1 light
- Subject in a black suit
- Black and white backdrops
- And guns… lots of guns! God bless America!
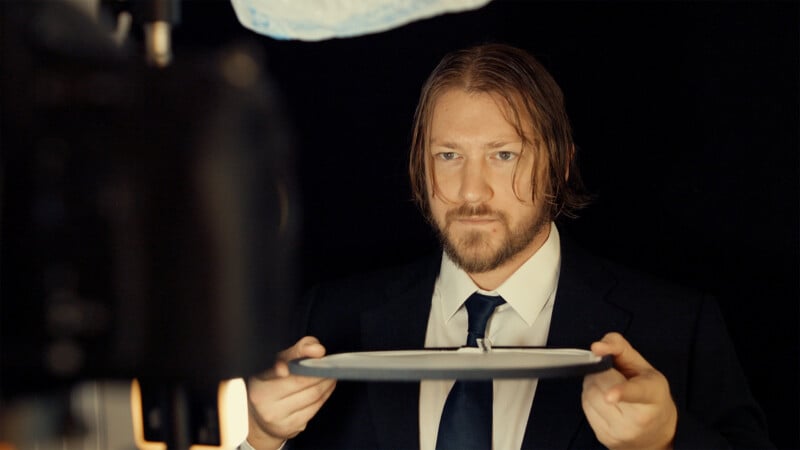
John Wick Portrait Behind-The-Scenes
It’s time to capture all of the pieces to build the puzzle. We’ll start with the portrait setup. I used my Nikon D810 DSLR with a 24-70mm f/2.8 and a SB-910 flash. My camera settings are: 50mm, f/5.6, 1/50th, and ISO 100. After some test shots, I decided that the bare flash was a bit too hard of a light source. So, I’ll add a plastic bag as a quick DIY diffuser and use a white bounce card to soften the shadows slightly. Overall, I have about 20 different variations of the portrait. Keep going until you’re completely satisfied with the pose and lighting. Now for all the guns!
Gun safety disclaimer: I am a well-trained individual with a military background. I’m highly experienced with firearms and follow basic rules of safety. No ammo was present, no weapons were loaded or pointed in an unsafe direction. If you’re not familiar with firearms, DO NOT handle them. I am not encouraging unsafe behavior, nor am I responsible for any of your actions.
With all of that being said, let’s take some photos! I’m utilizing the white backdrop for these images so the background can quickly be removed in Photoshop. My light and camera settings will stay relatively similar to the portrait for a consistent look. Again, I’m not here to advocate for you to use real firearms in your photoshoots, quite the opposite if you’re inexperienced. Safety is priority #1. Additionally, that’s why I’m photographing this in separate pieces, instead of having a weapon pointed at anyone. Now that we have our puzzle pieces, let’s build the John Wick composite in Photoshop!
The Photoshop Composite
Photo Organization
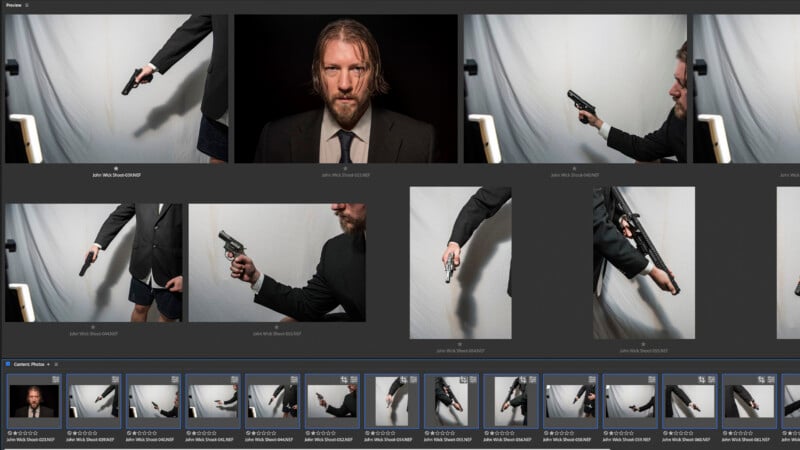
Now that we’ve collected our elements, it’s time to assemble them into the final composite. We’ll be using Adobe Bridge to narrow down our selections and assemble the final composition in Adobe Photoshop. Rating and filtering images play a key role in remembering my favorite shots. Stay organized, you’ll thank yourself later… I promise!
After a basic edit in Adobe Camera Raw, we’ll open all of our images in Photoshop. Also, it’s important to start with a new composition, or fresh canvas to work from. Photoshop is much better at accurately selecting objects, so the “Select Subject” tool is really coming in handy for cutting out all of these arms. There are a few touch-ups here and there, but it is saving us HOURS of selecting by hand.
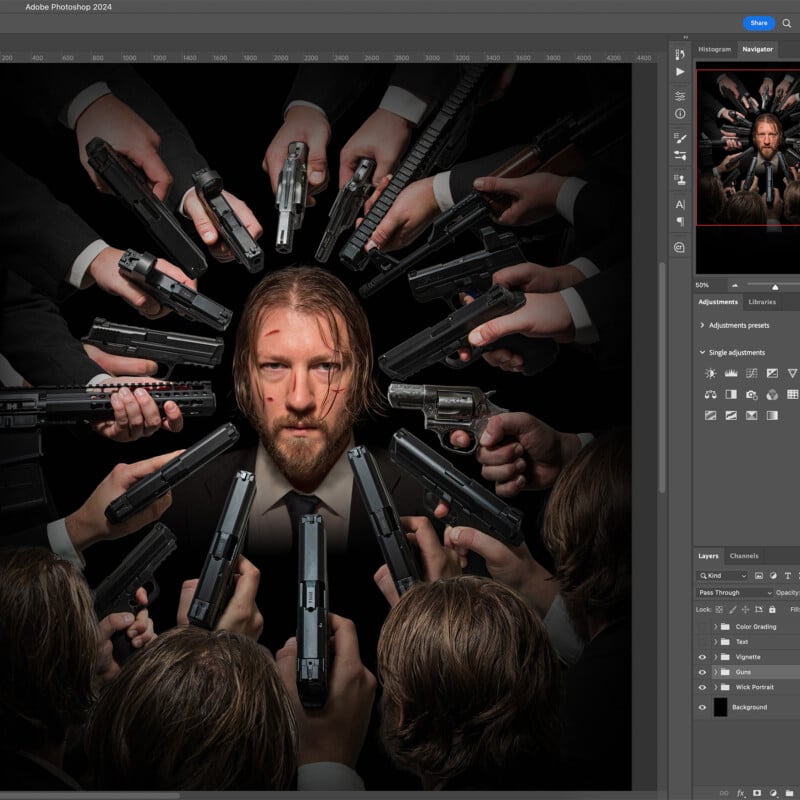
Layers
Remember it’s important to work in layers. Layers are critical to moving objects around and making compositional adjustments. Additionally, grouping layers will help keep you organized. The portrait, the guns, the text, and the color grading, all went into separate groups.
Vignette and Text
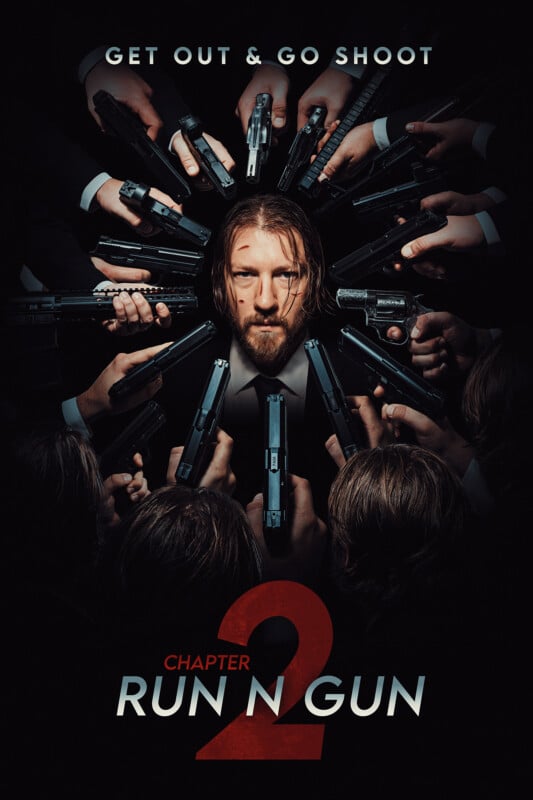
A critical compositional tool in our arsenal is the vignette. The original poster utilizes a heavy vignette (in addition to a centered composition) to immediately draw the eye to the middle of the frame. It also helps us hide little flaws or lack of detail in the shadows. For text, I’m adding Run N Gun, because the pun is just too good! Moreover, my closing statement for all of my YouTube videos is: “Get out & Go Shoot” which works so well.
Cinematic Color Grading
Overall, the original John Wick movie poster has a pretty desaturated look. It feels nearly black and white, except for reds and skin tones. But, I also want this to have my own run-n-gun feel — after all, it is my recreation. So, I’ll start by desaturating the entire composition with a Hue & Saturation adjustment layer. I’ll add one of Photoshop’s built-in LUTs to start the color grading. That adds some contrast and “punch” to the poster. I’ll top it off with my Summer Blockbuster LUT, which brings out the skin tones and the blues in the guns — sort of a subtle Hollywood orange and teal look, aka cinematic.
Final Thoughts
Overall, I think this John Wick movie poster took me about 6 hours to recreate and I had a ton of fun doing it. I think recreating movie posters is a great exercise to learn how the pros work and pick up some tips and tricks along the way.
About the Author: JT Armstrong is an award-winning military photographer and is currently the video director for the U.S. Space Force. He runs the Youtube channel RunNGun Photo that focuses on sharing photography tips, tricks, and hacks. This article was also published here.