How to Use Paper as a Photo Backdrop to Keep Costs Down
As a product photographer, I use paper in various different ways as a background for still-life photos to keep costs down for creative shooting. In this article, I’ll show you how I do it and how you can do it too.
Photography on a Budget
Let’s face it, photography can get expensive. Cameras, lenses, lights, model fees, studio hire, props, and more can all leave our budgets squeezed. So, finding more cost-effective ways to build our portfolios and enjoy our photography can make a real difference.
With a bit of lateral thinking, we can keep tighter control of our expenditure without sacrificing image quality. For example, when I couldn’t afford to buy some of the “proper” modifiers for my studio lights, I created a number of my own modifiers and in fact, I still do.
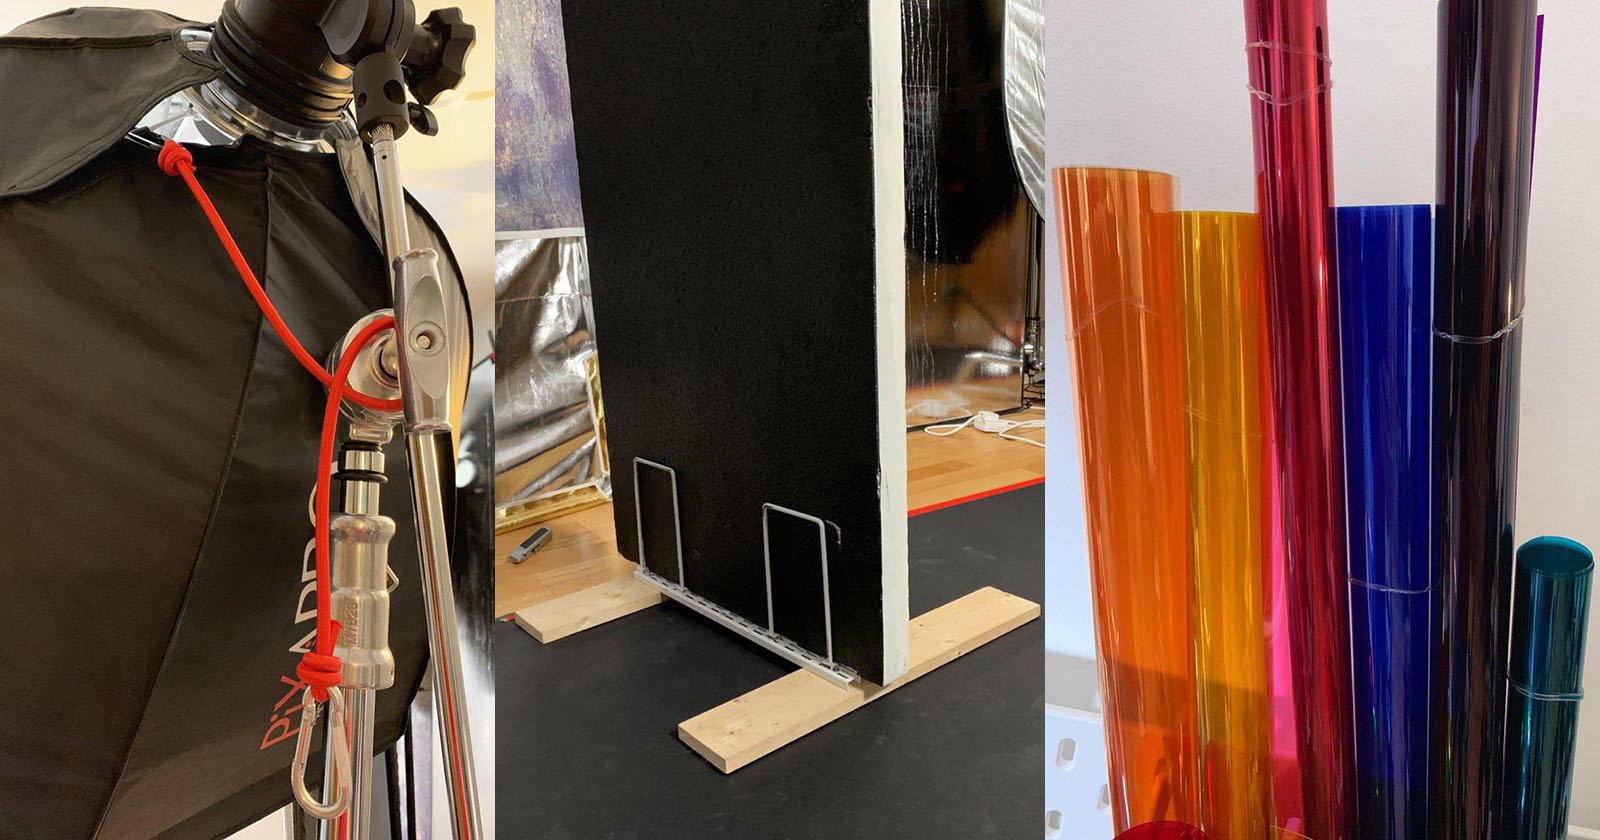
Make Your Own Modifiers
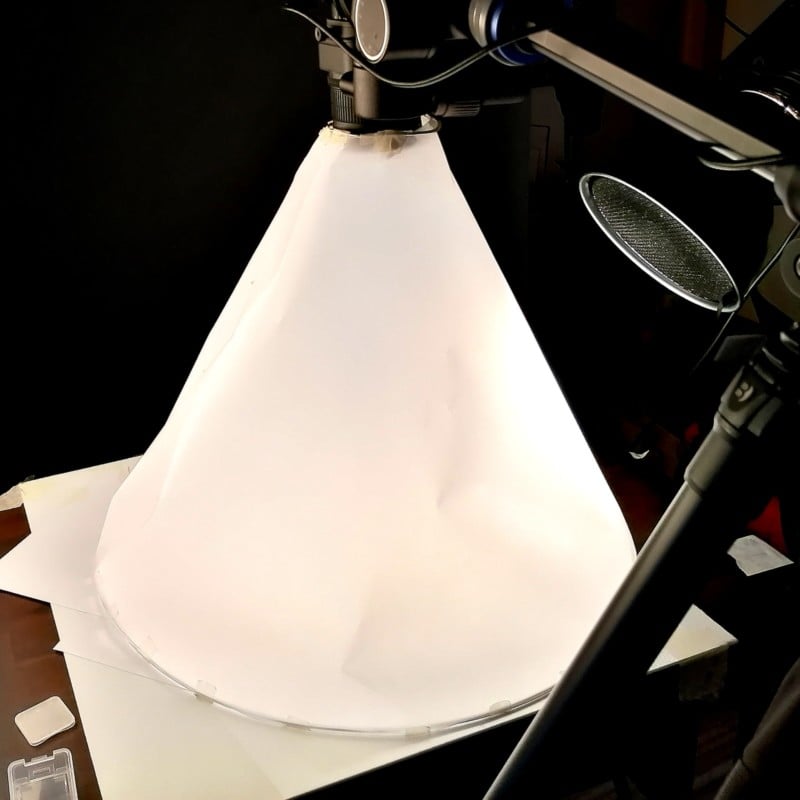
The shooting cone I used for the images in this article is homemade. It is a metal hoop (from a florist supplier via Amazon), some LEE 216 diffusion material (or Savage Translum), a flexible aluminum rod for the smaller opening, and the whole thing is held together with masking tape. The flexible rod makes it easier to get a good fit around the lens, while the hoop provides rigidity where you need it.
We will shortly look at how paper and card stock can be useful for creating a set for an item, but they can have another handy use too. Both paper and card stock can make really useful reflectors of all different sizes to bounce light onto your subject.
I work in a very small studio most of the time so I often use cardboard or foam-core sheets instead of setting up an additional light. The whiter and more glossy the card, the more light is reflected. You can use black card as a negative fill or stick some aluminum foil to the card for a strong, harder reflection. I basically make my own mini v-flats!
Charity Shop Challenge
When I started out in product photography, I used to buy used items from charity shops to practice with. That sometimes made it more of a challenge to get great images, especially if there were any scratches on the subject. But it was a cheap way to practice my lighting and editing skills. When I then came to work with brand-new items it made everything feel easier. It also meant that I could build up a pretty solid portfolio without spending a fortune. Basic jewelry and watches can become affordable subjects when you aren’t buying them new.
Grow Your Own Subjects
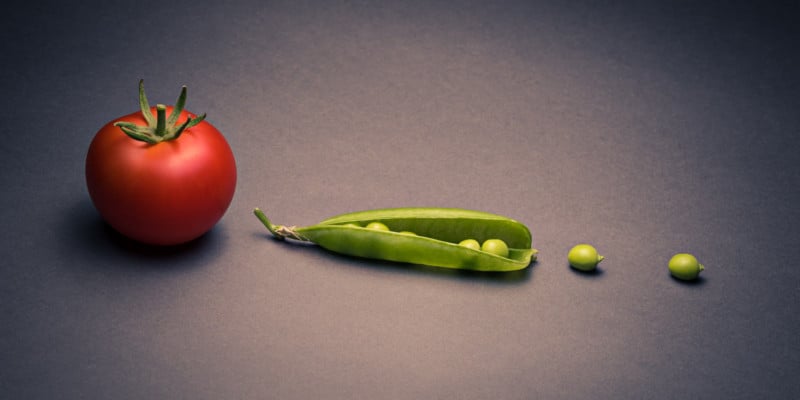
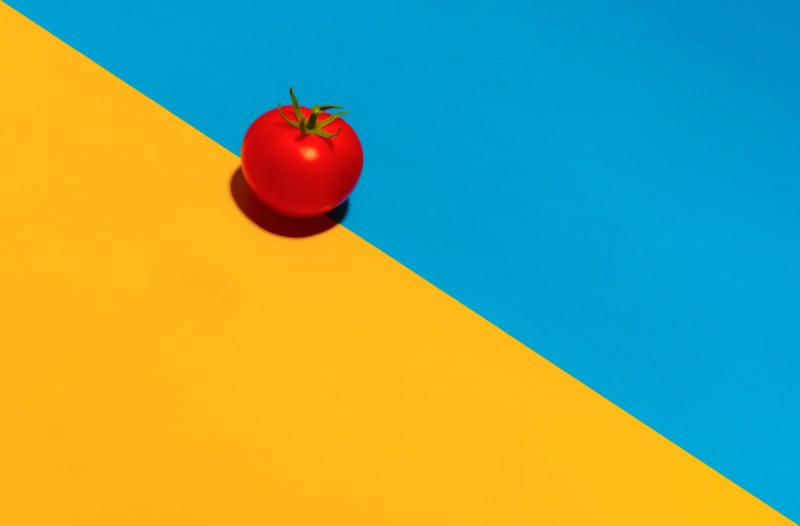
I also used to bring in fruit and vegetables from the garden to practice lighting a range of matt to glossy subjects. They act as blocks of vivid color, too, which is good for playing with composition ideas using color theory. The photo below takes the simple idea of RGB as the basis for the image. We’ve got a tomato for red, the peas for green, and blue paper. I then split-toned the result slightly to bring in some yellow.
Card and Paper Backgrounds
In this article, I’d like to spend some time focusing on another possible money-saving tip for still life and product photography: we’re going to have a look at using paper and card stock to create backgrounds and sets.
Most of us will probably have some paper and card stock laying around the house somewhere and if not, it is one of the cheapest set-building props you can get. Cheap materials don’t have to mean a cheap-looking final image either. You can get good results that can contribute to your portfolio with next to no outlay.
Paper works well in a variety of contexts. For example, it is good for simple geometric compositions and for blocks of color or texture. You can use it for flat-lay images and to build a little depth or create patterns by stacking layers. Larger sheets can make a basic infinity cove effect to give a seamless background. Clearly this is easiest for small items, but you can also work with larger rolls of paper for bigger subjects for things like portraits if you want. You then just need a way of mounting the roll or holding the paper up.
Working With White
When using white paper or card, you have to watch the exposure carefully if you want to avoid large areas burning out, leaving little or no detail. Some papers have an interesting texture that you might like to keep in the image, so then it is even more important to expose for that to come out well. Don’t forget to check your histogram on your camera to make sure nothing is clipping out on the right (in the highlights section). Or, if you have a highlight warning mode, ensure that nothing is flashing with a clipping warning.
It is a good idea to fix your paper down somehow to avoid it sliding around and ruining your composition. I tend to use masking tape as it generally comes off card fairly well without ripping it. You could equally use weights or put a corkboard underneath and pin things down. You may even want to keep your subject in place with wax or something similar (I find cheap dental wax often works well enough). These types of shots are carefully composed with precise placement. So, it is well worth taking a bit of extra care to keep things still because having everything move about when you accidentally nudge something is rather frustrating!
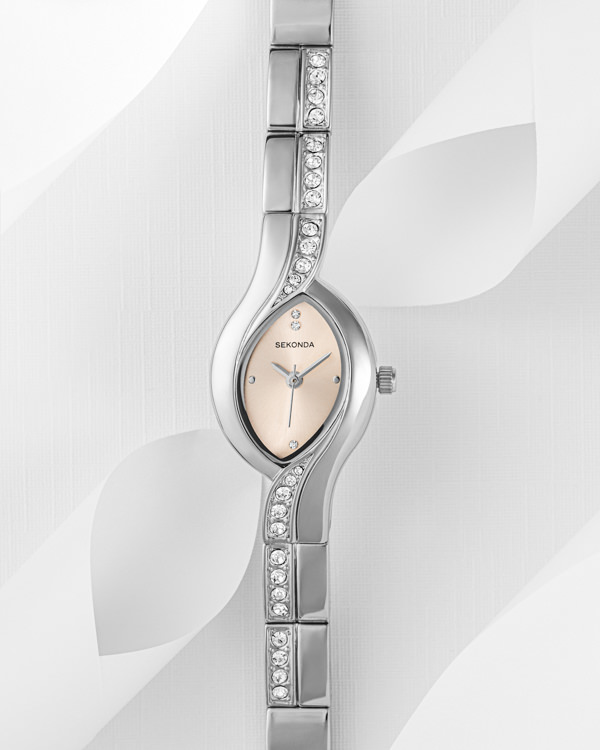
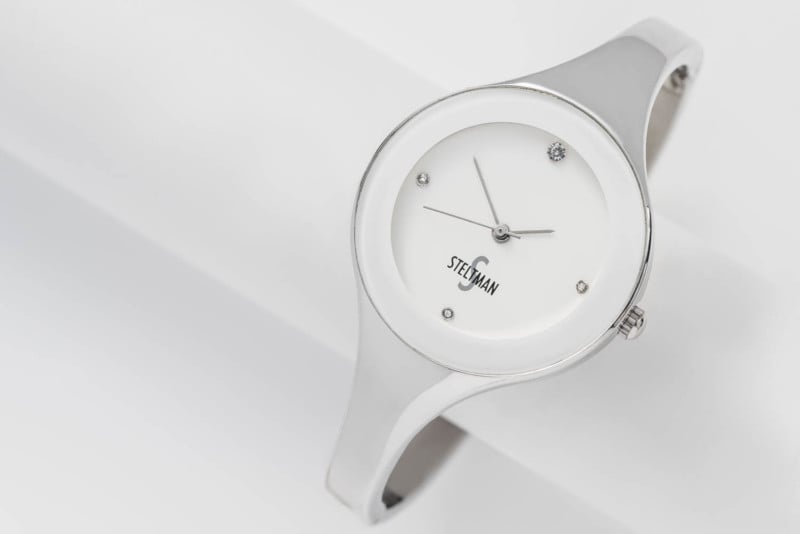
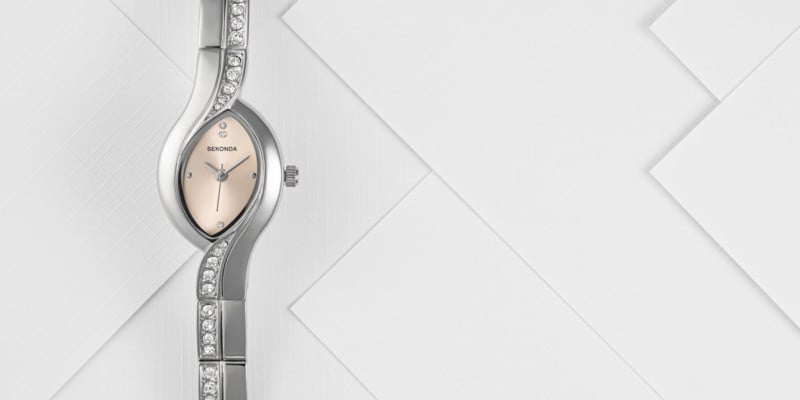
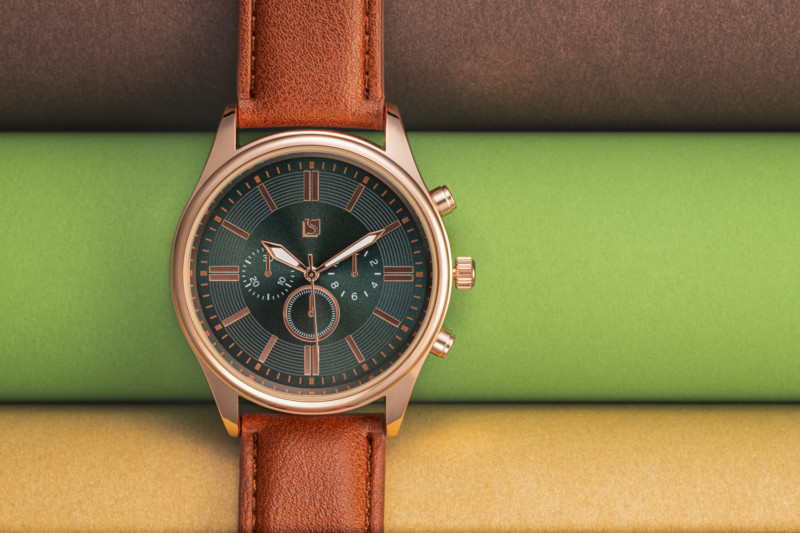
You don’t have to stick to flat sheets of paper either. Try rolling them up to create tubes. If you roll them at an angle you get an interesting shape to the opening. I used this with the Sekonda watch pictured here as it resembled the shape of the dial. Complementary shapes can be an interesting compositional tool.
Simple geometric designs or repeating patterns are easy to do with just a few extra sheets. One good thing about trying this is it gets you to think carefully about the basics of composition. It is a good way to get yourself thinking more about shape and subject placement as there is less going on in the scene.
Not Just Neat and New
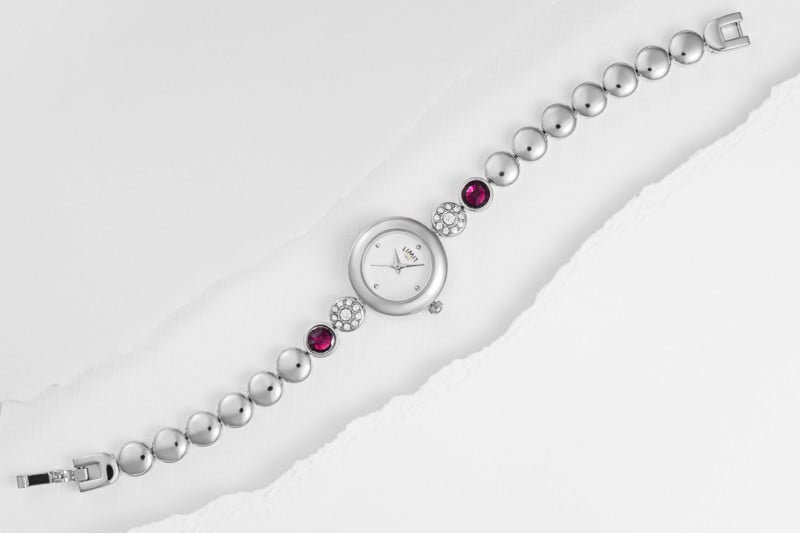
You can even go for a rougher look by ripping up your paper. Tearing paper or card reveals a highly textured rough edge that you might be able to use creatively. Having a ripped sheet on top of another can help add depth to your image. Experiment with the angle of your lights to create more or less contrast along these edges. In this image, I tried to create a curve that both the tear and the watch would follow (approximately at any rate!). I wanted some detail along the rip but not so much as to distract from the watch.
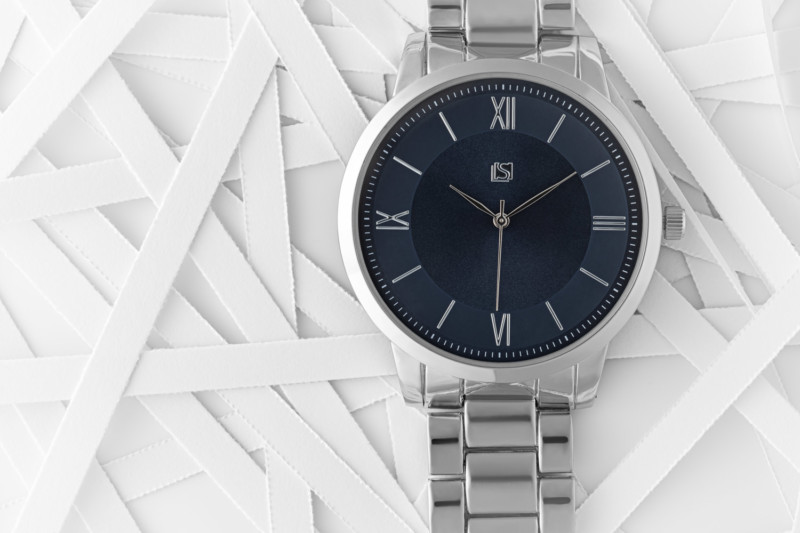
Or, how about putting some paper through the shredder?! There are many potential ways you could use the strips that this creates. You could create careful, neat stripes or some kind of weaved pattern perhaps. In the image below you can see that I’ve just scattered shredded bits of white paper so that I’ve got overlapping lines going in lots of directions. Sometimes the chaos of naturally allowing things to fall as they want is all you need!
Bring On The Color
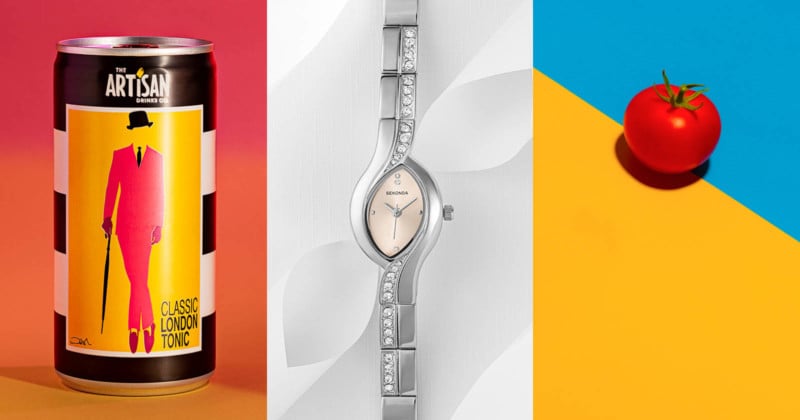
Once you introduce colored paper, the possibilities multiply even more. You could use overlapping flat sheets or cut-out shapes as with the white paper but combine complementary colors, for example. In the picture below you can see that I’ve used rolls of colored poster paper to place the subject on. I didn’t even bother to unroll them…! The undulating surface adds interest with areas of light and shadow as well as the subtle texture of the paper itself.
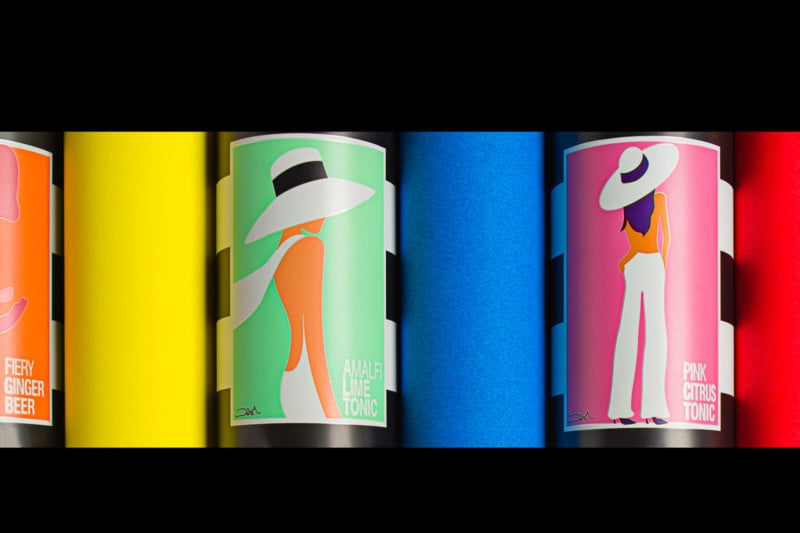
The drinks cans below came in a variety of different colors for the various flavors; so I had the idea of creating a kind of rainbow or color sequence by adding in the missing colors using rolls of paper. Again, this is just straight out of the box doing nothing more than removing some of the protective plastic. I just sat the paper rolls between the cans and made sure that everything was supported at either end so nothing would move.
If you don’t want the harsh, sudden transition between colors that you can get when using sheets of plain card or paper then you can use gelled lighting to create gradients of merging color. Angle the light source so that it is stronger near one end of the paper and fades out towards the other end. That way you can get a nice soft gradient.
Product Photography on Paper
We’re obviously just touching the surface here with the creative possibilities that this cheap prop opens up. It just goes to show that with a bit of imagination and experimentation, we can create good images on a budget.
My set-building skills are somewhat limited. But if you are good at origami or like a bit of crafting then I’m sure you could create some striking more three-dimensional scenes than those shown here. Foam or wooden blocks can cost a surprising amount, so why not make your own, perhaps even out of card? The fact that your props are then recyclable is another great bonus.
About the author: Joe Lenton FSICIP MA ASWPP ASINWP ADPS is a qualified international photography judge and mentor with The Society of Photographers. He is a freelance advertising photographer specializing in product and architecture photography. Based in Norfolk, UK, Joe lives with his wife and two cats, Ozzy and Sharon.
Image credits: All images © Joe Lenton.