10 Tips for Capturing Incredible Photos of Birds
Ben Knoot is a nature photographer and OM SYSTEM Ambassador whose passion for wildlife photography was born from his love of birds. The 26-year-old has traveled the world to document avian life with his OM SYSTEM OM-1 camera and shares his tips for capturing this fast moving and often unpredictable wildlife.
Full disclosure: This article was brought to you by OM SYSTEM Cameras
Read the PetaPixel review of the OM SYSTEM OM-1.
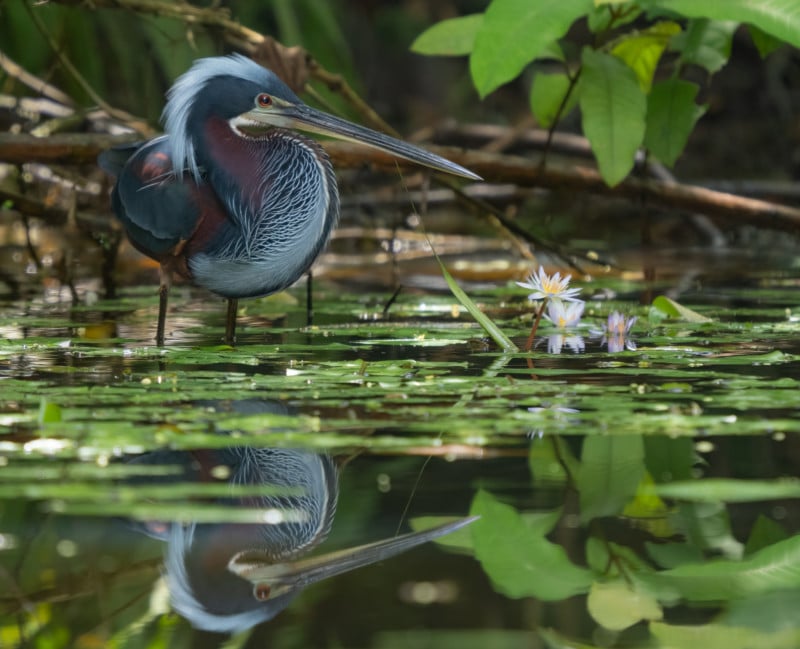
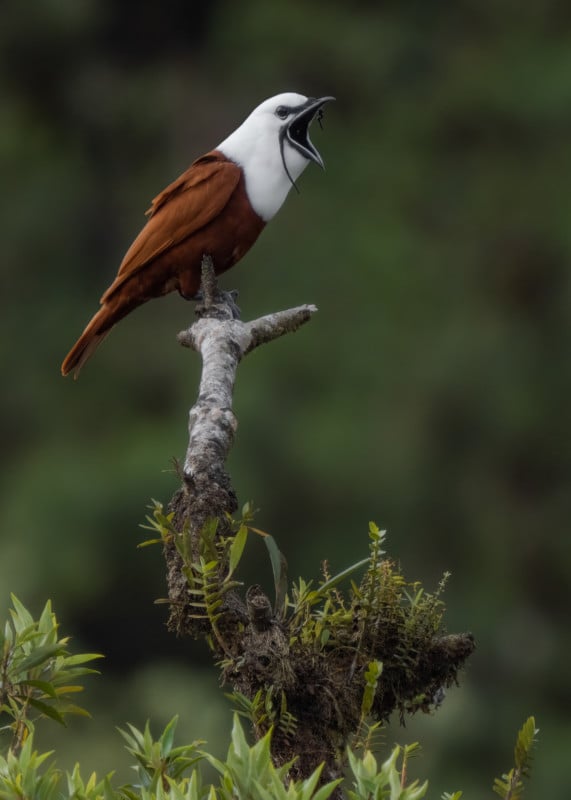
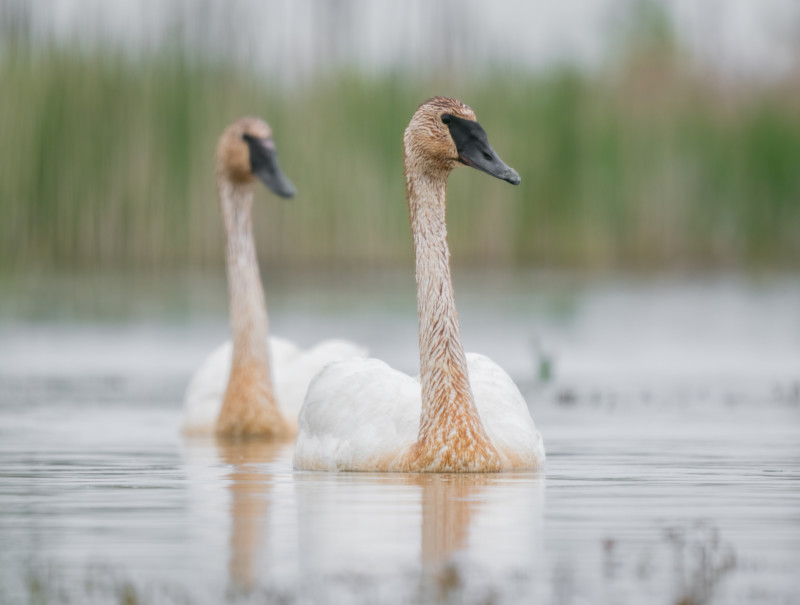
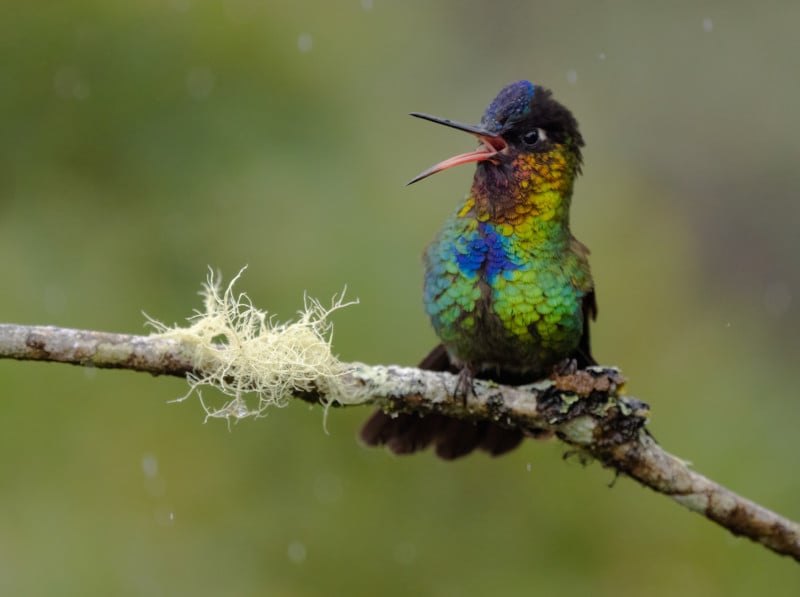
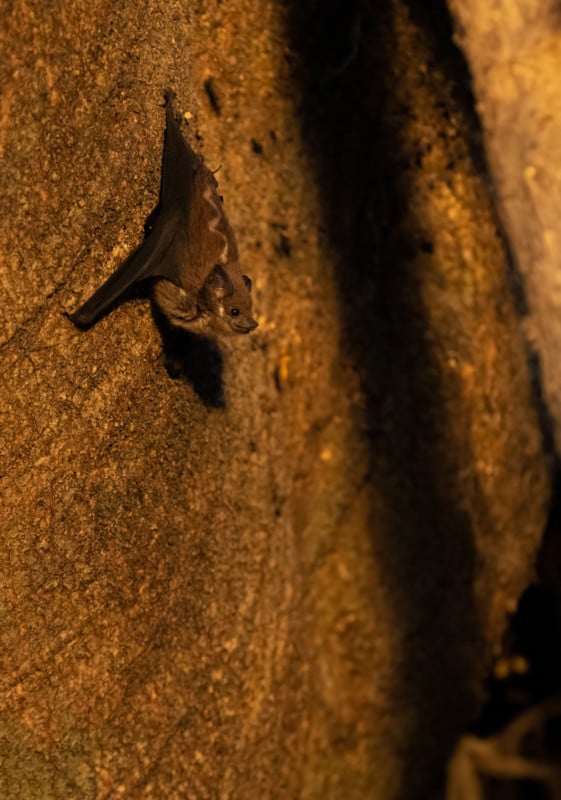
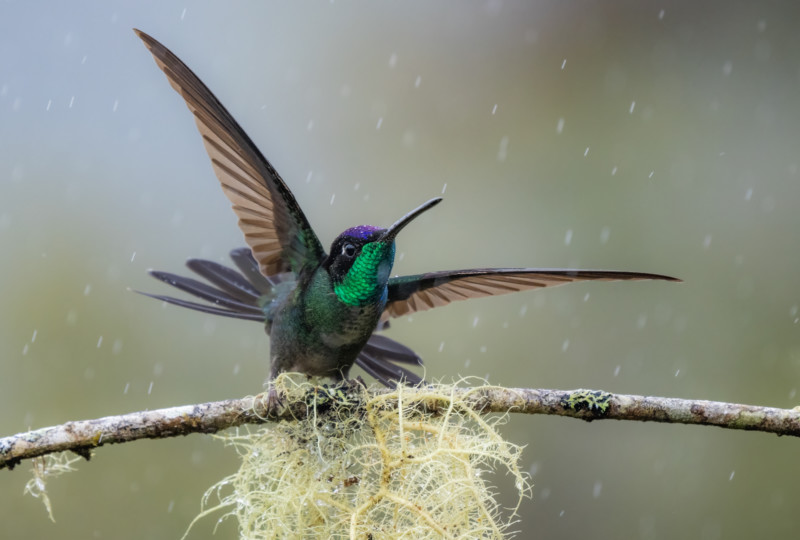
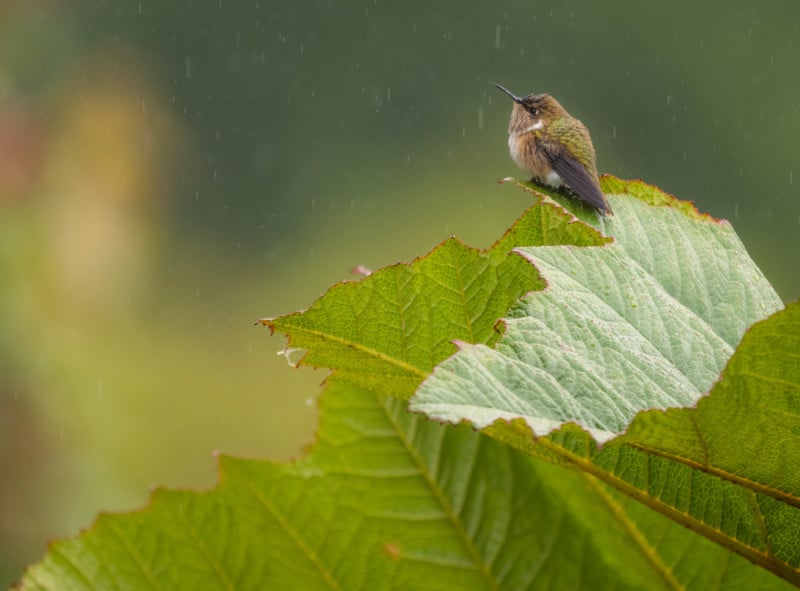
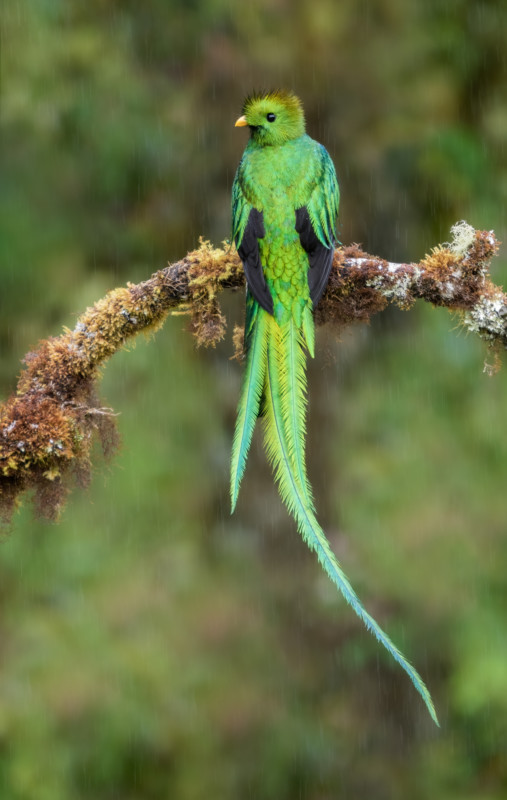
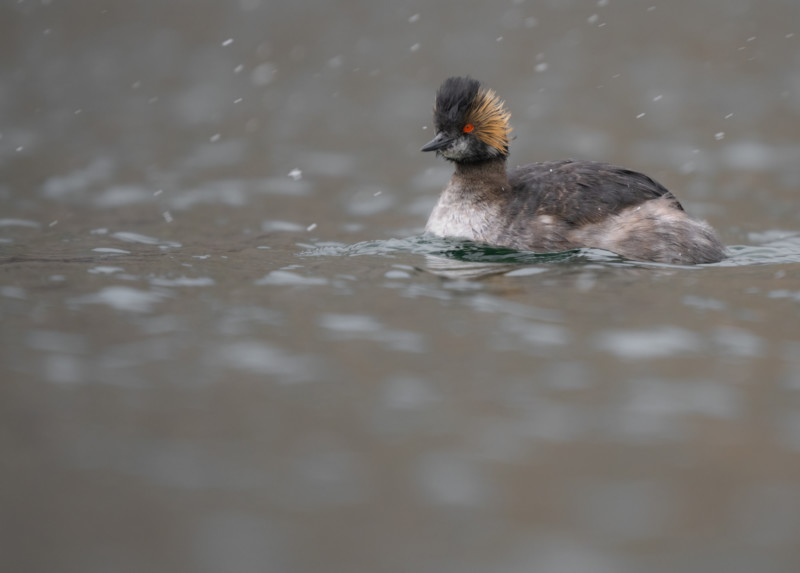
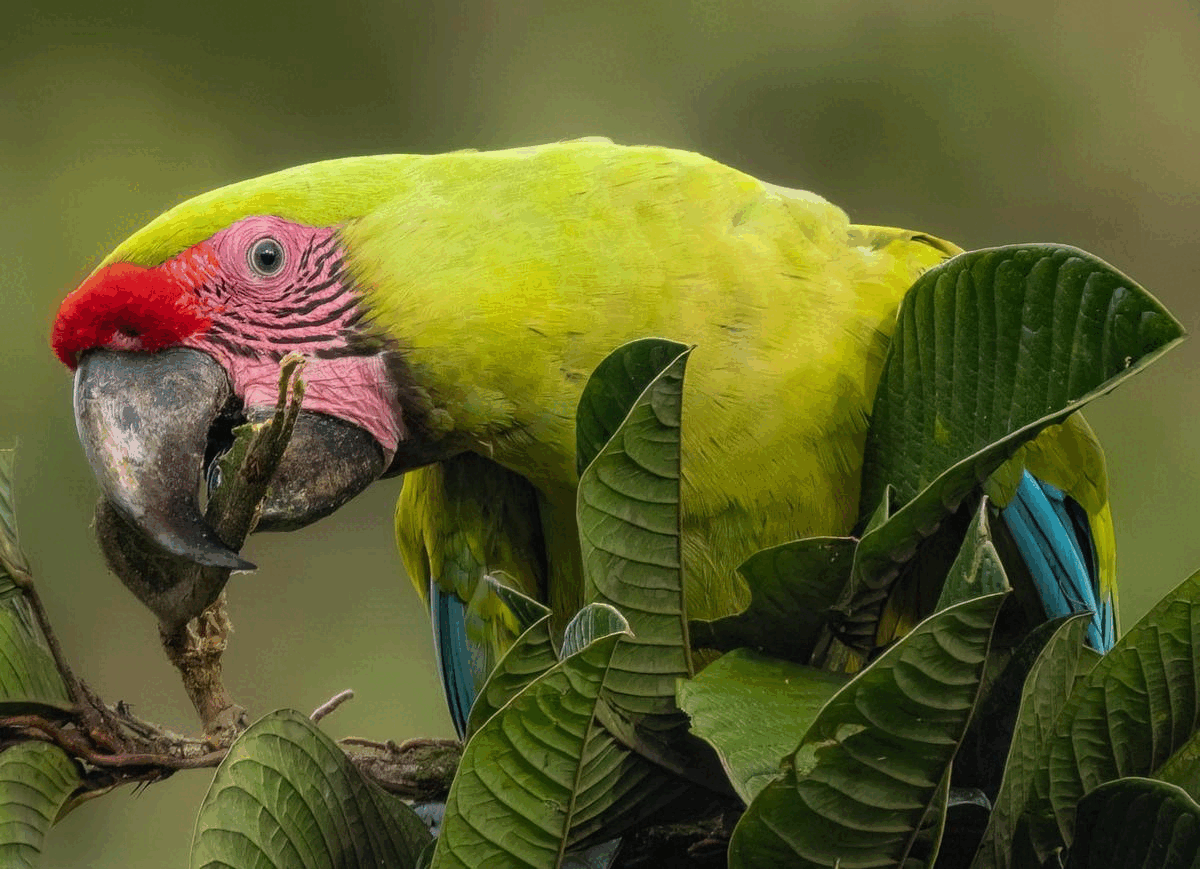
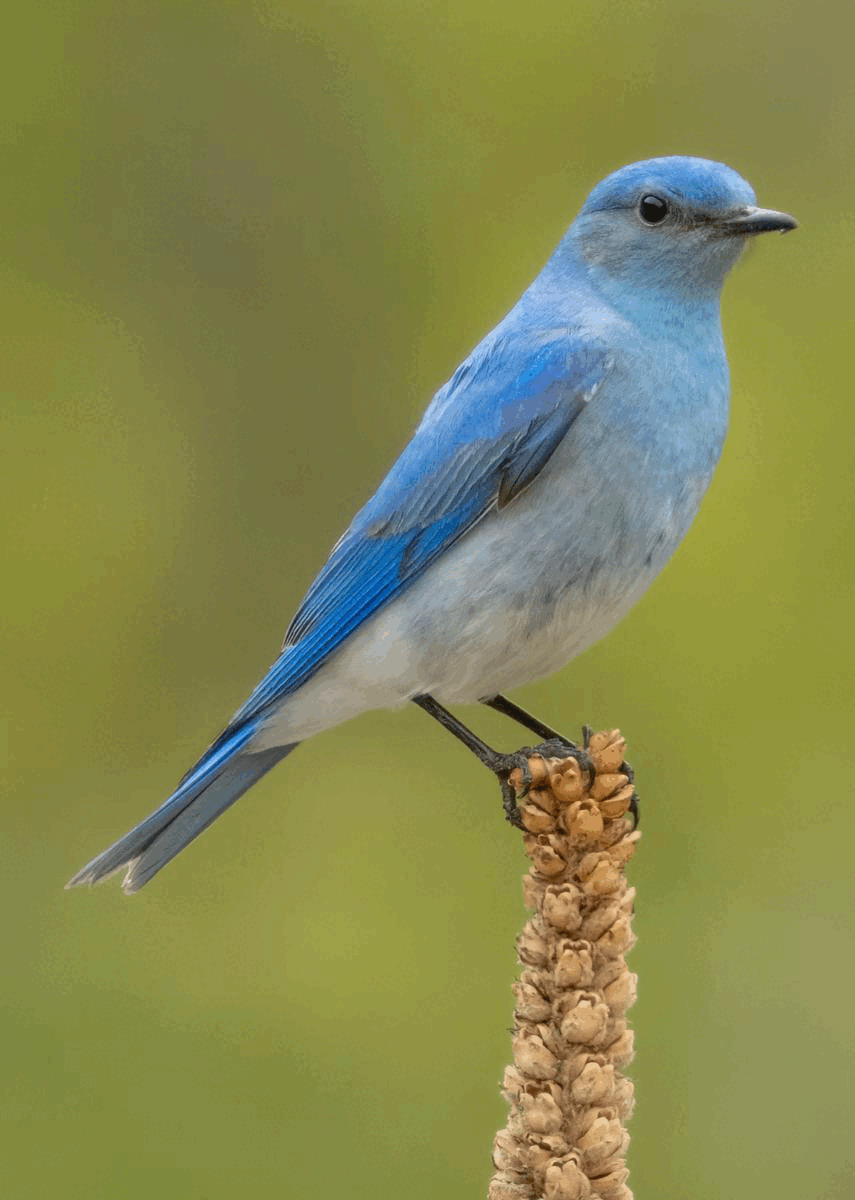
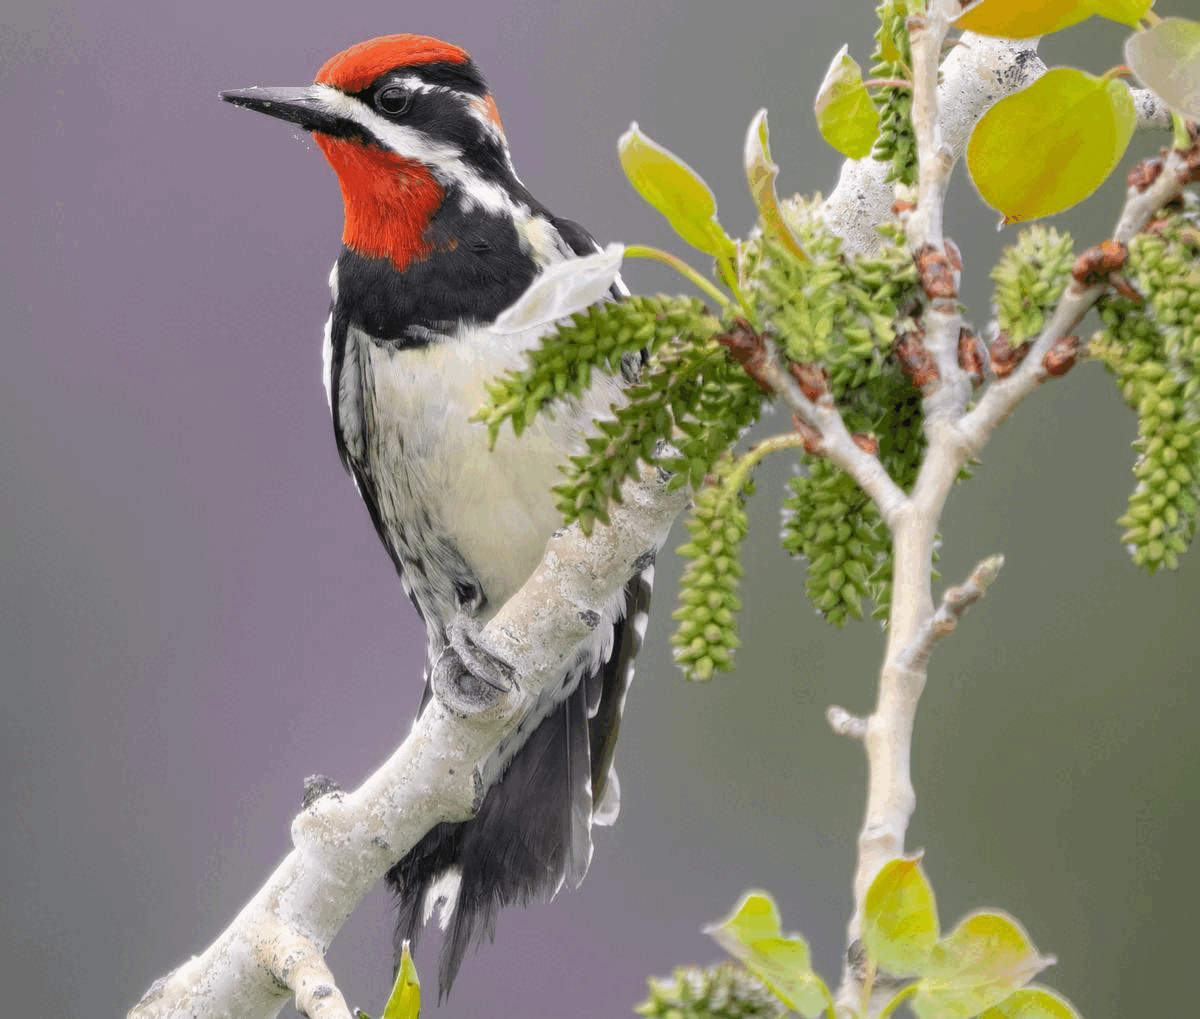
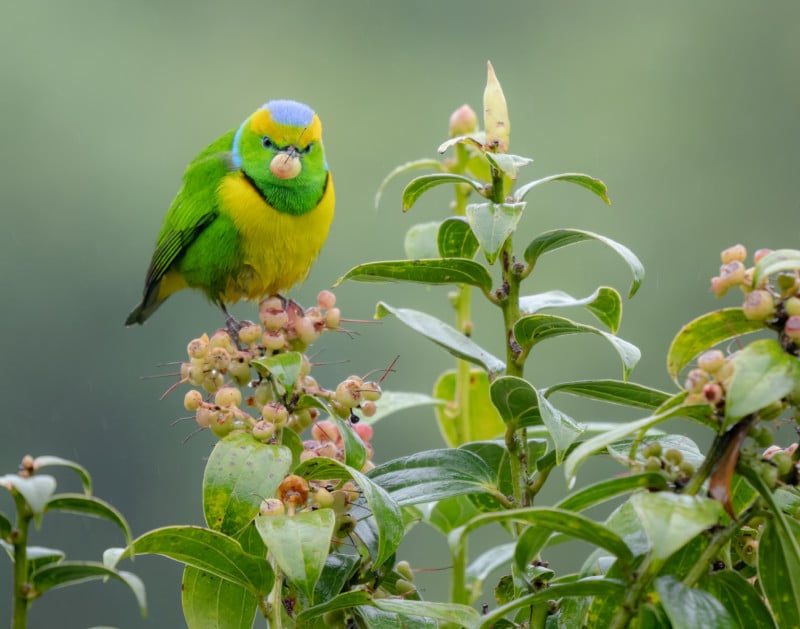
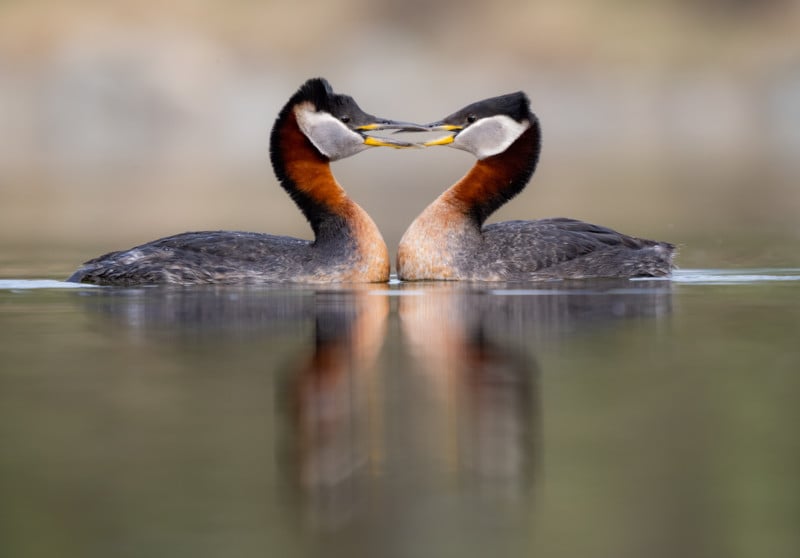
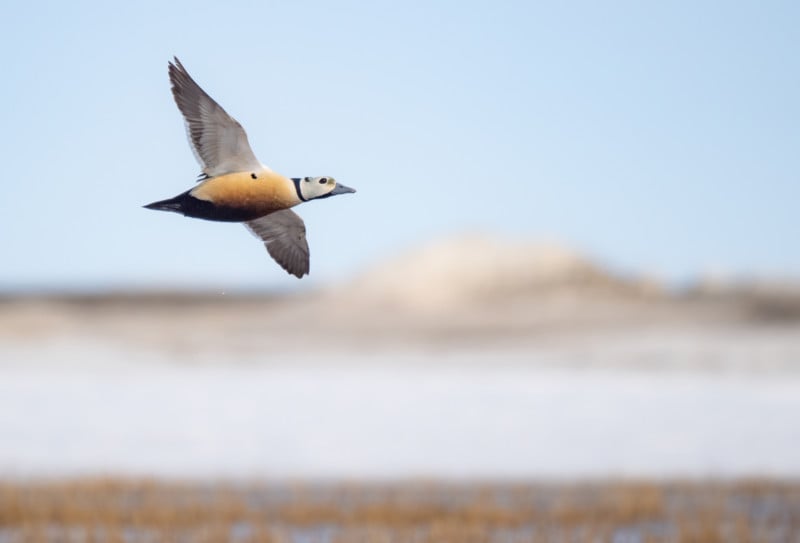
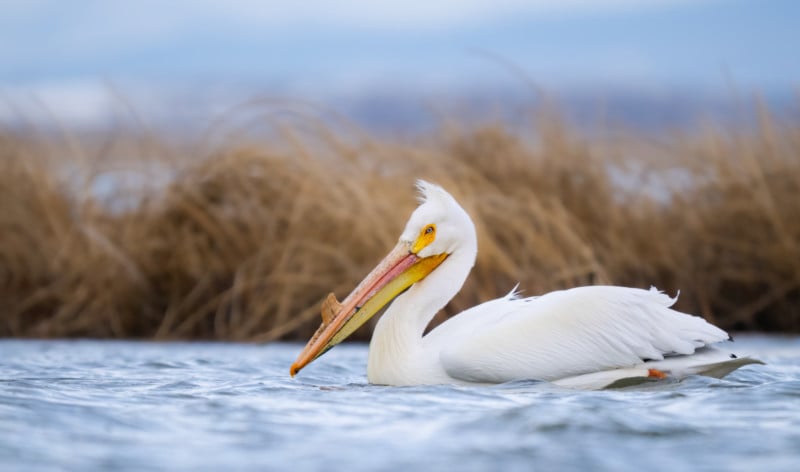
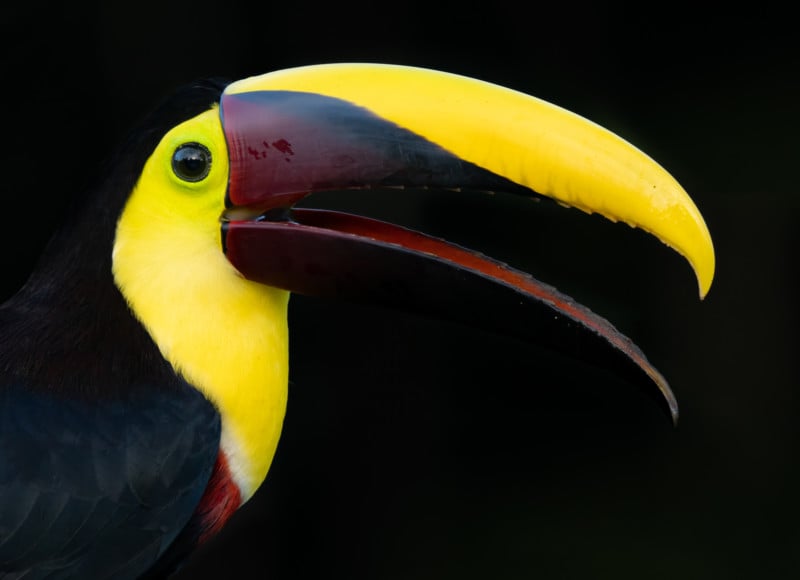
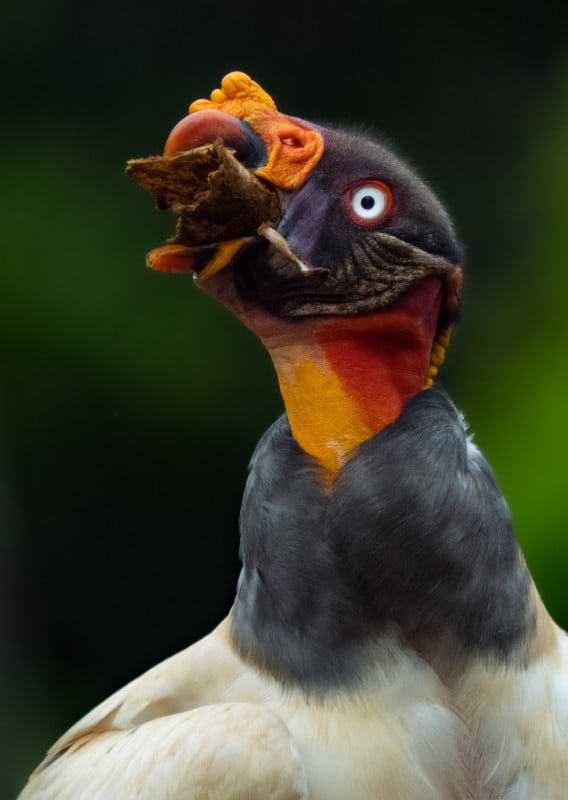
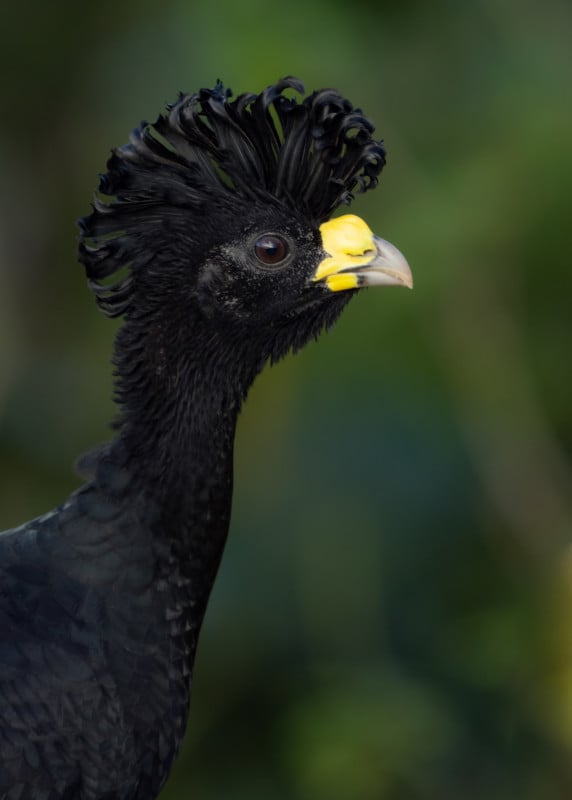
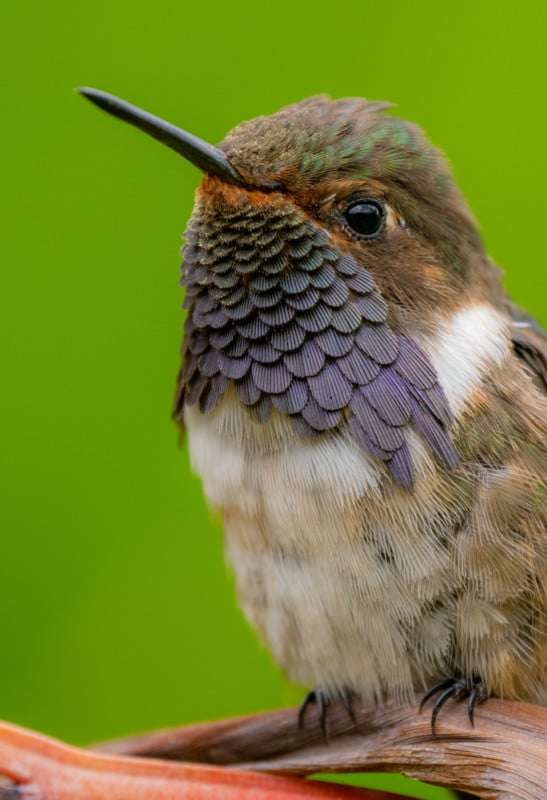
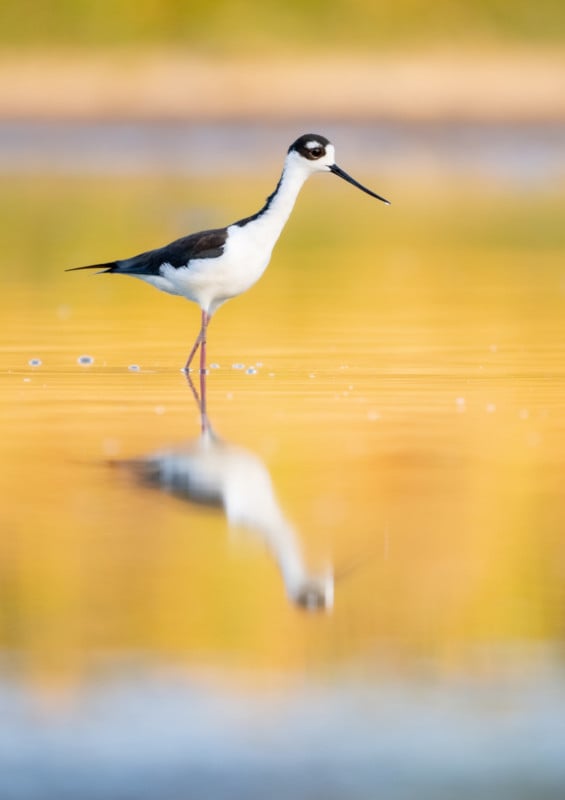
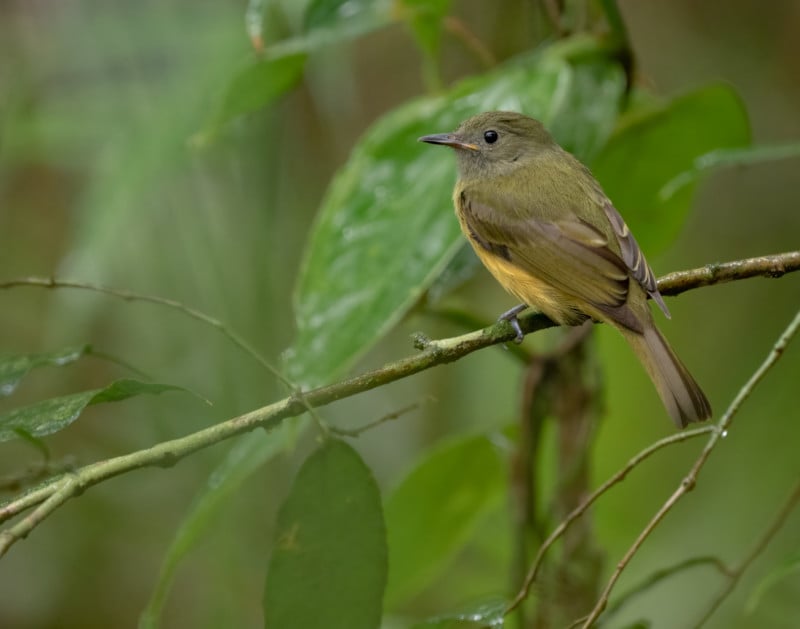
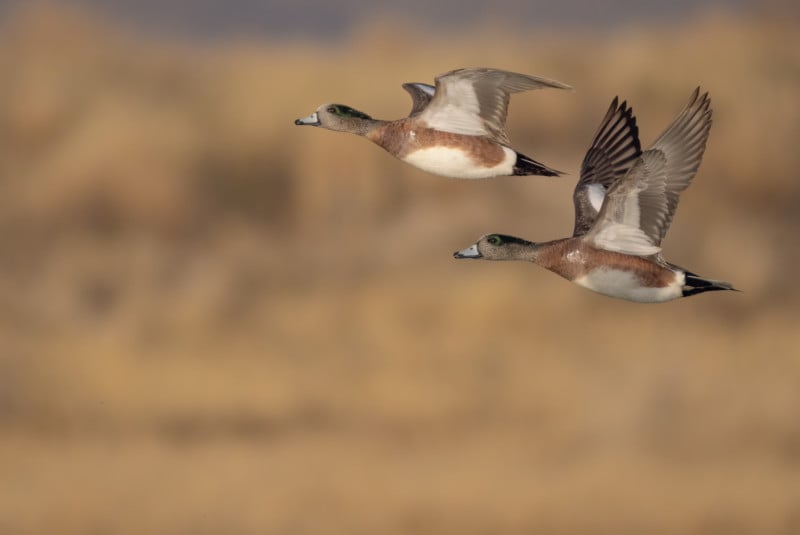
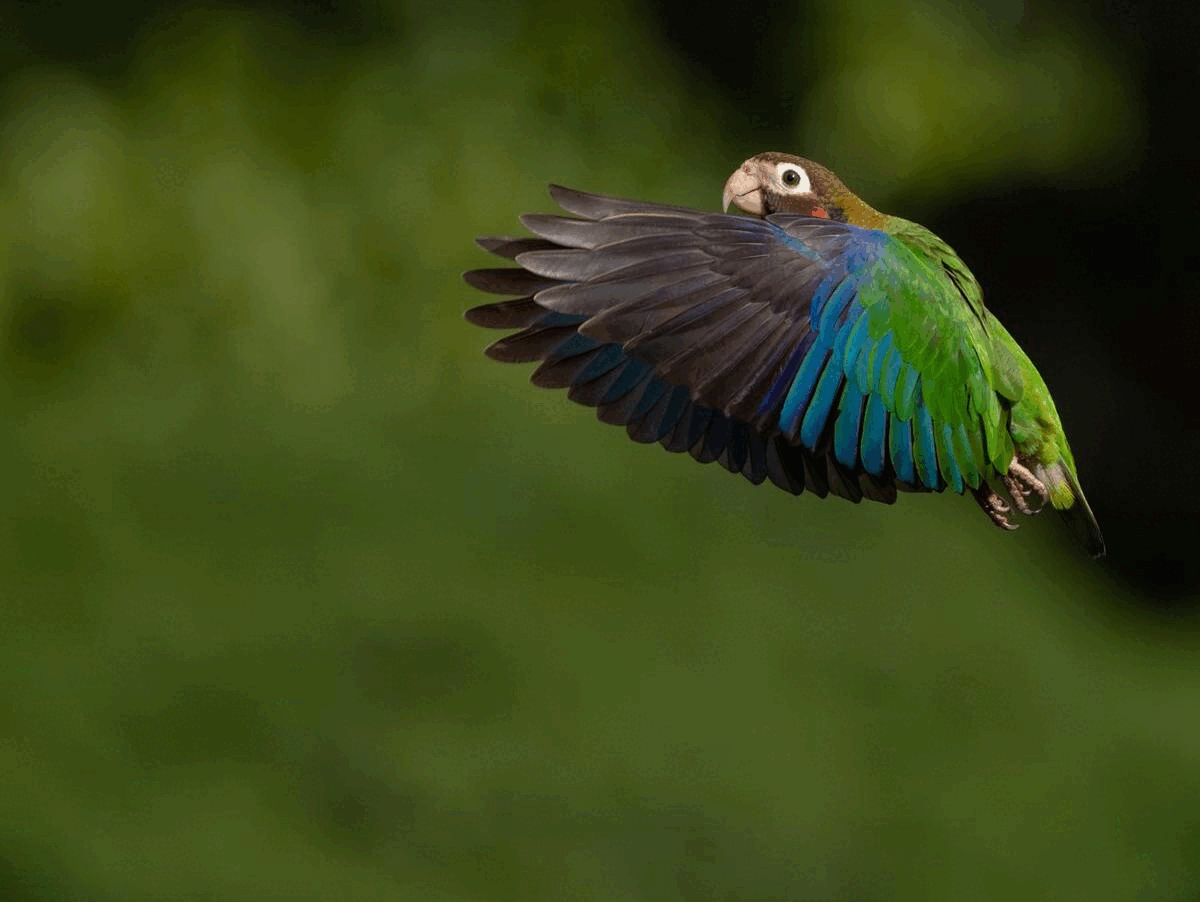
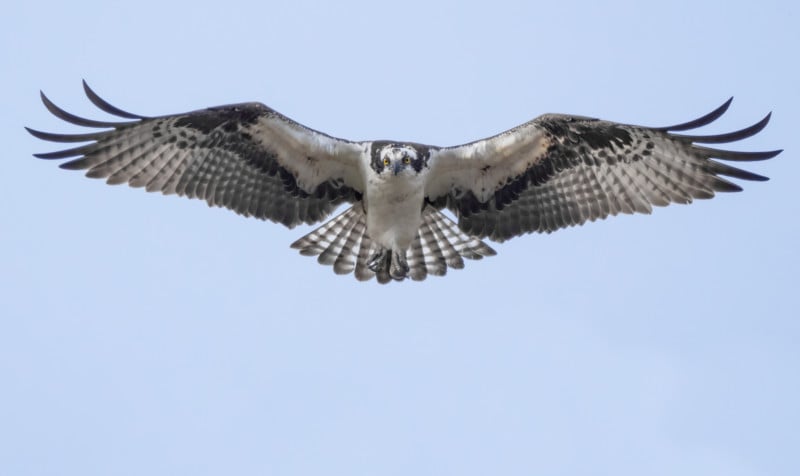
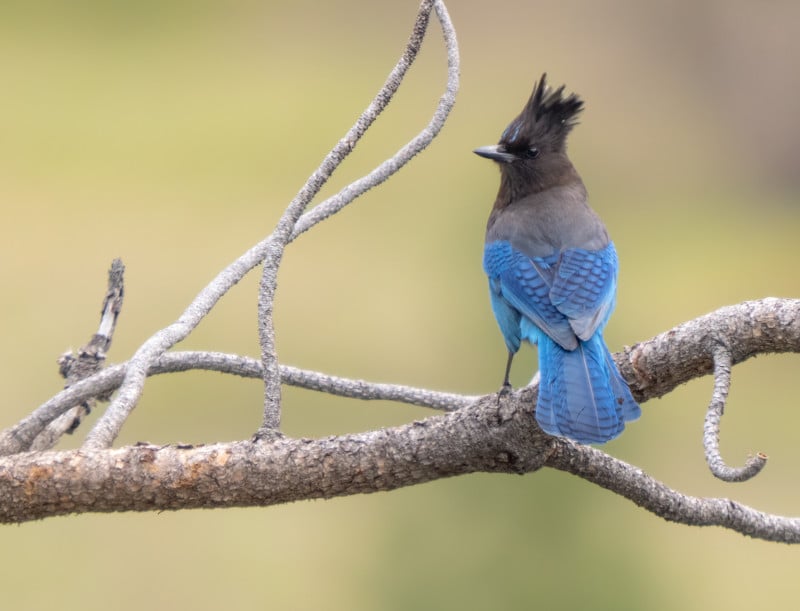
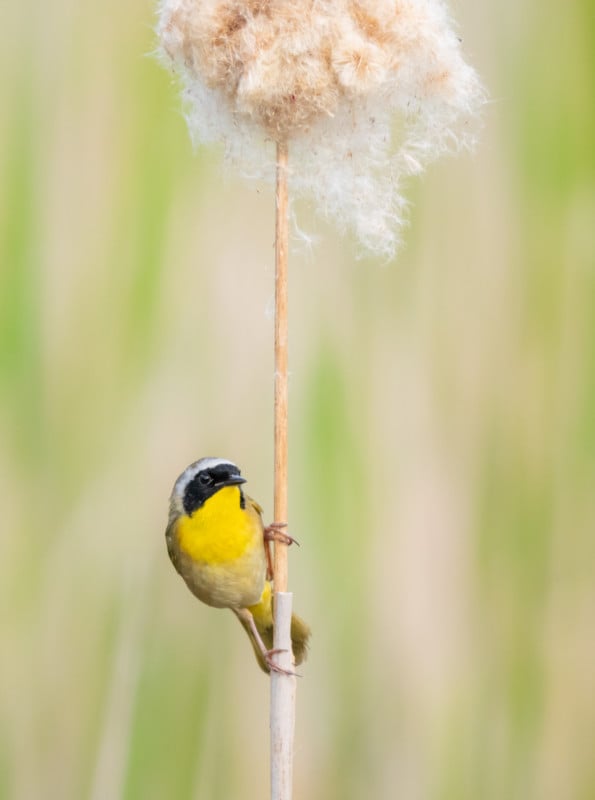
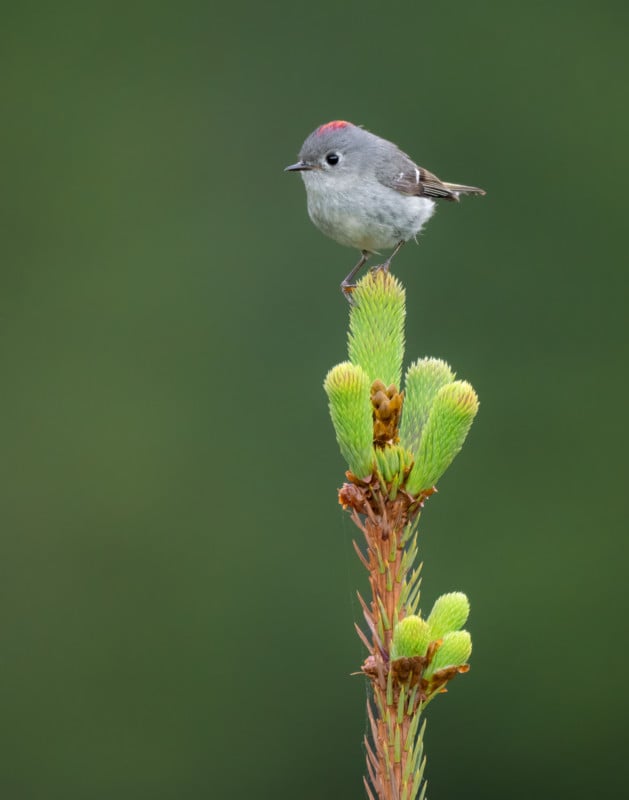
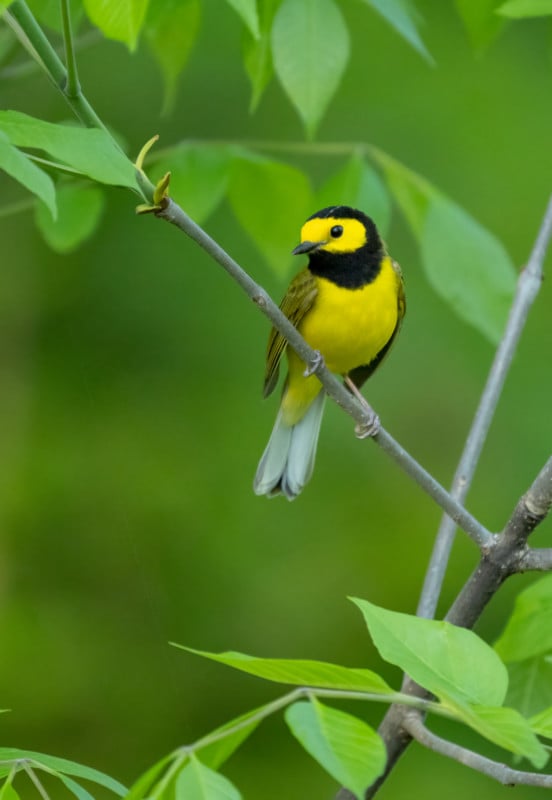
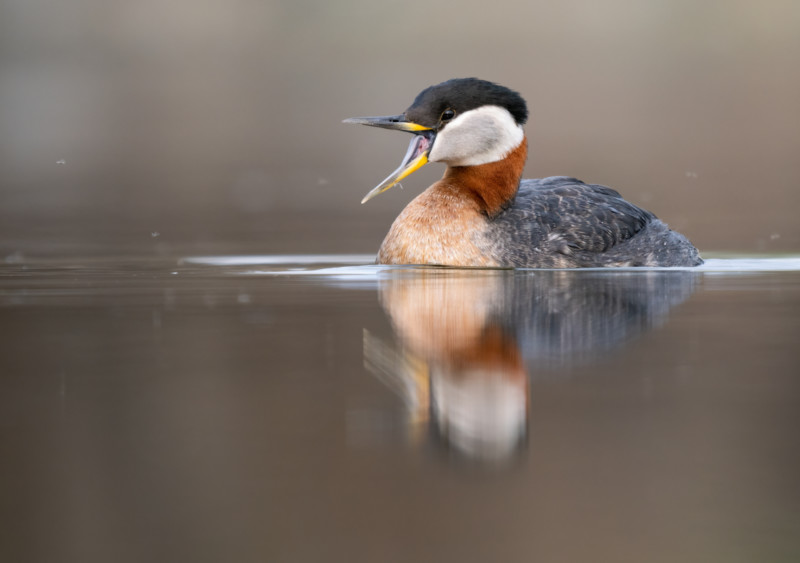
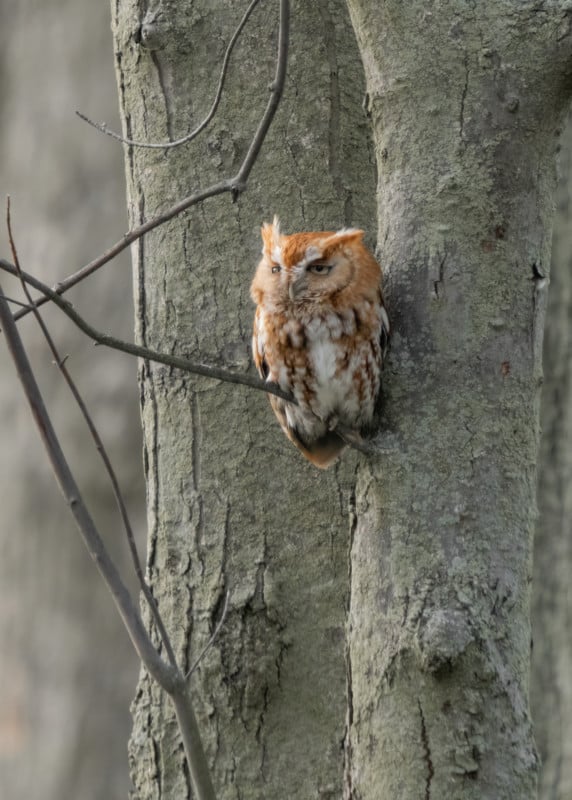
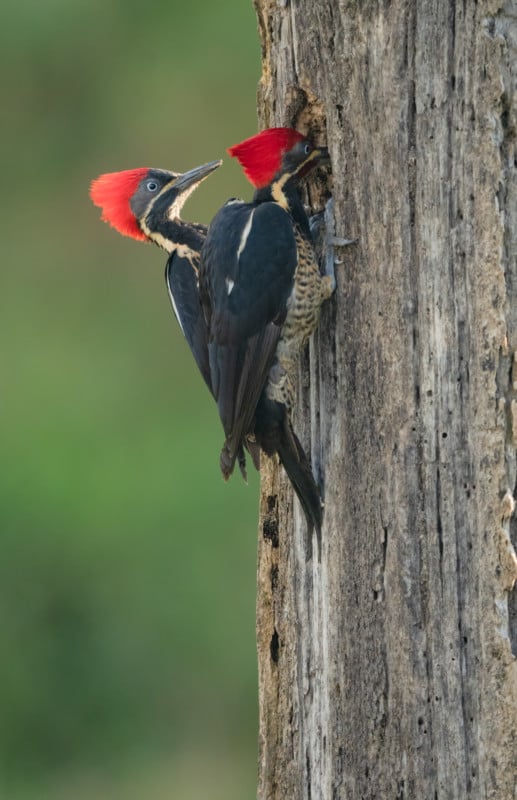
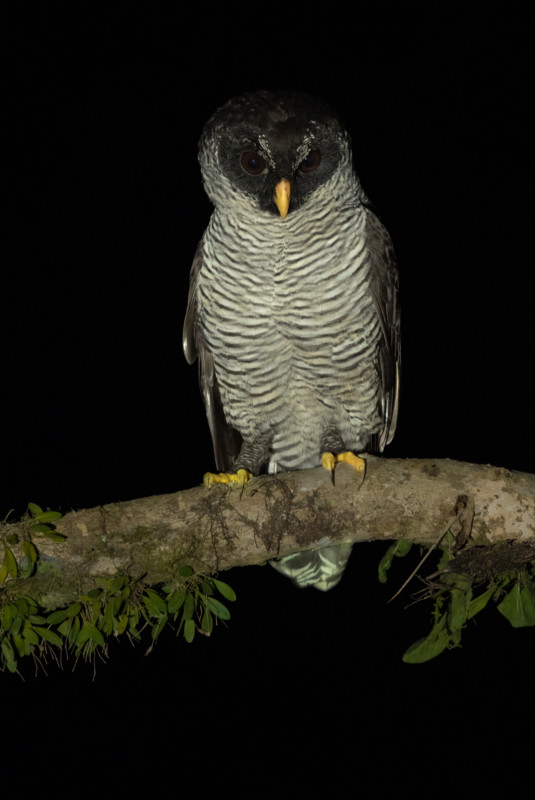
All photos in this article were taken with the OM SYSTEM OM-1 and M.Zuiko ED 150-400mm F4.5 TC1.25x IS PRO lens. The lens can extend the photographer’s zoom range to 500mm (35mm equivalent of 1000mm) by flipping down the built-in 1.25x teleconverter. When the 1.25x teleconverter was engaged, it is noted in the photo caption. Additionally, if the MC-20 2x teleconverter was used, it is also noted in the photo caption.
At a Glance
Know Your Camera And Make It Work For You
The most important aspect of capturing sharp, action packed photos of birds actually happens before you leave home, Knoot says. With any form of photography, knowing the ins and outs of the camera is helpful to photographers, but this might be most important for bird photographers. “With bird photography, having the ability to capture an image in the blink of an eye is crucial,” Knoot explains. “You may only have a half a second to capture the perfect shot, so knowing how to make lightning fast adjustments on your camera is a necessity. Often, I need to be able to adjust my shutter speed, aperture, and ISO very quickly in order to capture the well lit bird with a clean background before it flies away.”
Knoot says that the more practice a photographer can have in challenging situations, the better. However, the adjustments made before you even arrive at your shooting locations can give you an immediate advantage.

“Every photographer finds certain buttons and dials on their camera easier to access than others,” Knoot says. “Knowing which ones you are most comfortable with allows you to customize those buttons and dials to be the settings you will need in a pinch. Considering that I shoot all of my bird photography in the OM-1’s manual mode, the two most important adjustments for me are shutter speed and ISO. I have the shutter speed set to the back dial, so I can quickly make the needed adjustments with my thumb at almost the same time as my forefinger engages the shutter. I have customized my ISO to be on the dial right in front of the shutter button. The placement of this dial in close proximity to the shutter button allows me to quickly adjust the ISO in between photos.”
Knoot says that customizing your camera to be able to adjust focus points and focus settings quickly is just as important as knowing how to adjust shutter speed and ISO. “It doesn’t matter if you have the correct shutter speed if the bird isn’t in focus. I have customized my OM-1 to move the focus area using the joystick. It takes practice, but being able to change your focus area without removing your eye from the viewfinder will lead to better photos. I recommend mapping this to a place you feel comfortable adjusting without having to look at the back of your camera.”
“Additionally, on my OM-1, I have the ability to apply four different custom function modes to the dial, and I can assign those custom function modes to buttons,” Knoot explains. “If I want to access either of the ‘Pro Capture’ modes, High Res Shot, or my custom Flight Mode, I know I have four buttons set on the back of my camera to easily access these without having to enter any menus.”
Knoot says out of the four custom modes he has created, the Flight Mode is his most used. By simply clicking on one button on the back of his camera, Knoot’s OM-1 automatically makes a number of adjustments that will help him capture a bird who has gone from static to in-flight quickly. “With one tap of the AF button, my focus area changes from center point to wide and my shutter speed goes to 1/4000. After I get the shot, I simply hit the AF button again to return to the settings I had before the bird took flight. I can’t count the number of great images that I have captured by using this shortcut. Without having customized Flight Mode in my camera, I might have missed a large number of those shots.”
Knoot makes a strong case that knowing your camera inside and out, and investing the time to get comfortable using it in fast moving situations, is the most important aspect of capturing sharp, action-packed photos of birds.
Consider the Trade Offs
When photographing wildlife, most photographers see the shot and immediately take it without thinking of the bigger picture. Knoot explains that in bird photography, one must always consider the trade offs that come with different options to photograph the subject.
“Unlike landscape photography where your subject is large, birds are small, and because of that small size, even micro adjustments to your composition can have major effects on the final photo,” he says.
Knoot says that when a photographer sees a bird sitting calmly above them in a tree, the first reaction is to usually walk closer to it. “What they don’t think about is how moving closer to the bird will make your shooting angle higher, which might lead to a photo that shows the underside of the bird more than the face,” Knoot explains. “Or even worse, the bird might appear against a blown out sky. Instead of walking closer, consider how the photo might look if you got further away. Maybe there is a small hill behind you where you can get a side profile of the bird with a cleaner background consisting of colorful leaves. So the trade off is increasing your distance to the subject, but ultimately, getting a better perspective.”

This same trade off can come with light conditions and backgrounds as well. “If you see the bird you want to photograph with great light on it, but a dull background such as a building or a blown out sky, you need to decide what is more important for your photograph. For me, I will almost always choose the better background over the good light. With today’s camera technology, you have a lot of room to make extensive shadow and highlight edits in the RAW file that you capture. On the other hand, you can’t add an attractive background to an already captured photo. For me, this trade off is an easy choice.”
Know The Difference Between Single Autofocus and Continuous Autofocus
Almost all modern cameras will have both single autofocus mode and continuous autofocus mode, and both can be valuable to bird photographers. In single autofocus, a photographer will focus on one specific object in the frame and as long as they keep the shutter button pressed down halfway, they won’t lose the focus when they recompose. For bird photographers, this is the ideal focus mode for static birds, such as one resting on a rock.
However, since birds can fly at a high rate of speed where the distance between the bird and photographer is always changing, knowing how to properly use continuous autofocus is necessary to capture action shots.
“Depending on the camera a photographer is using, continuous autofocus can be hit or miss,” Knoot says. “For instance, if you are attempting to photograph a bird flying near trees, the camera might take the focus off the bird and put it on a static branch.”
Luckily for photographers, advancements in autofocus technology has made it easier for wildlife photographers to get the action shot without losing focus. AI Detection Autofocus with subject recognition and tracking for birds and animals makes it possible for photographers to simply follow an animal such as a dog, cat, or bird and have the camera continuously adjust focus with the animal’s eyes and movements.
“The bird tracking system in the OM-1 has completely changed the way I use focus,” Knoot says. “I am on continuous focus full time, even when a bird is static. With the incredible bird detection on the OM-1, even if I have my focus point set to center, the camera will override that when it detects a bird in frame, even if it is in the corner. This lets me keep my focus on continuous, which allows me to get the shot if the bird decides to take off suddenly. If your camera does not have bird detection, make sure you have an easy to access custom button that allows you to be able to quickly adjust from single autofocus to continuous autofocus. With practice, this quick maneuver will allow you to capture a dramatic shot of action that you weren’t anticipating”
Understand the Different Types of Lighting
When most photographers think of light, it falls into two categories. Good and bad. Knoot, on the other hand, says that it’s important to understand the five types of light you may encounter when photographing birds.
Front Light
Knoot says the most sought after lighting situation is front light, where the sunlight is coming from behind the photographer and lighting up the subject. “However, as the sun moves, the birds won’t necessarily accommodate and position themselves in a front lit situation, so you have to be ready and willing to work with the other types of light,” Knoot says. “But when you do get photogenic front lit conditions, I recommend aligning your shadow up directly with your subject. This shows that the sun is directly behind you, which will give you the best possible light.”
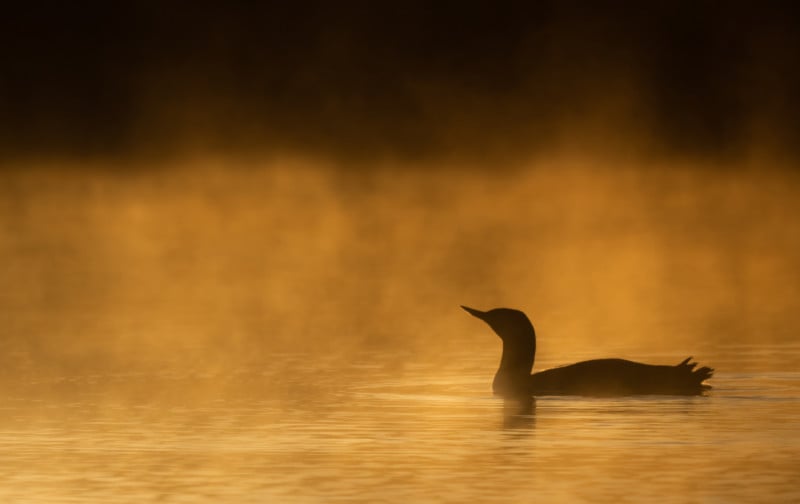
Back Light
Knoot says he has been seeing an increase in interesting backlit photographs from his peers in recent years. “I love the look of a backlit photo of a beautiful bird, but they are not easy to capture. With the sun behind the bird, you have to understand how to most effectively use your camera to capture a photo where you are shooting directly into the sun. It will take trial and error before you get the creative shot that you want. Deciding whether to overexpose or underexpose the photo depends on the bird, the surrounding landscape and the angle of the sun. I know I have to work quickly as the bird could take flight at any second, so being able to see my adjustments take effect in real-time in the OM-1’s OLED electronic viewfinder makes it easier for me to get the shot before it’s too late.”
Side Light
Knoot says that side light is another tricky lighting condition, but when captured correctly, it can yield some interesting results. “There is a certain dramatic element when you see one eye of the bird in golden light, but the other eye is in intense shadows. While this more abstract look isn’t for everyone, it is a great way to get unique shots of an often photographed species. With side light, I always expose for the brightest part of the image. When post processing, the highlights are always harder to lower than it is to raise the shadows.”
Flat Light
Flat light occurs when the sun is hidden behind a thick cloud layer or when the photographer is in a forest, making the entire scene have even, yet dull, lighting. “This is a very easy light to shoot in, as there are no overblown highlights or deep shadows to contend with,” Knoot says. “Usually in flat light, I will overexpose my image a touch if I am photographing a black bird and underexpose if I am shooting a white bird. You might need to bump up your ISO in a flat light situation as well. With my OM-1, I feel comfortable shooting at any ISO below 3,200 because I know I won’t have unmanageable noise in the image, so even in flat light, I can still capture a bird in flight with a fast shutter speed.”

Spot Light
Knoot describes how spotlight is the most rare of the five types of light, but it will almost always yield incredible photos. “Spotlight will occur in places like a rainforest, where the dense canopy creates even light in most of the scene. But every so often, the sun will shine through a hole in the canopy and light up a branch with a ‘spotlight’.
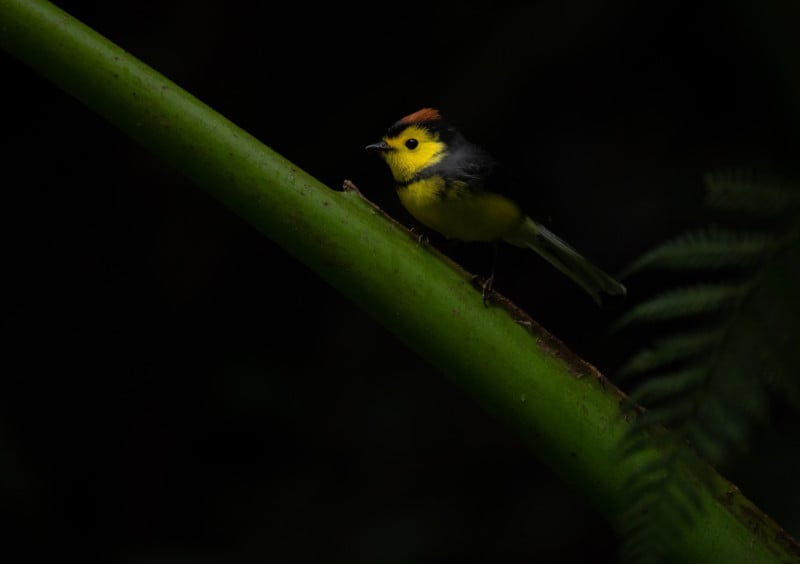
“Having a photogenic bird in that location at that exact moment is very rare, so it’s important to be prepared. In this case, spot metering can be helpful, as a more general metering mode might meter off the shadow regions that consume 90% of the frame. Like side lighting, I always expose for the brightest part of the image in a spotlight scenario.”
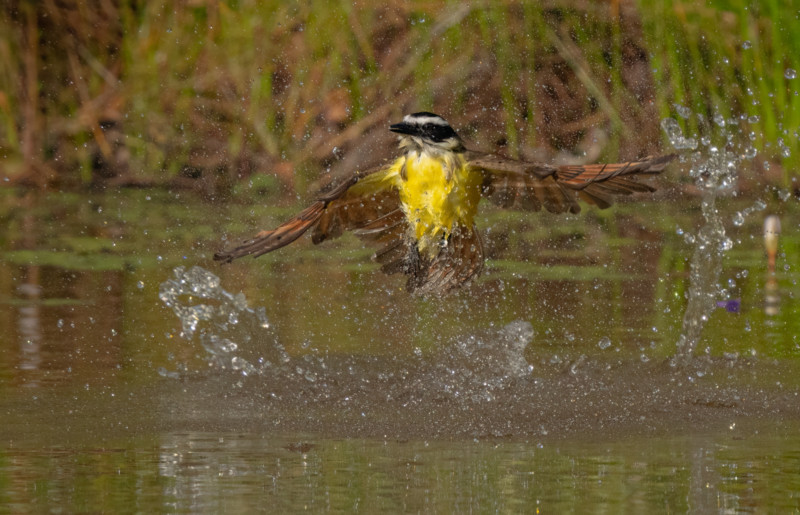
Use Motion to Capture Unique Action Photos
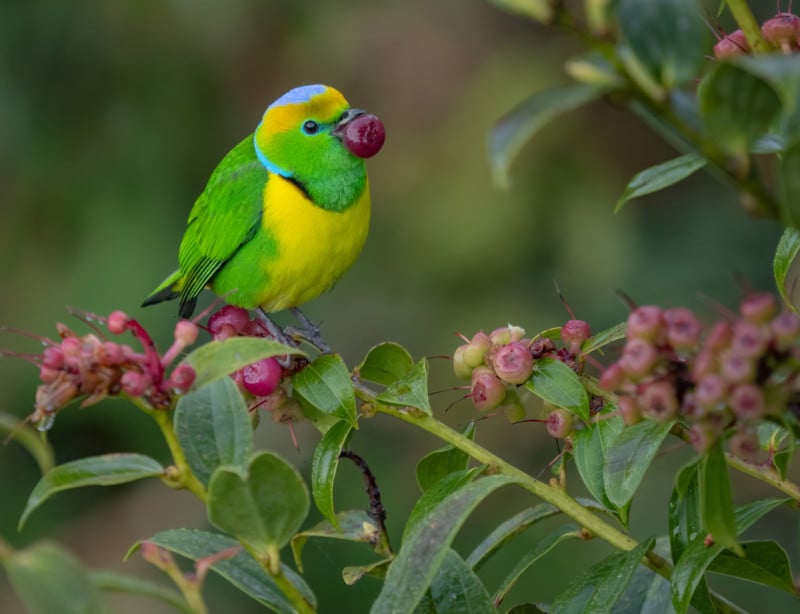
In general, photographers are looking to freeze the action in bird photographs. However, Knoot says that photographers should think outside the box when it comes to showcasing the action of birds and their habitats. “Over the years, we have been conditioned to believe that any kind of blur is not desired in photographs,” Knoot describes. “While this may be the case for the technical definition of a correct exposure, this isn’t true when trying to create a creatively correct exposure, which puts priority on the creative vision you have for the image. With bird photography, conveying the feeling of movement can make your images stand out. These are birds, after all, and birds fly. Many bird species are colorful and fly in this graceful way, so being able to show that movement is both unique and challenging. However, movement can also be showcased with surrounding landscape elements such as rain or splashing lake water.”
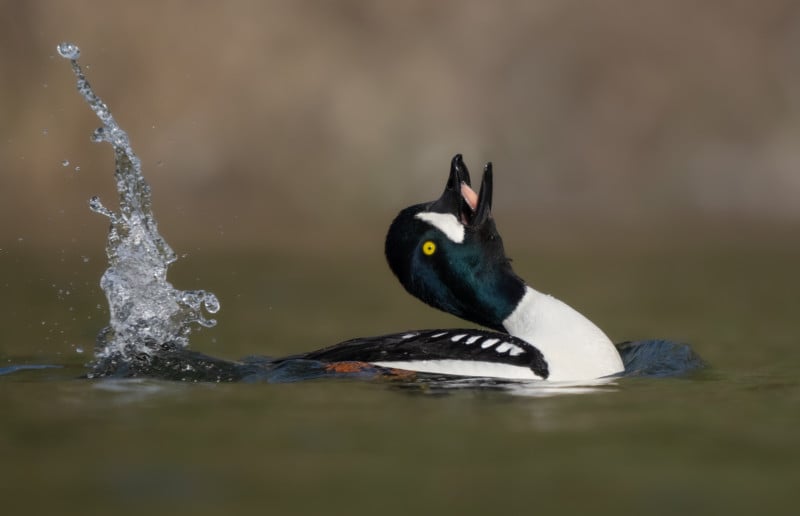
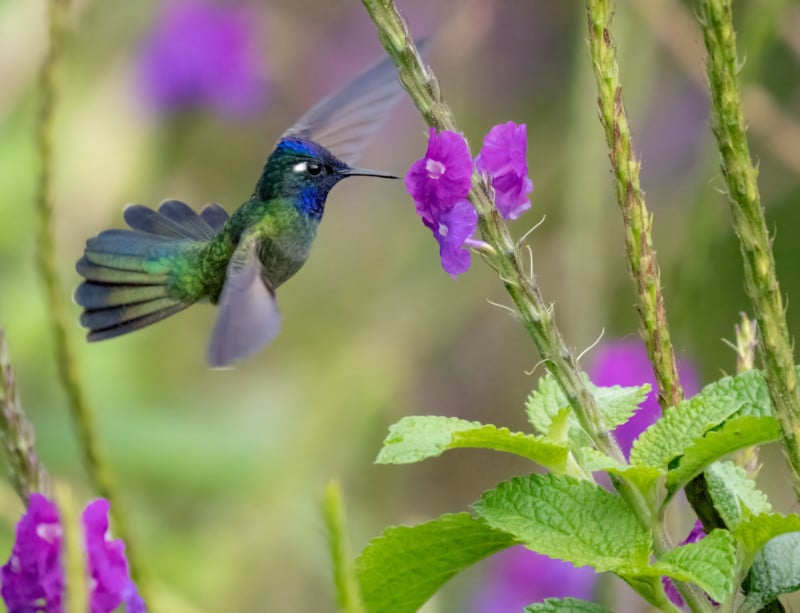
Knoot says that one should not expect their first motion photograph to be a winner. He stresses that capturing flying birds this way is challenging, but the rewards are well worth the time invested in practicing. “To capture movement of a bird in flight, first identify the shutter speed that you will need to freeze the action. From there, simply slow the shutter speed down a bit at a time. Slowing it down too much will result in a very blurry photo, but finding the perfect shutter speed should display a slight movement in the wings while keeping the bird’s face sharp. In a well lit scene, I usually find that 1/2000 of a second will freeze most birds’ wings, except a hummingbird, which usually requires 1/4000 of a second. When I want to include the feeling of movement using blur, I will gradually make it slower from the speed I usually use to freeze the wings.”
Factors such as lighting conditions and focal length will change what shutter speed is needed to create motion blur. With this in mind, Knoot recommends capturing the frozen photos first before you experiment with motion.
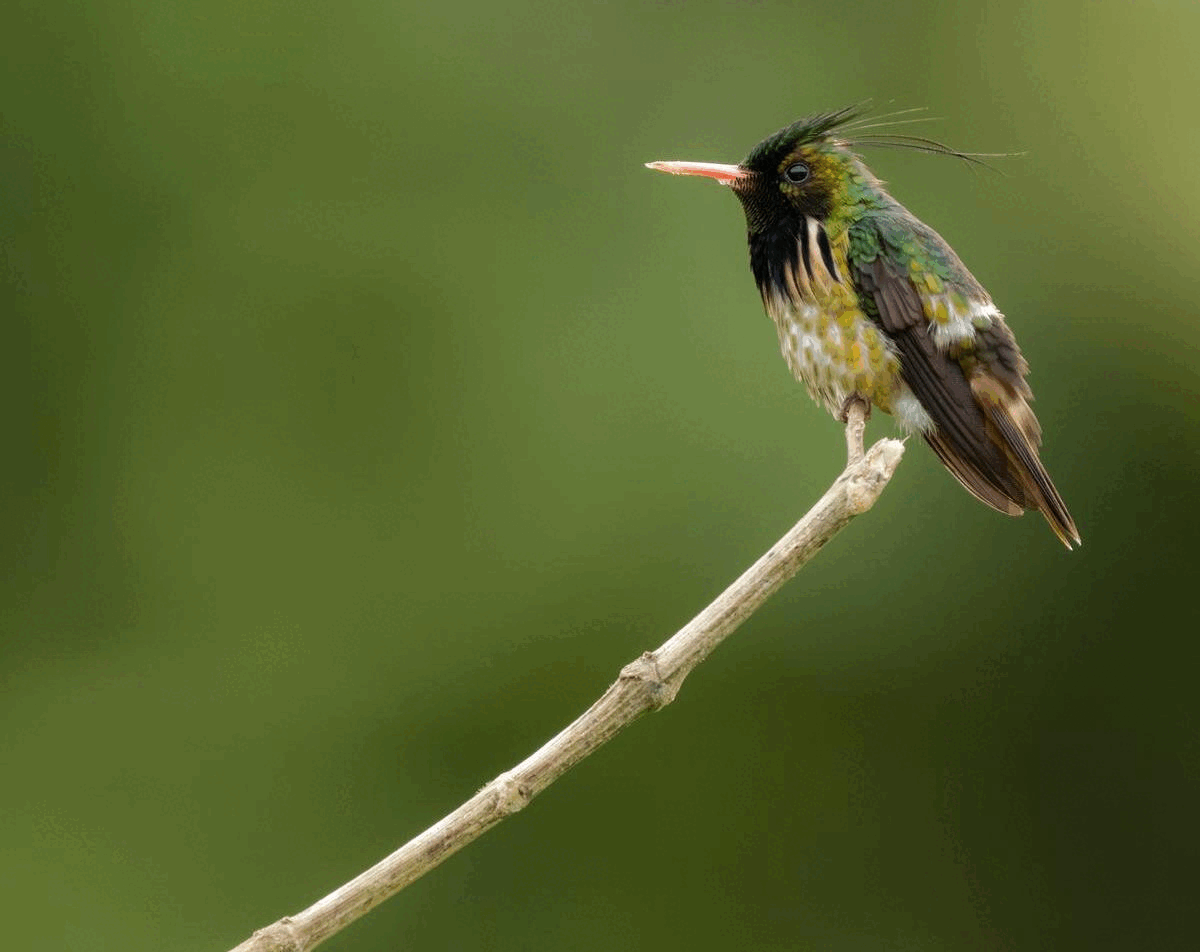
Don’t Overly Crop Your Images
Knoot says that while getting the up close and personal photos of a bird you have been tracking for hours can lead to interesting headshots, he stresses that it’s important to also showcase the bird’s habitat as well.
“Photography as an art is expressed differently from person to person, so everyone is going to have a different opinion on how to compose an image, even if that image is not of a bird,” Knoot says.
“My preference is to leave a little extra space around the subject. For me, bird photography is so much more than the birds themselves. I love to tell a more detailed story by showing the habitat that these birds call home. This helps to set a scene and can often be more interesting to your viewers. Thanks to the sharpness in the large files that are generated from today’s cameras, you can crop in while editing if the closer composition is more to your liking. It is always better to have too much than too little. With the OM-1’s 20.4 Megapixel sensor, I feel comfortable cropping my images at 50% or more before posting to social media, so having the additional location elements in my photos gives me numerous options on how I want the final image composition to look.”
Knoot describes that a photographer should be thinking of the three different stories that can be told, depending on the focal range the photos are captured at. ‘Birdscapes’ include landscape elements and are generally taken with a mid-range zoom, usually in the 100-300mm range.
“The standard ‘portrait’ range is 300mm to 500mm and can be effective for both static birds and birds in flight,” he continues.
“A focal length of over 500mm can give you detail and headshots,” Knoot continues. “While I am photographing a bird with my favorite lens, the M.Zuiko ED 150-400mm F4.5 TC 1.25x IS PRO, I can use the built-in 1.25x teleconverter, which gives me a little extra reach at 500mm. If I want to get really up close and personal, I will add the MC-20 2x teleconverter. Having both teleconverters engaged will give me a focal distance of 1000mm, or the 35mm equivalent of 2000mm.”
“This focal range of 150mm to 1000mm allows me to capture all of those stories with one lens and one small teleconverter. I usually start with the ‘birdscape’ and portrait ranges before I use the teleconverters to get detailed headshots,” he concludes. Knoot says that being able to quickly adjust between these three ranges will help you get a wide variety of photos that tell a complete story of how your subjects live.
Get Used to Using Burst Mode
As any bird photographer will tell you, it is critical to have plenty of high-capacity, high-speed memory cards available. Birds in flight move quickly, and Knoot recommends using your camera’s burst mode to capture as many photos of the action as possible.

“There is no downside to capturing as many images of a bird in flight as possible, which gives you plenty of photo options to choose from when you arrive home,” he says. “Having your camera at the ready in the highest burst mode possible will give you the best chance of capturing action photos. Depending on the situation, I will even use the new Pro Capture feature on my OM-1. This is a game-changer for wildlife and bird photographers, as we no longer need to capture the moment as it’s happening. With Pro Capture, I can simply track a subject without pressing the shutter button, and if the bird does something that I want captured, I can hit the shutter button once after the fact. Doing this will tell my OM-1 to write the last couple of seconds of my tracking to my memory card as individual RAW files. It’s essentially burst mode, but initiated after the action has already occurred.”
There are two settings with Pro Capture, with each one having its pros and cons. With Pro Capture 1, the OM-1 is locked into fixed metering and autofocus, but will capture a staggering 120 frames per second. Pro Capture 2, however, captures 50 frames per second, but the autofocus will track with the subject and the metering will also adjust based on the scene.
It’s better to have too many flight photos than to have too few, so Knoot recommends practicing how to track subjects effectively while photographing in burst mode.
Don’t Be Afraid to Use Slower Shutter Speeds in Low Light Conditions
In Knoot’s time leading bird photography tours, he has noticed that camera technology has advanced at a faster pace than the photographer’s mindset. He says a classic example of this is when photographers do not use the advanced image stabilization that modern cameras and lenses provide.
“These days, you can take handheld photos at remarkably slow shutter speeds and still get tack sharp photos,” Knoot explains. “For me, the combination of the OM-1 and my go to lens, the M.Zuiko ED 150-400mm F4.5 TC 1.25x IS PRO gives me an impressive eight stops of image stabilization. I have noticed the mindset of many photographers lead them to try to maintain a shutter speed at least 1/250th in a darker scene, such as a cloud forest. In order to accomplish this, however, you must bump up your ISO to make up for loss of light caused by the faster shutter speed. The higher the ISO, the more noise in your image. When you look at the images on your camera’s LCD screen, they may look great. However, you won’t start seeing the negative effects of noise until you edit the photo on your bigger computer screen.

Knoot explains that while he is comfortable shooting at ISO 3,200 and below, he will only increase his ISO when absolutely necessary. “I am always trying to limit my ISO whenever possible, so taking advantage of the the OM-1’s 7-stop Image Stabilization, as well as the added stabilization on the 150-400mm lens, I know that I can get sharp images of a static bird at a shutter speed of 1/25th of a second. In reality, I am pretty comfortable shooting handheld at maximum zoom on that lens with a shutter speed of only 1/10th of a second. Modern day image stabilization is just that good. But, most people don’t realize that or take advantage of it. Once you do, however, you will start to notice that your images look cleaner, thanks to not only a sharp subject, but less ISO noise throughout the entire image.“
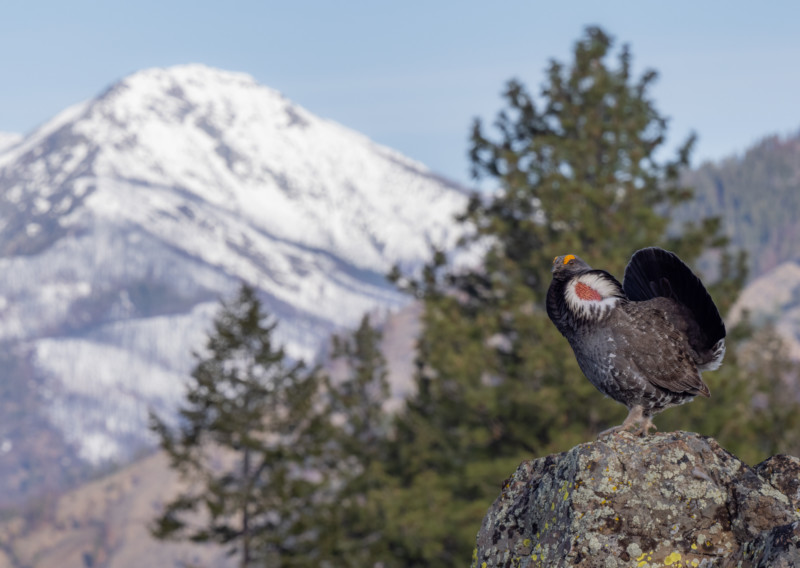
Know the Desirable and Undesirable Poses of Birds
With over 18 years of experience photographing birds, there are certain aesthetic poses that Knoot will gravitate to when culling through his images in Adobe Photoshop Lightroom.
“The accuracy of the OM-1 bird detection while shooting in burst or Pro Capture mode allows me to not worry about specific positions of the bird when they are in flight,” he states. “I can just track the bird and capture image after image until the moment has passed. For me, the art of bird photography doesn’t end once I arrive home. Knowing which images to edit and share is a critical part of telling the story of the experience being among these beautiful birds.

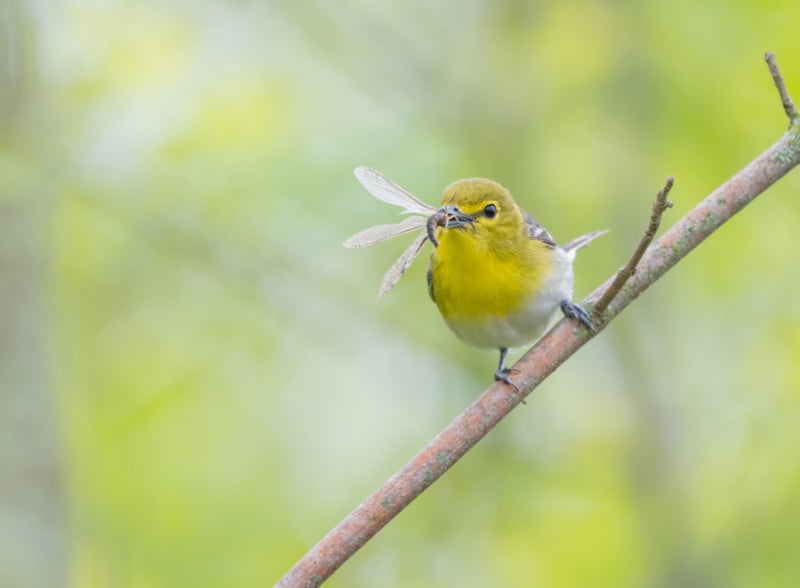
“Immediately, I will always skip over any photo that has the bird’s wings intersecting or covering any part of its face. The bird’s face shows its personality, especially when they are in flight, as they will get a more intense and determined look, so I want to see that in as many images as possible.”

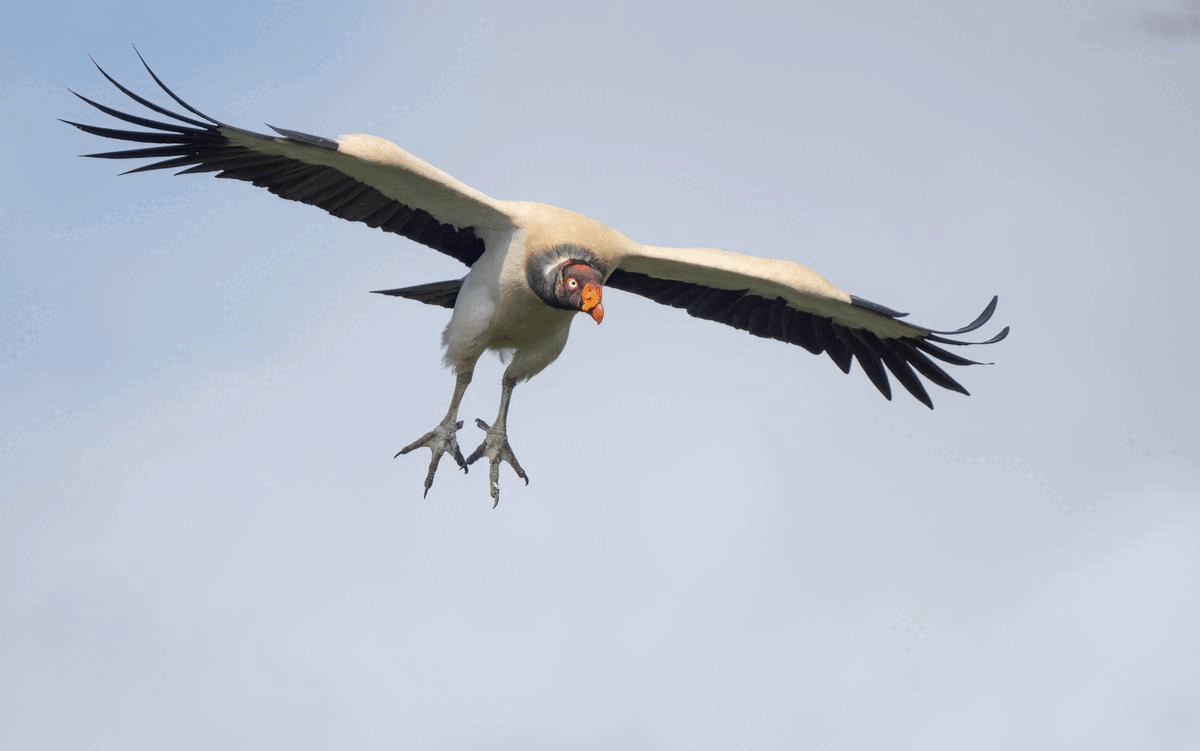
The first pose that Knoot is drawn to is when the bird’s wings are facing forward, revealing the shoulder and the scapula feathers. On the opposite side of the coin, he also recommends looking for photos that have the bird’s wings fully back, which can show any color in the armpit.
Knoot usually avoids sharing photos where the bird’s wing is angled directly at the camera. The look, he says, often makes the bird look wingless.
“Eye contact is incredible when you can get it,” Knoot recommends. “It looks especially dramatic when you get a head tilt in conjunction with eye contact. A lot of bird photographers talk about ‘the glint.’ It’s basically a description of the bird making eye contact with the camera, especially when the bird is front lit. I love these shots, and they really help viewers feel connected to the subject, much like I do when I capture those moments.”
Knoot says that capturing a unique body position can also lead to interesting photos. He describes one of his favorite being when a bird looks over its shoulder and backwards. This doesn’t happen often, but he says the bird may look backwards if a noise or people talking catches their attention.
“I always try to capture birds when they are hanging onto a branch in an unconventional way,” Knoot recommends. “Often, birds may have their entire body contorted with their talons hanging on as the bird leans off of the branch. Or you may find them resting on fauna that barely looks like it could hold their weight. I love how beautiful these awkward positions and unique scenes translate on camera.”
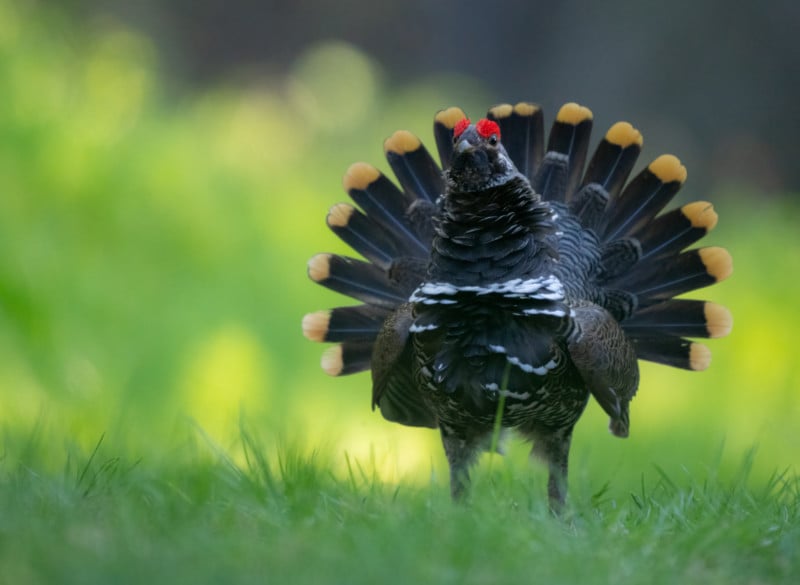
Tail flares are also something to look for in your photos, Knoot recommends. A tail flare is when the bird spreads their tail feathers, and it is especially beautiful on birds with vibrant colors. Knoot says his favorite tail flare photos often come with eye contact and a desirable wing position, if they are in flight.
“I tend to not be attracted to photos of birds flying with their wings completely parallel,” Knoot concludes. That doesn’t feel very dramatic to me.”
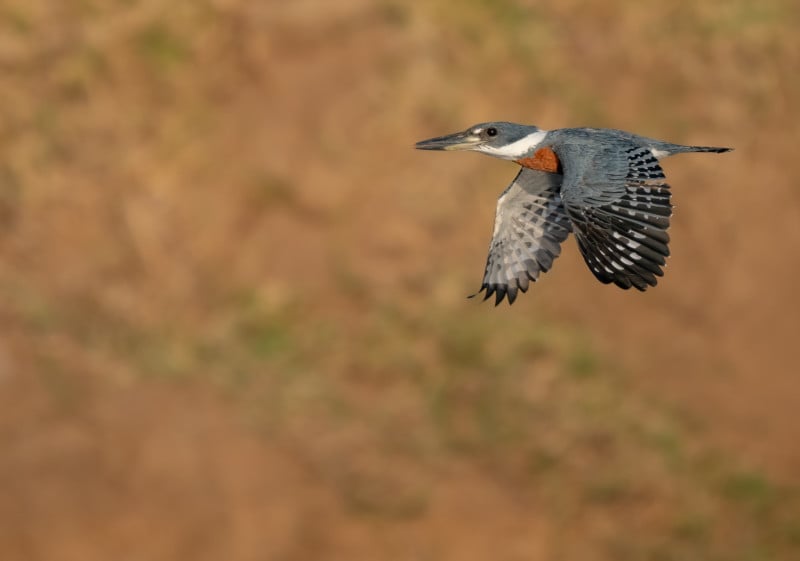
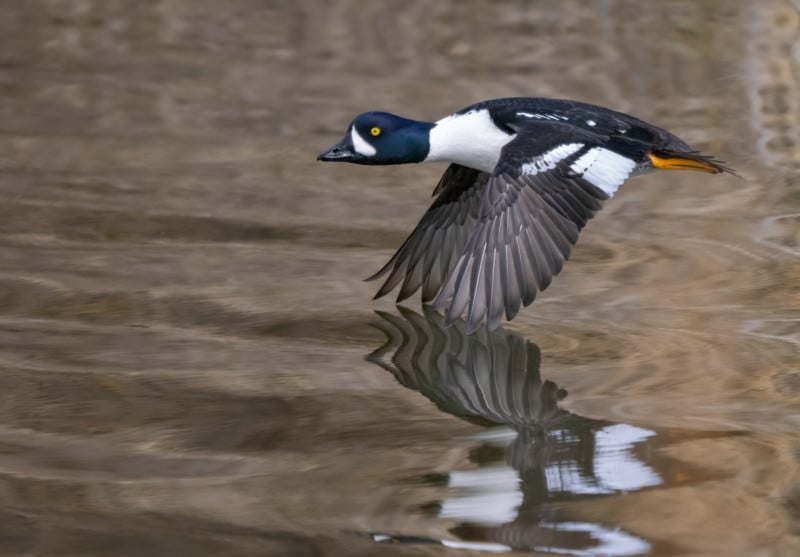
“I prefer to see the wings all the way up or down, as those show the action of the scene better. These wing positions look especially stunning when the bird is banking towards you. For me, those are the shots that show the beauty of a bird in flight the best.”
Patience…and Persistence is Key
Knoot has been documenting birds in the wild for over 18 years, and over that time, he has learned that one of the most valuable assets to have when photographing any kind of wildlife is patience. “With bird photography, the more time you can spend with a species, the more you will understand its behavior, which will help you capture better images over time,” he says. “When I find a subject that I want to capture that isn’t in a very photogenic location or doing something interesting, I visualize the photo that I want. This allows me to be prepared when the moment does come. I find that if I don’t visualize the photo first, when the bird does something interesting like show off the food it is about to eat, I am scrambling to make the shot and I don’t get the best composition and background. On the other hand, don’t be too patient that you lose the ability to adapt if the bird doesn’t do what you expect. Have the shot you want in mind, but be ready to quickly adapt to capture another shot, as birds are very unpredictable. You might need to move and adapt again, and then again. So not only is patience key in bird photography, but persistence is as well.
“I have been photographing birds year round for the majority of my life, and to this day, this form of art can try my patience. It is not an easy genre to master, and I don’t believe I ever will feel like I have. But one thing keeps me coming back, time and time again. There is no greater feeling than getting an incredible photo you had pictured in your mind as you spent all day crouched in the mud, behind a tree, in a heavy downpour, just waiting for the right moment to come. I will never get tired of that feeling.”
More from Ben Knoot can be found on his website, and Instagram.
Full disclosure: This article was brought to you by OM SYSTEM Cameras
Image credits: All photos by Ben Knoot