This Complete Six-Part Portrait Retouching Video Series is Totally Free
Professional photographer and YouTuber Sean Tucker — known for his informative and inspiring content centered around street photography — has quietly released a completely free series of focused tutorials on portrait retouching.
Tucker, who is more widely known for discussing the “why” rather than the “how” when it comes to photography, has shifted gears from his typical content with this new series of videos. Starting with the video above released in January, Tucker has released a new addition of the series regularly since that are filled with informative and targeted instruction on some portrait retouching skills every photographer should know.
“The way that the world’s been over the last two years it’s just meant that I’ve got to shoot very few portraits over the last little while and I really miss it. I’ve set my intentions for 2022 to get back to portrait photography,” Tucker says.
After spending several weeks shifting gears with his social media accounts and posting nothing but his portrait work, he realized his inbox was flooded with questions about how he lit, shot, and more specifically, how he retouched the images to get his final looks.
“I thought maybe a good way to start this year would be with a series of videos showing you how I take an image from straight out of the camera to final portrait in Photoshop,” he says.
Since there is a lot of information to cover, Tucker decided to break the tutorials up into separate topic-specific videos covering everything he does with an image.
The six-video series contains videos that range in lengths from 10 to 18 minutes and are thus smaller and easier to digest than some of his previous long-form tutorials, making it easier for viewers to focus on the topics that are the most important to them.
“This is the series I wish I had free access to when I was starting out in portrait photography, and my hope is that by sharing this knowledge, it will save others a great deal of time in their progression as portrait or headshot photographers,” Tucker says.
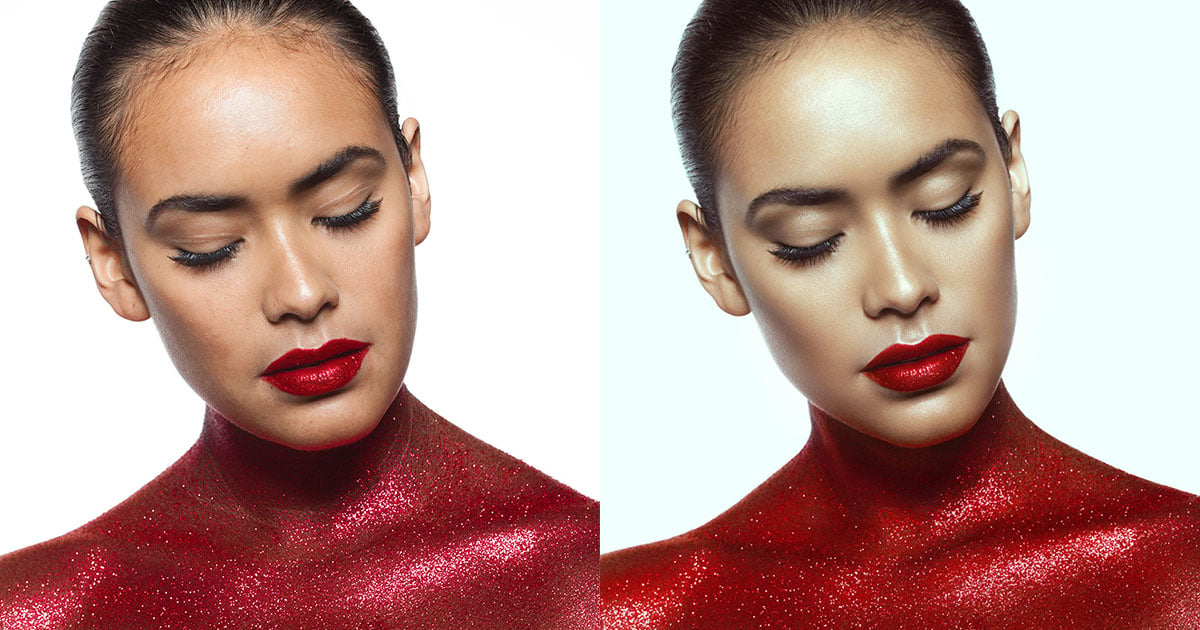
His first tutorial, above, is on natural-looking skin retouching and his three-stage process to achieve it using the spot healing tool, micro dodging using curves and tone balancing with colour brushes in Adobe Photoshop. The goal is to give subjects their best skin day whilst avoiding that “plastic look. The rest of the series can be found below.
Enhancing Eyes
Tucker shows his process for lifting the eyes by cleaning up veins, shaping the light, popping the colour, enhancing the catchlights, and flooding the lower iris with illumination.
Shaping light with Dodge and Burn
Tucker covers his techniques for shaping the light on the face using subtle dodging and burning to add more depth and drama to the light you captured during your shoot.
Changing Colour and Texture of Backgrounds
In the fourth video of the series, Tucker walks through his methods for changing colour and adding custom texture to backgrounds which match the lighting and depth of field in your original image.
Finishing with Colour, Contrast and Sharpening
The fifth video covers his process for finishing an image by creating a colour mix to add mood to your portrait, before adding tasteful contrast and subtle sharpening to complete the look.
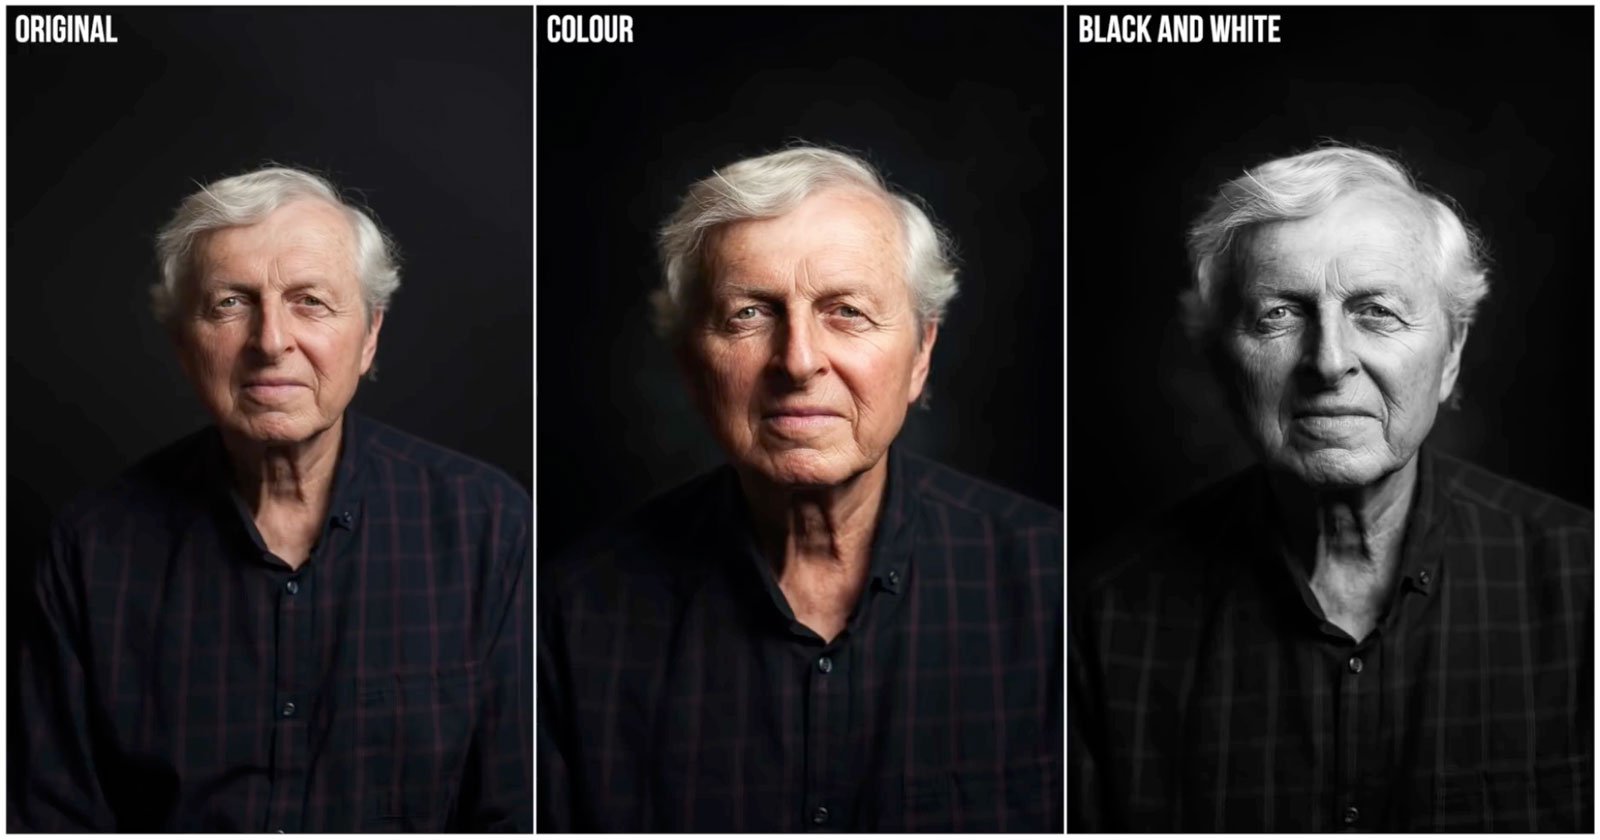
Creating Dramatic Black and White Conversions
In the sixth and last video of the series, Tucker shows his technique for creating dramatic black and white conversions of portraits that can make the image pop without losing the detail you worked so hard to capture in camera.
To see more of Tuckers work, be sure to visit his website, YouTube, and Instagram pages.
Image creditsFeatured image licensed via Depositphotos.