Fylm.AI Photo Editor Review: A Specialized Tool for the Color Obsessed
Fylm.ai was originally created with professional video color grading in mind, but the browser-based editor recently added support for RAW photos. That sounds nice, but does it have something unique to offer a relatively crowded space?
Last year, we noted that fylm.ai was becoming an option for photography as a browser-based and artificial intelligence-powered color grading platform. That software has now launched, and the company claims that the editor is the best and easiest tool to create cinematic and film-based color grades for still images.
That’s not an overstatement, and Fylm.ai has some impressive tools designed specifically around working with color in your photography. That said, what Fylm.ai can’t do will likely end up being a more important factor into your purchasing decision.
Purpose-Built for Color Grading
Although “color grading” as a concept is generally associated with video editing, in this case, Fylm.ai editor applies the same idea on stills. This means that the editor supports professional and in-depth color tools like Artificial Intelligence (AI) Color Extract, Color Match, Subtractive Color, Print Film Emulations, Cine Looks, and others.
On the flip side, the editor centers solely around color grading. This means that other compositional features like cropping or image transform tools are not offered in Fylm.ai and anything other than color grading will need to be done in other editors, like Adobe Lightroom. This immediately changes how a photo editor can use the platform and its value since it can’t operate as a standalone platform.
Based entirely in a browser, the platform emphasizes ease of access to professional tools and team collaboration. The ability to have input from others, particularly in larger production teams, can be helpful and speed up the color grading process.
Although the editor has introduced RAW file support which could arguably make the tool more appealing to professional photographers, Fylm.ai claims the editor is useful and user-friendly for beginners, too.
Fylm.ai has monthly subscription plans, the lowest tier of which is free but, as you might expect, it has some limitations and is probably best used as a trial to test out the platform. The first paid plan, which is $16 a month, is aimed at professionals who work solo or in very small teams, followed by $41 a month for larger teams.
The Color-Grading Process
As a color-managed application, Fylm.ai uses ACES color management system, specifically ACEScct sub color space of the ACES linear which is more tailored for color grading.
For the general user, this information may not be significant. However, because of this color management system, for an image to be properly color-managed, users need to tell Fylm.ai two things.
Firstly, when a user loads an image for editing, they need to select which color space it has. This is called ACES Input Transform. For images in JPG, PNG, and similar formats, there are generally three possible values: sRGB, Adobe RGB, and ProPhoto RGB.
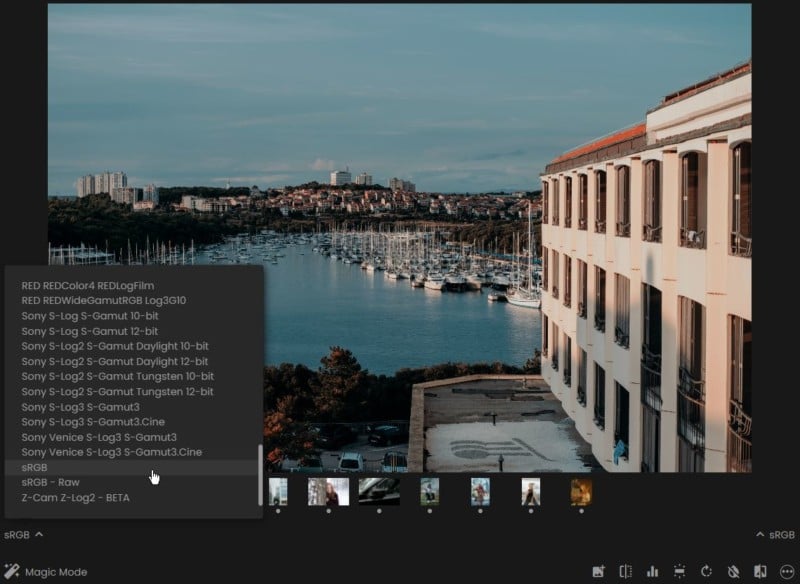
Then, the user has to pick the right ACES Output Transform which tells the editor what monitor is in use to view and edit photographs.
If the image is a RAW file, Fylm.ai will automatically develop the file and select the correct Input Transform. For Output Transform, it will auto-select sRGB as it is the most common monitor. However, if needed, users can select a different value.
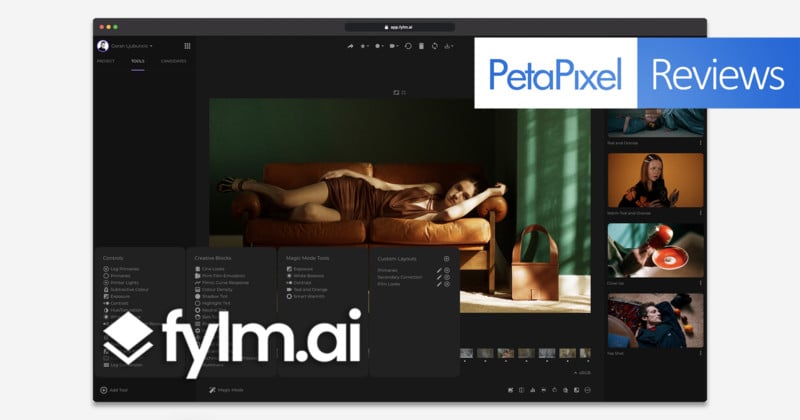
Overall Usability and Design
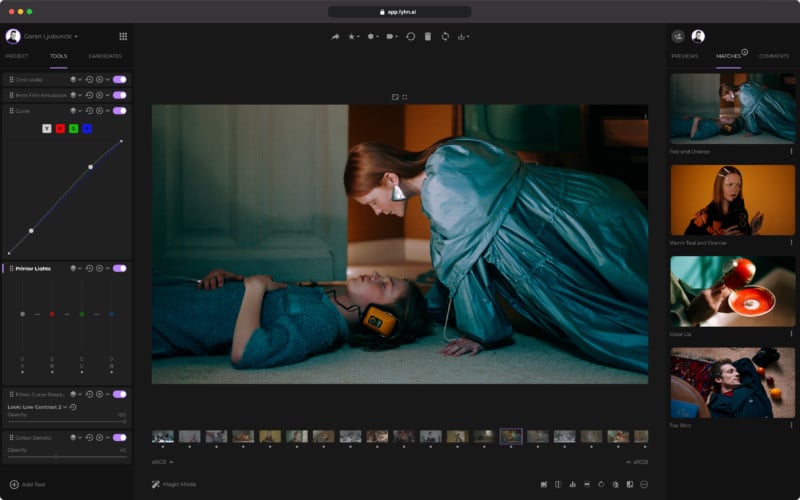
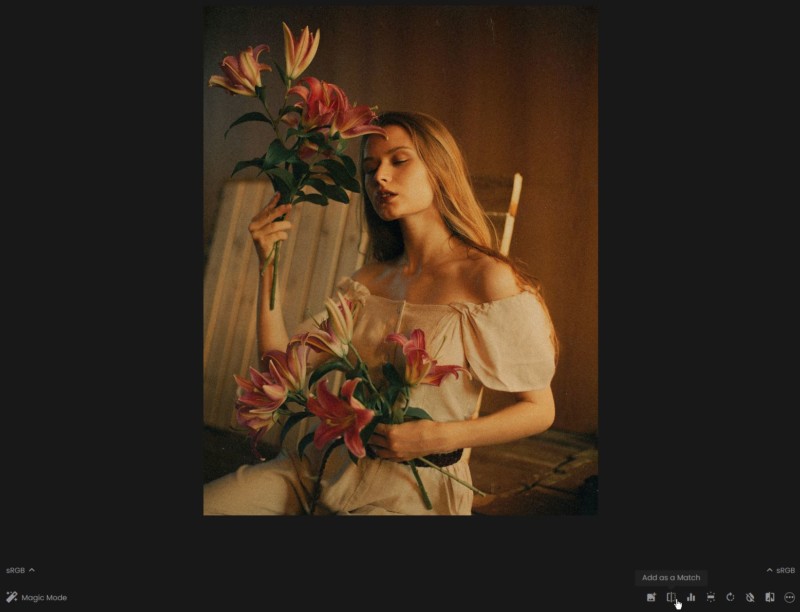
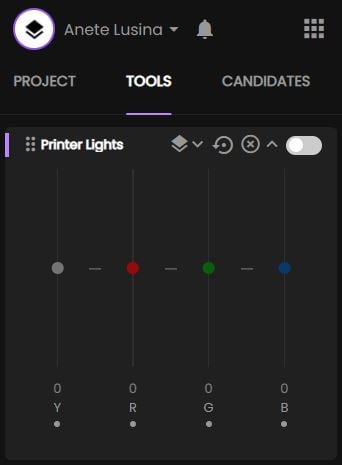
Fylm.ai’s dark interface puts your photography center stage. Project management tools and editing tool layers are situated on the left. On the right, you will find previews of the tools.
For example, if you select Cine Looks, you will see several previews to choose from before applying it as a layer to your image. All Matches — which are images used as a reference for AI Color Extract or Color Match — and comments from other team members are also on the right panel.
You can create custom layouts for tools that you use most frequently. All tools load fast and the opacity slider is smooth, too. Using and modifying tools is a pleasant experience with no lag or clunky transitions.
Additional quick features and shortcuts, such as changing the image status to “In Progress” or “Needs Revision”, or others, can be found above and below the photograph.
![]()
As a nice bonus, the editor keeps note of your editing progress so you can pick it up where you left off the next time you log onto Fylm.ai.
For users who come from a photography-only background and have experience in mainstream editors like Adobe Lightroom and Photoshop, most of the tools will be familiar or at least provide an inkling of what they might represent at first glance. The workflow, on the other hand, is not quite as similar and involves a slight learning curve.
Getting Started With the Editor
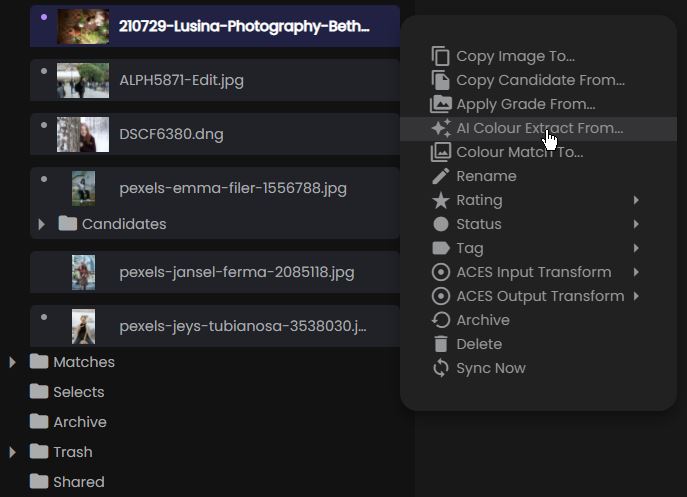
Before you can start editing, you need to start a new project and import your files, which are stored in “Bins.” Inside the Bin folder, you will find the subfolders Media, Matches, Selects, Archive, Trash, and Shared. You can also create new Bin folders to organize your workflow within each project, similar to a catalog in Lightroom.
![]()
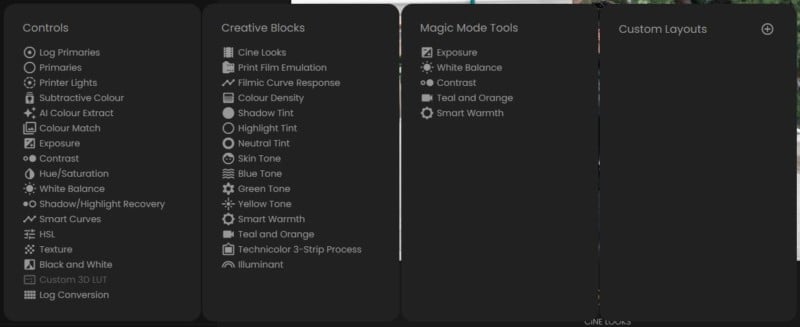
Some might find the large variety of available tools overwhelming. Some tools, like “Log Primaries” or “Filmic Curve Response,” might be unfamiliar to those who don’t have any prior video color grading experience or extensive knowledge of editing stills.
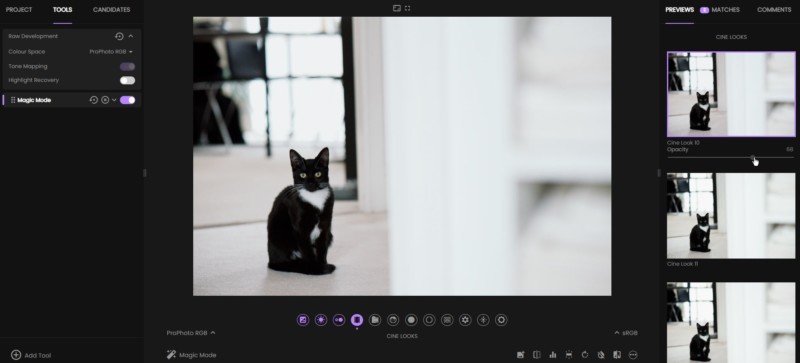
As a response to this, Fylm.ai has created “Magic Mode.” It guides you through 12 stages of editing starting with exposure, followed by white balance, and all the way up to Smart Warmth.

During each stage, you can select a preview option that appeals the most and then goes on to the next step. It’s a simple but effective workflow of color grading a photo without having to learn about other in-depth tools. Arguably, just the “Magic Mode” alone could be enough for some users to color edit their image.
Each individual section can be adjusted using an opacity slider and using the left and right keyboard keys, you can easily move between the different tools.
More Advanced Color-grading Tools
One of the tools that the company touts is its AI Color Extract. Have you seen an edit that you like and want to replicate that onto your image? Or, perhaps you’ve done an edit yourself, but can’t remember how you got to the end result and want to achieve something similar again. Fylm.ai claims that the tool extracts any color grade from a reference image and applies it to the photo you edit.
First, you need to find a photo that will be your Match. This photo’s color grade is one you aim to achieve on your image.
It should be noted that every image has its unique set of characteristics from the light available in the scene to colors present either on the subject and the background and so forth. It’s not reasonable to expect vastly different photographs to always be a visually pleasing match. However, you can still use the tool to give you a unique foundation for your edits and open up opportunities for endless creativity.
For the purpose of this review, I downloaded a royalty-free photo from Pexels and uploaded it on my Fylm.ai project. I picked a very warm photo that has plants and features large sections of beige and brown because my image had similar characteristics, too.
Once you have selected an image and a reference image, the editor will take a brief moment to apply the color grade and it will appear as a new layer. From there on, you can select the best pick from several previews given and modify the white balance and tint.
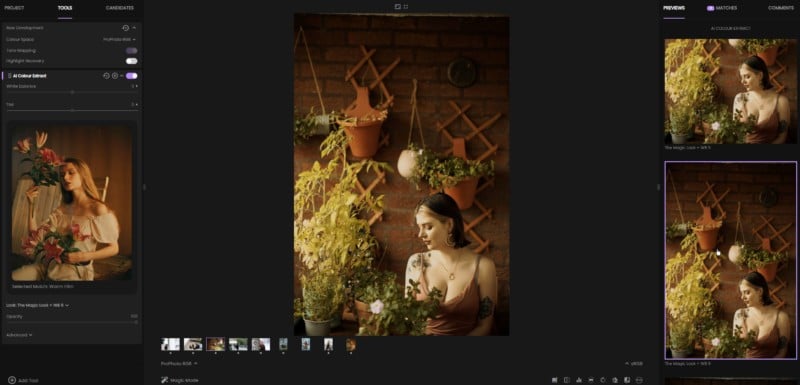
If needed, you can continue editing as normal by applying additional tools or run through the image through “Magic Mode” for a quick edit. For this review, I edited the image with “Magic Mode” to add more warmth and magenta to the photo.

Similarly, in the example below, I used AI Color Transfer on the portrait on the left, using the middle image as a reference to extract the color grade. I find that to achieve a final desired look, it helps to make a few additional adjustments on top of the AI Color Extract.

Overall, the tool works well for the intended purpose. Even if you don’t have a particular look in mind, you can use it to experiment with different creative choices that could take your color grading to a place you didn’t expect.
However, if you want a result that is closely matched to another photo, you need to evaluate the reference image and review its characteristics and whether it could be a suitable match for your photo.
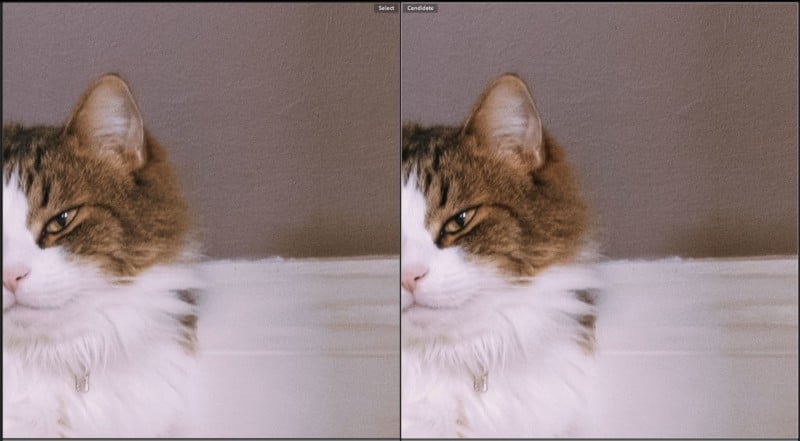
Similarly, you can use the Color Match feature which helps users make camera matching a faster process. An example of this would be if you use two cameras for a lifestyle shoot and want images from both to be a close match in editing. At times, matching images can be tricky, especially if you use presets in Lightroom which doesn’t always deliver a uniform look across different camera files.
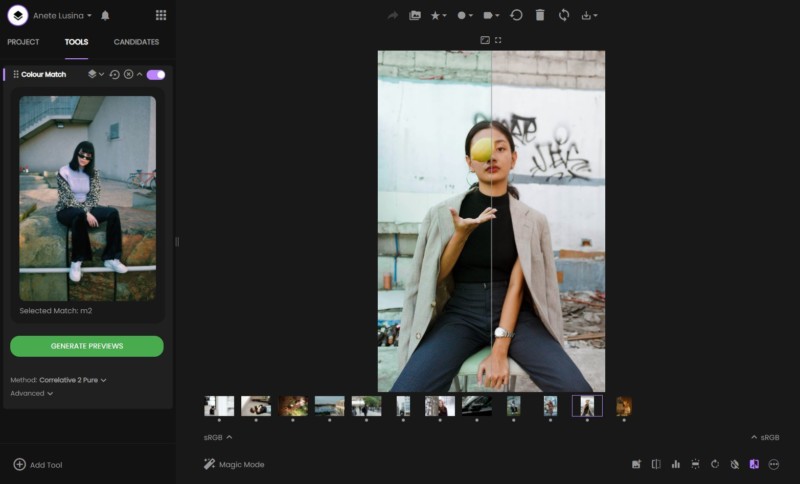
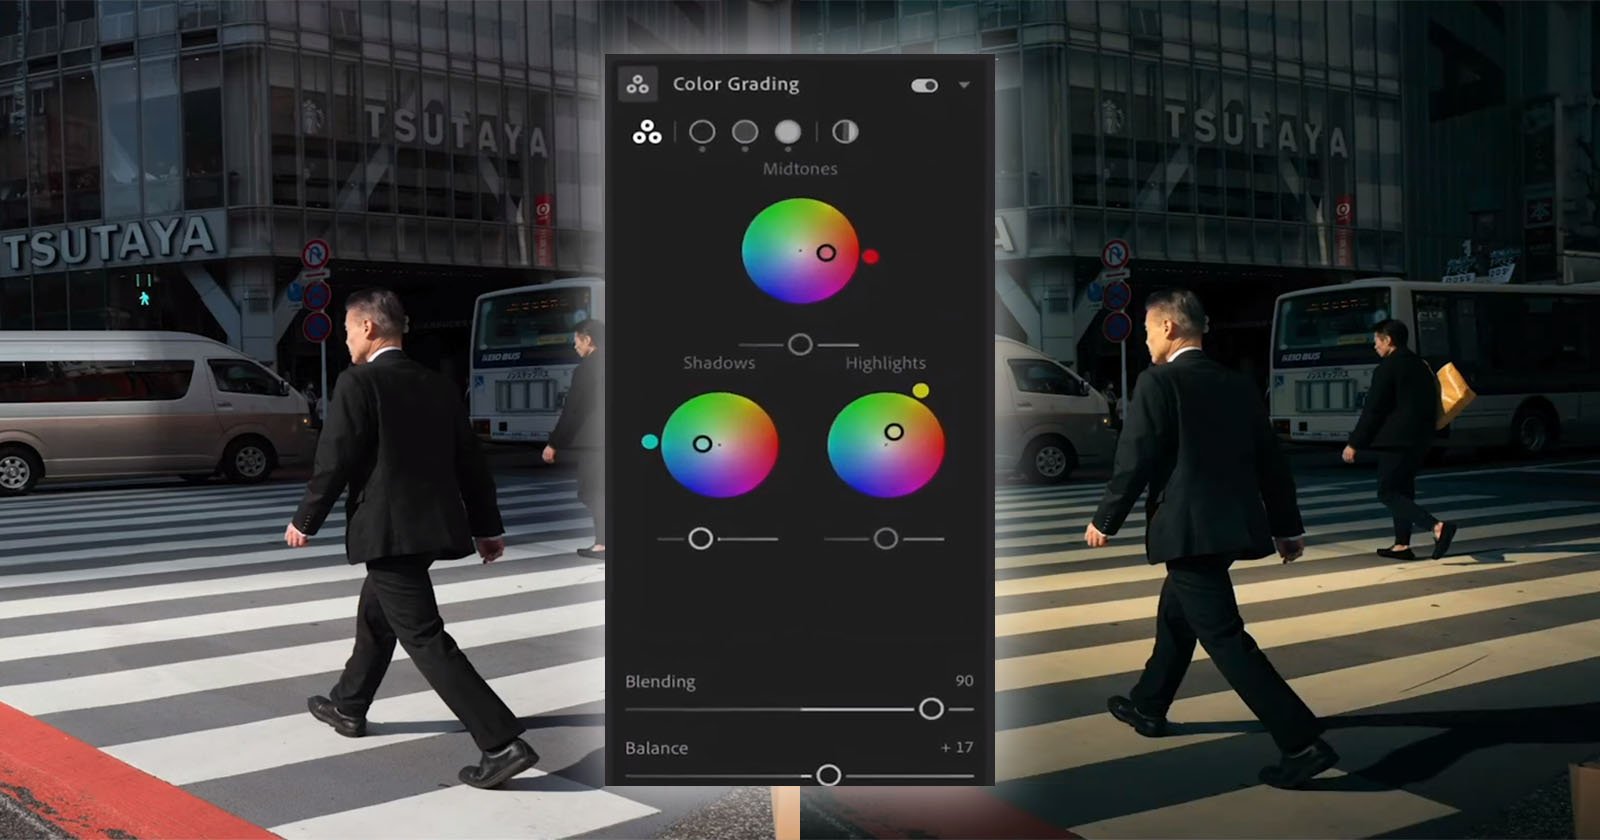
In the example above, I matched the original image to the portrait on the left. Using a split view of before, on the right, and after, on the left, you can see that the original had more warmth and magenta. Fylm.ai then added blues and greens in highlights and mid-tones, which is visible in the “after,” matching it closely to the reference photo.
You can do the same to match digital to film, and also apply the same principle for video editing.
Unless you’re already proficient in color grading, it will take a time to familiarize yourself with all the available tools. There is no doubt that learning more about the more advanced tools would give a better understanding of color grading overall, whether you stick to stills only or venture into video editing, too. Although you don’t need to utilize all of the available tools, the option is there.
Exporting Your Edits
Once you are happy with your edited photo, you can save it as a preset to apply the color grade to other files in fylm.ai or you can export it as a LUT, as an XMP Profile, or simply click “Save Image” which will download the edited photo as a PNG file directly on your device.
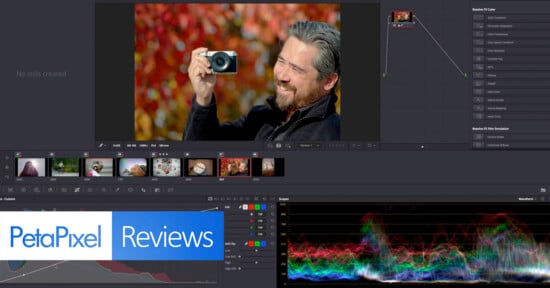
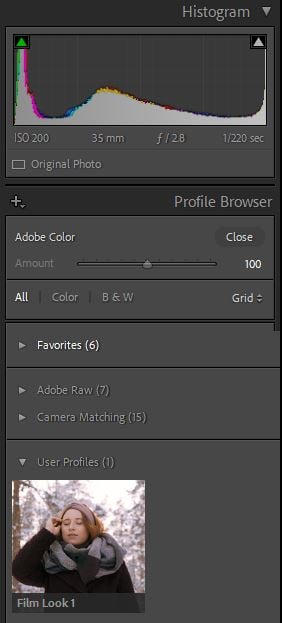
If you are a Lightroom user, you can export it as an XMP Profile and then import it as a preset, and it will appear in the Profile Browser. Unlike presets, you can adjust the opacity of profiles which makes it a more versatile color grading tool. The imported profile will appear under the User Profiles category, as seen below.
However, it is crucial to note that applying your profile onto a RAW image in Lightroom will not give what you saw in Fylm.ai editor. This is because Fylm.ai and Lightroom — or any other editor for that matter — develop RAW files differently.
Fylm.ai explains that the company uses open source LibRaw library to handle the file debayering — which can be viewed as the reconstruction of the image — while Lightroom uses its proprietary methods.
One method to ensure that your edits look exactly the same in Fylm.ai as they do in Lightroom or Camera Raw is to open the file in Lightroom, export it as a JPEG, PNG, or TIFF in sRGB, and then use that file in Fylm.ai to develop the look.
Once done, the new profile can be applied to one of the three file types back in Lightroom and the color grade will be matched.
Similarly, you can perform all other Photoshop editing tasks on your file first, for example, if you need to remove any unwanted objects or distractions, fix the perspective, crop, and so forth. After saving the file as a TIFF back in Lightroom, you can go on to color grade it in Fylm.ai.
The difference in results of applying the same profile to a RAW file and a JPEG, PNG, or TIFF won’t always be drastic but that will depend on the image itself and the format.
Although in the example above, my Fylm.ai profile didn’t look drastically different on a TIFF, on the left, and a RAW file, on the right, it was still visible. Other examples may show greater differences.
For users who want to use images from Fylm.ai straightaway, the option to download the color-graded image as a PNG can work well, although it would be helpful to have a JPEG download option, too. Having the choice would work well for those who edit on the go and want to have smaller-sized JPEGS to instantly use for websites or social media.
A Specialized Tool for the Color Obsessed
Fylm.ai is a very specialized tool that not every photographer is going to find a use for. I can see it being valuable to a hybrid photographer/videographer, especially since color grading for video is very different and often much more complicated than doing so for photography. I think the biggest thing holding the platform back for photographers is its inability to work as a standalone editor since it lacks the full editing stack photographers are going to need and relies on another software like Lightroom or Photoshop to fill in the gaps.
That said, the software does offer functionality Adobe programs don’t. Although you can create and save your own profiles in Lightroom, it doesn’t offer as many in-depth tools nor does it have features aimed at recreating the characteristics of film stock like you get with Fylm.ai’s Subtractive Color tool. Fylm.ai also scores points on how beginner-friendly it is. Even if you use the “Magic Mode” alone, it can be enough to learn more about color grading techniques.
As Fylm.ai is a browser-based editor, users also don’t have to download any software or plugins and can use the latest version of the software every time they log on. This can be particularly handy if you want to edit on the go or if you ever lose any saved presets or profiles after migrating to a new device or due to an external drive malfunction, or similar.
If you want to explore color grading in greater detail and learn to edit using professional-grade tools, Fylm.ai can be a great resource. Doing so may equip you with skills to better replicate your editing style regardless of what editor you use in the future. I also found that the software sparked my creativity faster than using Lightroom as the first point for color grading.
If you work as part of a multi-media team, the collaboration tools and the ability to match edits across stills and video make Fylm.ai worthy of consideration. The comments feature aside, even if you do video and stills as a one-man’s band, Fylm.ai can greatly speed up your workflow and help with the frustration of trying to maintain a coherent look all the way through.
Are There Alternatives?
I don’t believe there are any alternatives that closely match Fylm.ai features, particularly the AI color extract and color match. In addition, the ability to just as easily use the software for both color grading stills and video is unique as are the collaborative features. Having said that, Photoshop introduced a web-based feedback feature in the fall of 2021.
Should You Buy It?
Maybe. If you are happy with your current workflow and what you can achieve with your photo editor, you probably don’t have a need for another paid software that can’t fully function as an editor on its own. That said, Fylm.ai does have niche appeal for those who want to better understand color grading and has niche tools that editors like Lightroom can’t match.