What Gear Do You Need To Start Your First Photography Studio?
Opening your own photo studio can be an incredibly large undertaking. There are many things to consider, the least of which is what pieces of gear you’ll need. Having recently helped out a friend in setting up their first studio, I’d like to share a few ideas on what you may include.
Grip
First things first, every creative needs good grip. This can cost a surprisingly large amount and might seem like an unnecessary purchase, but believe me, it will save you thousands in cash (not to mention the time savings) when things go south. Good grip will of course cost more, so don’t be afraid to spend more upfront, as it will save you a lot in the long run.
C-Stands with Grip Arms
When it comes to light stands, I suggest getting one of the Manfrotto Avenger stands. Ideally, you’d want to get C-stands for your studio as they are a lot more stable and can last for decades. A good choice would be the Avenger C-Stand.
A slightly more budget-friendly option would be the Flashpoint stands, although the grip heads can wear off over time.
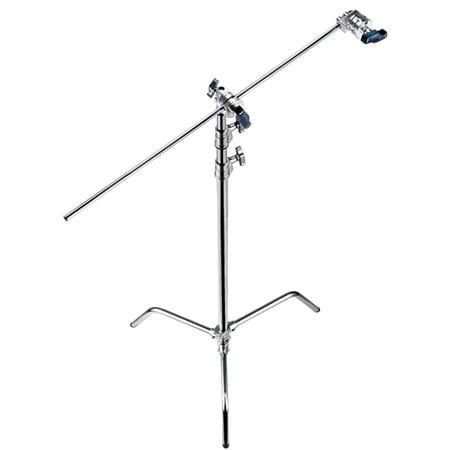
The reason I suggest getting grip arms for the C-stands is they will allow you to achieve more complex and precise lighting setups. Using a setup like this will allow you to place your lighting and modifiers outside the image frame giving you and your subject more room to play. Whenever I don’t have a boom stand on shoots, my retoucher ends up having to remove one or more light stands from the finished photos which can increase your costs and time to deliver.
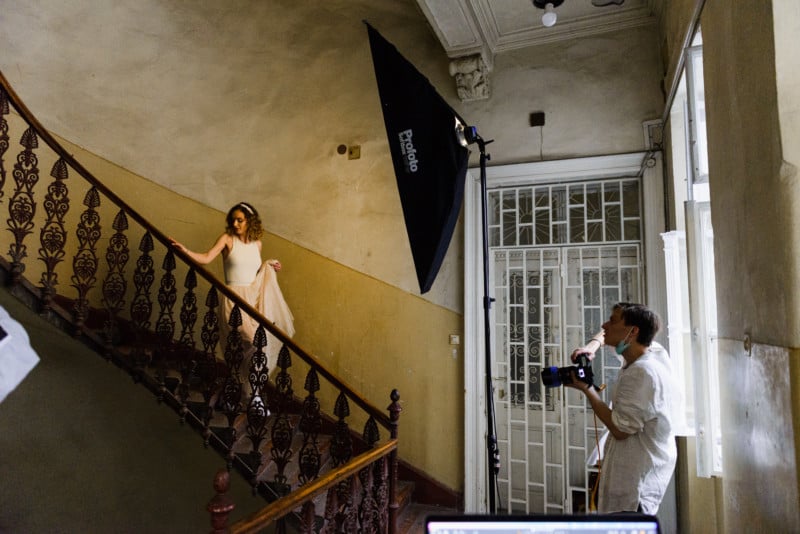
Tall Stands with Boom Arms
When things get too heavy for the C-stand, you will need a tall stand with a boom arm. Commonly these are used for key lights where the modifier is very big/heavy and has to be placed overhead. Overhead rigs are common in fashion and portrait photography, and having a good boom stand will definitely add more flexibility and open up creative opportunities for you.
Here are three options when it comes to good boom stands:
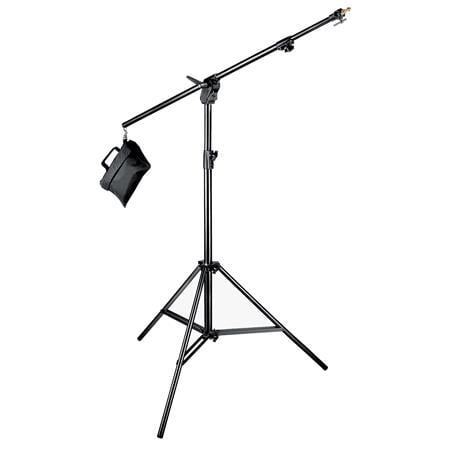
Budget option
This is a combination of a boom and light stand. It holds the least amount of weight, but it works. I wouldn’t trust this stand with anything beyond a lightweight 3-foot octabox.
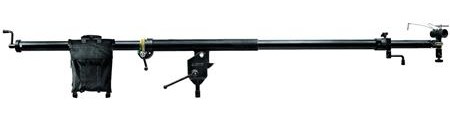
The Standard Option
This is a simple rolling light stand with a weighted boom arm. Making adjustments to the light position can be tedious after some time but they are typically smaller and give you greater positioning control. These systems seem like they are able to take on heavier setups like a standard light with a 4×6 softbox on top, but still may not be the safest or best option for larger setups.
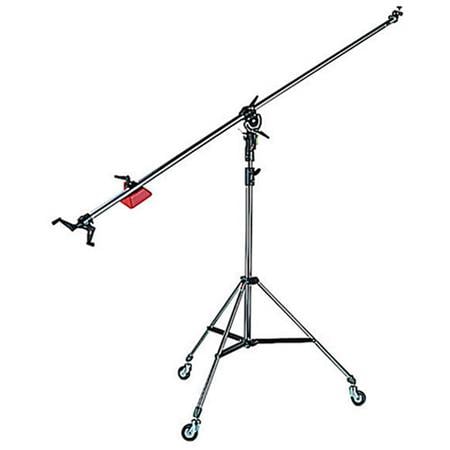
Luxury Option
For me, this is the preferred option. The boom arm has handles that let me control the light from the ground without having to lower it to my height. The entire system is a lot more durable and can hold/support much more weight, meaning I am not worried when I put bigger lights and heavy modifiers on it.
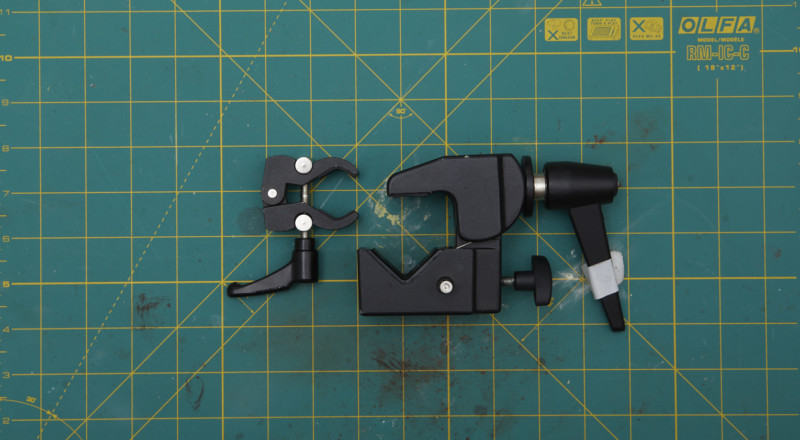
Superclamps
These will be helpful when building out a set and joining things together. For most setups, you will need at least five to start with and if you are anything like me, you’ll keep adding more as your shoots get more interesting. I prefer the Manfrotto ones as they are incredibly sturdy and feel practically indestructible.
Lighting
In this section, I won’t say what brand and what modifier to get as everyone has their own preference and budget, but I will make suggestions on the roles modifiers you buy should play.
As a rule of thumb, I recommend getting a set of grids for whatever lights and modifiers you use because you want to have control over your work. Remember that grids don’t increase contrast, they only reduce the amount of light spread and that’s it.
Key Light
For key, you should get a soft key light and a hard key light. Commonly, soft key light is something along the lines of a 3’ octa or white umbrella.
As for hard light, I suggest a 7-inch reflector, a p70 or a zoom reflector. These are great starting points for any photographer. As you advance, you will want to purchase additional modifiers and get “unusual” with your lighting. If you are out of ideas, check out my article on unusual light shaping tools.
Fill Light
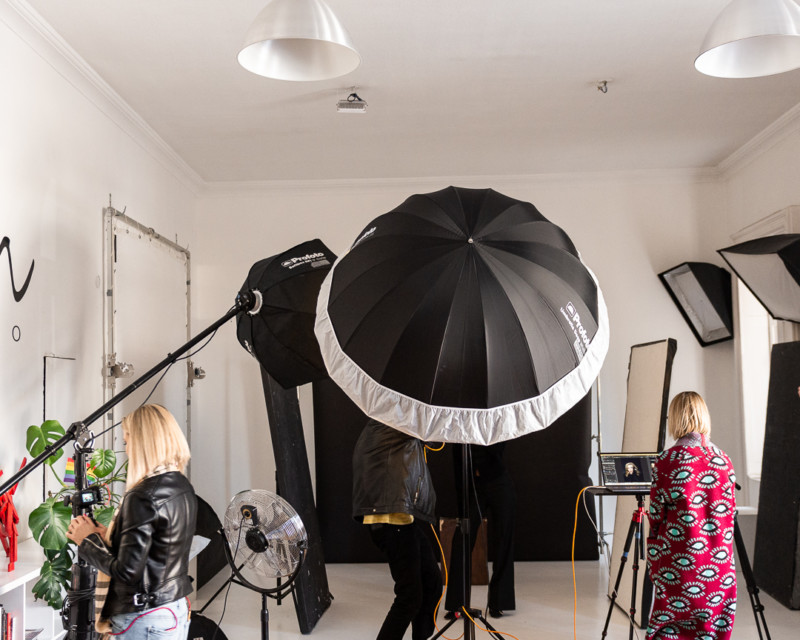
Generally, a fill light is a large light source that is used to bring in detail from the shadows. This can be anything, from a flash bounced into a wall to a giant parabolic reflector for $10,000.
Personally, I use a large white umbrella as my fill light. It is a very portable modifier, so I can easily take it on location, and it is one of the easiest light modifiers to set up. As a rule of thumb, I always set up a fill light, regardless if I will actually use it or not for the final shot. Once the subject is on set, I can turn it on or off depending on what the situation demands. Typically it is better to have it and not need it than to need it and not have it.
Other/Additional
If you’re doing fashion or portrait work, owning a strip box can be very beneficial. It is a popular choice among photographers for the rim light it can provide, especially when gridded. Generally, a rim light is aimed at highlighting the shape of the subject, so a strip box is perfect for that.
Miscellaneous Tools
Finally, let’s discuss some other items you may want in your first studio that do not fall under grip and lighting.
Tethering
I am a tethering-evangleist. Personally, I can’t understand photographers who work with a team and don’t tether. Allowing for input from the on-set team with tethering will allow for a much better final capture. The stylist can catch and adjust how the clothing and accessories are sitting, Hair and make-up artists can fix shiny spots on site, and the producer/clients can give feedback on poses and looks to help achieve a better shot.
Getting a tethering station you can roll around is a must. You can either build it around one light stand by using Tether Tools or purchase a cart and place everything on it. Personally, I bought Tether Tools equipment as I can take some of it on location as well. Just be sure your light stands have wheels/castors so they are easier to move.
Flags and Scrims
Additionally, I suggest getting some flags and scrims. These will enable you to build a precise setup aimed at getting the best images. Flags allow you to control the spill and fall off of your lighting for precise placement. It is easy to add more and more, but learn to cut and remove light where needed for some impressive results. As for scrims, they will help you diffuse or cut a portion of light. This can help solve a lot of problems on set when you have unwanted hard and/or hot light spilling onto your subjects.
Closing Thoughts
While you might feel like purchasing all of the items I listed in the article, (and I encourage you to at some point), I would like you to consider buying used equipment to start. Besides being good for the planet (less packaging waste), it is also considerably cheaper. Grip gear is made to last decades, so you can safely purchase most everything (excluding some modifiers and diffusion fabrics) on the second-hand market without much worry.
P.S. If you want to learn more about buying used gear, check out an article I wrote about this exact topic.
Image credits: Header photo from 123RF