How to Make a DIY Dappled Natural Light Background for Portraits
Creating a do-it-yourself lighting setup for dappled natural light backgrounds isn’t as tricky or as involved to achieve as some setups and techniques, but it is a nice little idea to play with if the occasion arises.
What Do You Need?
1. A white sheet or bounce board
2. Another thin white sheet or scrim
Yes, that’s honestly all you need, so to all the people who complain about tutorials written for people with a full studio’s worth of kit, this little setup is for you.
What You’ll Also Need
1. Bright, sunny day
Sorry, there was one more item I forgot to mention and that’s the Sun. Sadly this last item will prevent most of us Brits from pulling this setup off for 51 weeks of the year, but if you get lucky and the Sun does indeed come out, this is a very quick and easy look to achieve.
The Setup
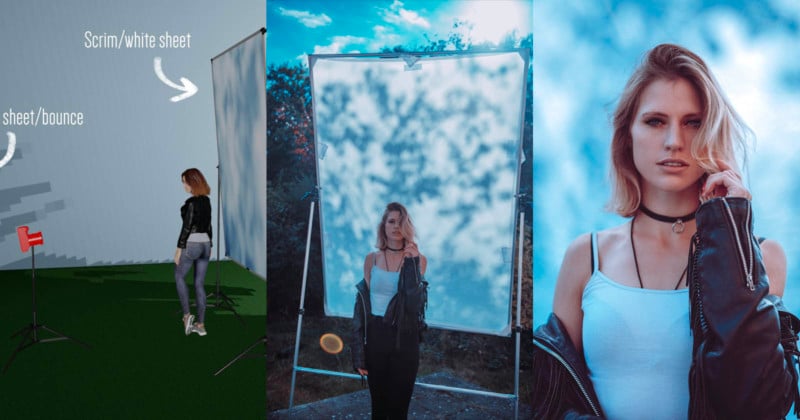
The setup itself involves you placing one white sheet or bounce-board behind you and then you place the other thin sheet or scrim behind the model. To be clear, yes I am using a purpose-built scrim here, but a single cotton sheet will do just as well for the look we’re after. When positioning the two sheets, be sure to also position your model with the Sun behind them.
Lastly, try to set the whole thing up in front of some bushes or trees to get the desired dappled light effect on the scrim behind your subject. Take a look at the diagram below to see what I mean.
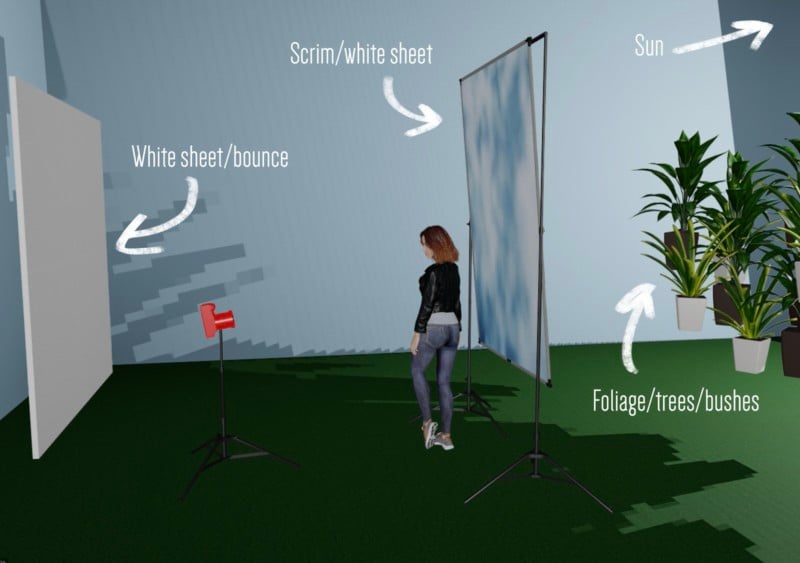
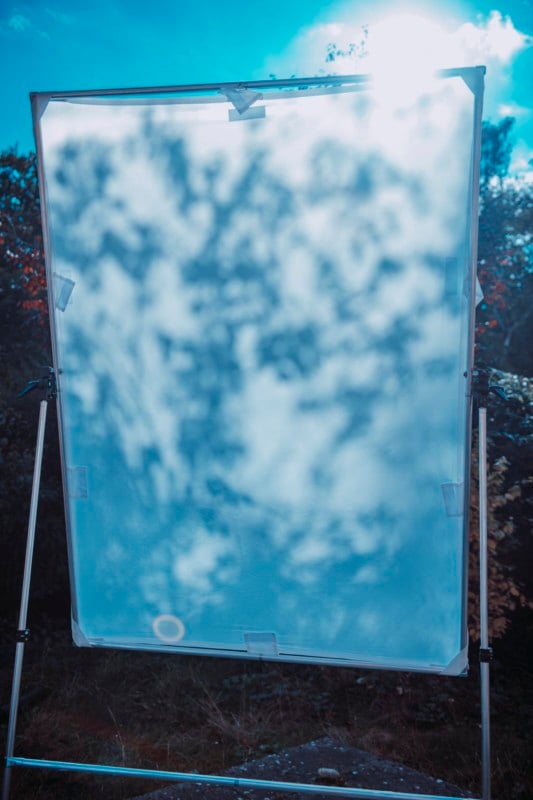
The setup works as the hard sunlight shines through the trees behind the subject and essentially projects the dappled light and shadows onto the white sheet behind them, resulting in this beautiful pattern on the background.
The same sunlight is also so strong that it hits the white sheet behind you and bounces back onto the model which in turn bathes them in this beautifully soft light as well. Effectively you’re getting two lights in one here as the same light is illuminating the background as well as the model too.
The Final Look
There are some clear benefits to this look and firstly, of course, is its ease of implementation. Sure, you need the Sun to be out, but if you live in a region where the Sun isn’t revered like a mythical creature like it is here in England, this isn’t too much to ask for.
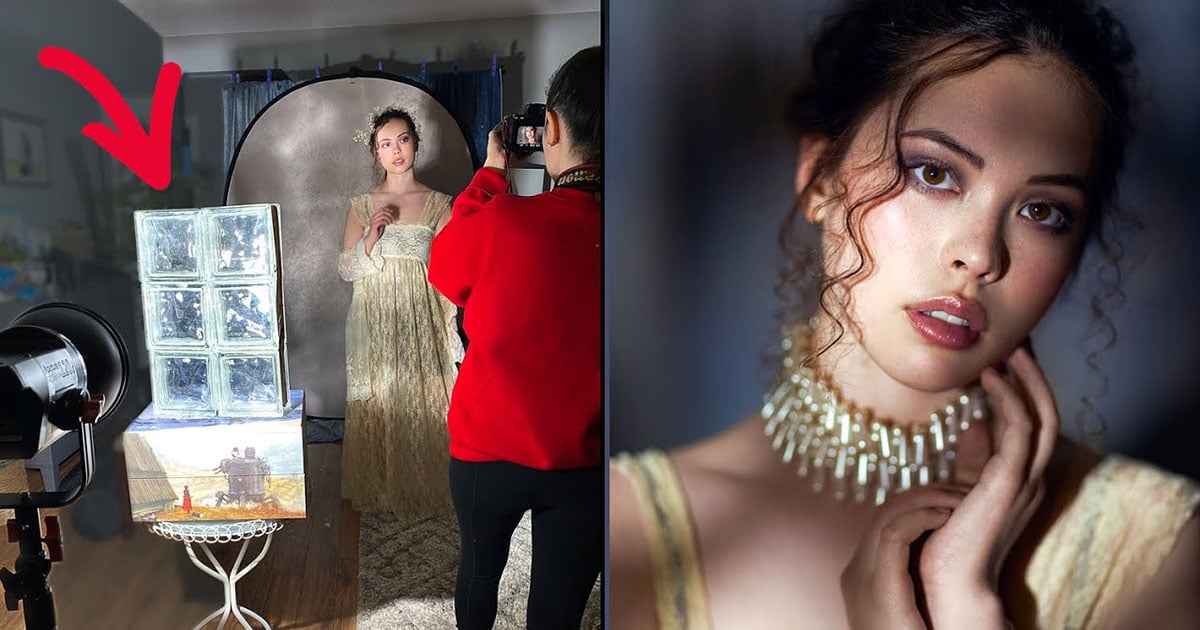
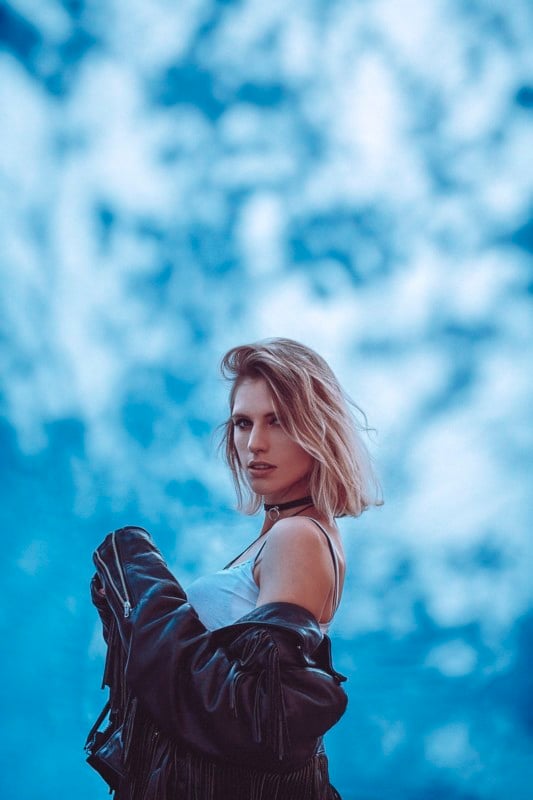
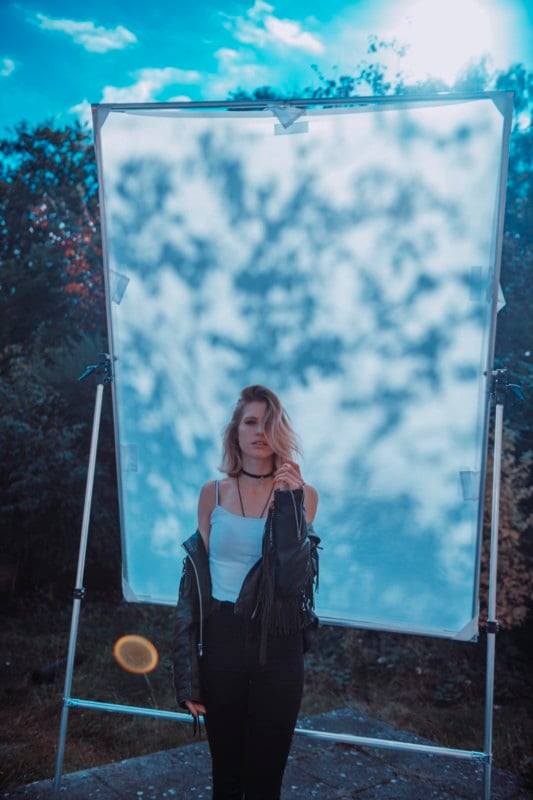
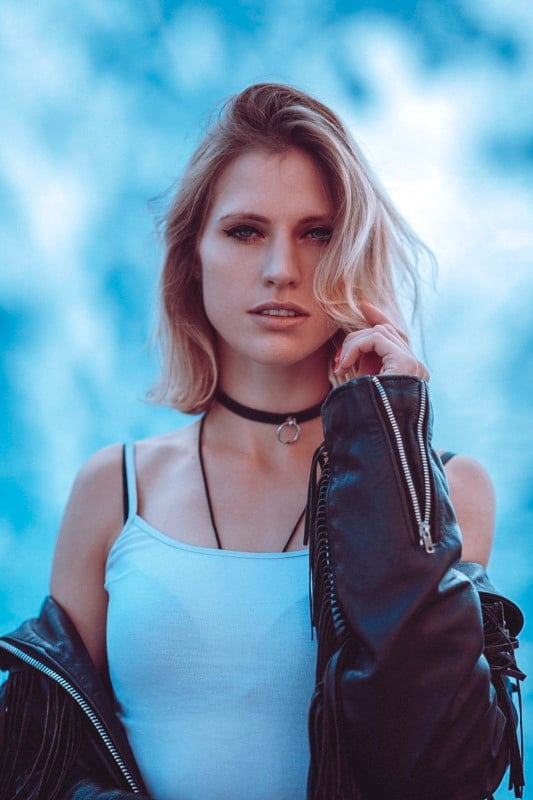
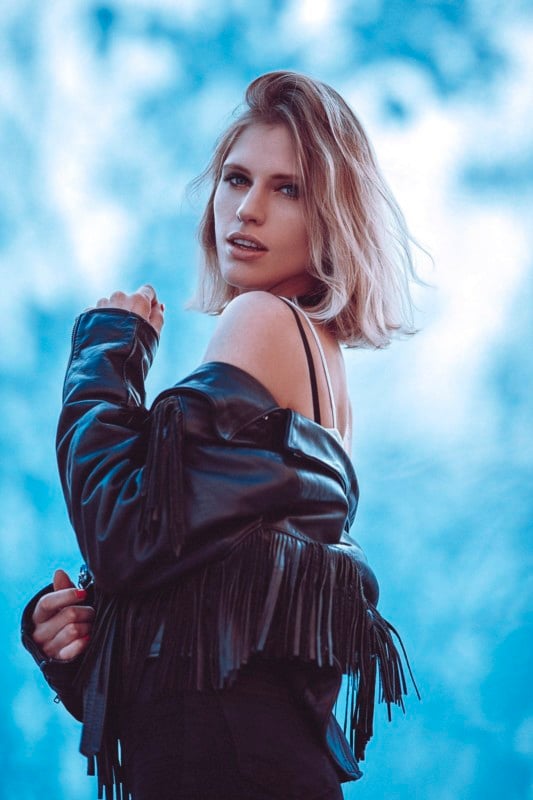
Secondly, the look this light gives to the model is extremely flattering as the bounced sunlight hitting the sheet behind you and illuminating the model is extremely soft. Plus, when the model is stood close to the scrim sheet behind her, a little light bleeds through and delicately lights the edges of her face and body to further add dimension to the body too. Look again at the images here if you missed them at first glance. See how the edges of her body and jacket are highlighted?
Lastly, I was particularly impressed by how the dappled light effect on the background actually looked like clouds on a sunny day behind her. This is of course just an illusion thanks to the dappled light from the trees behind, but it’s an interesting way to achieve this effect if that’s what you’re after.
Closing Comments
Ultimately this is a very easy setup to achieve as long as the Sun is out. There are a couple of things I want to mention though that are worth bearing in mind when setting this up.
Color contamination
Be mindful of your surroundings when doing this and by that I mean be aware of what the Sun is actually bouncing off around you. Sure it will bounce off the white sheet behind you and light the subject beautifully, but the Sun is also bouncing off of everything too. In these shots, I had a red-brick building to my right and as a result, I was getting a red cast on the right of the model (her left). I reduced it in post so it’s not too visible here now, but it’s certainly worth being aware of.
Adjusting the amount of dappling
One other thing to play with is adjusting the amount of dappling you get on the background behind your subject. I liked the blurred and out-of-focus dappling I was getting on my background, but you can choose to make it sharper or more blurred depending on how close you position your setup to the trees and foliage behind you. Placing your setup quite close to the trees will result in very blurred mottling and puling the setup further away will get you sharper dappling effects. Just something to play or at the very least be aware of if you’re not getting the desired effect when you try it yourself.
Good luck and have fun playing with this one. Be patient though, as the scriptures have foretold the return of the Sun in due course, let’s just hope we can remember where this article was when that great day does indeed come to pass.
CreditsPhotographs by Jake Hicks. Featured model is Annabelle Strutt.