Lighting White-on-White or Black-on-Black Photos with Just One Flash
The most complex scenarios one can get in lighting are black on black and white on white. These scare most photographers, regardless of the genre. If black absorbs light and white bounces, how can you achieve natural-looking results with just one light?
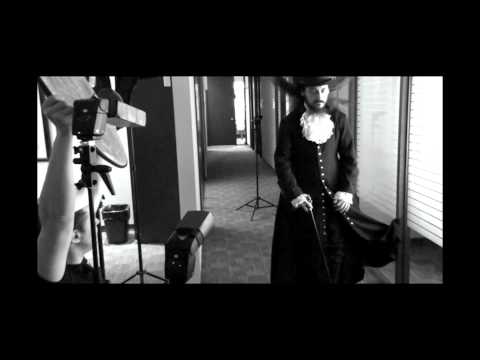
Still-life photography is a very popular genre that is in high demand. For this reason, many photographers consider product photography to be quite lucrative. That said, product photography requires very intricate knowledge of lighting and how to deal with complex situations.
Are two of those annoying light scenarios are black on black and white on white.
Why Is This Important?
These two scenarios are probably the best way to see if a photographer really knows light. Importantly, black on black and white on white isn’t unique to still life photography. I’ve had to photograph such scenarios in fashion as well.
White backgrounds are commonly found in E-commerce shots, with the ability to crop and change the image easily, white background images have become a standard for many websites such as eBay or Etsy.
Black backgrounds on the other hand are fantastic in showing details of shiny metallic objects, jewelry. A common place to find black background shots is in luxury ads. An overall dark image captivates the viewer’s attention to what’s most important: the product or subject.
White on White
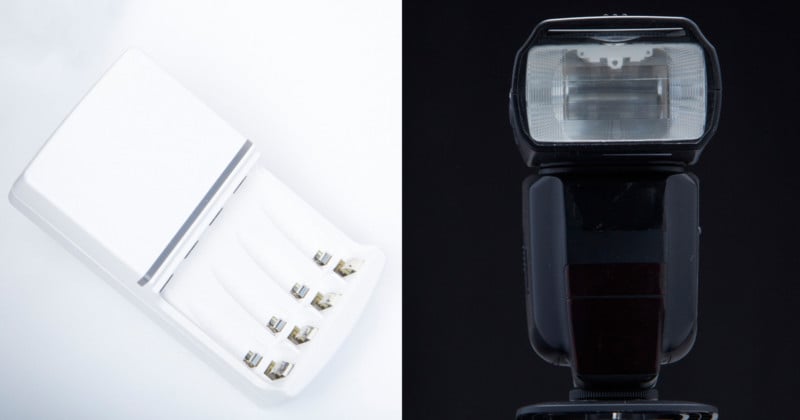
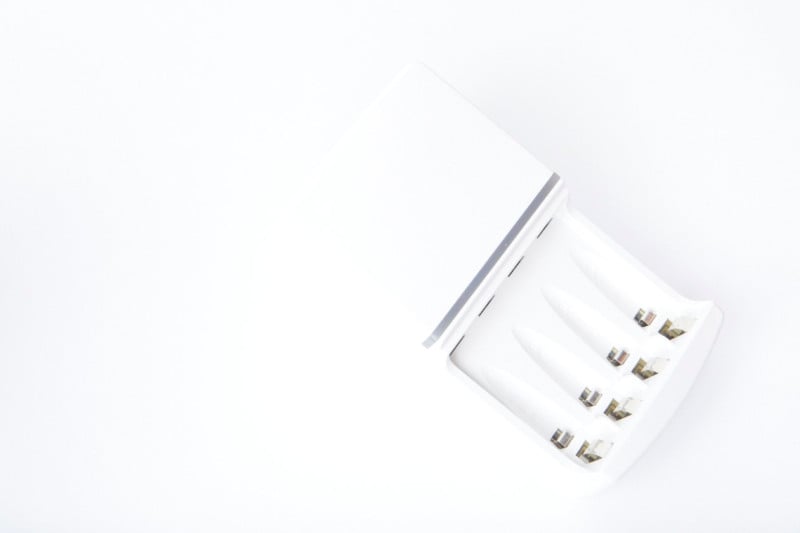
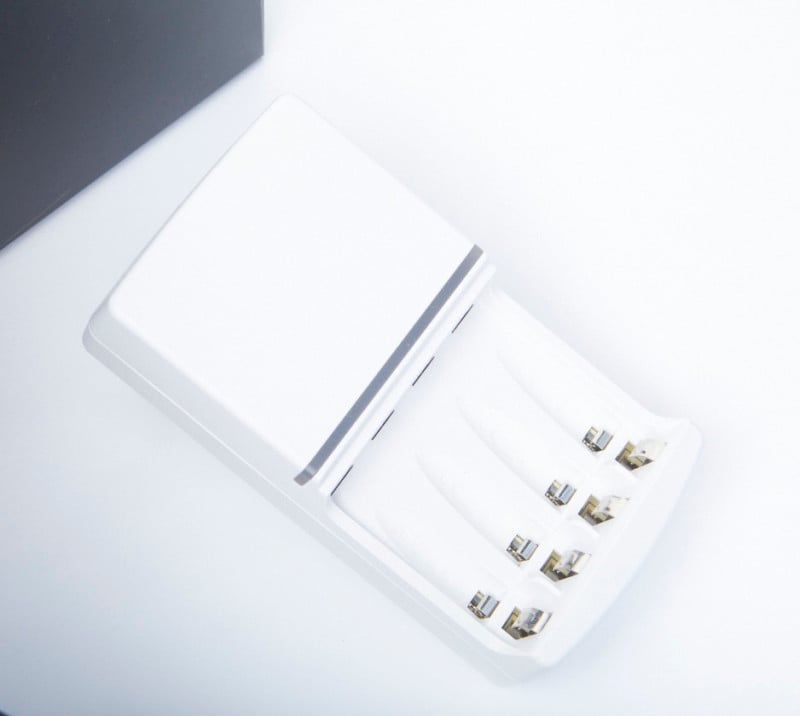
There are several techniques to photograph this setting. The most important consideration is creating depth and shape as we want to highlight the subject at hand as best as possible. Let’s look at a simple setting: A white battery charger against a white backdrop.
1. Black Frame
Goal: My goal is to create an image where the object doesn’t blend in the white background, has defined edges, and the background is evenly lit without any significant hotspots.
2. Test Light
Let’s introduce the first strobe. Placing it on the side that’s closer to the camera yields this result:

That does not look compelling and is far from what I need. There is an unwanted shadow behind the charger, moreover increasing the power blows out the highlights beyond imaginable.
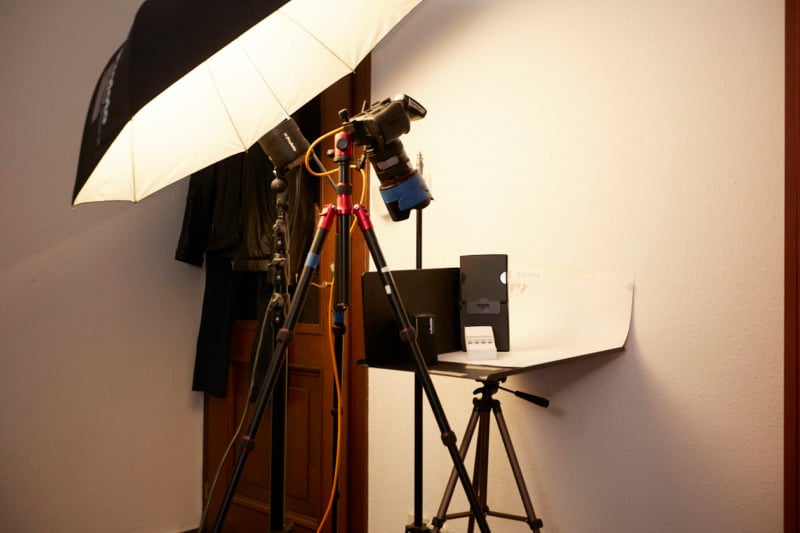
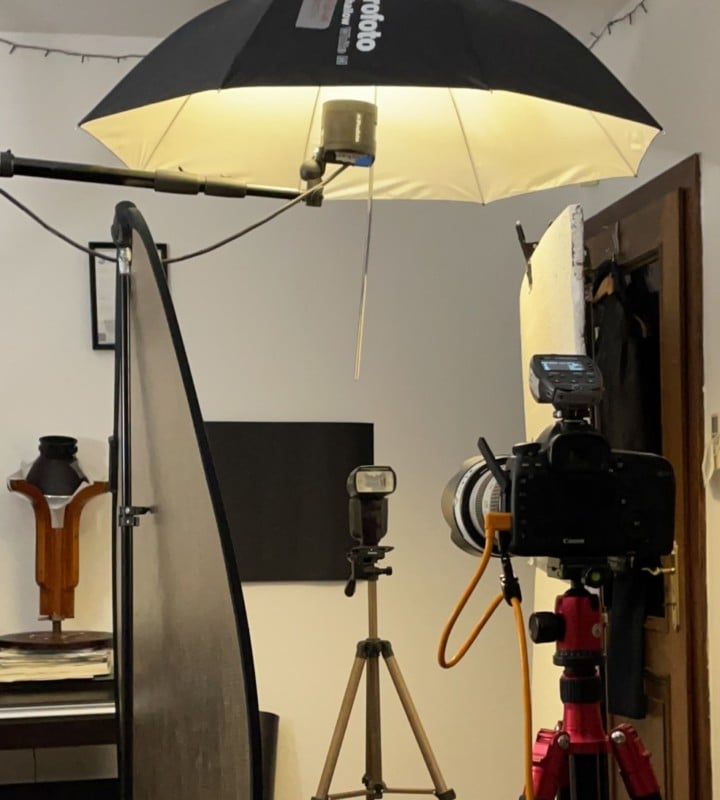
In order to create an even diffused soft illumination, I need a large source. In this case, a white umbrella is the best option. As the object is white and matte there isn’t too much necessity to control direct reflections from shiny surfaces.
Introducing my first strobe, I see that there is some shadow edge definition, but really not that much. The closer side has completely blended in with the background. In order to add definition, I must cut the light. Chances are, you’re like me and don’t have a warehouse of flags and grip. When it comes to cutting light, most matte black objects will do the job adequately well.
I used my graphics tablet and empty boxes to create a setup — each of these things will cut light and hence add definition to my subject.
Here’s the resulting photo straight from the camera:
Here is how I achieved my goal of creating this simple-looking but a technically complex image with just one light:
Black on Black
Because we all love flash photography, our next subject will be flash itself. The task is to capture a unit for a hypothetical campaign. The main requirements are to make sure the image shows the details of the unit. This seems not that difficult.
As a general rule of thumb, you need to make sure that the outlines are visible. While in white on white that was about cutting light, here it is about adding light. Outlines will be only visible if they are a different color than the general image.
1. Black Frame
Goal: The goal is to create an image of the flash where the edge definitions are shown clearly. The flash itself must have volume and stand out from the background which is to remain black.
2. Test Light
Same process, but slightly different midset. I want to show how symmetrical flash is, hence I place my light slightly on top. Bare bulb, just as always.
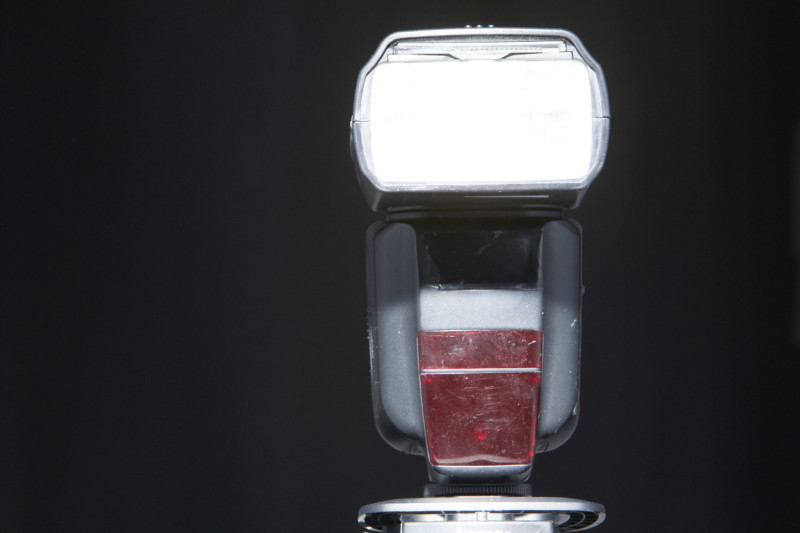
This yields a wild range of problems: from the overexposed flash tube to the unevenly lit flash body. Naturally, this isn’t the desired result. I want to smoothen out the light and gradate it. For this, I need a soft diffused source.
Placing an umbrella on my strobe and placing the modifier directly above the subject yield this exact result.
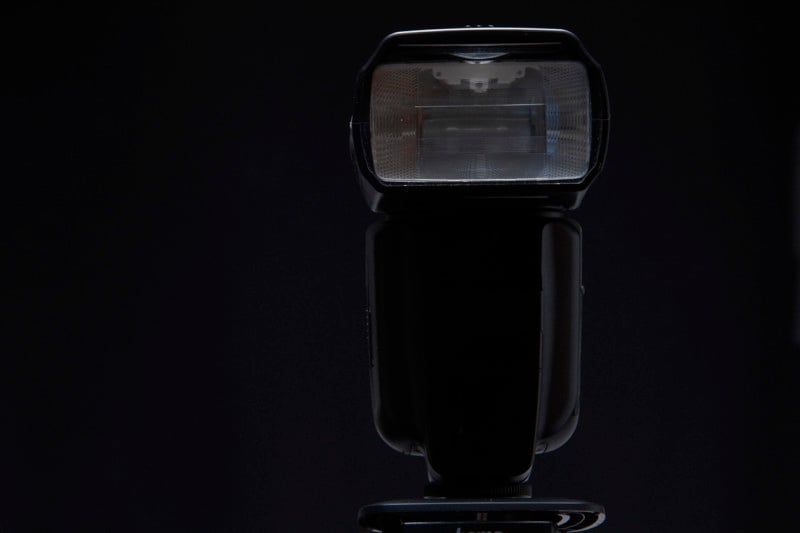
However, there is a problem, the reflections in the body are not the same. This, while being a small detail can be a crucial one. In order to make my reflections the same, I introduce two white walls into the frame: a collapsable reflector and a foam board. It doesn’t make a huge difference what you use as long as they have a similar texture and are white.
Here is the final result (straight from camera):
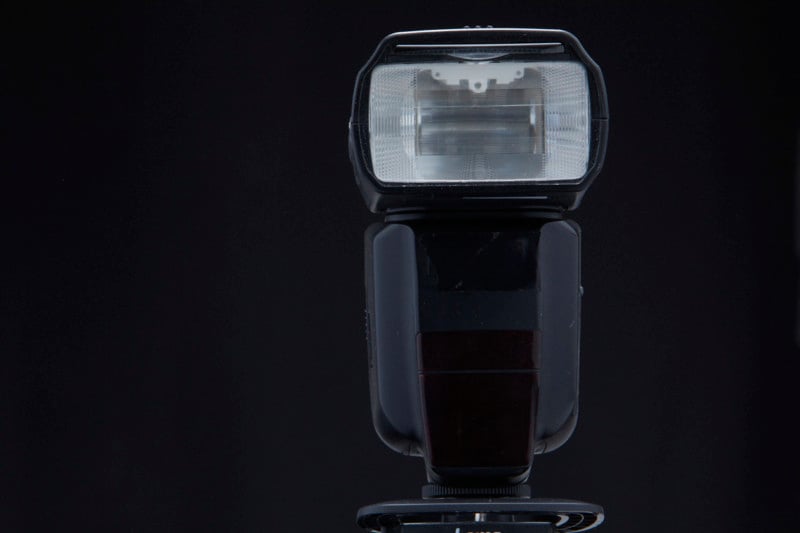
This achieves the goal, again with one single light.
Background Considerations
It is important to know that not all black is equally good at absorbing light. For example, black paper, although being dark is pretty useless if the light hits it. It produces a huge amount of diffuse reflection and therefore will show up as dark grey.
If you want to photograph an object that is resting on a black background, you may want to pick out something that produces direct reflection, or polarized reflection. For this reason, acrylic black is a great choice for such applications.

Closing Thoughts
The setups shown here are products of a different approach to light, one that doesn’t think in terms of setups. While not better than the approach in terms of setups, it does allow me to be freer with how I make light.
In simple terms, if you think of light as an instrument and not a setup you will be able to craft complex setups even from one light and simple modifier. Naturally, feel free to use the setups used in this article — however, they are crafted to serve a specific purpose, not to taken from the Internet and used as-is.