How to Modify a Monitor Arm into an Overhead Camera Mount
Though there are multiple off-the-shelf solutions for over-head camera angles, DIY-er Jay Doscher decided that there was a better way. By combining a VESA mount monitor arm with a few “universal” parts along with some 3D printed pieces, he made his own.
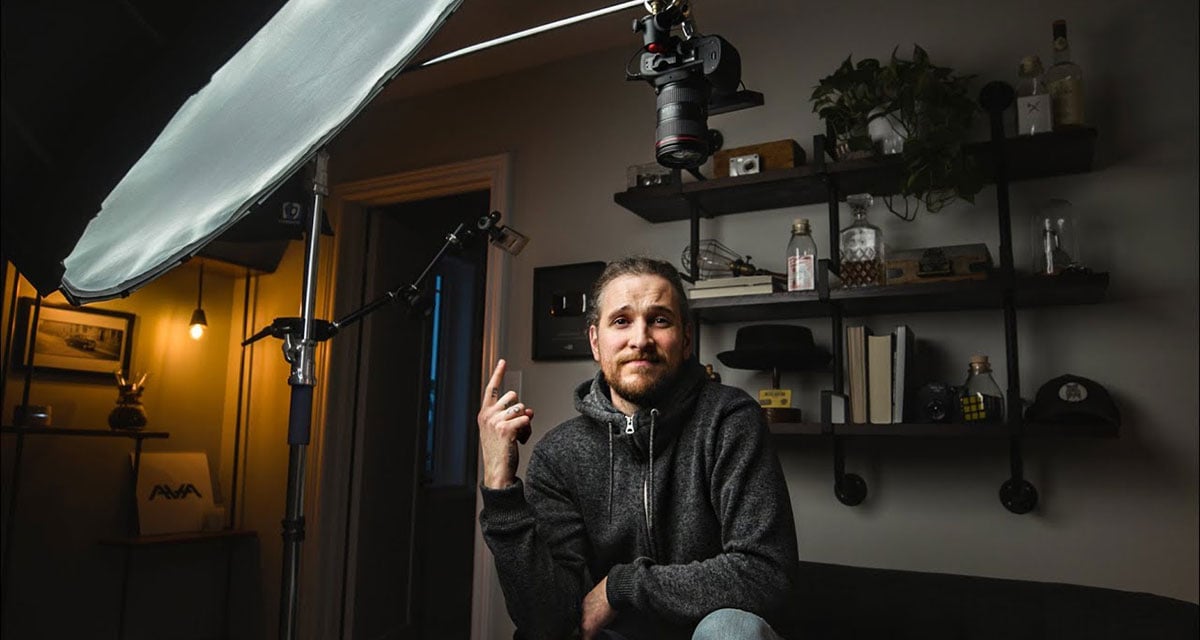
Initially, Doscher wanted to build his own overhead camera mount so that he would have an easy way to show a top-down angle whatever project he was working on. On YouTube, it’s pretty common to find nicely-framed top-down camera angles for unboxing or maker videos (Doscher specifically references Adafruit’s Show and Tell videos). Especially on a webcam, it can be near impossible to show others what you are working on without a secondary overhead camera angle or the awkward shuffling of your main camera, handheld above your desk.
“For those of us creating video content at home, webcams or full-fledged cameras are the norm. Getting your face on camera is pretty easy,” Doscher writes. “For those of us that create objects we want to share, getting those on camera can be much harder.”
While photographers are used to tripods with overhead angle capabilities, small home office spaces aren’t really the most conducive to a tripod setup and are especially hard to keep tidy if you don’t want to constantly be setting up and tearing down camera rigs. Outside of tripods, other overhead camera rigs can get expensive or even more impractical, which is a significant barrier for the average person.
“I’ve seen all kinds of clever camera stands that look down on the entire desk,” Doscher says. “But they take over your desk pretty quickly- so unless you’re a full-time YouTube person that’s not really great.”
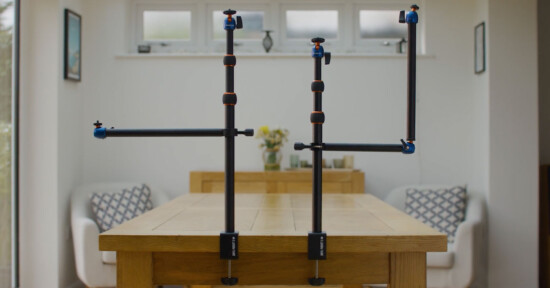
Doscher’s much more elegant desk-ready solution uses a VESA mount monitor arm at its core.
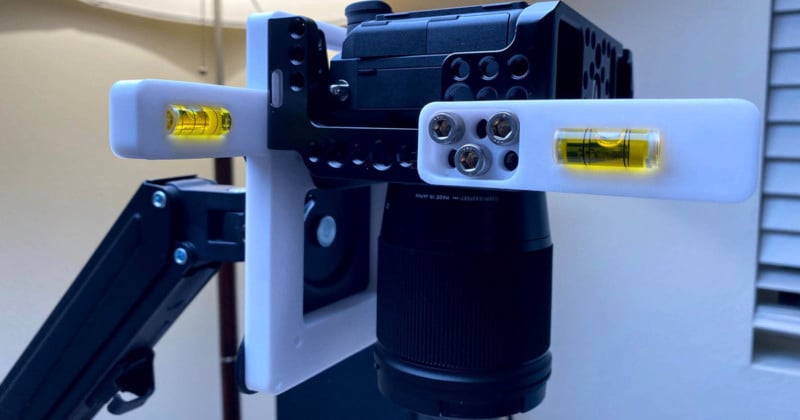
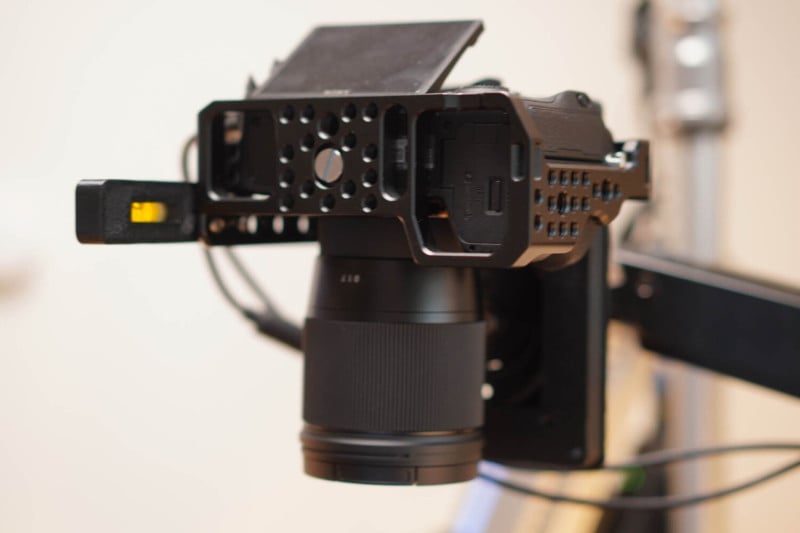
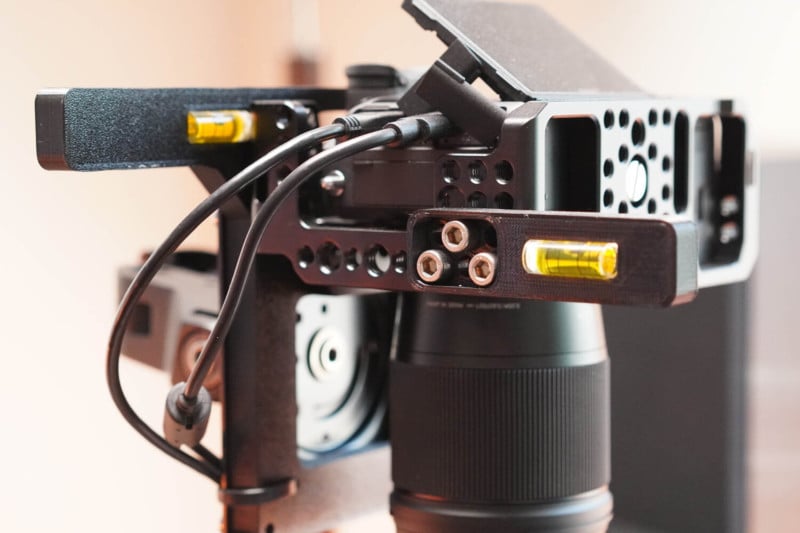
“The idea is pretty simple- a 3D printed mount that attaches to a heavy-duty PC monitor arm. My design supports a full-size Sony mirrorless camera, but you could easily design your own to do the same thing. Given how many different cameras there are I could only design for what I have, so you will need to either invest in the same gear I did, or simply make your own design.”

Below is Doscher’s full parts list for this setup:
My Camera Specific Parts:
The “universal” parts that should work with your build:
- Heavy Duty Monitor Arm
- M5x10mm Socket head screws to attach the monitor arm to the 3D printed base plate – 91292A124 on McMaster Carr
- 1/4” Socket head screws to attach the “plastic parts to the camera frame – 92196A537 on McMaster Carr
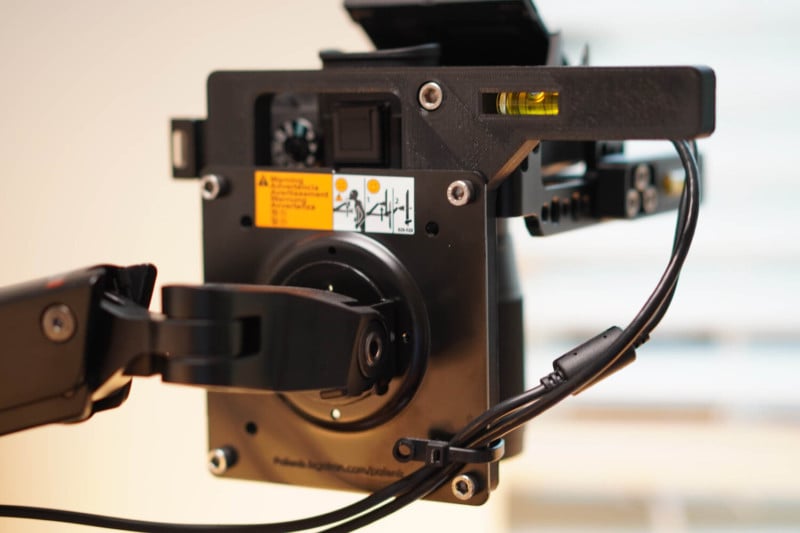
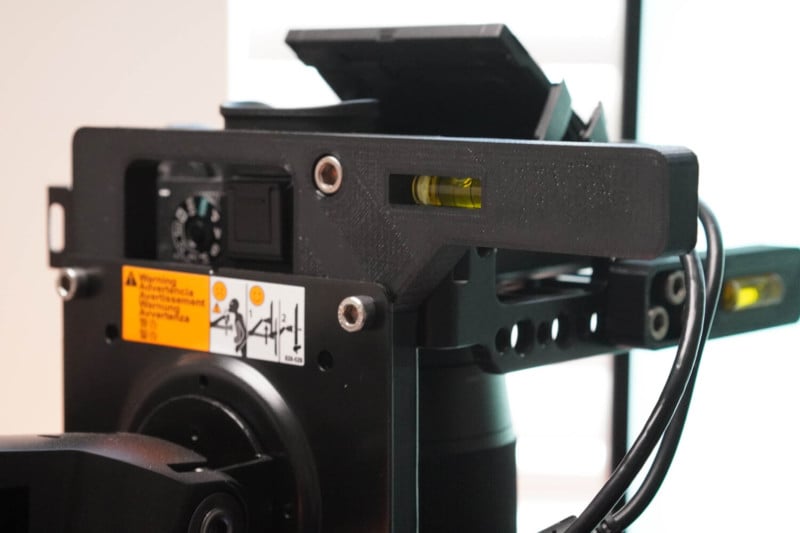
- Two bubble levels to snap-fit into the project, one into the base plate and one into the handle – 2148A66 on McMaster Carr
As far as the 3D-printed parts, Doscher has uploaded the two files here:
If you don’t own a 3D printer, you could theoretically build these parts from wood as well.
The 3D printed parts that Doscher designed fit right into both the camera cage and the VESA monitor arm, so once all the parts have been compiled, putting together the finished product is pretty straightforward.
“The files are specific to this camera frame and camera, but the bolt pattern for the VESA mount is the same,” Doscher writes. “I hope this inspires you to design your own!”
For more from Doscher, you can see more of his projects on his website.
(via Hackaday)
Image creditsPhotos by Jay Doscher and used with permission.