How to Get Professional Results with Photoshop’s AI Sky Replacement Tool
One of the major updates to the latest version of Photoshop is the addition of Sky Replacement: a tool that has the potential to save you a ton of time when editing your landscape images. But as Aaron Nace explains in this video, this AI-powered tool requires a bit of thought if you want to get professional results.
AI-powered photo editing tools are always sold as “one click” or “a few clicks” solutions that can transform a photo with next-to-no input from you. But even with the most advanced machine learning available, no automated tool can generate fool-proof results without a little bit of thought from the creator on the other end of that mouse.
Photoshop’s new Sky Replacement tool is a great example of this principle in action, as PHLEARN‘s Aaron Nace explains in the video above.
In the course of testing out AI Sky Replacement and showing you how it actually works inside Photoshop, Nace takes plenty of time to explain how to analyze the lighting in your original photo and create the most realistic composite possible. In his example image, the sun is clearly coming from the top left, so dropping in a sky where the light is clearly coming from the right would just look wrong:
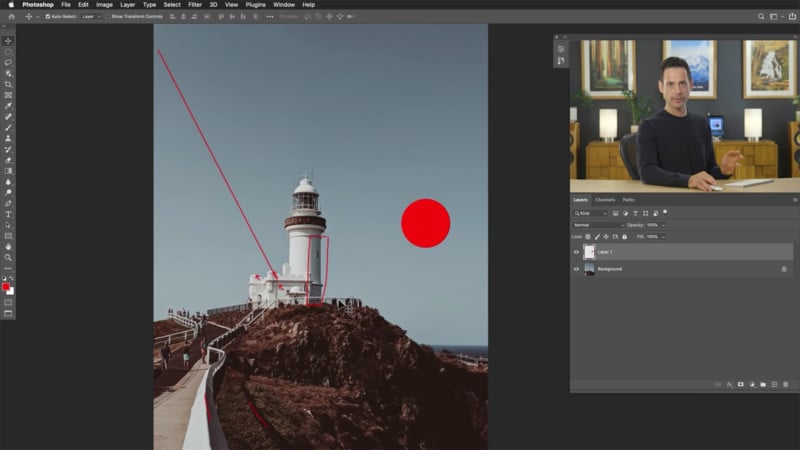
“If I chose a new sky and I composited this together beautifully with perfect seams, but the sun was [in the wrong spot], it would not look right no matter how technically perfect you made this photo,” explains Nace. “The sun would be in the wrong place with the directionality of the shadows.”
This sets up the rest of the video, in which Nace explains how to use the new tool, refine the automatically generated edges, and pick a sky that has a chance of looking realistic.
He shows you how to adjust the various settings available like brightness, color temperature, and scale of the sky you just dropped in; how to alter the character of the scene re-lighting by changing the Blend Mode (Screen or Multiply) and playing with the Lighting Adjustment slider; and, finally, how to output you results.
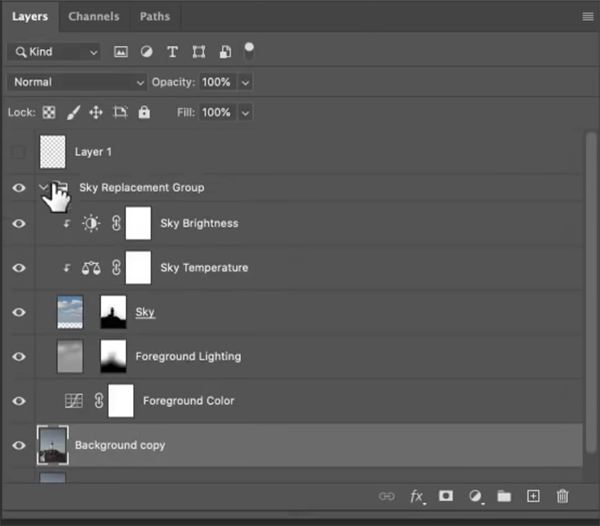
For that last setting, the new sky will either be placed in “New Layers” or “Duplicate Layers”—but either way, you’ll get a new Sky Replacement layer group that will contain all your adjustments separated out so you can keep fiddling with the masks, adjust your settings, or add more adjustment layers after the fact.
As Nace demonstrates, even an AI tool requires a little bit of work to get the final product looking just right. But if you put in that work, you can get the same results you would have gotten from a manual sky replacement in less than half the time. That’s the real benefit of an AI-powered tool like this—not a “one-click” edit, but a much faster way to get professional results.
Check out the full tutorial/test/demo up top to see Photoshop’s new Sky Replacement in action for yourself. And if you want to watch more Photoshop tutorials like this one, you can find lots more on the PHLEARN YouTube channel.