Photographer Creates Bullet-Time Rig with 15 Raspberry Pi Cameras
Famed bullet-time expert Eric Paré decided to challenge himself by building an experimental bullet-time rig using the Raspberry Pi Camera Module V2, a tiny 8-megapixel camera. While he encountered a few problems with the rig, he eventually got the 15 cameras working together without using custom electronic components.
In the 5-minute video above, Paré explains how he turned the set of tiny cameras into a functional bullet-time array. He usually uses a large number of DSLRs to create some incredible bullet-time effects (which you can see in action on his YouTube Channel), and while he notes that the Raspberry Pi experiment here is unlikely to replace that rig, it was a fun challenge for him to tackle.
In short, he was curious how far he could push the small cameras and what kind of image quality he could expect. “My main interest here is the size of them as they can be put super close to each other, giving me my best density ever on a multi-camera structure,” he said.
Initially, he struggled to get a good result because the cameras are mounted on thermal paste and cannot be placed with the precision required for a smooth bullet-time effect. That lack of precision resulted in a very shakey result. “The problem is that these are very wide lenses, and with the distortion, I really need to have all of the cameras to look at the same center spot,” Paré said.
Undeterred, Paré figured out a solution. Instead of mounting the camera on the thermal paste, Pare instead got rid of the paste entirely and attached the camera to the small boars directly. While not perfect, it resulted in a dramatic improvement.
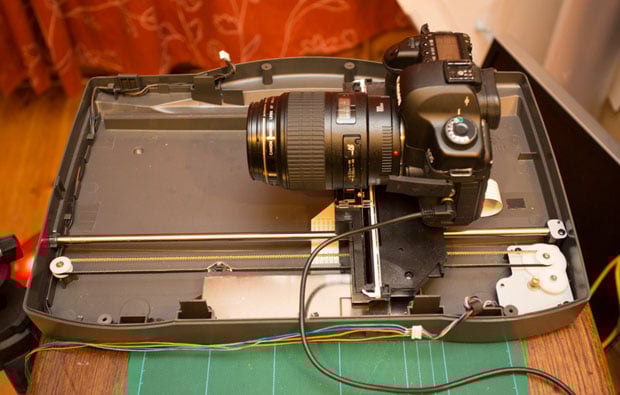
“For all of my tests using continuous light, I’m using 15 PiCam on 15 Raspberry Pi 3b+ with no custom electronic components. Each Pi is sending its data through ethernet cables to the switches to the laptop,” Paré explained. “My trigger is a simple Bluetooth PowerPoint presenter. But for my shots using an external strobe, we had to design a little PCB to send the signal to my speed light. The board is on the last Pi and linked to the flash via an audio cable and a hot shoe adapter.” If you were thinking of mimicking his setup, Pare mentions that any kind of flash can work in this application.
While satisfied with the result, Paré is not done tinkering with Raspberry Pi cameras. His success with the Module V2 led him to start experimenting with the Raspberry Pi High Quality Camera, which allows for interchangeable lenses. Given what he was able to accomplish with the V2, he should soon be able to show his results with the more powerful camera.
You can follow Pare on his YouTube channel where he says his experiments with the High Quality Camera will be posted in the coming weeks, and also his Instagram where he shares some of his incredible art.