How to Calculate Exposure Time with a 10-Stop ND Filter
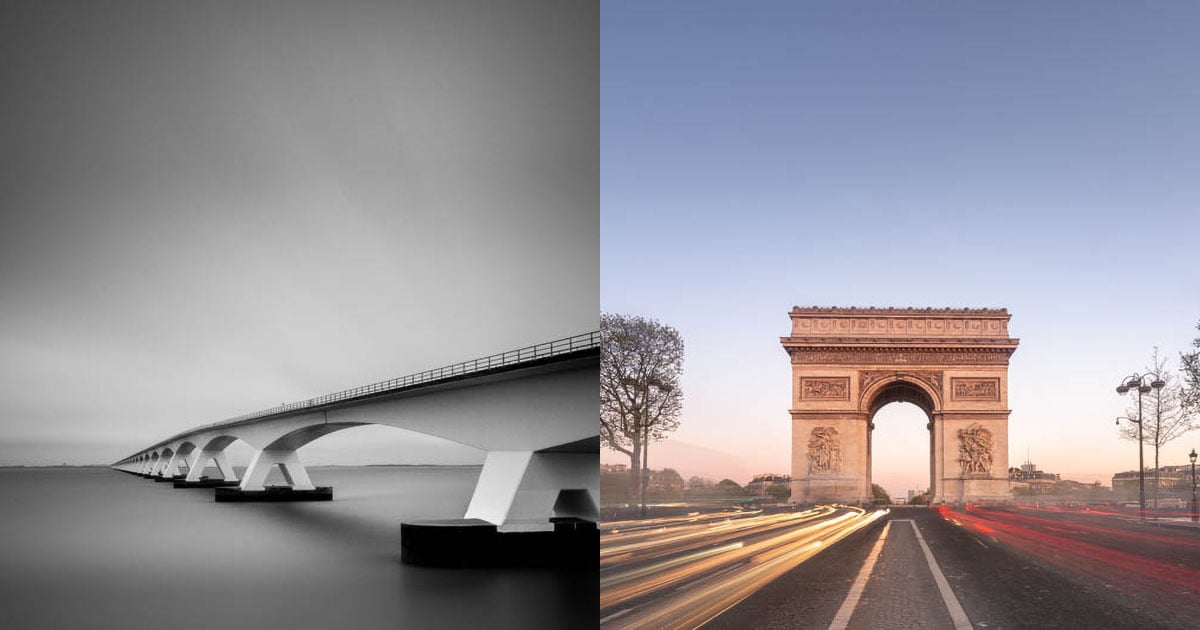
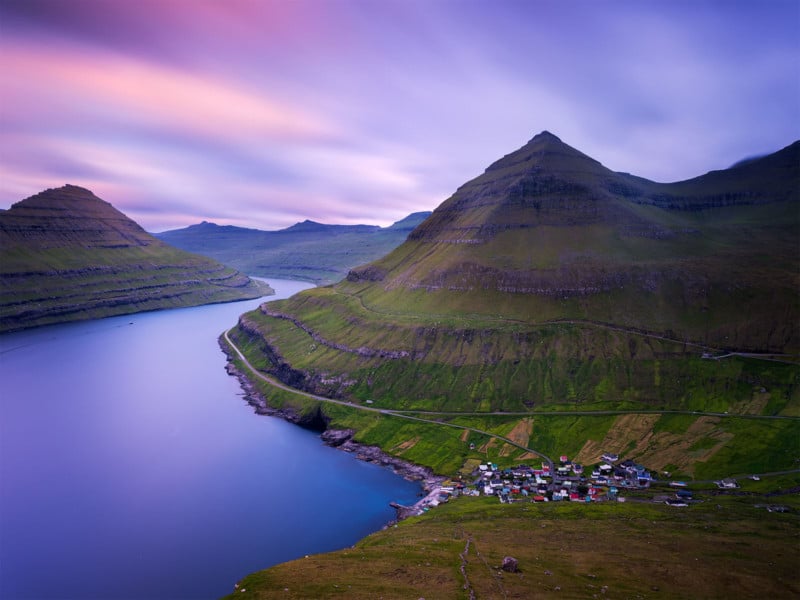
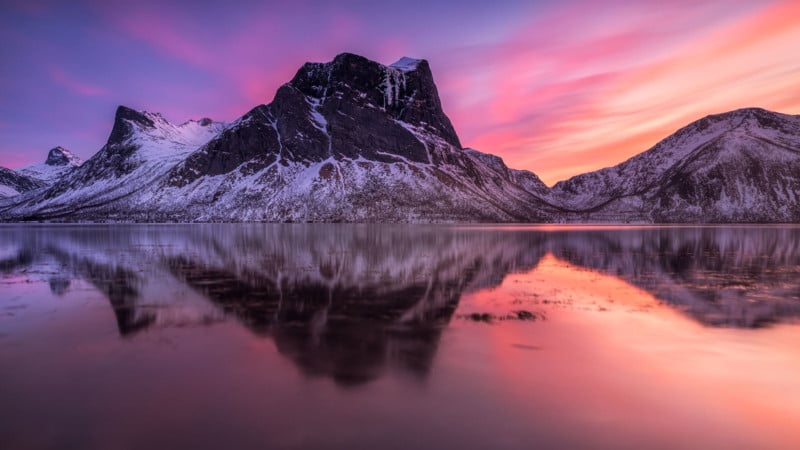
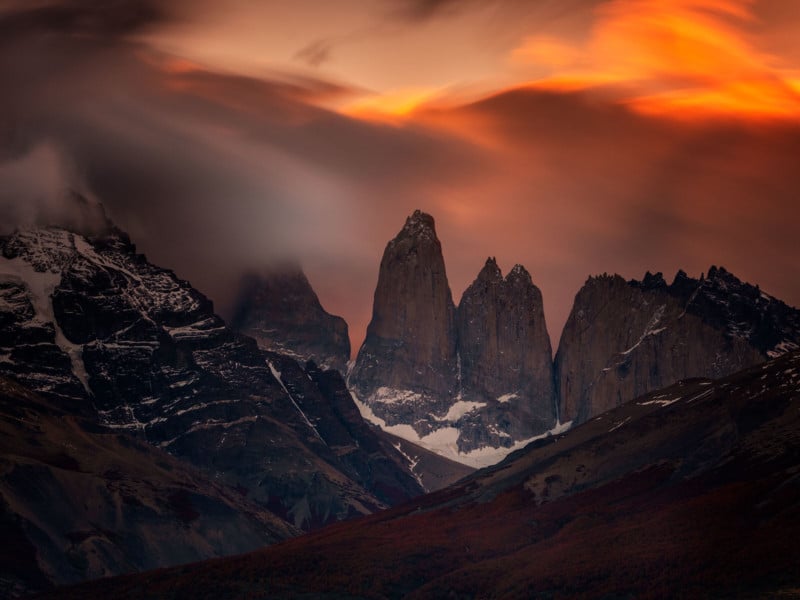
Have you ever seen long exposure images shot using 10-stop ND filters? They are visually energetic and dynamic due to the motion blur caused by the moving clouds over a long duration of exposure.
There are various ways to calculate the exposure time, especially when using high strength ND filters like a 10-stop ND filter, when the exposure metering is beyond the camera’s capability. Here are a few techniques that are generally used for exposure time calculation:
- Simple math
- Exposure calculation table
- Exposure calculator apps
- Reverse calculation
- The “1-second exposure” technique
In theory, techniques 1-3 should give very precise exposure times, but this is not always the case when using higher strength ND filters like a 10-stop ND filter. This is simply because 10-stop ND filters are not always 10-stop for all brands — they are often off by a stop due to the manufacturing difficulties. The discrepancy can compound at long exposure times and lead to inaccurate exposures when using formulas/calculators.
Technique 4 and 5 are particularly useful in this case, especially if you’ve just bought a brand new 10-stop ND filter.
A very important consideration when doing long exposure photography is the change of light, especially during sunrise and sunset when the light changes very quickly over a short period of time. This is quite noticeable when you are making extremely long exposure, say 5 minutes or longer.
During sunrise, the light is getting brighter, and there might be a risk of getting an over-exposed image. During sunset, the light is getting dimmer, and there might be a risk of getting an under-exposed image. This should be taken into consideration in order to get the correct exposure during these times of the day, i.e. by decreasing the exposure time during sunrise and increasing the exposure time during sunset accordingly.
1. Simple Math
Sometimes simple math will do the job very well! Here’s the formula to calculate final shutter speed:
For a 10-stop ND filter, if the base shutter speed (without filter) is ¼ seconds, with the use of 10-stop ND filter, the exposure time becomes ¼ x 210 = ¼ x 1000 = 250 seconds. To simplify the calculation, we always assume that 210 is equal to 1000 instead of 1024 since the difference is negligibly small.
For a 6-stop ND filter, if the base shutter speed (without filter) is 2 seconds, with the use of a 6-stop ND filter, the exposure time becomes 2 x 26 = 2 x 60 = 120 seconds. Similarly, to simplify the calculation, we assume that 26 is equal to 60 instead of 64.
As for a 6-stop ND filter, you may need to calculate the exposure time under low-light conditions when the camera metering is no longer capable of estimating the shutter speed (especially if it is over 30 seconds for most cameras).
To make the calculation fast and easy for a 10-stop ND filter in the field, you can adjust the aperture and ISO setting to make the base shutter speed an easy number, say 1/10 seconds (1/10 x 1000 = 100 seconds for 10-stop ND) or 1/20 seconds (1/20 x 1000 = 50 seconds for 10-stop ND), to speed up the mental calculation.
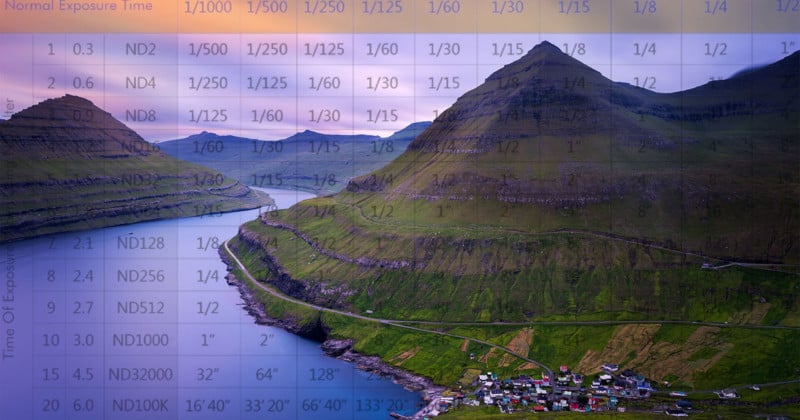
2. Exposure Calculation Table
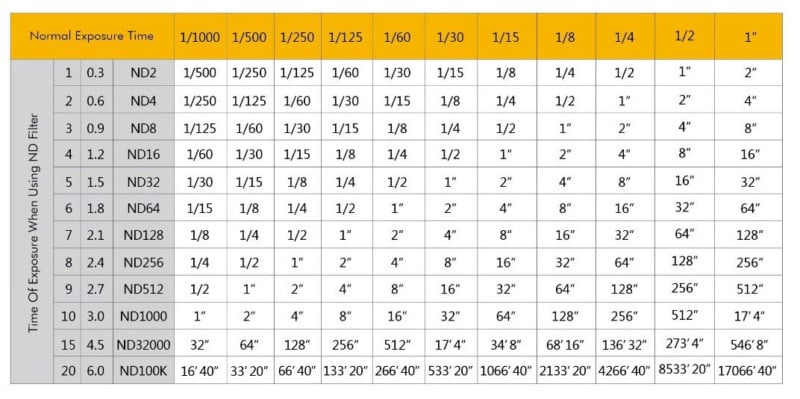
You can use the table above or compile your own exposure calculation table based on the formula in the above section (or download the chart online by simply searching “long exposure calculation table” or “long exposure calculation chart”). This is a useful table in which you can find the appropriate shutter speed by choosing the base shutter speed and the strength of the ND filter used.
It is very easy to use this table. First check the base shutter speed (without filter) in the first row, then go all the way down to the intersection with the column of ND filter, and this is your final shutter speed.
For example, the shutter speed without a filter is ¼ seconds, and if you are going to use a 10-stop ND filter, go down to the intersection with the 10-stop and you will find 256 seconds as your final shutter speed.

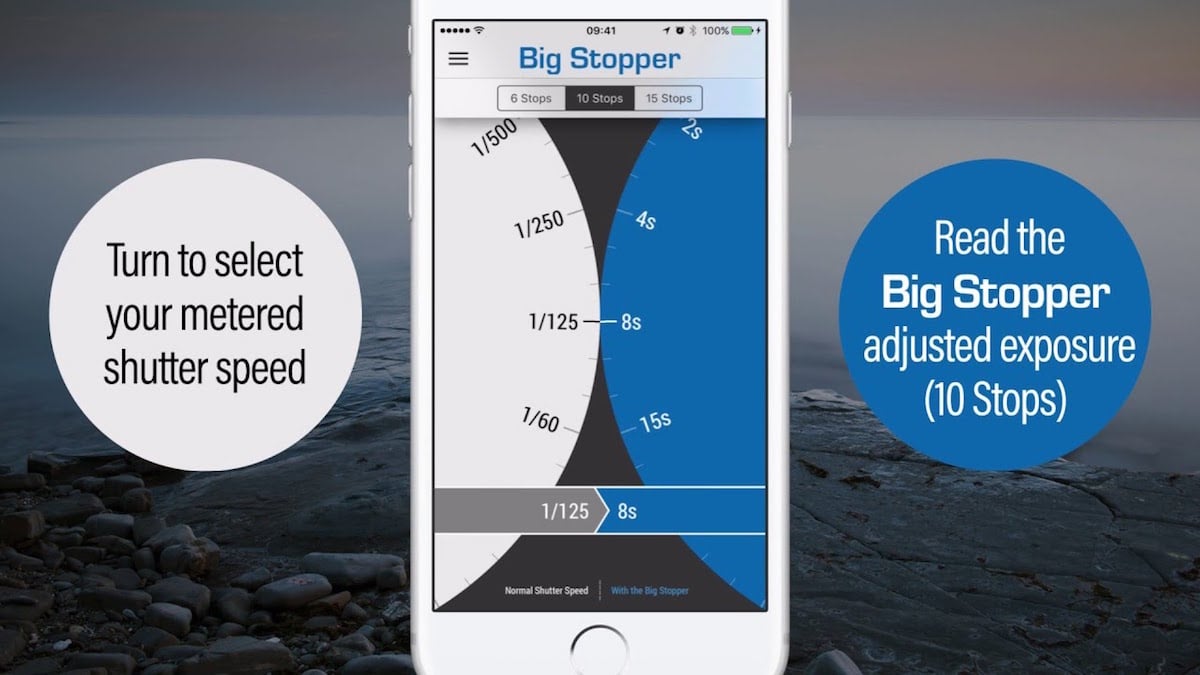
3. Exposure Calculator Applications
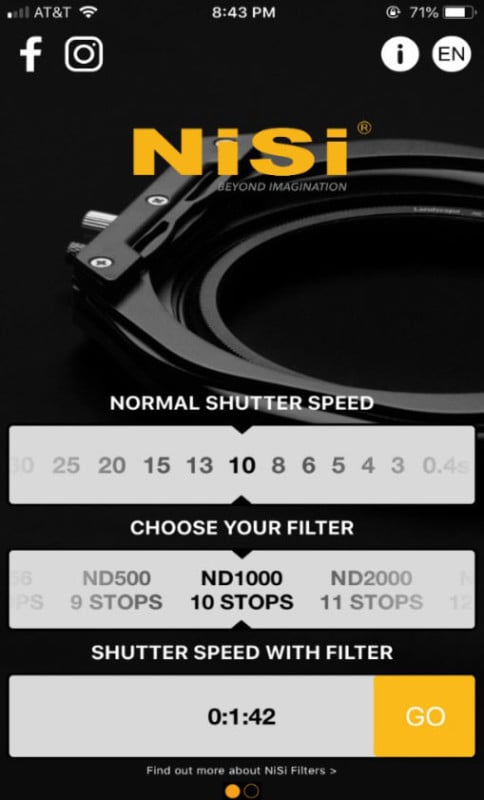
Everyone has a mobile phone, therefore photography applications are getting popular these days. There are plenty of exposure calculator applications available for both Apple and Android, and most of them are free to download.
A few are NiSi Filters, Long Exposure Calculator, LongShot, Exposure-Calculator, ND Calculator, and Slower Shutter Exposure Calculator. Some apps like PhotoPills also feature an exposure calculator as part of the functionality.
The use of these applications is very straightforward: just choose the base shutter speed (without filter) and the strength of the ND filter, the apps will automatically calculate the final shutter speed. For most of the apps, if the final shutter speed is over 30 seconds, the countdown timer automatically appears. The countdown timer is convenient for many camera brands without a timer when using the bulb exposure mode.

4. Reverse Calculation
First, set the shutter speed to 30 seconds, ISO 100, and the appropriate aperture. With the use of a high strength ND filter, the camera metering may indicate the shot is under-exposed. Then, increase the ISO until the camera metering shows that the shot is well exposed (EV 0) and count the number of stops increased in ISO. Adjust the ISO back to 100. Finally, set the camera to B (bulb) exposure mode, increase the shutter speed to compensate for the stop difference in ISO.
For example, the shot with 30 seconds is well-exposed at ISO 1600, which is a 4 stop increase from ISO 100 (1600 > 800 > 400 > 200 > 100). Therefore, the final shutter speed is a 4 stop increment of 30 seconds (30s > 1m > 2m > 4m > 8m) which is 8 minutes at ISO 100.

5. The “1-Second Exposure” Technique
Here’s another way you can figure out the precise exposure within a second. This technique was first described by Sam Wang in his article published in 2008.
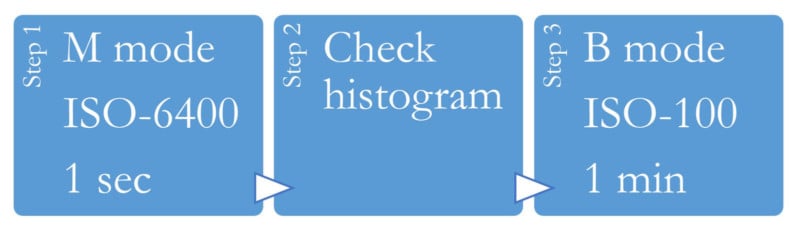
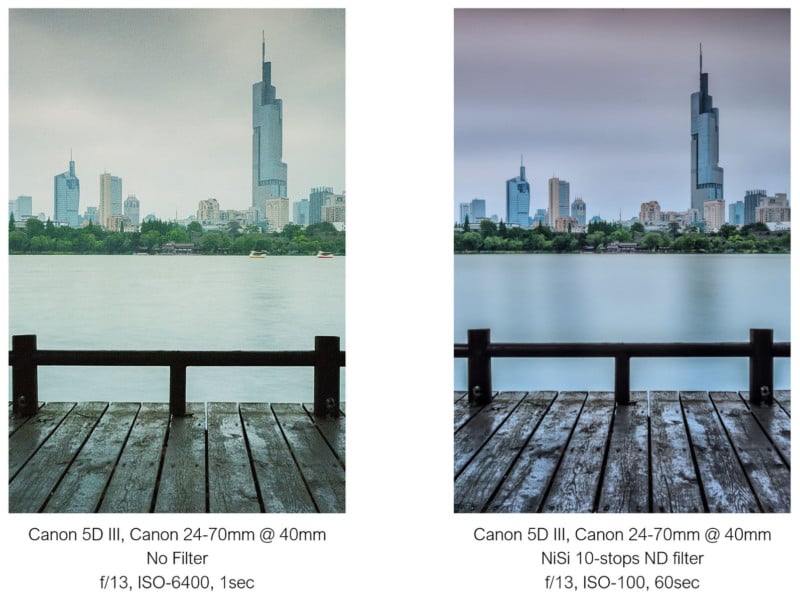
First, take a test shot by setting your camera to M mode (manual mode), ISO 6400, 1 second (below left). Then check the overall exposure by viewing the histogram to make sure the test shot is well exposed. If yes, follow by setting your camera to B mode (bulb mode), ISO 100, 1 minute, with the same aperture used in the test shot (below right).
What if the test shot of 1 second is underexposed? Adjust the exposure time to 2 seconds at ISO 6400, which corresponds to 2 minutes at ISO 100; 3 seconds correspond to 3 minutes; so on and so forth. Same for non-integer, for instance, 1.5 seconds correspond to 1.5 minutes. What if it is over-exposed? Adjust the exposure time to 0.5 seconds at ISO 6400, which corresponds to 0.5 minutes at ISO 100.
The principle of the “1-second exposure” technique is simple if you understand the principle of the exposure triangle. There are 6 stops from ISO 6400 to ISO 100 (6400 > 3200 > 1600 > 800 > 400 > 200 > 100). A 6-stop decrement results in 26 = 64 times decrease in exposure. On the other hand, 1 minute is 60 times longer than 1 second. Therefore, a 60x increase in exposure time compensates for a 60x decrease in ISO sensitivity.
What if the exposure time is way longer than desired, let’s said 10 minutes and you want to make it shorter? You can easily play around with ISO or aperture. For example, if the exposure time is 10 minutes at ISO 100, you can decrease the exposure to 5 minutes at ISO 200 or 2.5 minutes at ISO 400; if the exposure time is 10 min at f/16, you can decrease the exposure to 5 minutes at f/11 or 2.5 min at f/8.
The “1-second exposure” technique can also be used with a 6-stop ND filter in low-light conditions when it is impossible to estimate the exposure with camera metering, especially the resulting exposure time is more than 30 seconds for most cameras. It can also be used on higher strength ND filters, like a 15-stop ND filter.
You can even use the “1-second exposure” technique in night photography when no ND filter is used. Unfortunately, most people are still practicing trial-and-error to obtain perfect exposure in night photography.