How to Remove a Chain-Link Fence in Photoshop in 3 Easy Steps
If you ever shoot a photo through a chain-link fence (at a zoo, perhaps) and want to erase the fence from the shot, here’s a 15-minute tutorial by PiXimperfect that shows how you can do it in Photoshop in 3 simple steps.
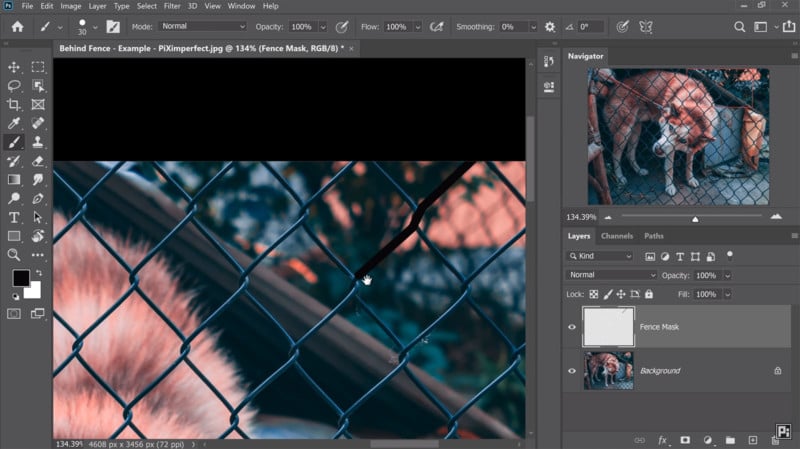
Step #1: Paint Over the Fence
Create a new layer for the fence mask, select a hard brush that’s just a little wider than the wire diameter of the fence, and paint over all the fence. This is the time-consuming part, but you can hold shift and click endpoints of the fence instead of tracing it by hand.
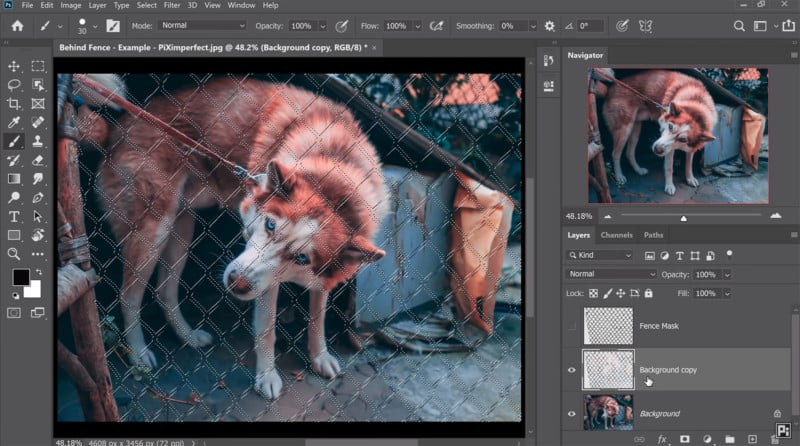
Step #2: Apply Content-Aware Fill
Use the fence mask you’ve created to select just the fence and then let Photoshop’s Content-Aware Fill do its magic.
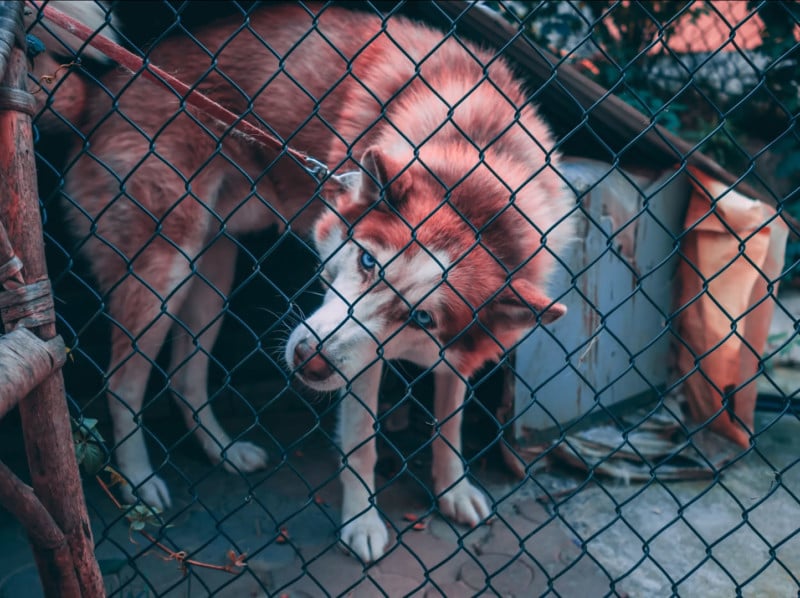
Step #3: Making Minor Adjustments
You may need to zoom in to the shot and correct areas where Content-Aware Fill did a less-than-perfect job. You can use tools such as the Healing Brush or Clone Stamp tools to fix things like hard edges.

Once you’ve nailed down this process, the results can be quite amazing:

Those are just the three basic steps outlined by PiXimperfect, but watch the video tutorial above for a step-by-step demonstration of how each of them is done (including helpful tips, tricks, and shortcuts you can use to be more efficient in your work).
And if you enjoyed this tutorial, be sure to subscribe to PiXimperfect’s extremely popular YouTube channel for more videos like it.
(via PiXimperfect via Fstoppers)