Street Photography Compositions with the Ricoh GR III
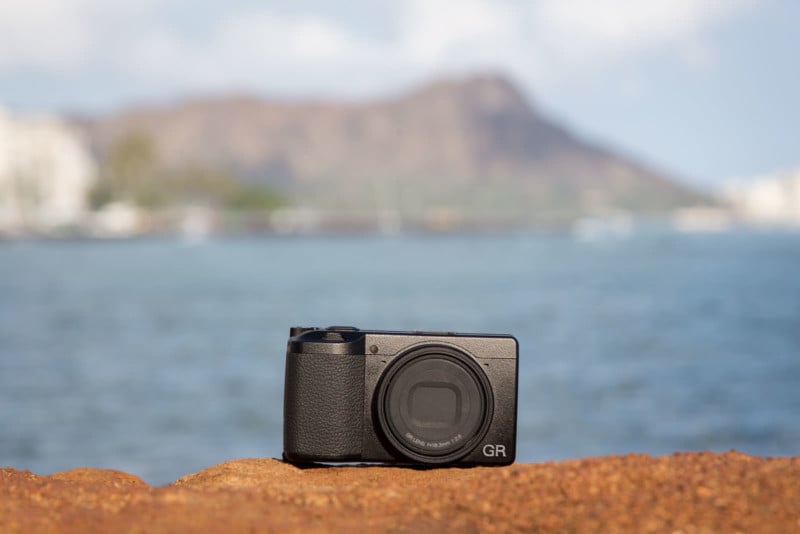
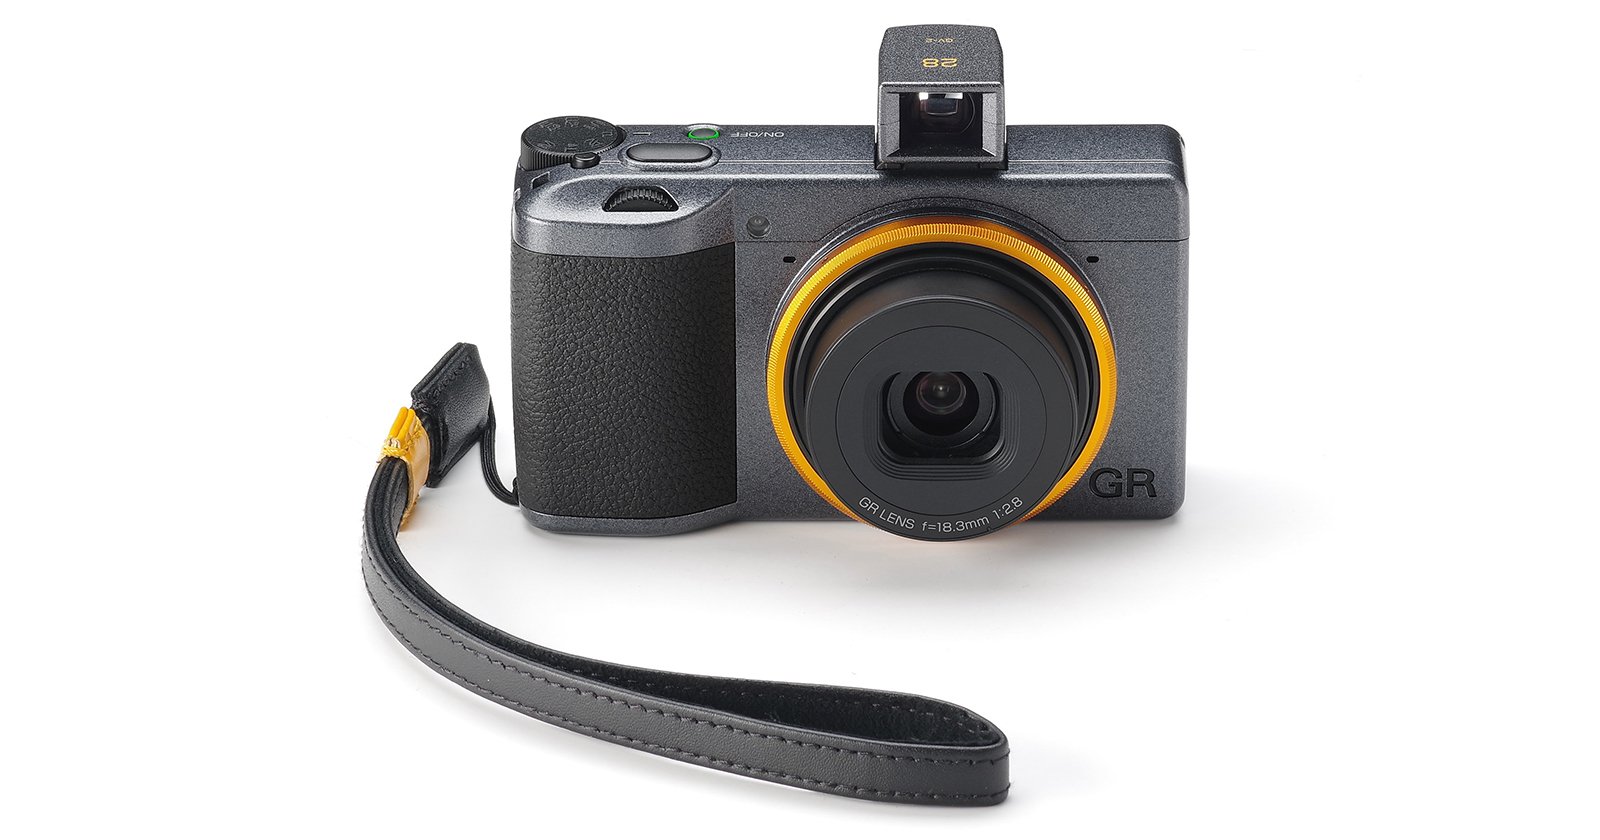
At first glance, all we see is a dinky point-n-shoot camera; not much to it. It slips inside my front pocket, I mean, how powerful can it be? Well, photographers shouldn’t be fooled by its size and minimalism; like many of our subjects in the street. The Ricoh GR III is called a “wolf in sheep’s clothing” for a reason.
In the video below, you’ll see how I use this little camera to try and capture some interesting street photos around Waikiki, Hawaii. While I’m putting the Ricoh GR III to the test I talk about composition techniques, dynamic symmetry, meet interesting people, and have tons of fun while I’m doing it.
Camera Grid
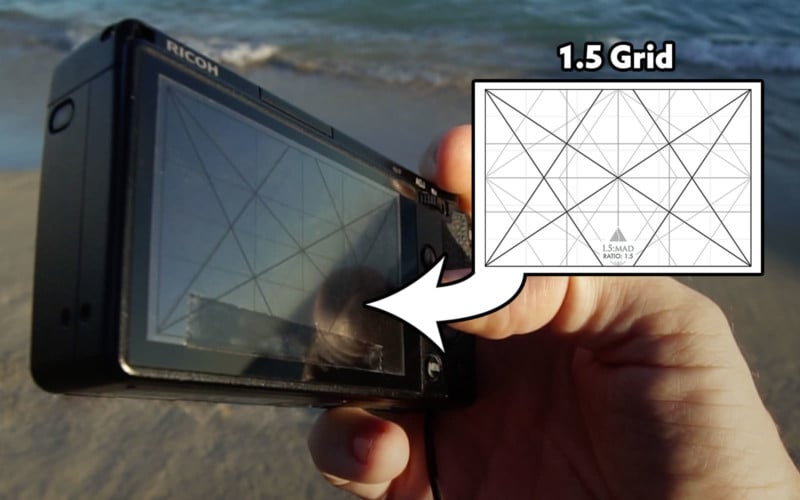
The Ricoh GR III has two grids available to use; Rule of Thirds and another one with two diagonals. These aren’t really what I’m needing to help organize the compositions I want to make, so I have the 1.5 dynamic symmetry grid taped onto my LCD.
If this talk about dynamic symmetry sounds confusing to you, no worries. This is just a different kind of grid that prioritizes diagonals rather than horizontals and verticals (i.e. rule of thirds grid). It’s much different than the two grids provided within the camera.
For any street photographers wanting to start using dynamic symmetry, start slow. Start with the “Baroque Diagonal” which is the diagonal that runs from the lower left corner to the upper right corner. Super simple!
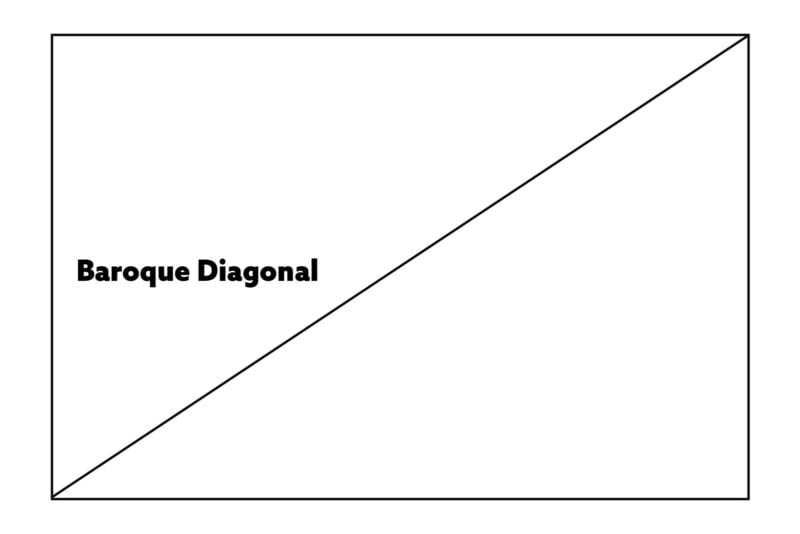
Line up the subjects limbs or part of the landscape to the baroque diagonal and see what you get. Try to capture more diagonals in general because they will add a sense of movement to the image, and potentially create unity, rhythm, and strength. If you’re wanting a perceivably calmer scene, by all means, use straight horizontals or verticals.
Ok, let’s get into the fun stuff!
What I’m Searching For
As I’m walking around the beach with the Ricoh GR III, I’m always looking for color, interesting subjects, dominant diagonals, the list goes on and on. We won’t cover all of the design techniques in this video/article, but we’ll cover a handful that will definitely get you excited about shooting.
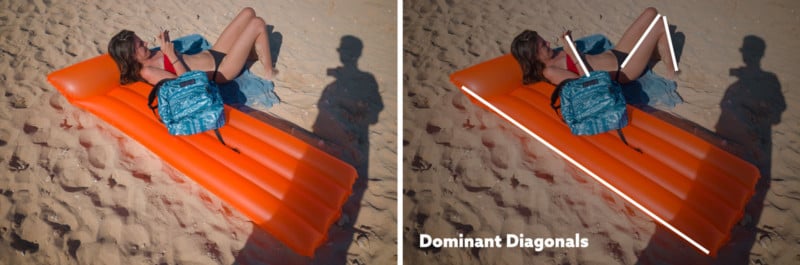
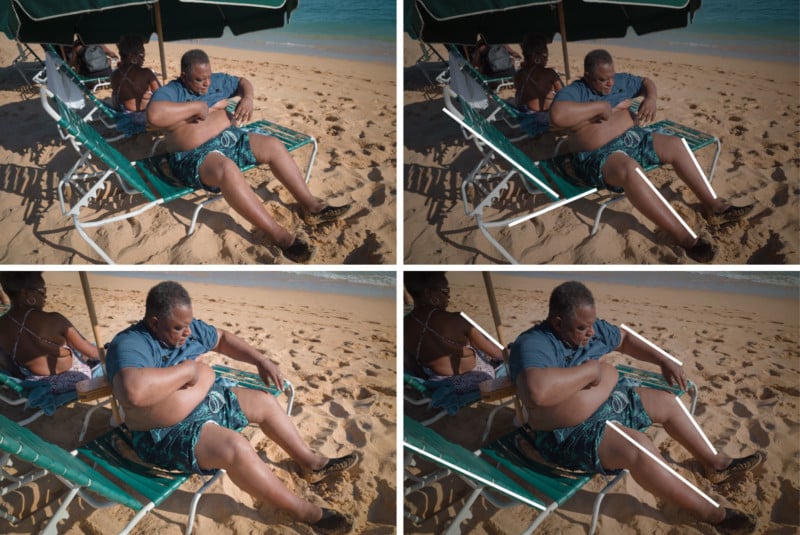
In this first image, I saw the bright orange color with the blues and red. That’s initially what got my attention, plus the girl laying on the raft was pretty humorous to me. Another thing that caught my eye was the diagonals being created from the float and her pose. I headed towards her, held out the camera, looked at the grid, then took the shot.
It was about 4:50pm, so the sun was making my shadow appear in some of the photos. Not a bad thing, it’s a trade off for having nice light, but as the video progresses I do my best to omit my shadow from the images.
Not all of these images will be keepers by any means, but rather, attempts to make mistakes. As I make more mistakes, I’ll learn from them and slowly grow into a better photographer. If we’re not shooting, we’re not making mistakes and that can be detrimental to our development.
Note: The full grid was used on my camera and shows in the video, but for all of these examples we’ll only see the dominant diagonals within the scene. This keeps it simple and emphasizes the “geometry” I’m always on the lookout for. The grid is an important tool I use for my photography but is beyond the scope of this article.
As we continue to look at the images captured, we’ll see how the limbs of the subjects can play a huge role in creating diagonals.
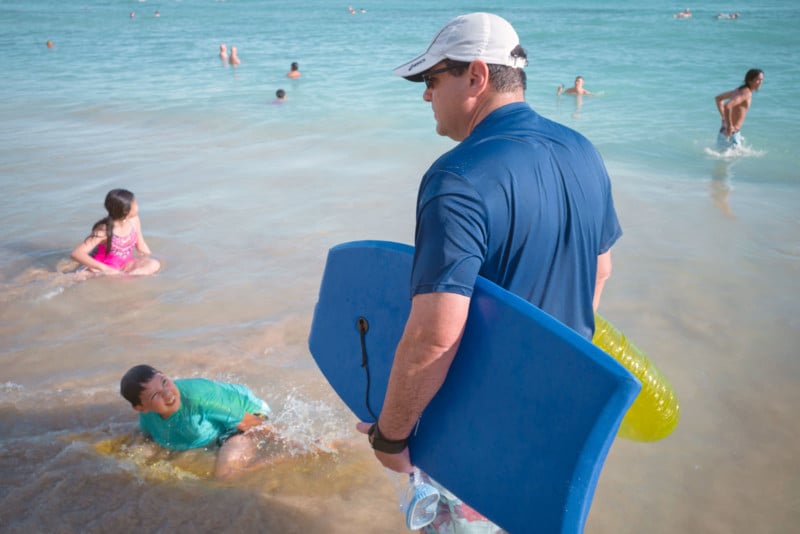
In the video, I rush to snag these next photos. Capturing a bit of humor in an image seems to be a goal for many street photographers, and when we can combine it with a nice composition it’s even better. We can see how the man’s leg was being targeted for the dominant diagonal. The folding chair also does its job to create more movement within the scene.
Camera Settings
My settings in the sun are set to 1/1000, f/5.6, AUTO ISO and the Ricoh GR III has an auto ND filter that comes on when necessary. The shutter speed is high enough to freeze the subject without motion blur, and the aperture is wide enough to capture some depth in order to have the background as part of the composition. The ISO is set to auto just in case the sun goes behind the clouds and I’m too involved with shooting to make the appropriate adjustments. All-in-all, you should use the settings that work best for your style of shooting and the environment that surrounds you. I like to be in control over the motion and the depth of field, while ISO isn’t a huge concern.
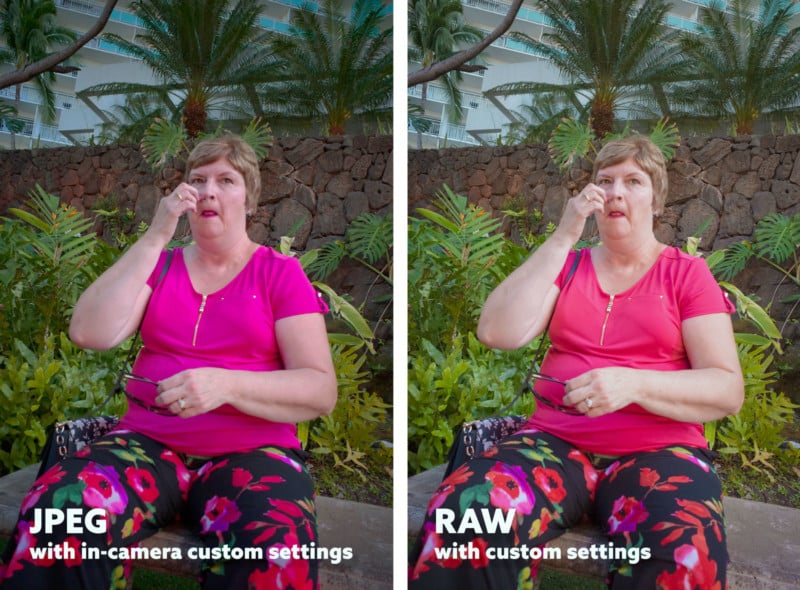
So, how does the Ricoh GR III do with JPEG and RAW?
Since the camera is rather new, I’m still messing with the presets, but the “Positive Film” seems to be the look I like most. I’ve also created custom settings which can be seen in the JPEG below (Custom Image Control: Standard, +2, -4, 0, -3, -2, +4, -1, -2, +1). Yet, even though I find the JPEG version appealing, I can produce something even better with the RAW file (seen on the right). So yes, the Ricoh does great with both formats, and what you choose is up to the workflow you want to adopt.
It’s much quicker to share the JPEG images directly from the camera using the ImageSync App, rather than processing the RAW files by hand or with presets. It boils down to quality differences and time.
Oh, and the sharpness within the photos is great, so no problems there.
Focal Length
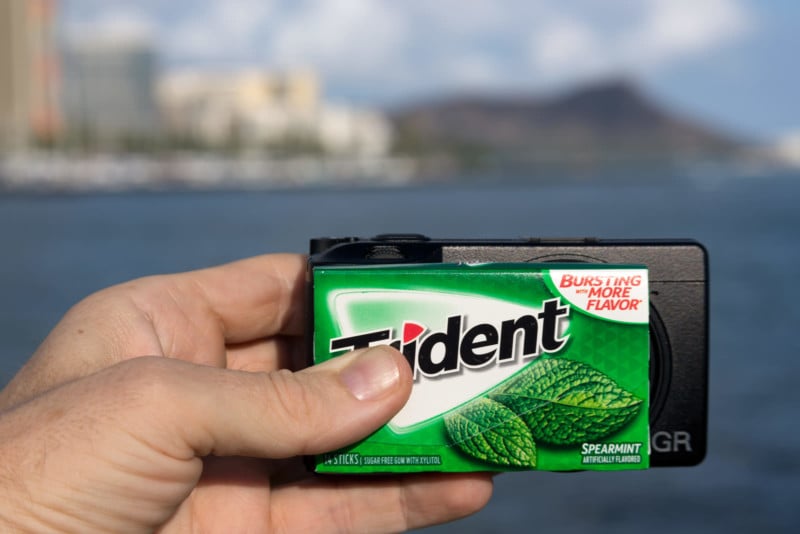
Since the Ricoh GR III has a 28mm equivalent focal length, I had to get a bit closer than the 50mm I was used to on the Leica R4 film camera. No worries though, because this camera is so small and “sheepish” looking, you’ll notice how people seem to be oblivious of it or completely non-threatened. This is such a huge advantage when it comes to street photography!
Just to give you a better idea of how small the Ricoh GR III is, here’s a shot of it next to a pack of gum. In an age where bigger is usually better, this tiny camera opens up more possibilities to capturing quality images of the life around you.
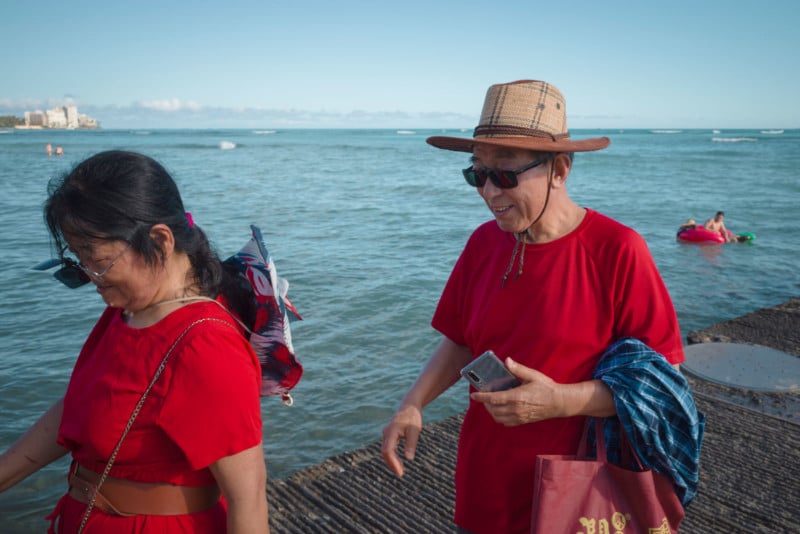
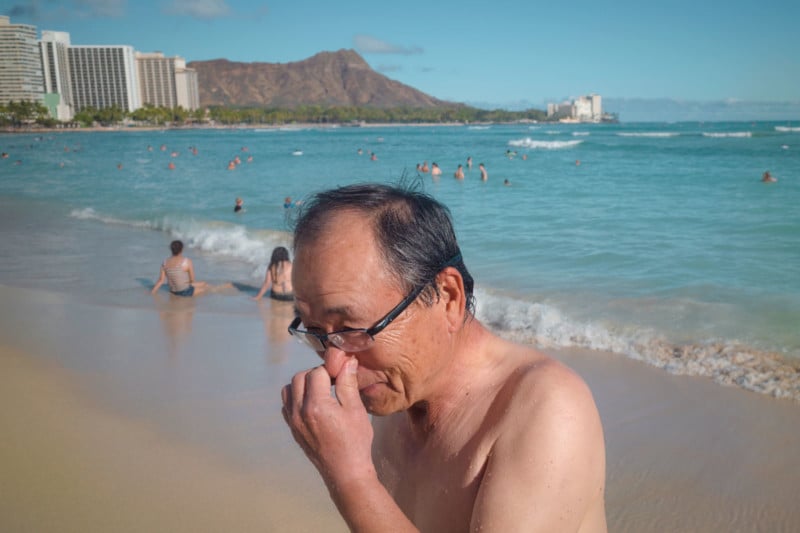
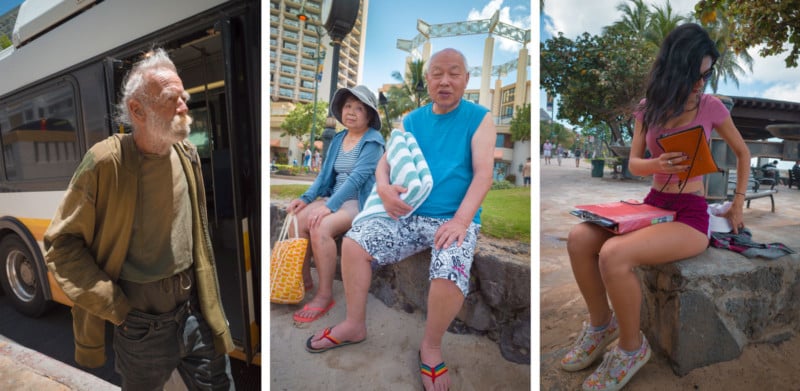
In the video, I walk right up to these people and snap the next photo. First I consider the figure-ground relationship, making sure they are clearly separated from the background elements. I also notice the theme of red in the scene and include the person in the background on the right.
As I hunt for colors within the scene, I’m looking for red, blue, yellow, and green (or variations of hue) in a hierarchy (think large, medium, small, extra small). So in this image, we see all of those colors and we have a hierarchy of blue, red, yellow, then green. I would’ve liked a bit more green (seen on the float in the distance), but we have to take what we’re given when it comes to street photography.
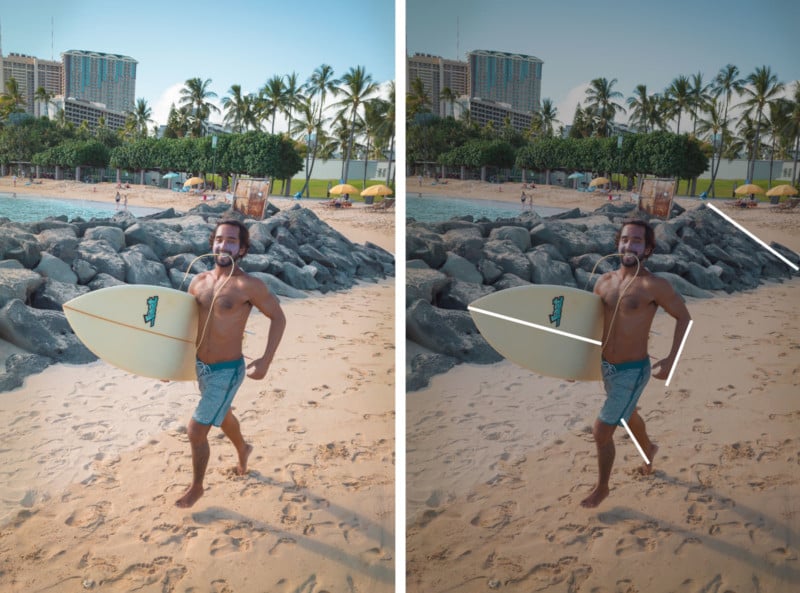
The Decisive Moment
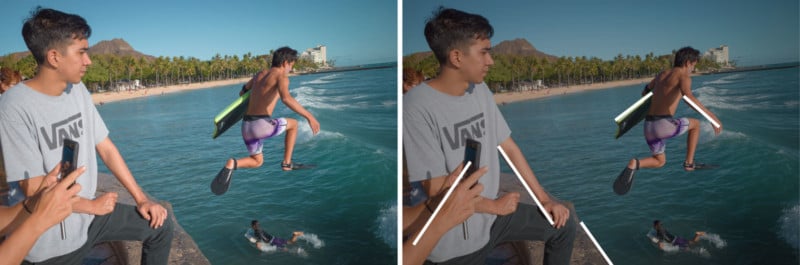
As I turn around, I see this surfer running in my direction. I see the diagonal of his surfboard and know his limbs will look better in the final image if they are separated, so I try to time it perfect. Henri Cartier-Bresson would call this the “decisive moment” because I know what I’m looking for and have a clear idea of when to press the shutter button.
Photography is not like painting. There is a creative fraction of a second when you are taking a picture. Your eye must see a composition or an expression that life itself offers you, and you must know with intuition when to click the camera.
That is the moment the photographer is creative. Oop! The Moment! Once you miss it, it is gone forever.
Shooting the Back of Heads
One of my friends said something during a street photography session that kind of stuck with me. He said he “needs to stop taking photos of the back of people’s heads.” This makes sense, especially if the reason he’s doing it is because he’s scared confrontation. First, this fear of confrontation is usually just that; a fear and nothing more. It’s not a reality. Second, as long as the composition is interesting and you’re telling a story that you want to tell, don’t place rules on yourself that will impede your creativity.
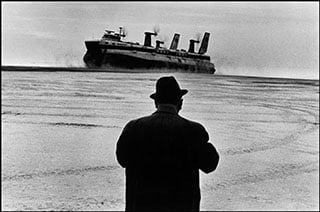
Josef Koudelka and many other master street photographers have excellent photos of the back of someone’s head. In the next image, we see how Koudelka got a bit higher to use figure-ground relationship and separate the man with the distant ship. It’s a simple, yet excellent composition and the last thing we think is, “man, what a wuss, Koudelka should’ve captured his face. What, is he scared of that guy?” The final image is a result of the story he chose to create and gave us the perspective of the mysterious man in the foreground.
Here’s an example of the same concept. I saw a very skinny swimmer leaning on the railing and looking out into the ocean and saw a story that I wanted to capture. I didn’t think about how it was the back of his head and I should capture his face. I’m not scared of confrontation because the fear stands in the way of my street photography goals. In fact, in the video I ask many people for their photo and chat with them a bit.
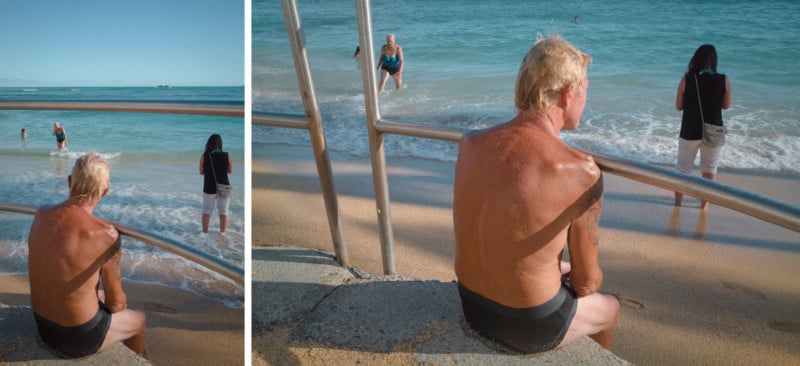
Take what you’re given in the streets and make the best of it without setting rules for yourself. I try to capture diagonals in every shot, but did lack of diagonals stop me from taking these images? Not at all.
Design Techniques and Expressions
As I work down the beach, I try to get closer and closer to people. Always looking for a nice figure-ground relationship and using the dynamic symmetry grid to help organize the composition.
In this shot, you can see how I get higher to create a nice separation from the foreground lady and the background objects. Telling a story, but presenting it with visual clarity.

I walked right in front of this next tourist and used what I call the “filming” technique. It’s when I pretend that I’m recording video like a tourist and take pictures as I pass by. Since the Ricoh GR III is so small, this technique works even better.
Example: Hold your camera up 20 feet before you get to the subject, take shots of them as you pass by, then keep holding the camera up for another 20 feet. They might think that you caught a glimpse of them in a video, but will be unsuspecting that they are the main subject of your photo. Just avoid eye contact, look into the distance like you’re filming it, and keep walking past them. It works every time.
As you familiarize yourself with certain design techniques, you might start to see triangles form like the one below. This is called an enclosure and works much like a dot-to-dot image does. The mind completes the gaps to make the simplest shape possible. The triangle is hidden, but it’s there. Master painters would use this in the art to create unity and movement among many objects.

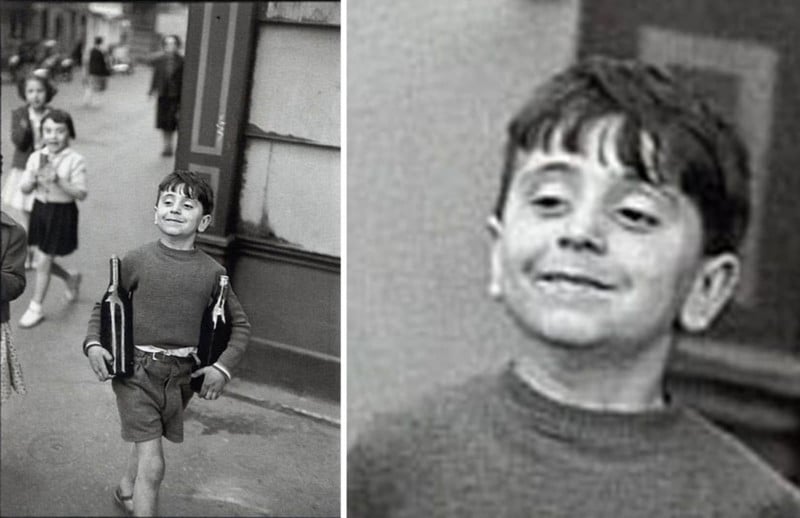
Another goal for many serious street photographers is to capture facial expressions. Even if the composition isn’t perfect, we can still have a keeper if the expression is strong enough.
A great example of this would be the next image by Henri Cartier-Bresson. In the video, I point out how the composition isn’t as refined as many of his others, but the expression on the boy’s face is golden. A young boy walking around with two wine bottles and girl’s chasing close behind. Why wouldn’t he have this proud expression, right?
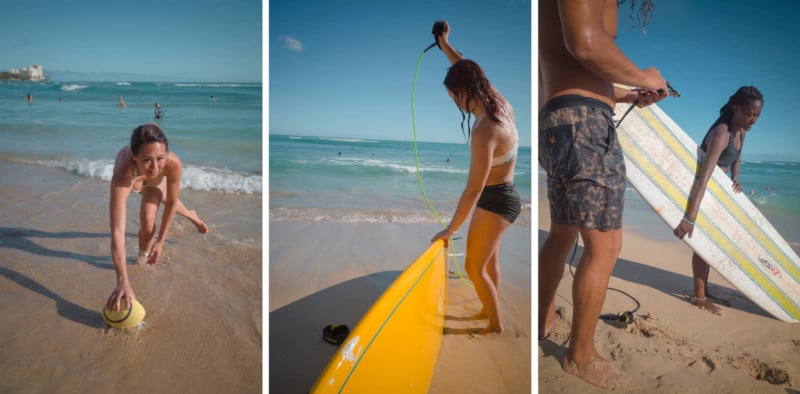
As mentioned before, timing is everything. This girl was being thrown a football, but I was a bit too late to create better visual clarity. In the original image on the left, the ball is too close to the background objects and isn’t clearly visible. When the football is moved to a more prominent location in the sky, it creates better visual clarity and makes a more complete story.
Note: I don’t clone anything in/out of my street photos, this is just to demonstrate the difference better timing can create.

Style and Shooting from the Hip
When looking at master painters for inspiration, we’ll see that some have very different styles, just as street photographers do. I’m trying to find a balance between tight and loose street photography in order to have nice compositions, yet still have fun and experiment. That’s where “shooting from the hip” comes into play.
Since the Ricoh GR III has the wider 28mm equivalent lens, it makes shooting from the hip an actual possibility for capturing interesting images. When I did this with the 50mm lens the results were much worse.
Not that I recommend shooting from the hip all of the time, but it’s a fun way to “gamble” in street photography. I say gamble because when you shoot from the hip the ability to apply figure-ground relationship, use the grid, and capture apparent design techniques goes out the window. It’s all based on luck, but it’s pretty fun regardless.
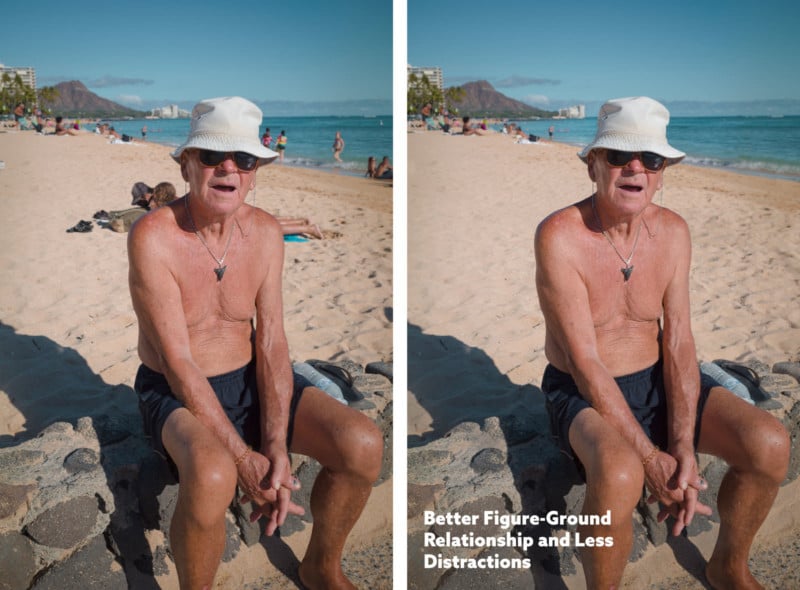
In this next photo shot from the hip, we can see how the figure-ground relationship isn’t the best and there are plenty of background distractions. The edited version on the right has a bit more visual clarity, don’t you think?
These next images were captured from the hip by using the autofocus point in the center. The Ricoh GR III has “snap focus” which can pre-focus to a certain distance, but I like using the center focal point (at least until I do more tests with snap focus). I tap the shutter button as I’m approaching the subject, then snap the shutter.
Kind of like pulling the lever of a slot machine. I ask myself, “Did I get a good one?!”
If your focus is already set to the correct distance, you can rotate the camera around as you pass by and capture a few images. If you’re not looking at the subject or your camera, no one will suspect a thing. This is a super incognito way to get interesting images because the Ricoh GR III is amazingly quiet and the focus light can be turned off.

Shooting from the hip definitely allows you to capture the subject in the most candid way sometimes.
More Design Techniques
In the video, I saw this pink flamingo float. There are tons of unique floats in Waikiki, but this one didn’t have any subjects near it. Therefore I had to squat low to make it the foreground, then try to capture a subject in the background.
The man in the distance on the right has an aspective view and I’ll explain that next.

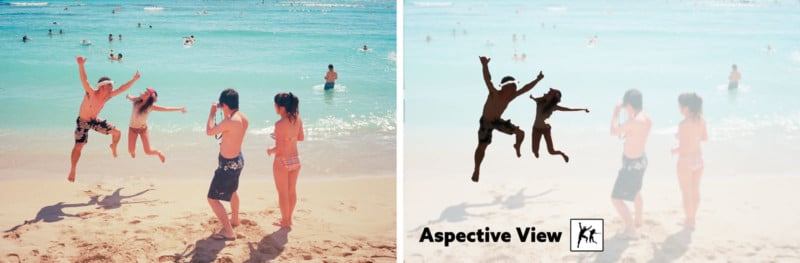
An aspective view is basically when we see the side profile of the face, or the subject’s limbs are spread. This is the most identifiable view and works great for silhouettes because we are primarily dealing with the shape of the object.
In this film photo (Sept 2015), we see how the aspective view of the people jumping helps us to easily identify them. Even in the black and white thumbnail, we’re still able to tell what they’re doing. That’s why many street photographers have learned to capture subjects when they have an open stride.
Most of the master photographers have taken shadow selfie’s, like Henri Cartier-Bresson and Vivian Maier. Capture something interesting in the scene and snag one for yourself. It’s fun and keeps the creative juices flowing. Try to separate your camera hand from your head and see what you come up with. Use the figure-ground relationship to help with the composition. Oh, and try to incorporate some diagonals if you’re feeling fancy.

Timing is Everything
In the video, I mention how I don’t break my stride while shooting. Waiting around for the perfect scene in a busy environment like Waikiki usually means I’m missing something that is ahead of me. That’s the case for the next shots to follow.
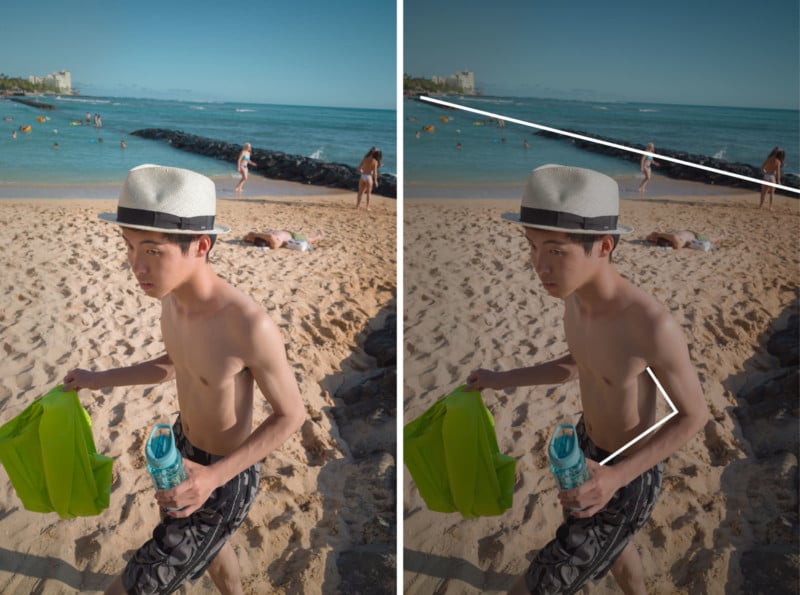
I capture this boy with a unique hat and his arm helps create diagonals within the scene. Yet, look at the background. You’ll see the subjects for the next image, which I would’ve missed if I waited in the previous area too long.
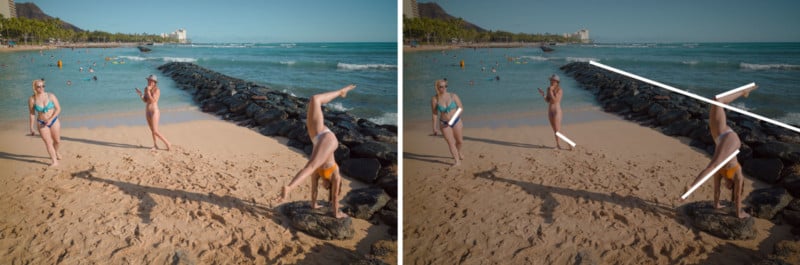
This attractive Australian girl and her friends were doing gymnastics and taking pictures, so I asked them if I could get a picture. I held up the innocent looking Ricoh GR III and they nodded “yes.” I ended up capturing something awkwardly interesting. Notice how their limbs create diagonals within the scene.
In the video, you’ll see how I chat with them, make some jokes, and thank them for the photo. Street photography is a great way to get out, enjoy nature, and meet new people.
Lots of Action
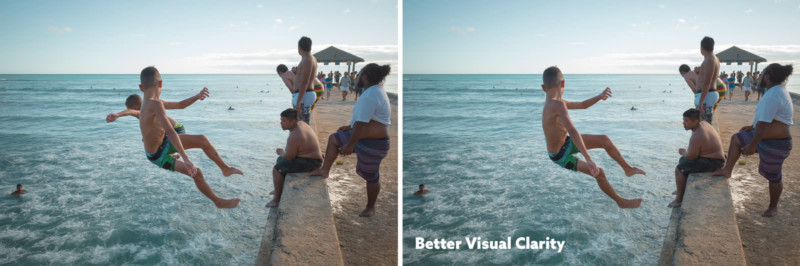
As I make my way to “walls” in Waikiki, I see these two boys are about to jump into an oncoming wave. I prefocus the Ricoh to where he’s standing and wait for them to leap to the depths below. Unfortunately, they both jumped at the same time; something that I wasn’t anticipating. This affected the visual clarity that I had envisioned. In the edited version on the right, we can see how the shape of one boy is more identifiable than the original image with both boys.
I linger in this action-packed location and hunt for diagonals, the decisive moment, and other techniques.
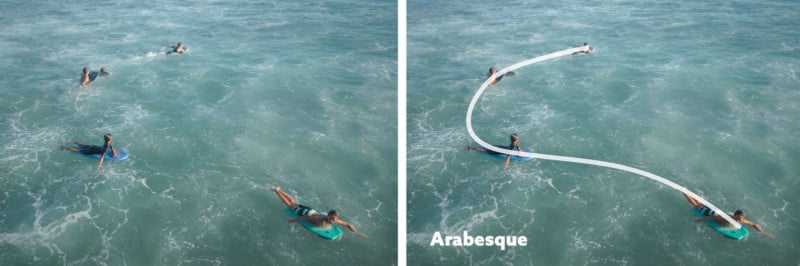
As I looked down, I notice that these boarders were creating an arabesque (a curvilinear element) in the water, so I snagged a shot real quick. Even if the composition isn’t compelling to others, continue to capture the hidden design techniques whenever you see them.
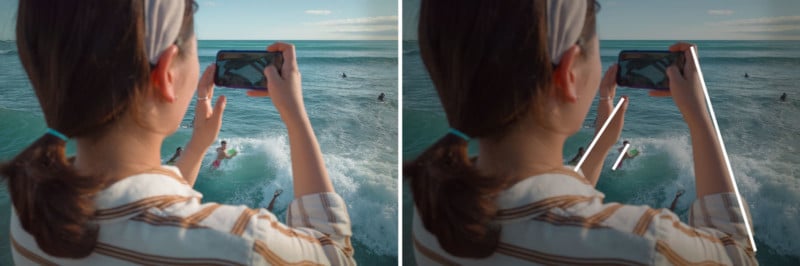
Shooting through the diagonals of this woman’s arms was another cool way to fill the grid of my camera. I prefocused on the distant boarder, lined up the shot, then pressed the shutter. This is another example of why the 28mm focal length is fun to shoot with.
Give Me Some Juice
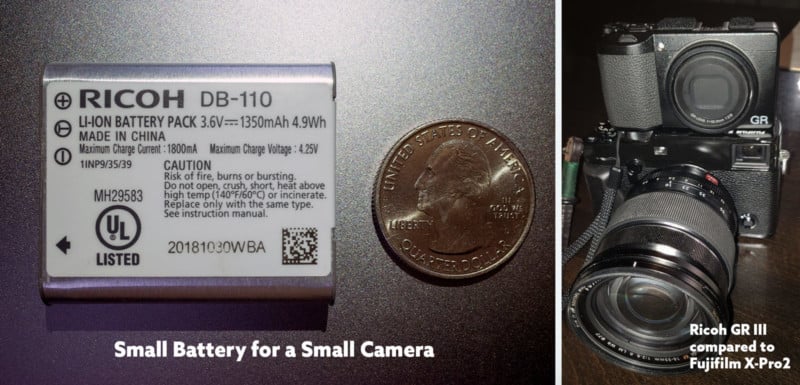
By this time in the video, I’ve changed my battery once. The battery is super small, so it doesn’t last very long; maybe an hour or so with the screen brightness all the way up, and the auto-off power feature enabled.
My friend @hawaii_street_photographer and I went shooting a few days prior, and I went through three batteries before he used up one. He was shooting with the Fujifilm X-Pro2 while using the viewfinder and got this hilarious comparison of his camera/lens vs mine.
So yes, the small battery doesn’t last long, but it lasts long enough. It’s a fair trade for the compact size. The only camera I’ve ever been able to fit in my pocket was my iPhone, and the quality of that is dramatically reduced compared to the Ricoh GR III and its APS-C size sensor.
Portraits and Diagonals
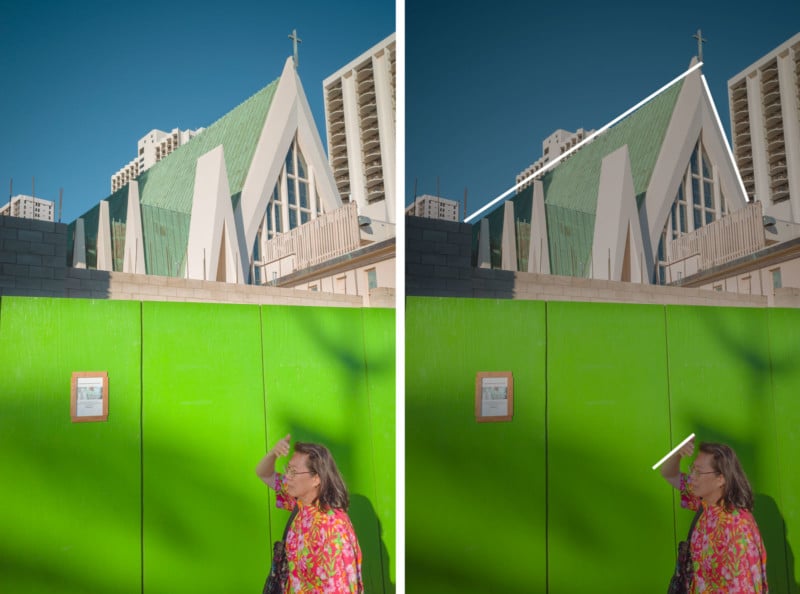
This green wall presented an opportunity to capture interesting colors. I was mostly looking for light pinks and I got lucky with this lady walking by. Her arm is at the same diagonal as the roof of the distant church, which helps create unity and rhythm within the scene.
As I walk back to the starting point, I stumble into a local farmer’s market. Inside I’m presented by a couple of cute dogs and a crafty elderly lady. All willing to model for my little, inconspicuous, wolf-like camera.
Note: Settings for indoors was 1/250, f/2.8, Auto ISO

I waited for this lady to look in my direction and the man’s gesture in the background helped add a bit of life to the composition. Yes, we can even use carrots to capture diagonals!

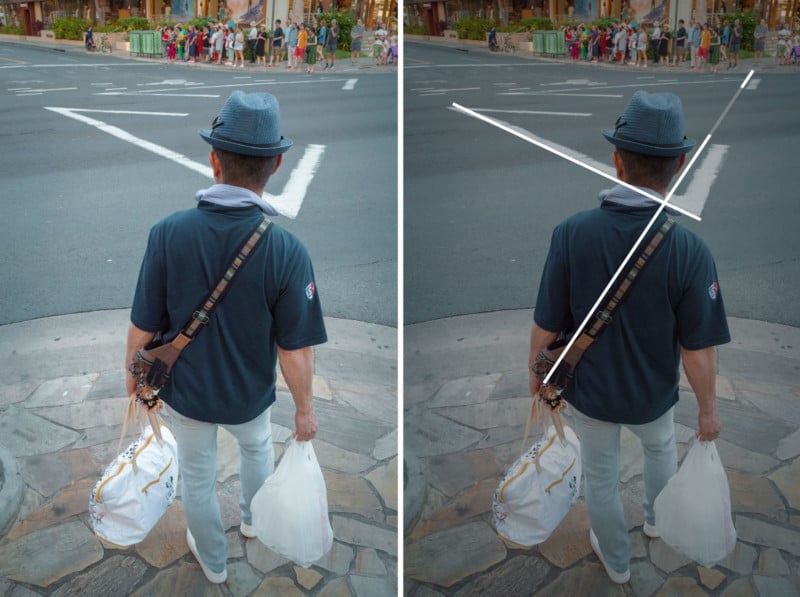
In this next image, I saw the diagonal of the crosswalk coinciding (like a dot-to-dot image) with the diagonal of the man’s shoulder strap, so I raised the camera up to help with figure-ground relationship, got closer to fill the grid, then took the picture.
Color and Lighting
Walking back in the other direction, towards the sun, makes all of the colors a bit muddy. When they are well lit, the colors are at their most vibrant. Yet, I was enjoying some of the rim lighting I was seeing. This man’s head glowed like a candle in the night and drew me closer like a moth.
I raised my camera higher to help with figure-ground relationship, lined up the diagonal of the crosswalk to the grid, then waited for a gesture. His bright orange skin and wrist band also compliment the bluish-gray shirt and background.

As I’m rambling in the video about Henri Cartier-Bresson, I see these tourists staring down this hilarious statue. The diagonals and colors were bonuses. The more design techniques included with the story, the better.

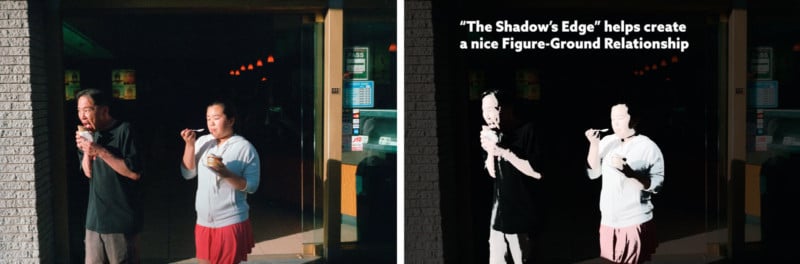
As the sun gets lower and lower, it shines through the city and creates shafts of light. These can be used to capture a subject on “the shadow’s edge” and create a nice figure-ground relationship. Doorways work well too, as seen in the next image taken with film (July 2015).
This next photo of the two children riding their scooters can be seen in the video. I lowered the EV to -2.0 to control the Auto ISO I was using. I looked specifically for a nice figure-ground relationship and tried to time their movement through the light.
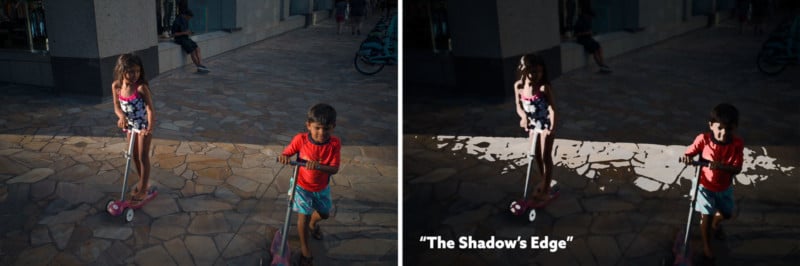
Note: Settings for “The Shadow’s Edge” was 1/500, f/5.6, Auto ISO, EV -2.0
Pixel Peeping
If you’ve ever flipped through Henri Cartier-Bresson’s book The Decisive Moment, you’ll notice how much they care about perfectly sharp images. They don’t. Many of the images in there are beautiful to look at even if there is motion blur (see next examples). Especially since Cartier-Bresson did his best to capture an interesting story with a great composition. This is something to be aware of if you find yourself “pixel peeping” too much. Some things, like composition and story, should hold a higher priority than the sharpness of the image.
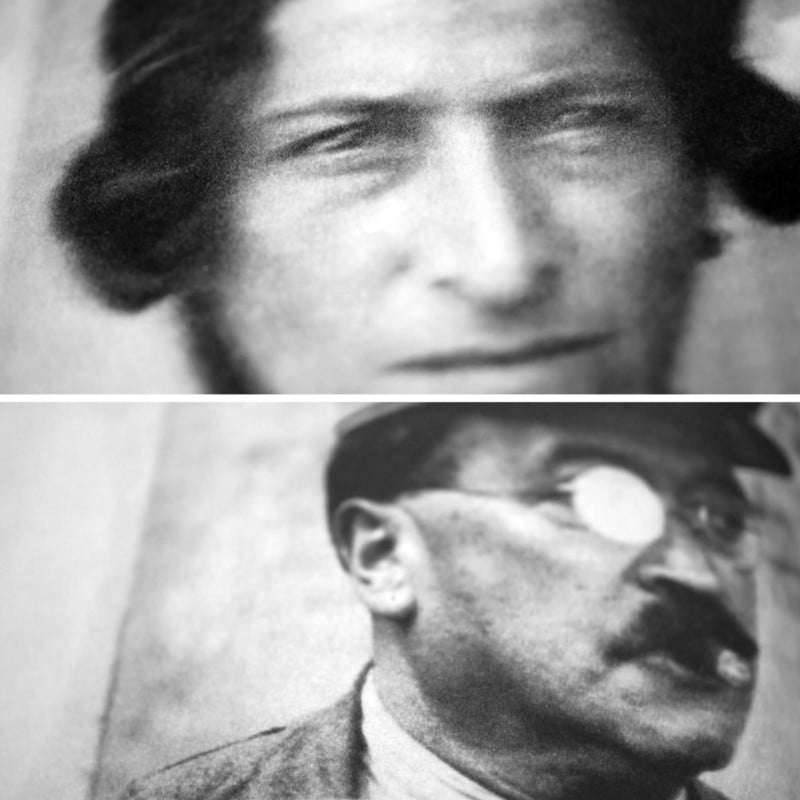
We can see how this next image has soft focus, but still captures an interesting story. The problem with the focus was probably caused by me getting too excited and pressing the shutter button too fast. This enabled the snap focus and prefocused to the setting (1m) rather than what was intended. Hmm, seems like a good mistake for me to learn from even if the image is still usable.

Conclusion
Should a serious street photographer use the Ricoh GR III? The answer is definitely YES! Not only for its ability to take quality images but for its inconspicuous size. It puts the subjects at ease and allows you to be perceived as harmless. These points alone are huge advantages for street photographers.
The wide angle allows you to have fun shooting from the hip, which can produce some interesting images. A quality camera that can go with me everywhere makes it the perfect camera for my environment and my style of shooting. I can’t remember having more fun with street photography than what I’ve experienced so far with the Ricoh GR III.
About the author: Tavis Leaf Glover is a fine art photographer and author based in Honolulu, Hawaii. The opinions expressed in this article are solely those of the author. You can find more of his work on his website, Flickr, Instagram, and Facebook. Glover is also an educator about applying Gestalt psychology principles to photography and art. You can find his composition website here.