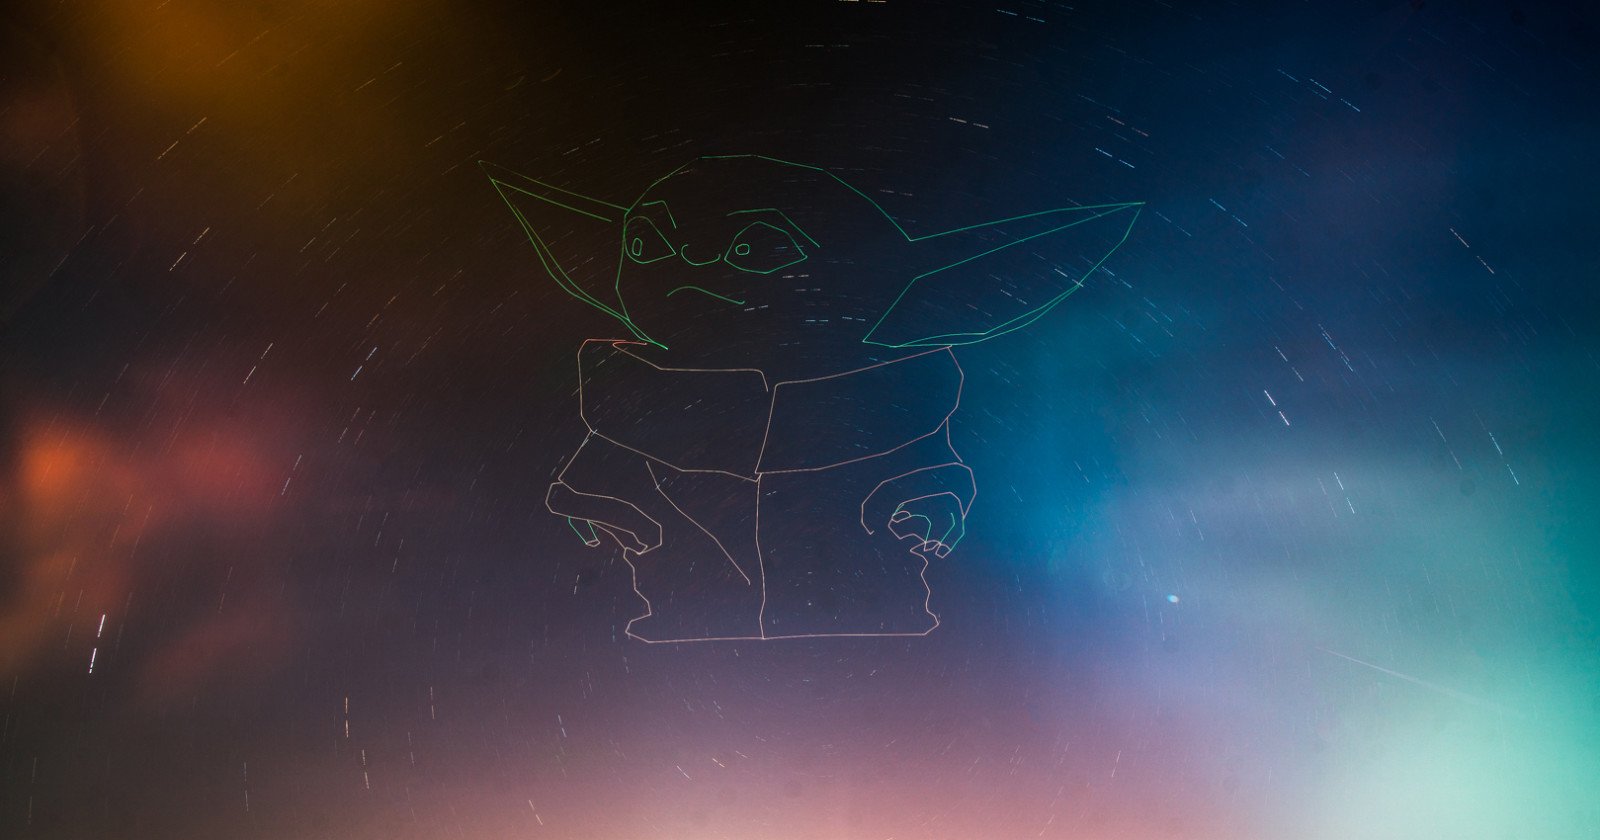
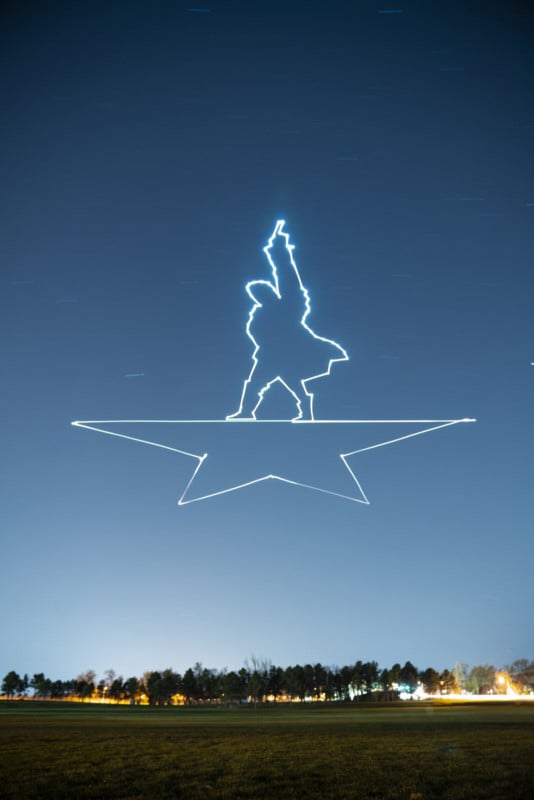
How to Light-Paint Giant Shapes in the Sky with a Drone
A few months ago I was inspired to try and see what shapes I could create while attaching a Lume Cube to my drone. I’d seen photographer like Phill Fisher do shapes in the sky manually and was extremely impressed, but I didn’t have the time to learn how to fly shapes manually. So instead I scoured the Web for drone apps that could make things like this possible.
Note: Before I go any farther I want to state that you should always know if you are allowed to fly in the area you desire. Use apps like Airmap and B4UFLY to check, so you don’t get in trouble. Even if you can fly there make sure you are always aware of your surroundings for helicopters or anything else in the air. They take priority over you. Also if you want to use this technique to make money you will need a Part 107A, and as far as I know a night waiver.
Google Earth allows to you get really detailed on where you want to fly, and the best part is you can put in image overlays. This more or less allows you to trace an image you put into Google Earth with your drone if you have enough patience.
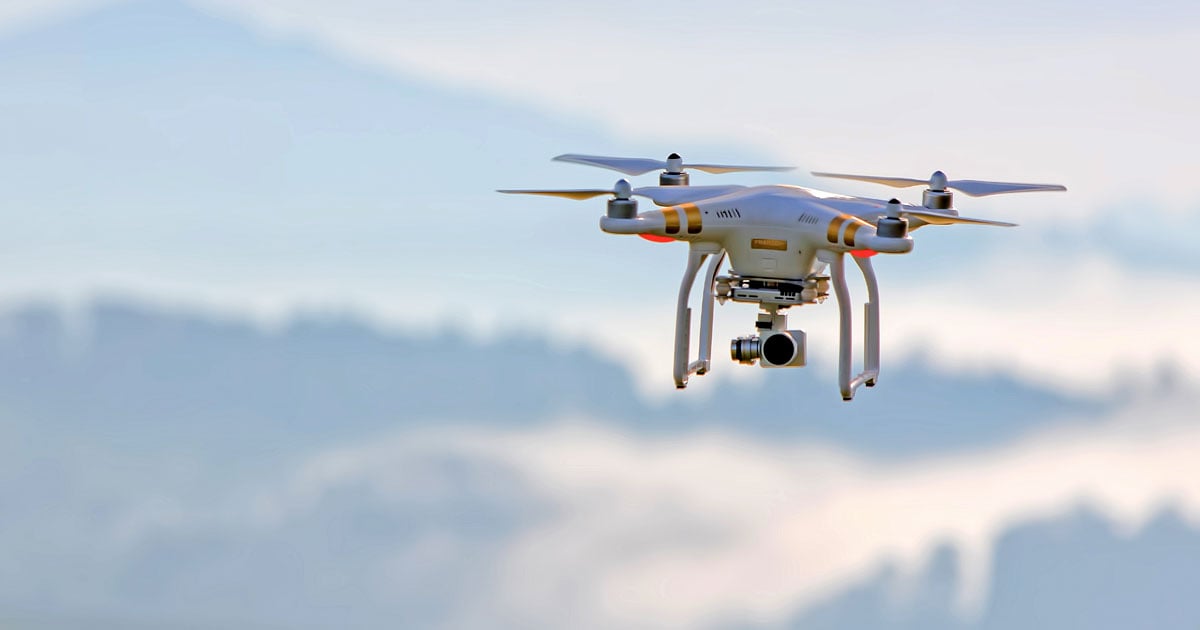
First, you need to get a drone and a bright light you can attach to it. Or if you have a Mavic Pro 2, for example, there are LEDs built in. Then you need to find a big open area you can fly in that safe and where you won’t be bothered. A tried and true spot is around 900 ft by 600 ft. This is also important because waypoints can’t be too close or the drone won’t fly the pattern (This is only if you are working in a horizontal plane). Once you have those it’s time to program. I recommend doing this at home or somewhere comfortable as it will take awhile.
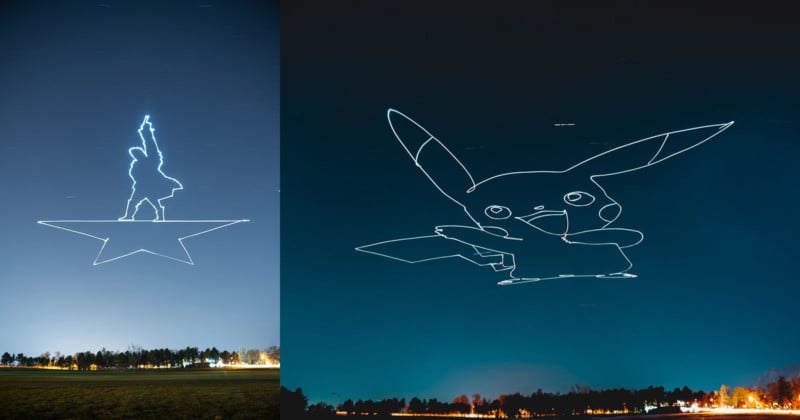
When programming you need to know where you will be setting up your camera. That’s important because when taking the long exposure you have to program the image upside down. In the image below you’ll see an X where my camera was and where I am in relation to Pikachu.

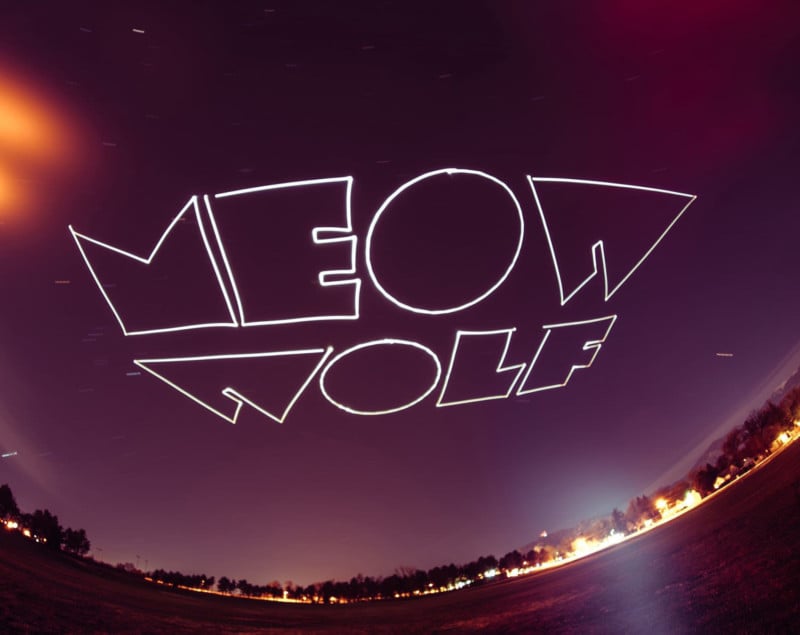
If you are doing words, then they need to be upside down and backward. Here is an example of the Meow Wolf one I did as well.

Then once you have your overlay set (you may need to make adjustments and resize it to fit the open space you’re using) you can start putting in the waypoints. Your overlay at this point should be stapled to the ground, I find this easier for creating. I prefer manually putting in the waypoints one at a time instead of drawing lines for them because it lets me be super detailed.
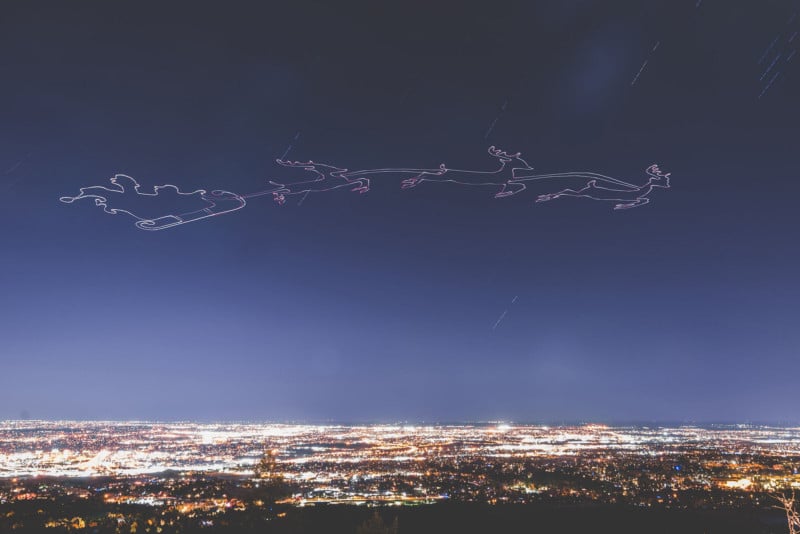
A shape can consist of a few waypoints or hundreds to thousands. My current record when writing this article is 633 for Santa and his reindeer but you can definitely have much more. It is worth noting that doing these shapes may take more than one drone battery (as Santa did) especially if you are using a small drone that doesn’t like the extra weight of a Lume Cube.
As you are creating your waypoints I recommend you do them in sets of 99 and put each set in a folder and label it. The reason for this is because Litchi only allows up to 99 waypoints for each path you program into it. So every time you complete one you’ll need to upload the next path. When this happens I recommend covering your lens so you don’t get any bright spots on your photo.
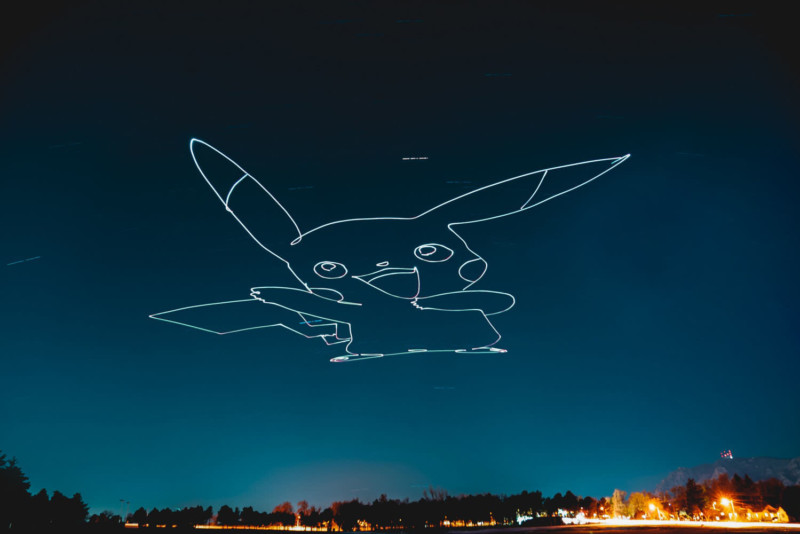
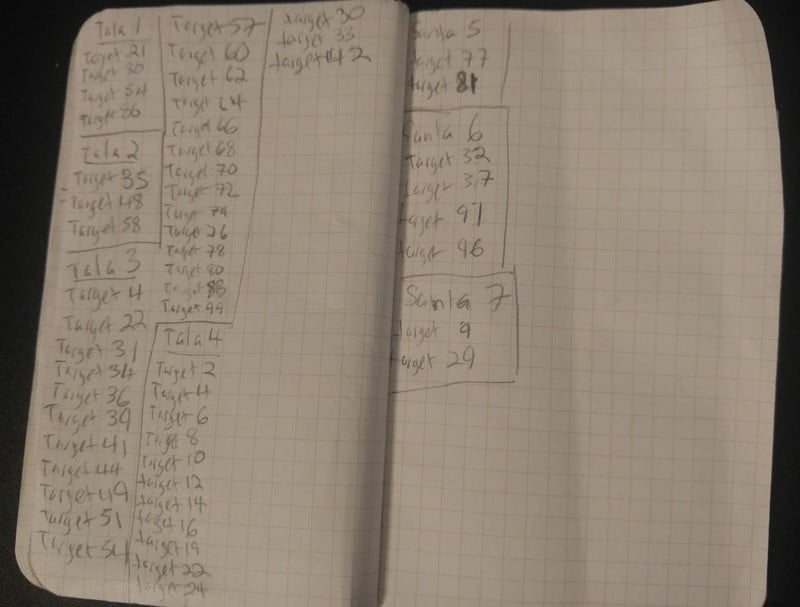
If you are creating a shape that has any gaps in it like Pikachu then you’ll need to know either when to cover and uncover your lens or you can change the POI of your drone (as I attach my light to the back) and the light will turn so your camera can’t see it. Though this depends on where your light or lights are attached. Here is an example of my little book of when I need to cover my lens, for one of my more complicated paths.
Once your shape is created you need to take each set of 99 and export them as KML files. This is what Litchi uses to read the paths you’ve created. You can import them onto the Litchi online Mission Hub program. Once imported it’s important that you save the file and then try and run it on your phone with the Litchi app. If it comes back with the error saying that it can’t connect to GPS then your waypoints are far enough apart that will allow the drone to fly unhindered. However, sometimes it may come back and say that two points are too close together. So then you’ll have to go back to Google Earth and fix that and reexport the KML file and try again until you don’t get these errors.
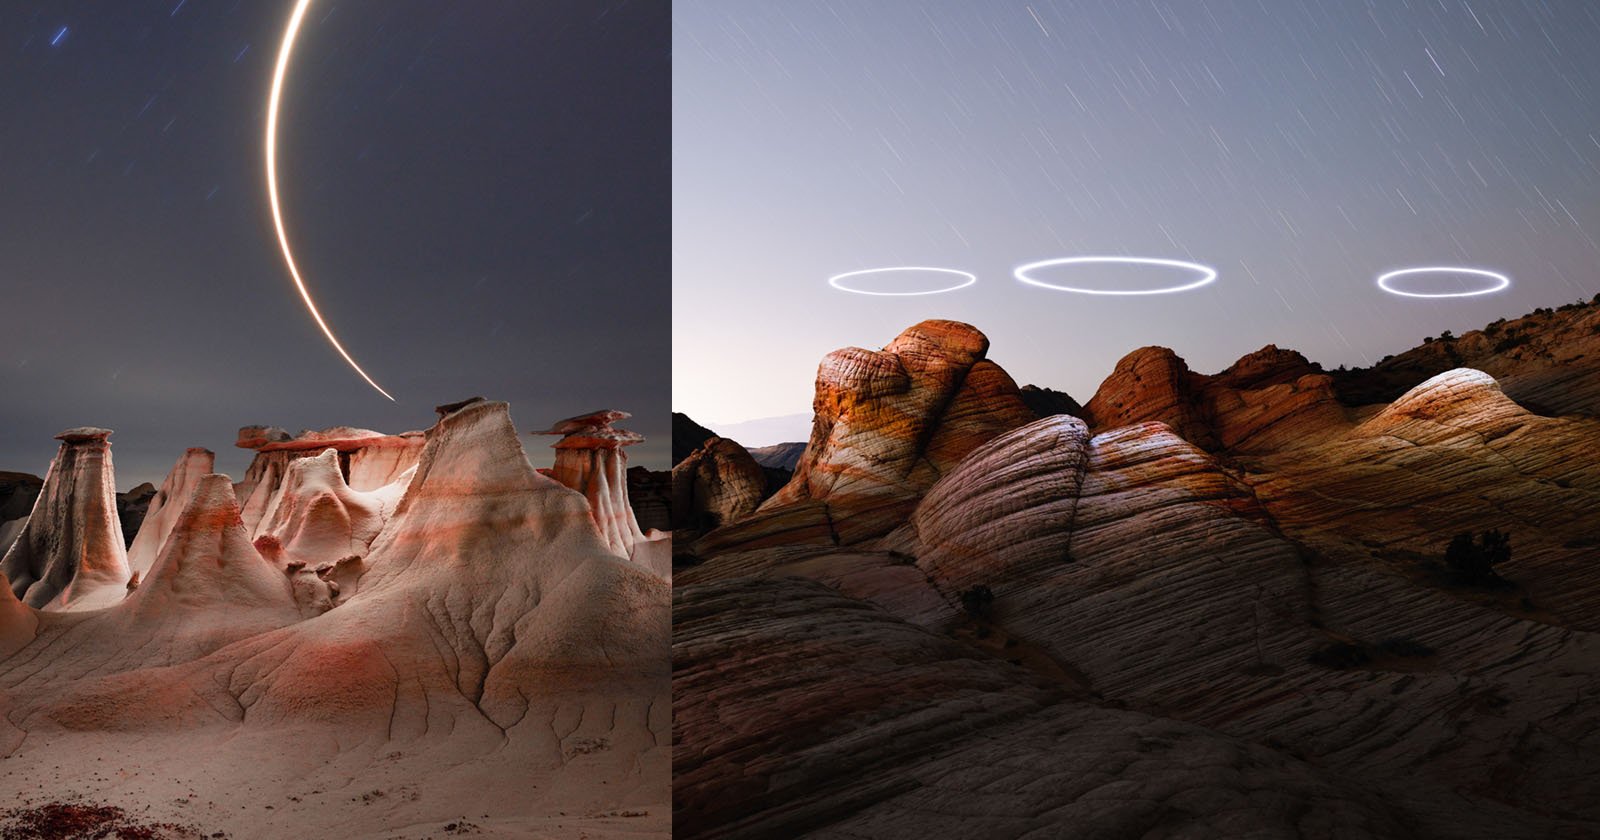
Once you have all of your paths working then you need to go and make sure you change the altitude, as when we started with the overlay we had it stapled to the ground. I like to use around 200ft or 60m. This is because I’m working on a horizontal plane for the most part and if I go much lower than that I might lose the light depending on how big my shape is. (If you attach your light a different way or have a different light source this may be different for you if using this method)
Another important aspect to this height is because we are working on a horizontal plane depending on the camera lens you are using which would change your location for where you are shooting your long exposure and it might squish your light painting so that’s something to always keep in mind.
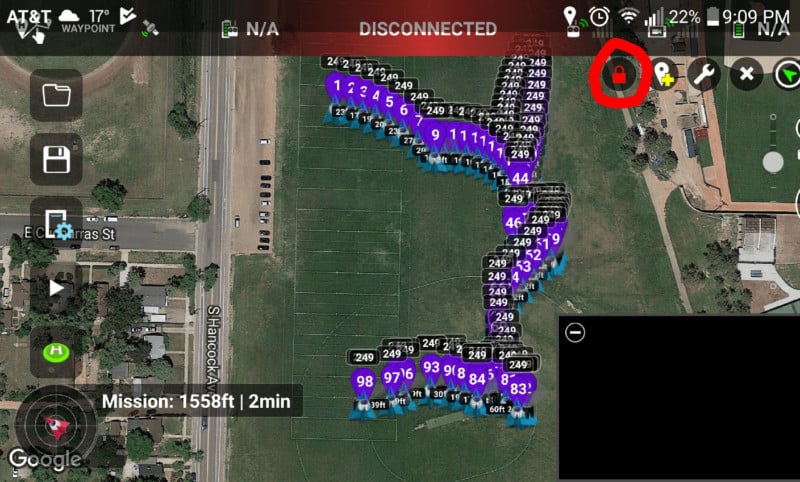
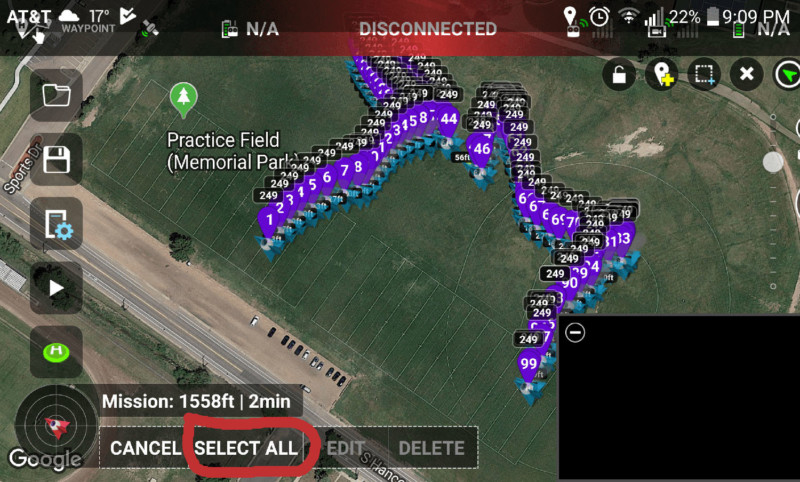
You change this with the Litchi app on your phone. First load your mission then unlock it with the little lock icon. Once that is done click on the wrench icon then the icon of the dashed square with a plus. A new menu will pop up, hit “select all” and “edit” and adjust the altitude relative to home (which is the ground) and hit ok. You should see the numbers change above the waypoints, make sure to do this with each mission if you have more than 99 waypoints. Also, keep your drone heading in mind as well as where the light will be. In general, if using a Lume Cube taped to the back of the drone, your heading will be the opposite direction your facing taking the photo. Below are some screenshots of each.

One more thing before you go outside to do this is to set your mph/kph. When doing detailed shapes I like to stay between 7-11mph or 7-17kph. This is because though you may have a waypoint your drone may overshoot and need to backtrack before going to the net point. This helps mitigate that. On top of that, I prefer to go into my settings in the Mission Hub of Litchi and changed the path to Curved Turns and set the default to 0. That way my drone will fly through each point.
Okay, so I know that was a lot, but now it’s time to go and fly! If using a wide lens (like a 12mm), you can be fairly close to your pattern if you shoot up at 45 degrees. Otherwise, you may need some distance depending on your composition and lens choice. I never know exactly where I’m going to set up so I generally create a test mission that does a rectangle of where the picture will take place and make sure that my composition is correct. Then I’ll replace the battery of my drone and create my picture!
When the drone flies the pattern I never watch it. Instead I watch my phone and look for the correct number to cover the lens and then uncover then that number has passed. Here is an example of Eevee on video sped up from 15 minutes to 40 seconds:
About the author: Russell Klimas is a photographer working on the art of aerial drone light-painting. The opinions expressed in this article are solely those of the author. You can find more of Klimas’ work on his website and Instagram. This article was also published here.