Create Impossible Photos with a Lighting Composite
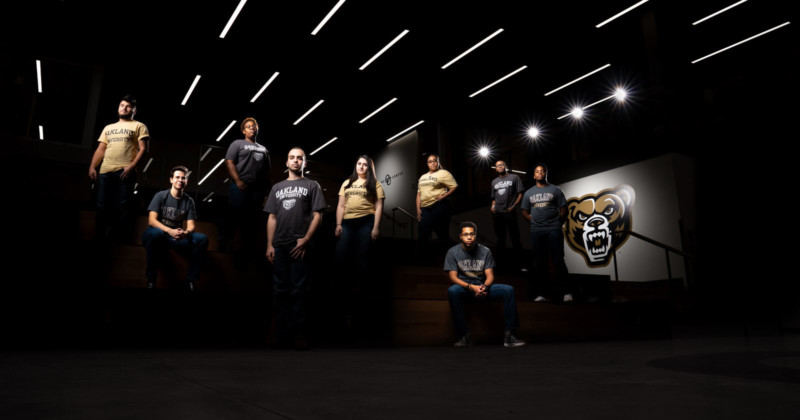
“Do you have 9 lights?” The account manager at Oakland University asked me. Somewhat inspired by a Queen album cover, he was looking to create an image where 9 award-winning students stood out in a dramatized version of a newly renovated space on campus. While I understood the goal of the session, I immediately knew rigging 9 lights up would be nearly impossible while showing such a vast space. I told him that it may take some time, but I could get it done with just 2 lights.
I’ve always been fascinated with creating this type of image, because it creates light patterns and a visual style that is otherwise unobtainable in a single image. There’s no way to have a massive light source illuminate multiple people, without also illuminating the entire space they are in.
I’m no Photoshop master, the vast majority of my work is volume editing done in Lightroom. So I took every precaution possible to ensure that this would be a seamless edit. Here are all the things you need to consider if you are interested in tackling your own lighting composite.
Keep It Steady
If you don’t want to hate yourself when you get to photoshop, make sure you keep your camera as steady as possible. If you don’t, you’ll find yourself having to adjust perspective and transform images just to get them to line up cleanly in post, which can be downright miserable.
A tripod is almost a necessity. I got away with keeping a Manfrotto tripod head on the ground for this low angle image, but I’d advise others not to take that risk as it’s easy for the head to slide on the ground.
Turn off any lens or in-body image stabilization. Those systems are great at compensating for movement, but when your camera body is securely locked down they can only harm your image by compensating for movement that isn’t happening.
If you can, avoid the camera’s shutter release button. Just that tiny amount of pressure could potentially alter your position and framing. This isn’t mission critical as your perspective is unlikely to change, but if you have the option definitely use an app or remote to trigger your camera.
Use Manual Focus. By switching to manual focus you ensure that your images will all have the identical depth of field.
Identify Your Settings
I highly suggest manual exposure for this, because you don’t want your settings changing shot to shot. It’s worth noting here that you want to do this in an environment where the lighting/background is not changing. If it does it may complicate your masking process later.
Don’t take my settings as a suggestion for your image, every location would require a different thought process. I started by choosing my f/stop of f/8. I knew I wanted total sharpness throughout the image. I set f/8 and checked to ensure that the subject closest and furthest from my camera were both acceptably sharp.
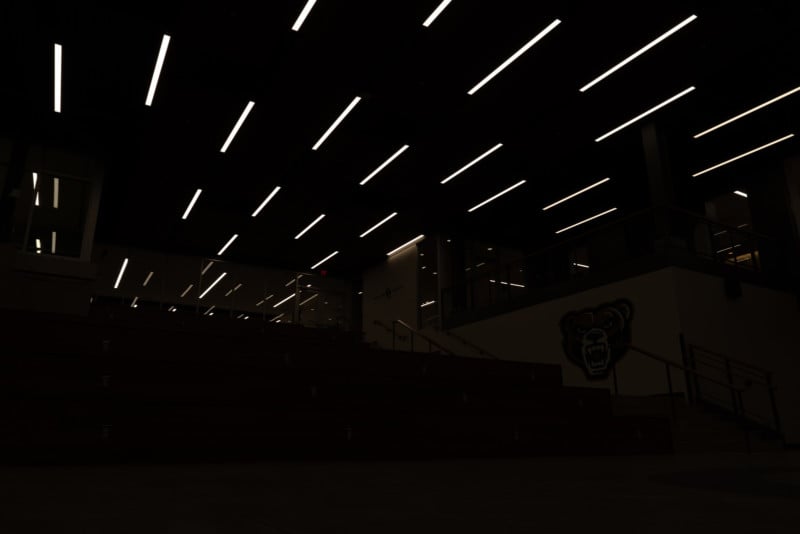
I then chose a shutter speed of 1/250s, which is the maximum flash sync speed my Sony a7R III does without entering high-speed sync. Then, I brought my ISO down to 400 which gave me the visual result I was looking for in the room. I chose to go so dark not only to make the subjects pop out in dramatic fashion, but I also wanted to hide the distractions that filled the room.
Note: In hindsight, I wish I would have brought my ISO down to 100 and shutter speed to 1/60s. That would have been equivalent visually, but given me more flexibility to manipulate images without introducing noise. The closer you are to your camera’s base ISO, the more dynamic range you will have in the raw file, allowing you to push the image without it crumbling. The 1/60s shutter speed would not have affected the image either, as the subjects are being illuminated by flash only, and the background and camera are static.
Managing the Group
Before ever starting the photography process, I made sure the entire group understood where their position was in the image and had them stay there until they were photographed. If they had to move we would mark their positions so they could come back to the same spot. This ensured that the students did not block one another, to make it really easy to isolate them in photoshop. As I worked through the group I would let those photographed slide down and out of the way.
Lighting it Up
I used 2 Flashpoint eVolv 200s (Godox AD200s) with the round head. My key light was in a 28” Deep Parabolic softbox with a grid. My rear light had a grid and snoot (from the proprietary AK-R1 modifier kit). The choice of the deep parabolic softbox and grid was to create a soft light that had a narrow cast. This narrow coverage means that the light will primarily hit the subject, and not spill onto the environment, creating inconsistencies between the photos.
I also chose a 28” because I wanted to keep the light very close to the subject. This means that the light will fall off very rapidly (see Inverse Square Law) and not influence the environment much. The rear light was modified with a grid and snoot for the same narrow light cast, however, the rear light didn’t need to be soft since its objective was to separate the students from the background.
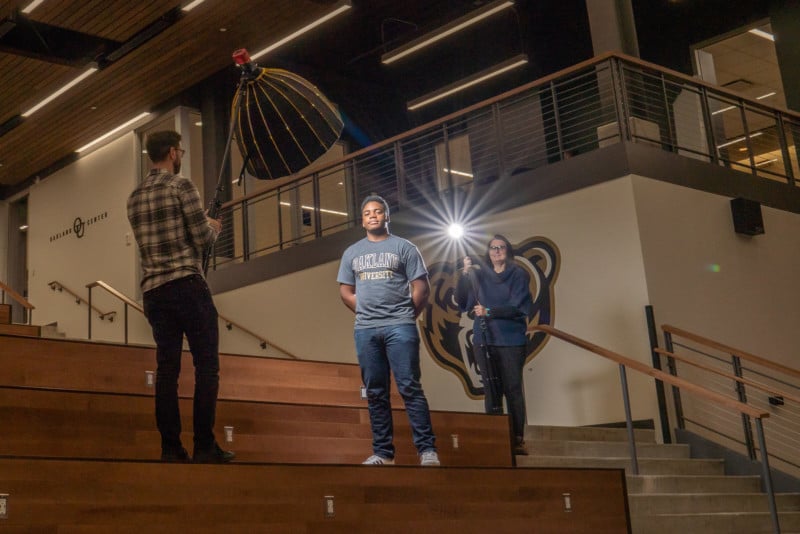
I made sure to keep the lights in relatively the same position and direction for each student, that way the light patterns are similar. This creates cohesiveness across the image. This isn’t a requirement, I simply prefer when lighting appears natural, even if it is stylized and dramatic. I also had the lights pointing downward onto each subject, that way any cast shadows were going onto the ground, rather than the background.
Checking the Room
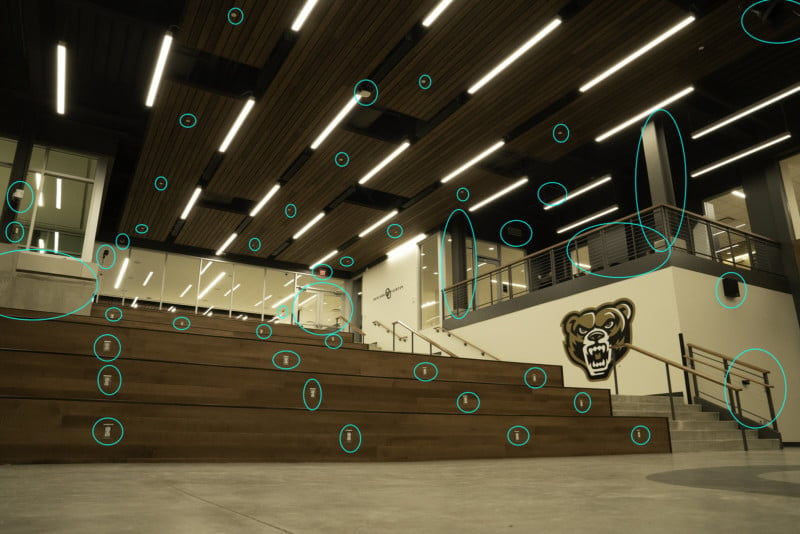
After all the students were photographed I sat for a moment to consider anything else I wanted to include. I decided to highlight two graphics in the room using the softbox, that way anyone seeing the image could more easily identify the space.
I also used the second level to fire the rim light at the camera. I figured since each student had light on their back, I had to create a believable light source in the background. I also made sure to capture the room completely empty, in case I needed to blend anything in the composite that was otherwise covered.
Post-Production
By taking all these steps, the post-production was quite simple. I brought in each student, made a soft selection around them, and masked out the entire background to show the empty room. I ended up using the graphics on the wall and the lights on the second level as well. The only complex masking I had to do was where one student overlapped the upper graphic, and removing a yellow color cast from the hint of ambient lighting on the base layer.
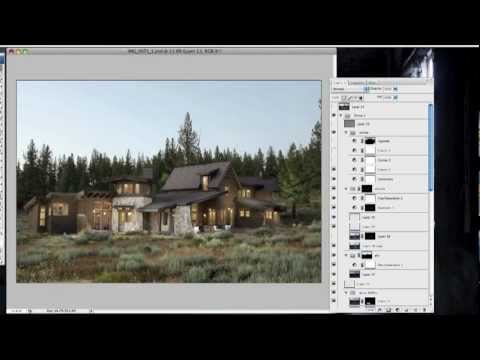
Once all the masking was done I removed a few more distractions through clone stamping (a breeze when 80% of your image is black), and finalized with contrast and sharpening adjustments. My video doesn’t dive too deep into the post-production, but if you want a follow-along approach to these composites, check out this video by Justin Haugen:
Keep in mind: this worked so well because I made the environment very dark. If you want to try in a brighter area, I highly recommend keeping your subjects far from the background so as to avoid illuminating your background with any flash. The inverse square law is your greatest ally here. I hope my break down helps you feel confident in tackling this type of image.