Astrophotography: How to Photograph the Stars
![]()
Before we get started, it’s essential to understand that astrophotography takes time and practice in order to achieve good results, so don’t get frustrated if you don’t nail it on the first go.
The aim is to shed some light on the type of equipment you will need and give you a general starting point for where your settings ‘should’ be so that you can head out into the night and have some fun with it.

Gear and Equipment
Camera
You are going to need a DSLR camera or a camera which allows you to manually control the shutter speed, the aperture, and the ISO. An automatic camera just isn’t going to get you the results you’re after.
Lens
You will need a lens which has a really large aperture. This is the ‘f’ number you can usually find printed somewhere on the lens. Another way to tell how wide the aperture of your lens is, is by adjusting the aperture setting on the camera (how low will the number go?). This is going to control the amount of light which comes in through your lens. Because you are going to be shooting at night a lens which has a greater opening (smaller ‘f’ number) is better.
Tripod
You are going to need some form of a tripod, the sturdier the better. This is because you’re going to be shooting long exposures and this means your camera is going to need to stay incredibly still for a given period of time. Any camera shake will result in blurry photos and we don’t want that.
Remote Trigger
This isn’t essential but it’s always a handy tool to have in the camera bag. It will help you avoid camera shake when you push the shutter release button down. A handy workaround to this, if you don’t have one, is simply using the timer function on your camera to delay taking the photo by 2 seconds, that way you will be nowhere near the camera when the photo is taken. You can also use the remote trigger to engage the bulb setting on your camera which will allow you to shoot exposures longer than 30 seconds.
Flashlight
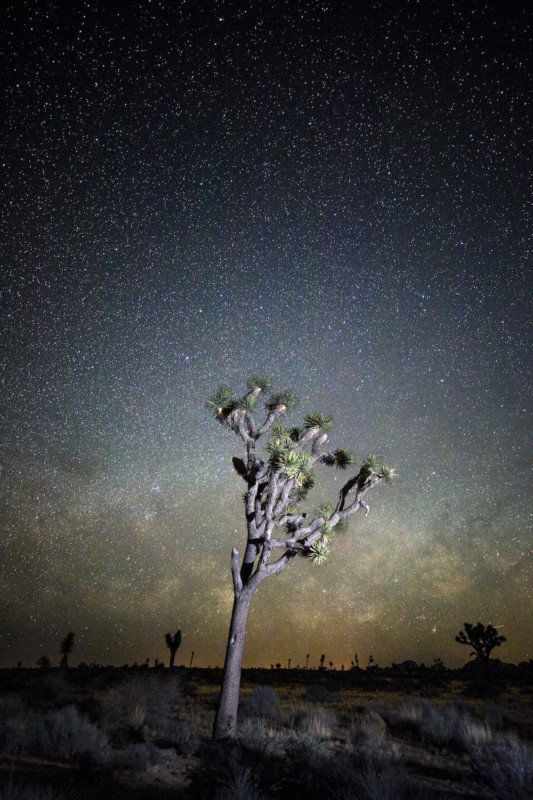
This is a great item to have in your kit. You can use a flashlight during long exposures to help paint in the subjects in the foreground of your image. For example, this could be used to paint in a tree or some rocks etc. You can even use a flashlight creatively if you want to jump in the shot. I’m sure you have all seen the images which float around the internet of people pointing the flashlight up to the stars in their photos?
Location
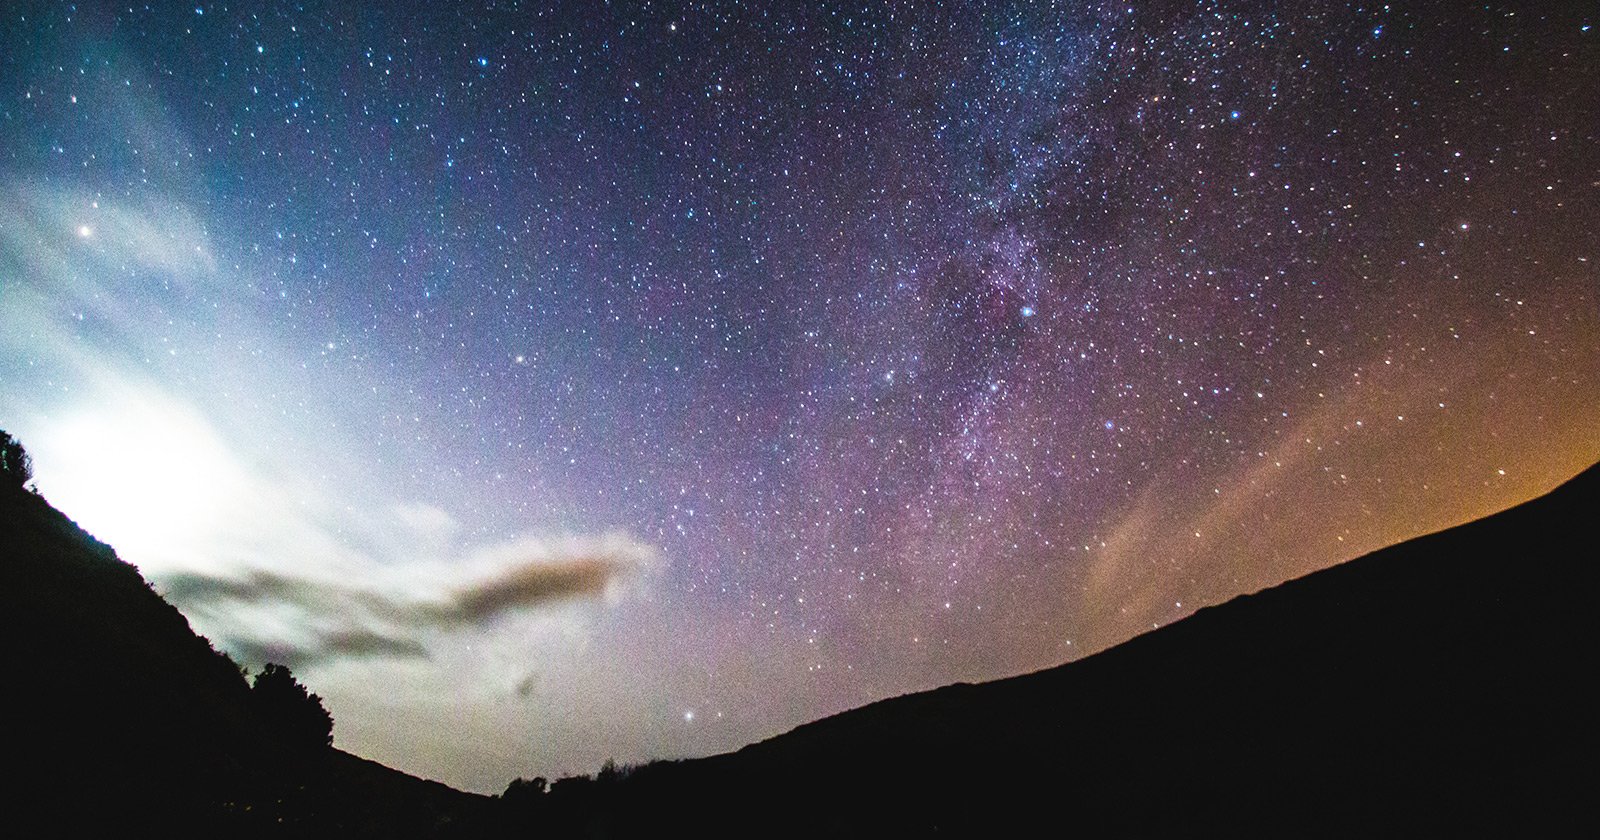
Night Sky
The location is very important when it comes to astrophotography. You want to find the darkest place possible, which means you want to avoid being anywhere near big cities or small towns. When it comes to star photography, we like to refer to the light emitted from cities and towns as light pollution due to the fact that it makes seeing the stars harder. The most ideal places to photograph the night sky are international dark sky reserves. This is where you will find the stars to be at their brightest because there will be little to no light pollution. Have a search on Google to see if there is an international dark sky reserve near you.
Subjects
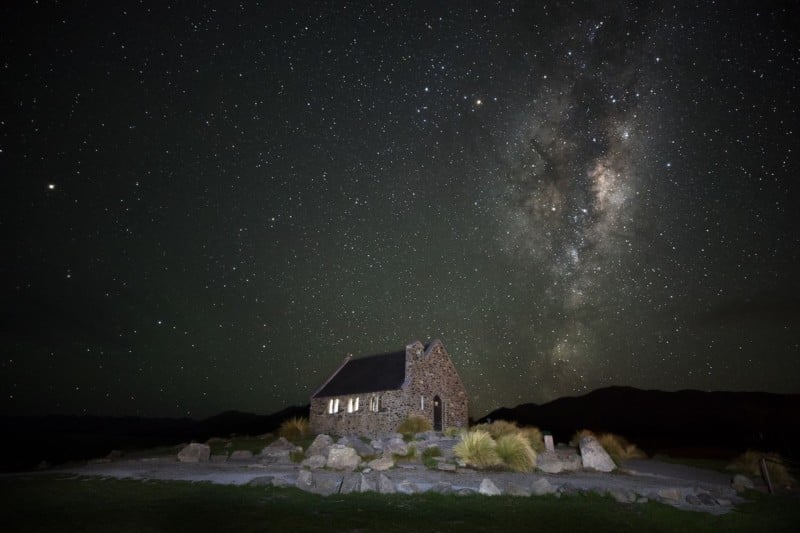
When I am looking for a location to photograph the night sky, I usually tend to visit the area during the day prior to heading out a night. The reason I do this is because I like to look for a subject or a point of interest that I can include in my photos. This way, not only will you have the bright stars in the background of your shot but you will also have a subject in the foreground.
Camera Settings
Shutter Speed
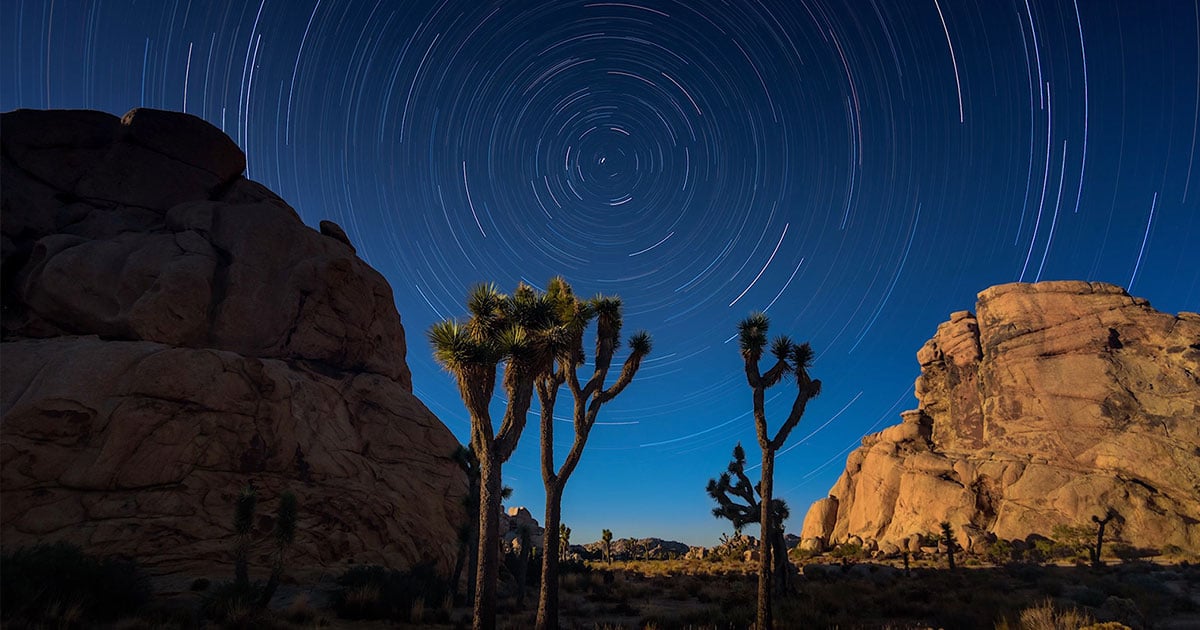
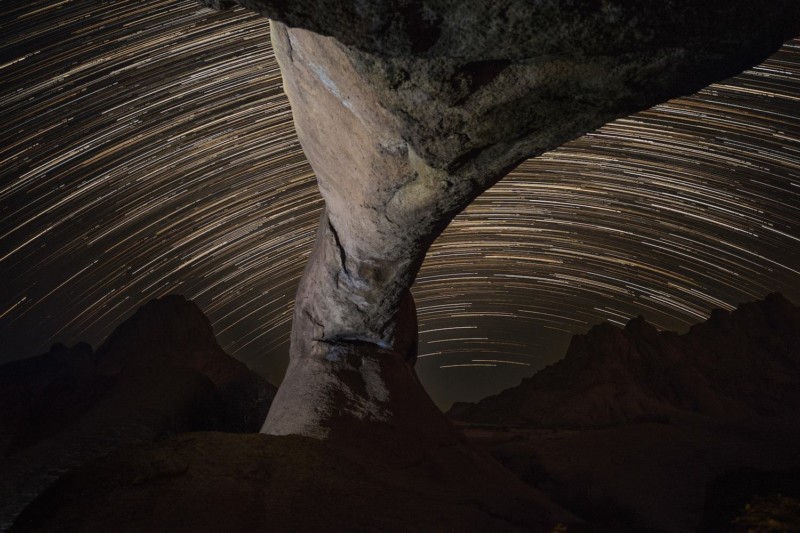
You want to use a long exposure time (slow shutter speed) when doing astrophotography, this will give your camera’s sensor enough time to record those little dots of flickering light. Usually, a good place to start is somewhere in between 20 seconds and 30 seconds. If you want to avoid any form of star trails, then use the rule of 600. Because we are stationary in our position on earth, as the earth spins the stars will very slowly move across the sky in front of our camera, which will cause the stars to create a trail of light. These photos can be incredibly unique in their own right but if you want to avoid that, divide 600 by the focal length you are shooting at. In my case its almost always 16mm because I want to fit as many stars in my shot as possible. 600/16 = 37.5 which means that I can use a shutter speed of 37 seconds before the stars begin to create trails in my photo.
But on the other, hand if your aim is to capture star trails then my advice would be to take a series of photos, one immediately after the other. In most cases, I would take a series of 100 photos and create the star trail in post-processing. Read on for how to achieve this in post-processing.
Aperture
Usually when it comes to setting your aperture, its best to shoot as wide as your lens allows (smallest ‘f’ number). This will let the largest amount of light into your camera. This means that you can shoot with a lower ISO which is almost always desirable or a slower shutter speed if desired. The lowest my lenses allow me to go is f2.8, so that’s what I always shoot with when photographing the stars.
ISO
Your ISO will usually range anywhere from 800 – 2000. I personally try to use a slower shutter speed (longer exposure time) and keep my ISO towards the lower end of that scale. Doing it this way creates less noise in my images.
Focusing
When it comes to focusing you want to set your lens to manual focus and adjust it to infinity, this is the safest bet when shooting distant objects. Most lenses do have a mark which tells you what infinity is. This is a little ‘L’ or ‘I’ on the focusing ring of your lens. Once set, take a photo and then zoom in on the stars using the LCD panel and magnifying glass button on the back of the camera. If it’s not 100% sharp, try adjusting the focus ever so slightly and taking another shot. Repeat until the stars are in focus. If you want to focus on a tree or subject in the foreground then I usually set the camera to autofocus, point the flashlight at the subject to light it and focus until your camera tells you that focus has been achieved. I then switch back to manual focus without bumping the focusing ring, this means all your images will be in focus and sharp.
Lens Stabilization
Some lenses have this option and some don’t. If your lens has a stabilization control, then you want to switch it off when shooting long exposures with a tripod. Doing this prevents the camera/lens from continually trying to auto-stabilize any shake. We do this because the tripod is already stabilizing the camera for us and this will lead to sharper photos.
Post Processing
Lightroom
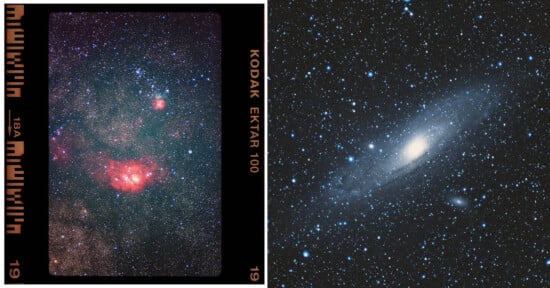
Don’t be disappointed if the images on the back of the camera don’t look exactly like the images you have seen on the internet or in magazines. When it comes to astrophotography a lot of the magic will happen in post-processing. This is where you can adjust some important settings like the highlights, the whites, the exposure, and even some clarity in order to really help those stars’ pop.
Photoshop
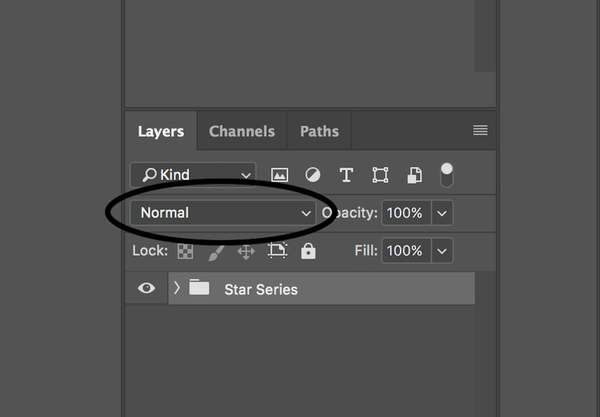
If you took a series of star photos because your aim is to create star trails then import all the photos into Lightroom and apply your desired adjustments to a single image. Now sync the adjustments applied to the single image across every other image in the series and import them into photoshop as layers. Once they are all imported, highlight all the images. Then in the layer’s tab adjust the setting from normal to lighten and boom! There are your light trails.
P.S. Some of the prints seen in the images above and many more are available for purchase through the online print store at Lonely Hunter.