How to Photograph the Back of the Hollywood Sign
It seems that every visitor to Hollywood wants to photograph the mountain with the Hollywood sign on it but rarely do people want to make the effort for a Hollywood sign hike to go photograph the back of it. If you can put in some extra time, photographing the back of the Hollywood sign will provide you with an amazing photo opportunity and a stunning 360-degree view of Los Angeles.

This is a 6.4-mile round-trip hike with 1,050 feet of elevation gain. I found a much faster route which is called the Innsdale Trail. Foot traffic is much less on this route and it is only 4.6 miles both ways with 750 feet of elevation gain.
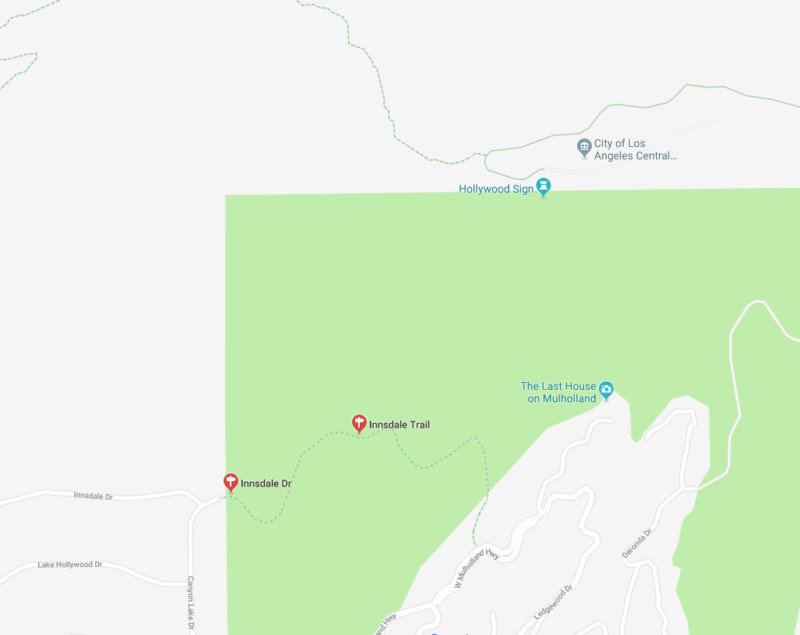
It took about one hour to get to the top and it was a very leisurely and beautiful walk to get up there. The trail goes through a few residential streets as well as the open mountainside. There are no steep sections. The starting point for this trail is at the top of Canyon Lake Drive near Innsdale Drive.
When I reached the top, I could see that most Hollywood sign hikers congregated at the very peak of the mountain looking down on the sign. This is a nice place to take photos from, but it does not give you an unobstructed view of the back of the Hollywood sign. The photo from the peak includes a chain link fence in your shot which will be slightly in the way of the sign, and you cannot see the full height of the letters. Your photo will look good, and clearly this is where everyone seems to go, but this is not the location for the money shot.
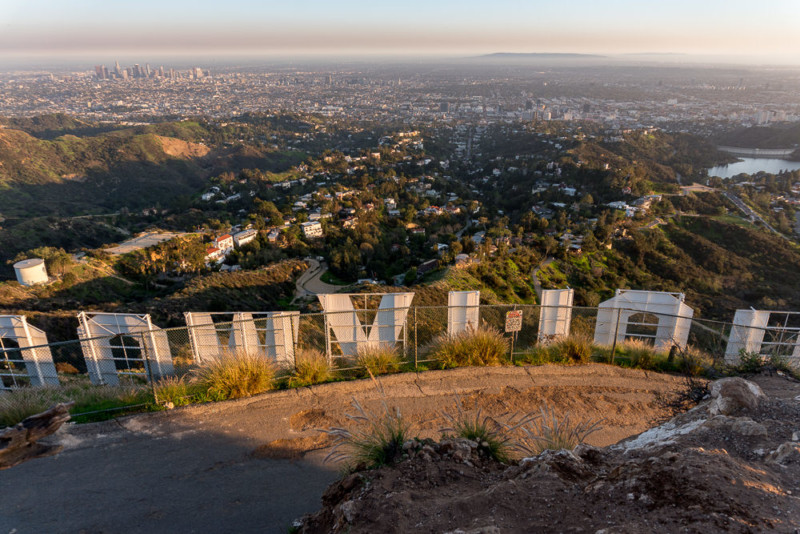
The best place to photograph the back of the Hollywood sign is on the asphalt road directly behind the sign and just below the peak. From the peak, you will look down on this asphalt road about 40 feet below you. At this location on the road, there is a six-foot-high chain link fence that keeps people away from the sign. You can either use your cell phone to shoot through the links in the fence for an unobstructed shot of the back of the sign or, if you have the reach, you can lift your camera or phone over the top of the six-foot-high fence for a completely unobstructed view of the back of the sign.
When I stood in front of that fence ready to photograph the sign, two things became clear to me:
1. The Hollywood sign is very wide.
2. The Hollywood sign is very close.
The sign would not fit inside the frame of my camera, but I could not back up and stand further away from the sign because the fence would encroach into the frame. Since I was so close to the sign, I would need a very wide angle lens, such as a 14mm on a full frame camera, in order to take a single image with the entire sign in one frame. If you have this lens then great, but for me this meant I needed to shoot the photo as a multi-image panorama. Good thing I love taking panos! Here is how I took this shot.
I selected a location where I was directly behind the letter Y on the sign and was directly in front of a fence post to decrease the possibility of camera shake because the fence was going to support the camera. I extended the legs on my tripod to full length, but I did not spread the tripod legs; instead, I kept the three legs together like a monopod.
I had brought two stretchy bungee cords with hooks on the ends just for this location, and I used one bungee cord to mount the tripod to the fence at the very top, and the second one at the very bottom. My tripod was rock solid while mounted to the fence with my camera about one foot higher than the top of the fence. The difficulty was that my arms had to reach up and make adjustments to the camera that was high over my head.
It was difficult to see the camera settings, so I had to take the camera off the tripod a few times to adjust focus, ISO, aperture and shutter speed. I used a wired shutter trigger to take each image at that height and so as not to cause camera shake. I love that thing and I use it for all low light photography. The trick is to wait at least four seconds after last touching the camera before taking the next photo. If you don’t have a remote trigger, you can set your camera’s self-timer for two or five seconds to reduce camera shake.

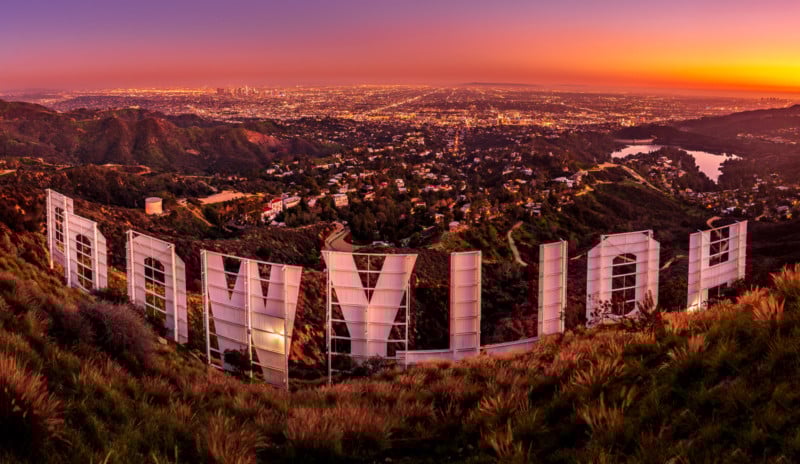
I waited until after sunset to get my best images.
My camera settings for the photo above were ISO 200, one second shutter speed, f/8, and the lens focal length was at 24mm using manual focus. When I shoot panos I set the camera in manual everything. My camera was in portrait mode and this is a six shot single row pano. I also shot an HDR pano and a super high-resolution 700-megapixel image made with 46 images in three rows. The photo above is the single row non-HDR version. It is 11405 pixels wide by 6613 tall. This means the image is 75 megapixels in size, so it is large enough to print very large while maintaining super high resolution.
A note about sunsets at the Hollywood sign: When I was there in late March the sun was setting far to the right of the frame. There is never a time of year when the sun will either rise or set directly ahead of the sign. With that in mind, don’t worry about finding the perfect time of year to get the best sunset there. With that said, December 21st is the date that will bring the sunrise and sunset closest to being in the frame. June 21st is the date when they will be the farthest away out of the frame.
My photographic technique is designed around creating a super-high-quality photo, but you can just as easily hold your phone and lift it over top of the fence and your photo should turn out looking fantastic. Use the fence to stabilize your hands, and then use the panorama feature on your phone to shoot a nice wide image. Make sure you crop out the fence and any other distracting elements.