How to Shoot the ‘Natural Glow Look’: A Beauty Lighting Setup
For the last few beauty shoots I’ve done, I was asked to emulate the “Natural Glow Look”. This is a pretty common look in photography today! We see it in campaigns of big makeup companies such as L’oreal, Estee Lauder, Revlon, and L’OREAL, ESTEE LAUDER, REVLON, & Neutrogena, just to name a few.
Lighting
The “Natural Glow Look” lighting can be achieved with multiple lighting modifiers. The two that I find myself using the most would be a white beauty dish, or a silver parabolic or regular umbrella.
The background is totally user dependent. If you would like a high key white background, I would suggest putting the model in front of some type of rectangular or parabolic softbox. This way when you take the image, it will be a beautiful pure white background. Also (depending on how far your subject is from the backlight), you will get a great wrap-around effect.
You can also simply change your backdrop color, or only use the key light to create a nice grey color behind the model! Today we will be going with the high key setup with a parabolic softbox behind and our key light will be a white beauty dish.
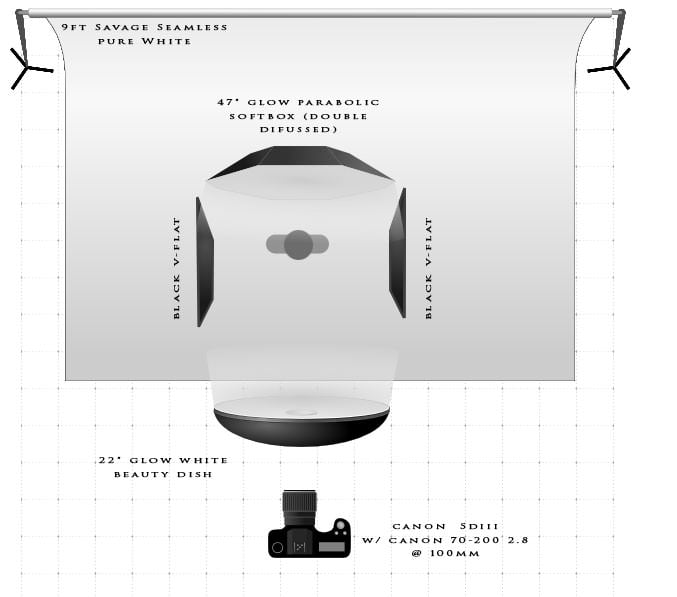
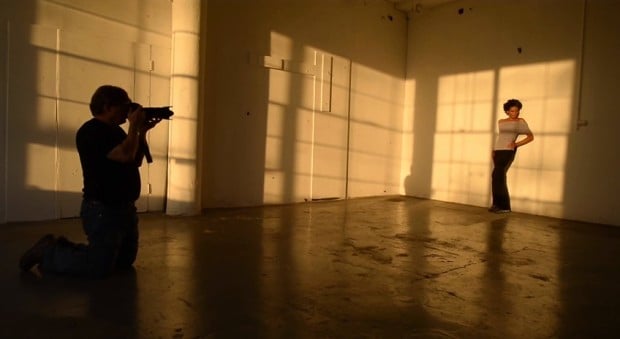
Once the model, Erica Silhan, was on set, I gave her an aluminum chair (back of the chair facing the camera) to sit on. The model is approximately 6-8 inches away from the parabolic softbox which has a 300-watt-second strobe on it at about 1/16th power.
Our key light is about 3-4 feet away from the model directly centered to her and slightly above eye level. Our beauty dish is bare and the light is set to 1/2 power.
(Please note my strobes operate like this: 1/128th lowest power | 1/1 full power.)
Also on both sides of the model were 2 black V-Flats to stop too much of the wrap around effect mentioned earlier.
This light can sometimes be considered “flat” but with using the v-flats and the high key background it blends out rather well!
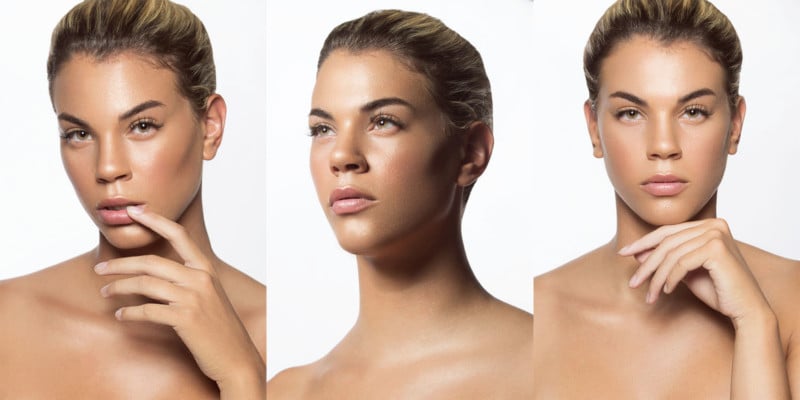
Highlights of the Beauty Dish
The beauty dish has a love-hate relationship with a lot of photographers! Mainly because it gives such a harsh source of light, which makes it a less forgiving light. When using a softbox, you get a nice soft wrapping light verses harsh and shadows. There are a few things I love about the beauty dish and it has to do with the highlights it gives you.
There are three highlights I want to focus on. It would be the bridge of the nose, right below the nose along with the top of the lip, and right under the eyes.
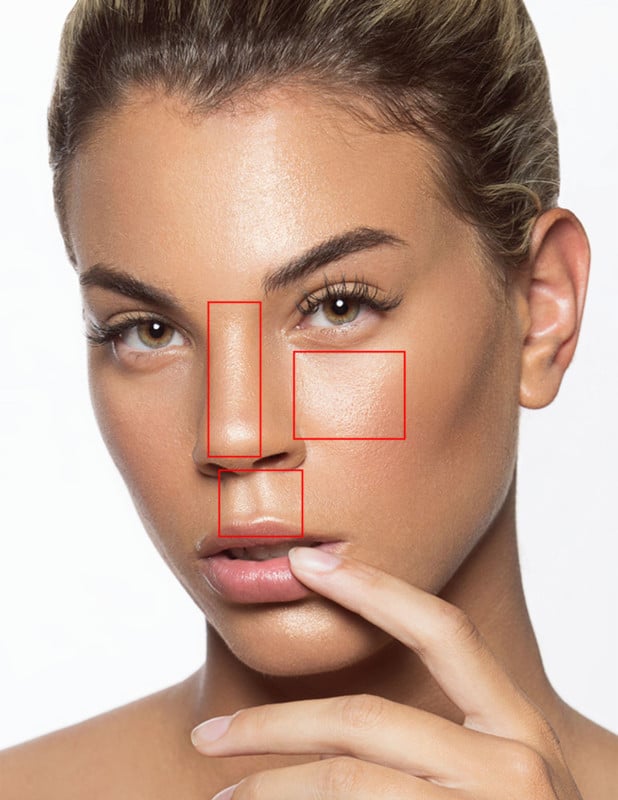
These three areas scream high-end beauty and are found in a lot of beauty images across the globe!
Post-Processing
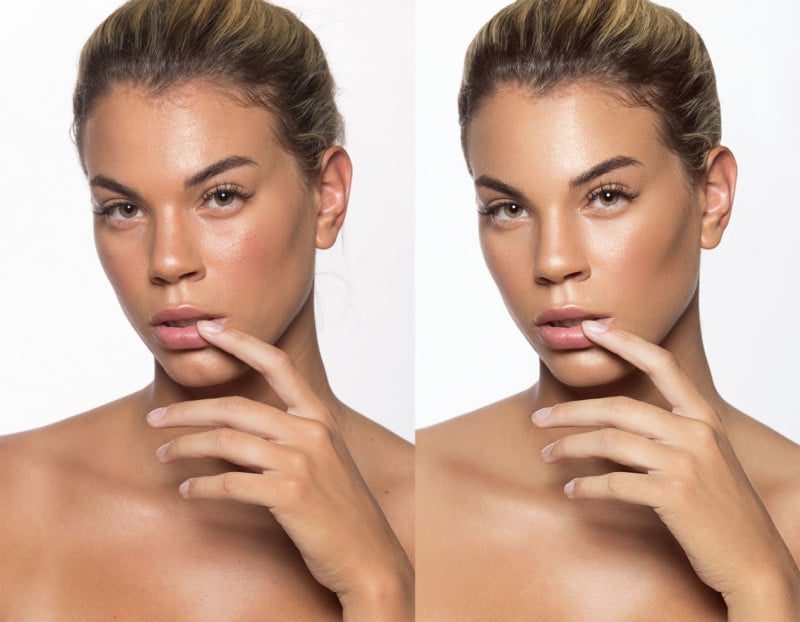
Once the lighting is as close as you want it in camera, it is time to take the images to the computer! I shoot all my images in RAW format because even though we get everything as close to how we want it in camera, that is only one step in making your images pop! Retouching and color grading are an essential step to showcasing your creativity in these images!
When I am in the studio setting I always shoot tethered into either my MacBook Pro Laptop or iMac desktop. It helps me to see what tweaks I need to make on the spot and with Lightroom it is really easy to get images over to Photoshop for retouching and color grading!
Conclusion
This is how you emulate the “Natural Glow Look.” Hopefully this blog post is able to help you recreate this look! I would love to see some of the outcomes!