Photo Studio Polyboards and Thrifty Alternatives
Nearly every professional studio I’ve ever used has these “polyboards” and you‘ve probably even seen them yourself but may not have known what they’re used for. Polyboards are polystyrene boards that usually measure 4 feet wide by 8 feet high and are normally 2 inches thick. One of the other defining characteristics is that they are often white on one side and black on the other.
The black side is used for the opposite reason, to reduce the bounce of light. In certain situations in a big white studio, your lighting can bounce around and result in the lighting on the model looking quite flat and uninteresting. By placing black polybords either side of your subject can help sculpt shape and form by adding shadows where there was none before.
For your reference, ‘polyboards’ can be purchased under the name of polystyrene sheets from DIY and hardware stores under the insulation section. An 8-by-4-foot board is 2400mm by 1200mm. You also want to watch out for the thickness. We’ll be using them for a purpose that they aren’t intended for so you need to purchase a thickness that is substantial enough to hold its own weight when upright. I recommend a 2-inch-thick sheet and that translates to 50mm.
Making it Stand Up
Polyboards are primarily used in the construction industry for insulation, as a result, they’re relatively cheap to buy. When you buy them, they normally arrive bright white on both sides so the first step is to paint one side black. But the biggest issue with them is not painting them but getting them to stand up. Normally this is quite costly as purpose built metal stands need to be purchased. But here’s a far cheaper hack that works perfectly: a simple bike stand.
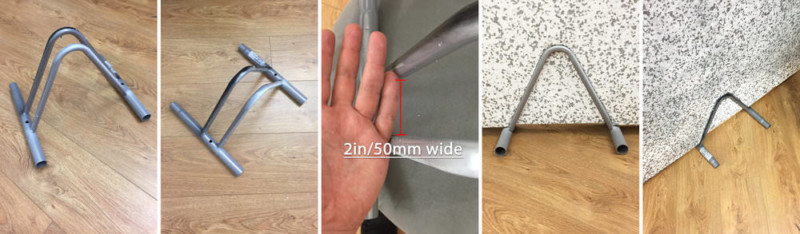
In the above image, you’ll see a single bike stand that holds your polyboards upright perfectly and very cheaply. Just make sure it’s at least 2 inches wide and you’re all set.
Using it On Location
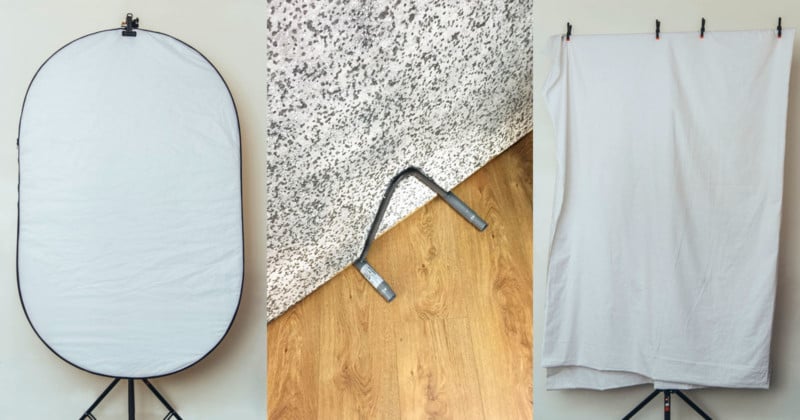
But what if you want the benefits of a polyboard but you’re on the move and working on location? Obviously bringing an 8-foot by 4-foot sheet of polystyrene is hardly very practical so here’s a mobile alternative. Simply use a large white reflector and attach it to a light stand via a couple of multi-purpose clamps and brackets.
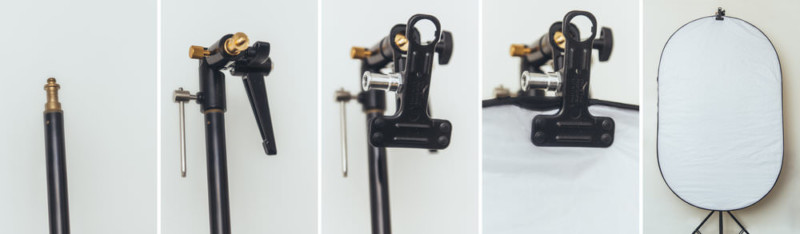
No matter how big or small the job, I always carry around these handy clamps and they come in especially handy here. Simply take your light stand, put an umbrella bracket at right angles on top and then attach a spring loaded clamp onto that. This will now hold your reflector firmly in place.
Desperate Times, Desperate Measures
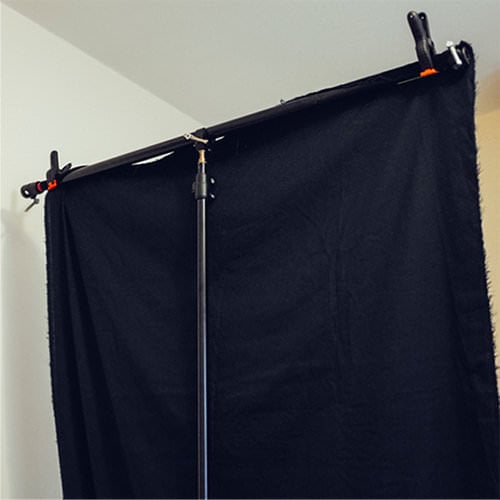
When things get really desperate and you don’t even have a large reflector with you, then a simple white sheet can be utilized to just as good effect. Any white sheet will do and by simply screwing a small crab-clamp atop your light stand and then getting that in turn to hold a crossbar (any pole or even broom-handle will do), you can then simply clip your sheet to that and you’re ready to shoot.

The white sheet can be anything from a large sheet of white cotton fabric to a simple bed sheet.
And here’s a pro tip: remember that these mobile ‘polyboard’ alternatives can be implemented with the black variations. Most reflectors now come with a black flip-side and that can be clipped in place instead of the white side. Also, if you’re after a black alternative to the white sheet, I recommend black cotton velvet.
This fabric soaks up more light than anything else and I will often use this fabric in a studio environment over the black polyboards as it’s so good at reducing bounced light.
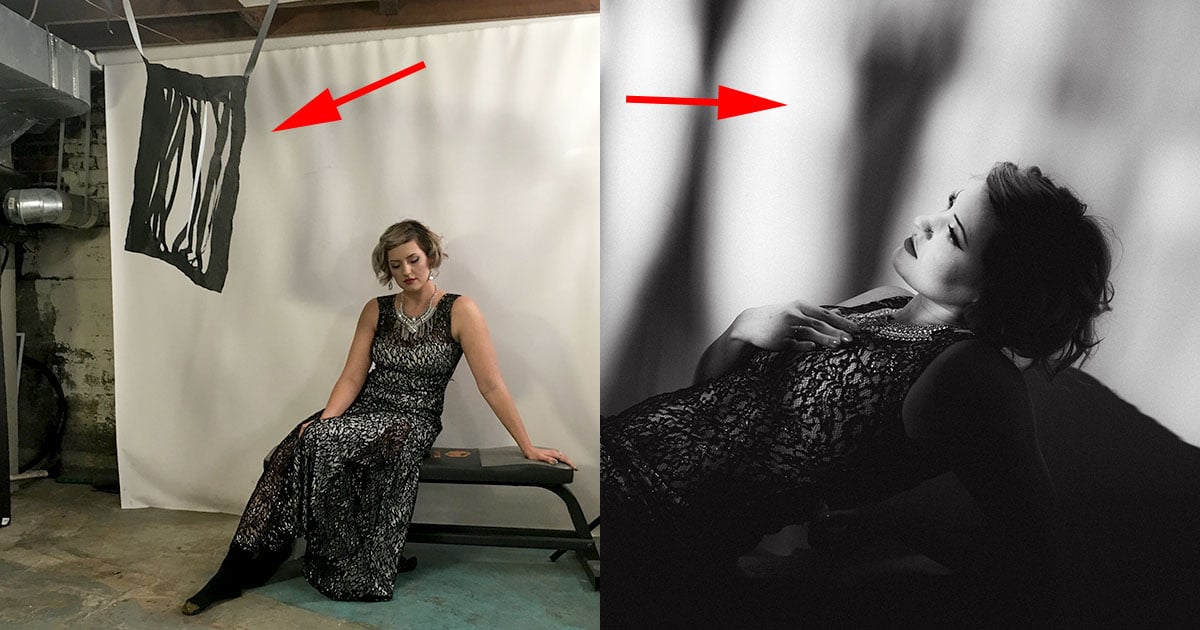
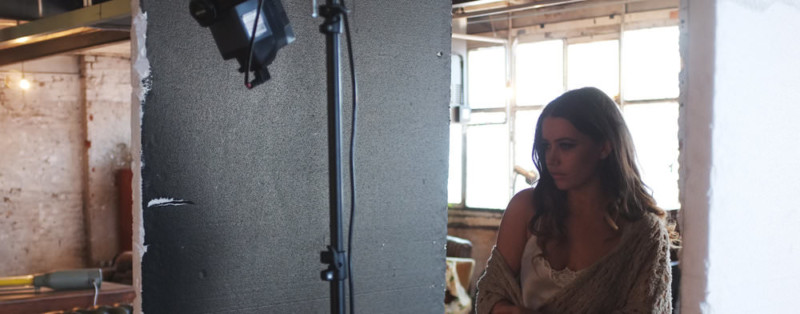
You can see me using the black velvet sheets on stands here in a studio to heavily control the bounce of light:
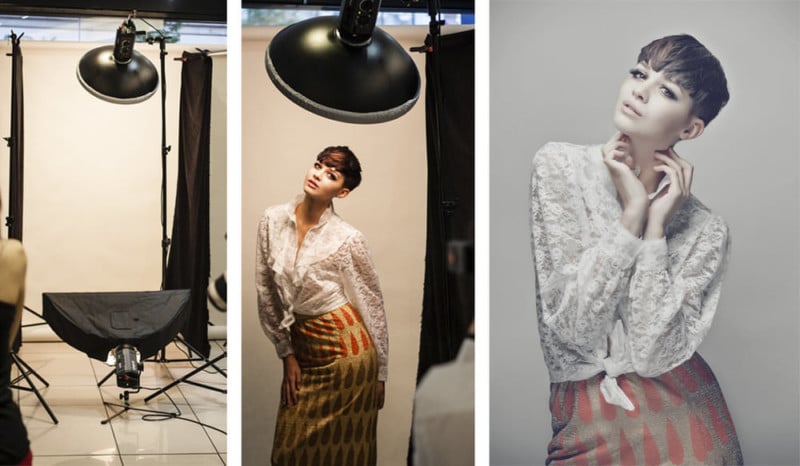
In large white spaces like studios, the light will keep bouncing around the walls, floor, and ceiling which can leave your lighting looking flat. You should be able to see here on the final image that there is very soft beautiful light on the models face but there are still strong shadows on the sides of her face to give depth and shape.
About the author: Jake Hicks is an editorial and fashion photographer based in Reading, UK. He specializes in keeping the skill in the camera and not just on the screen. Hicks has also just announced his first ever U.S. workshops in September 2017. If you’d like to learn more about his incredibly popular gelled lighting and post-pro techniques, visit this link for more info. You can find more of his work and writing on his website, Facebook, 500px, Instagram, Twitter, and Flickr. This article was also published here.