How to Shoot Inception-Style Drone Photos
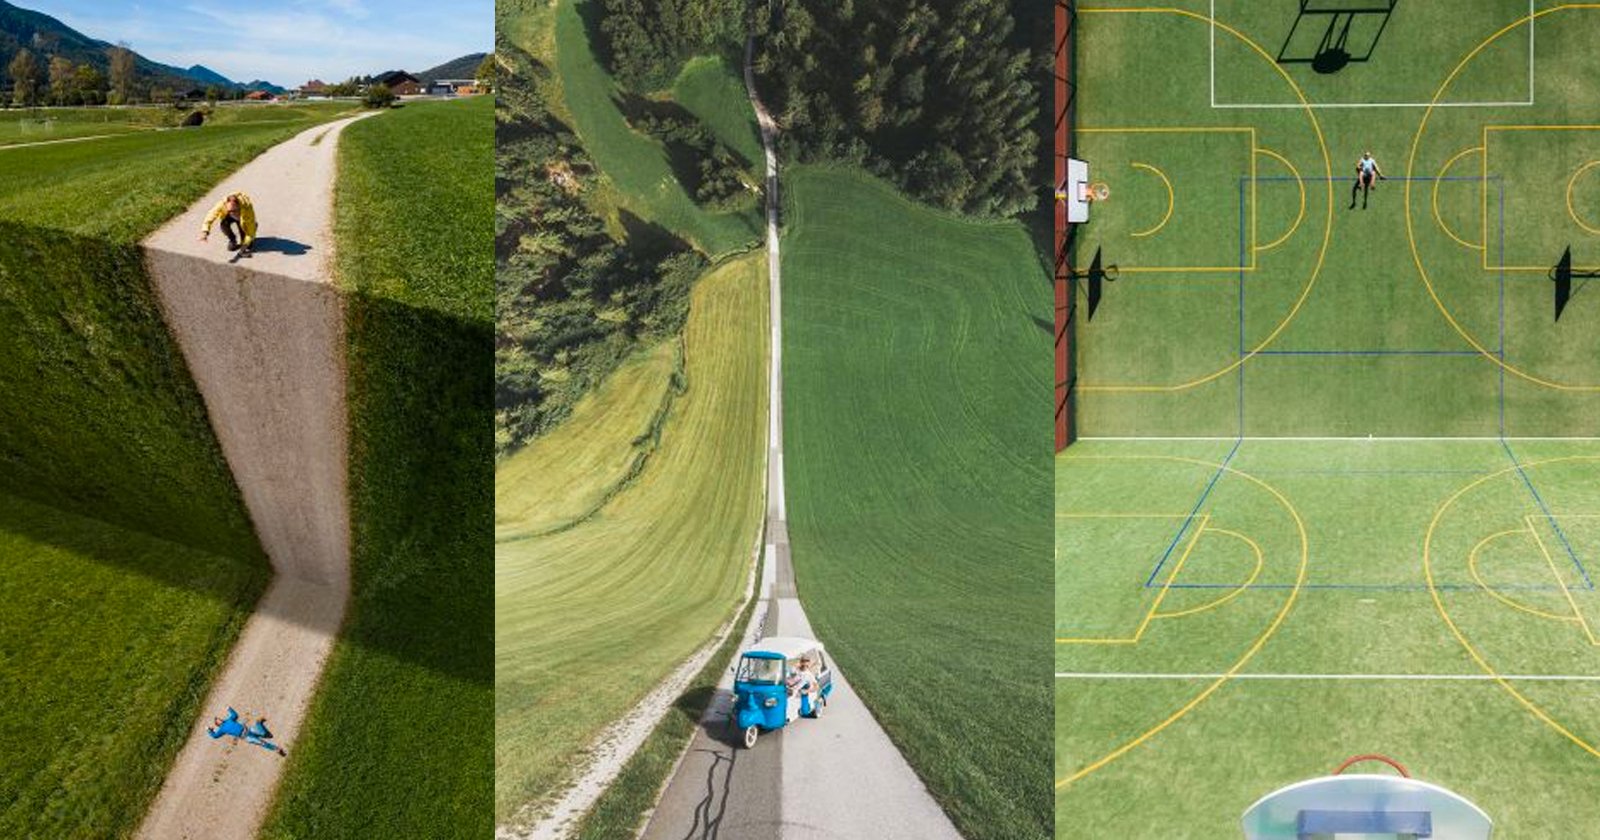
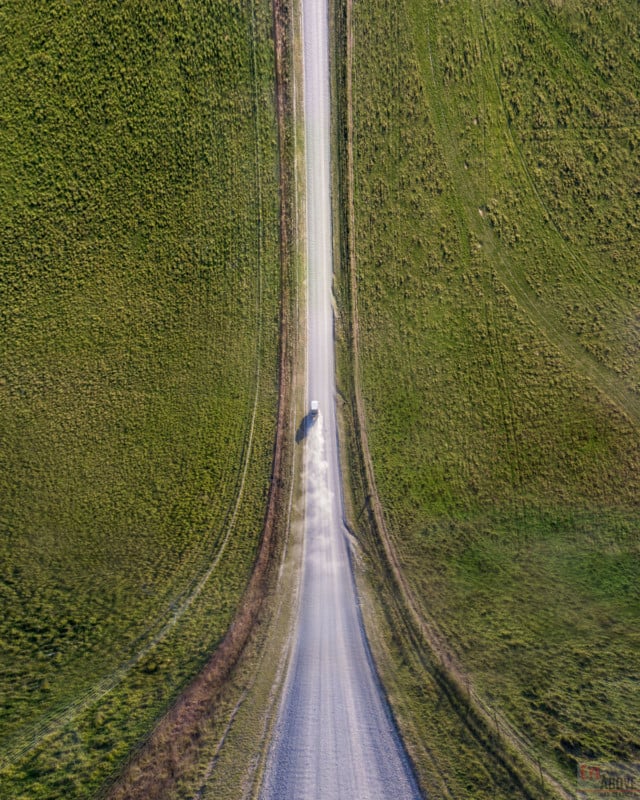
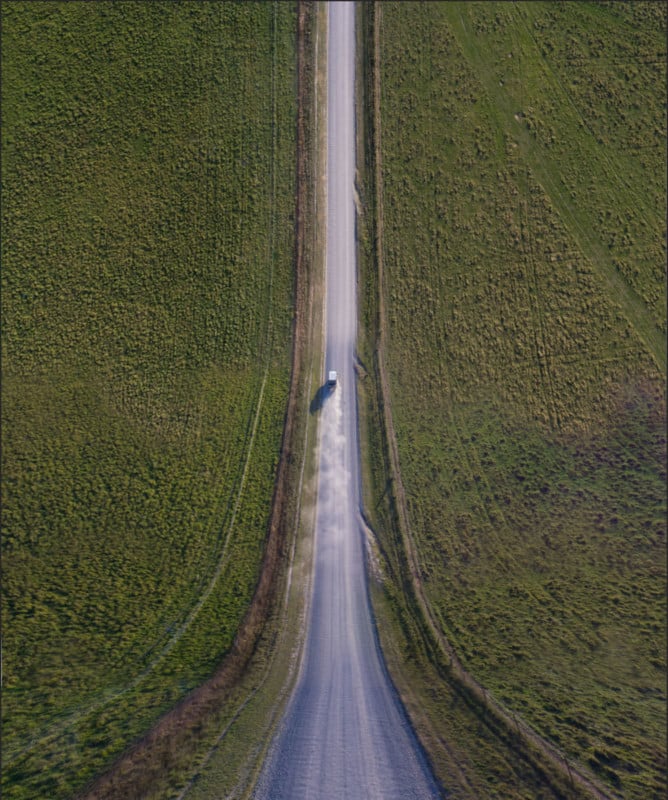
If you have been following anything drone-related lately, chances are you have seen one of the mind-bending images like the one above that are very reminiscent of the scene from Inception when the ground is bent up at 90-degree angles.
I am here to let you in on the secret and show you that it isn’t as hard as it may seem. If you have a drone and Photoshop, you are already most of the way there! You don’t need any special 3D software or fancy plugins — all you need in the basic warp tool in Photoshop.
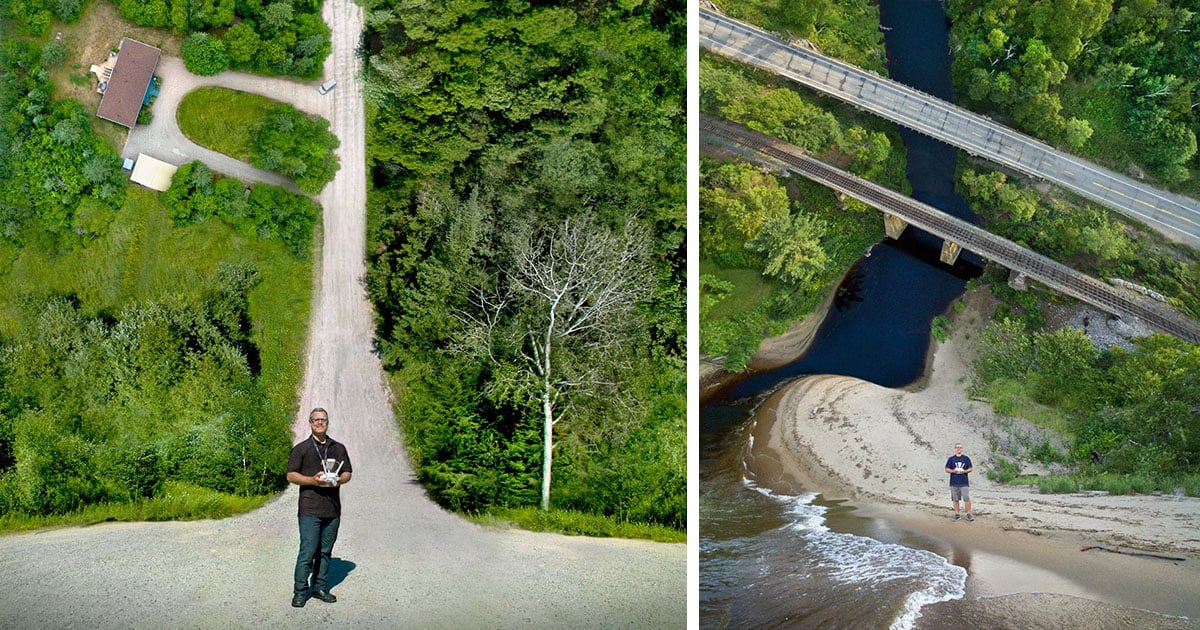
First of all, find a subject that will work well for the effect. You want to find a long straight subject, you can either have it run off into the distance or end above a subject. I chose this nice quiet country road because it will work well with the effect.
Now that you have you location, what next? You need to take photos at increasing heights above the same location and also angle your camera down further each time. The final top-down shot will be taken slightly further along the subject.
Here is how I went about shooting the image at the start of this post.
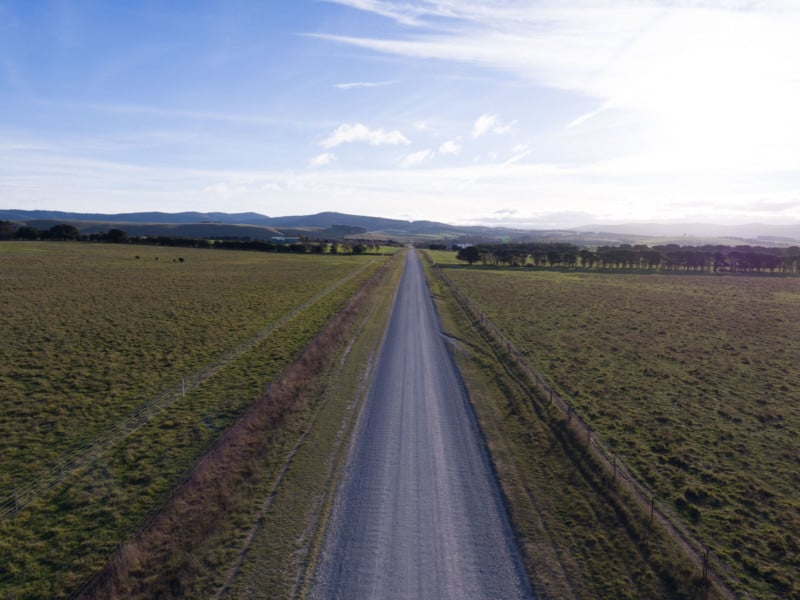
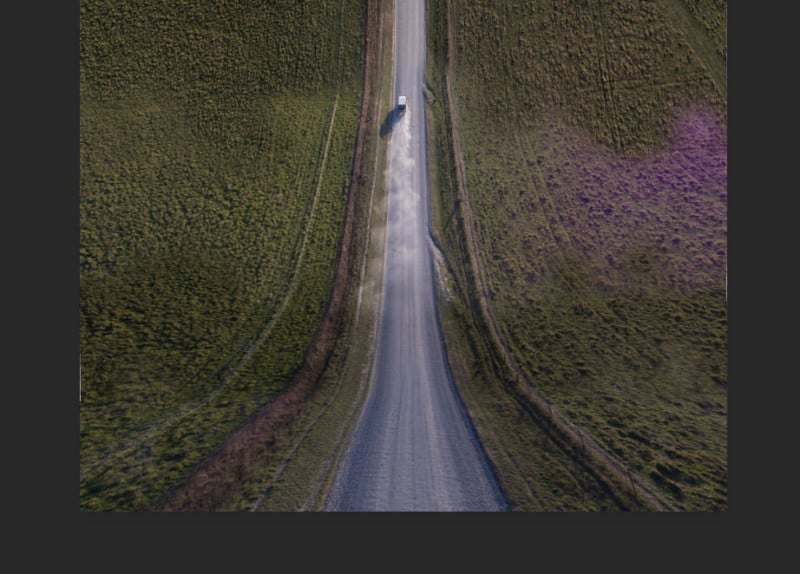
The 1st photo was shot 10m above the ground. Looking slightly down and facing straight down the road. Make sure that the road is running right down the middle of the photo.
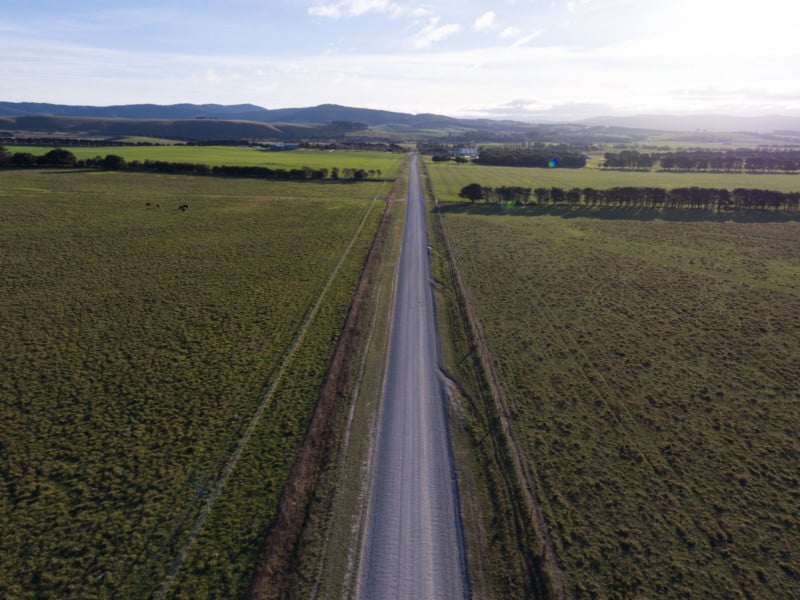
The 2nd was directly above the first but at 30m above the ground. Turn your camera down a bit more so that you can nearly see the same point at the bottom of the image.
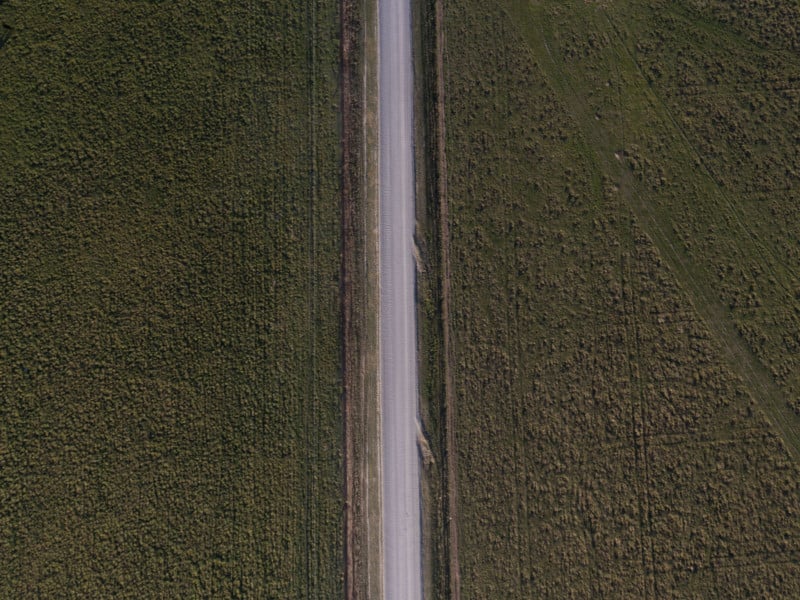
Next fly the drone straight up to 60 meters and angle the camera down even more. You want to keep the bottom part of the images at nearly the same point on the road, only moving it forward slightly each time. I was lucky that a car came past and added to the shot.

For the straight down shot I flew 60 meters down the road and up to 120m. This time you want to make sure that the bottom of the image is further down the road so that it ill line up in on the last image in the distance.
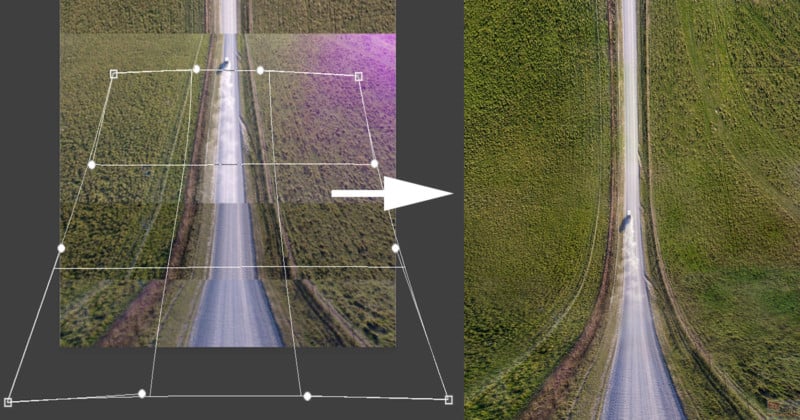
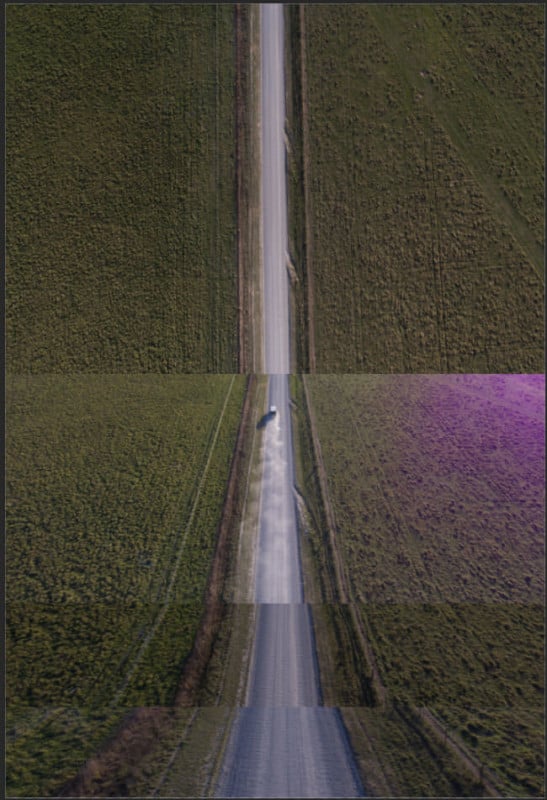
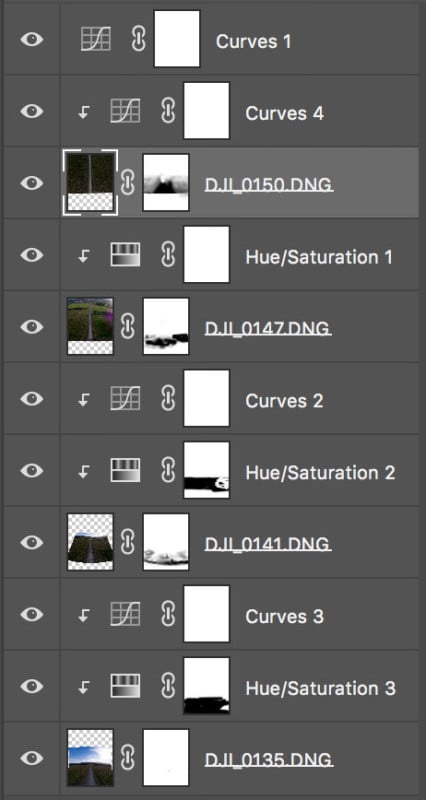
Now we need to stitch them together. Load all the photos as layers into Photoshop and position them roughly where they would go in the final image. In the layers panel stack them with the top down image at the top and then the next lowest until the last. You will have to make the canvas longer to fit in the images.
Starting with the bottom photo use the warp tool to widen the bottom and squeeze the top to make it closer to lining up with the next image. You need to make it a bit wider to leave room to widen the next image to match.
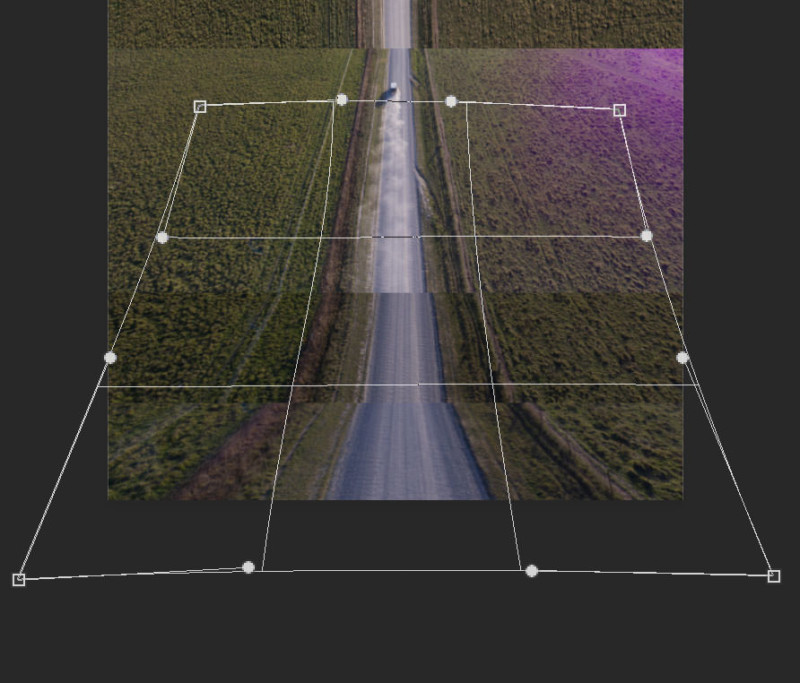
Do the same for the next 2 images to line them up while keeping a nice curve throughout. You have to make sure you are getting a smooth curve through the image otherwise it will look really angular at the joints. It takes quite a bit of fiddling to get everything to line up nicely. Lowering the opacity of the layer can help quite a lot.
You should end up with something that looks like this. Don’t worry about how it looks at the moment, the most important part at this stage is to have all the images aligned.
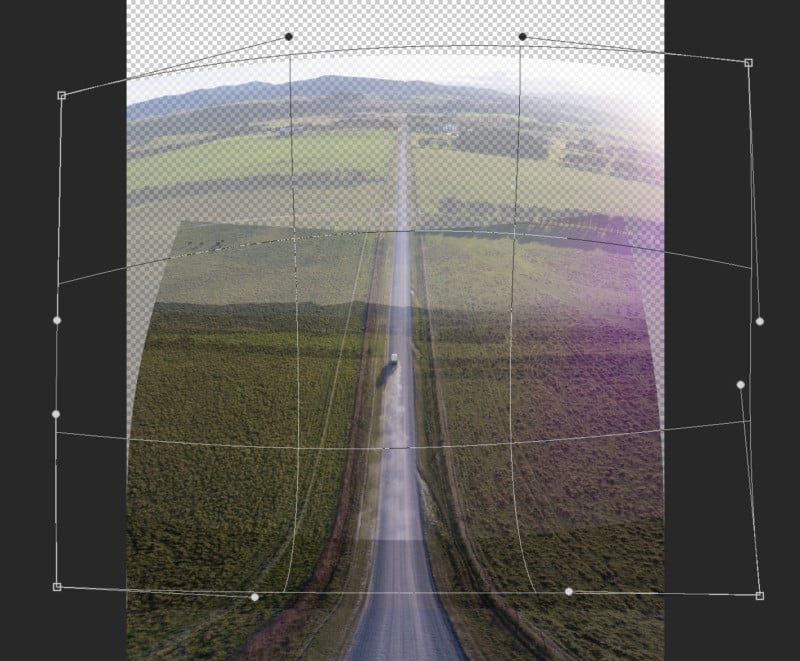
After you get all the photos lined up using the warp tool, put a mask on each layer. Using a soft brush smooth the transition between each layer.

Using a soft mask helps to hide the joints. Making the mask a bit random where each image finishes will also help to blend the images.
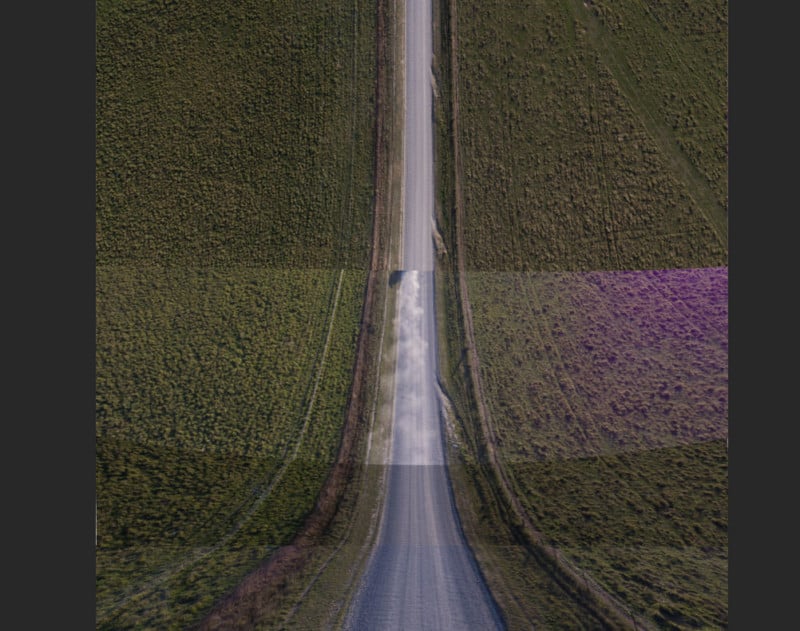
I used Curves and Hue/Saturation adjustment layers to make the images match and blend in well and to make the images more vibrant.
Once you have the images matching nicely use the warp tool again on all the layers to polish up the alignments and the flow of the image. You may need to fix up some masking after re-warping the images. I had to do some saturation and colour adjustment to hide the lens flare.
A final color and mask adjustment to make the images match in perfectly and you are finished!
There you have it — it’s not as difficult as it may seem at first glance. All you need is a drone, a subject, Photoshop, and a little bit of time.
I hope this helps you try it out for yourself!
About the author: Matthew Maas is a photographer and drone operator who offers his services in Australia through his business, Eye Above UAV Services. He has been doing photography for 5 years, and mostly shoots time-lapse projects. You can find more of his work on his Facebook, Instagram, and YouTube. This article was also published here.