10 Lessons Learned from Botched Motorcycle Photo Shoots
When it comes to motorcycles, I’m the grown-ass man equivalent of the 8-year old girl with the pony sweater that every single person knew in grade school. I’m obsessed: they’re what got me into photography; motorcycle photography brings the funnest edits; and bikes are a huge part of my life.
I’ve shot a lot of them in my short stint at photography, and I’ve learned a lot of “Do Not’s” in my time. The following is a list to remind myself, and hopefully help others to keep mindful of some things that may make or break your next vehicle shoot.
I’ve botched a lot of otherwise great shots, and want to minimize that terrible post-edit feeling in the future. Here we go:
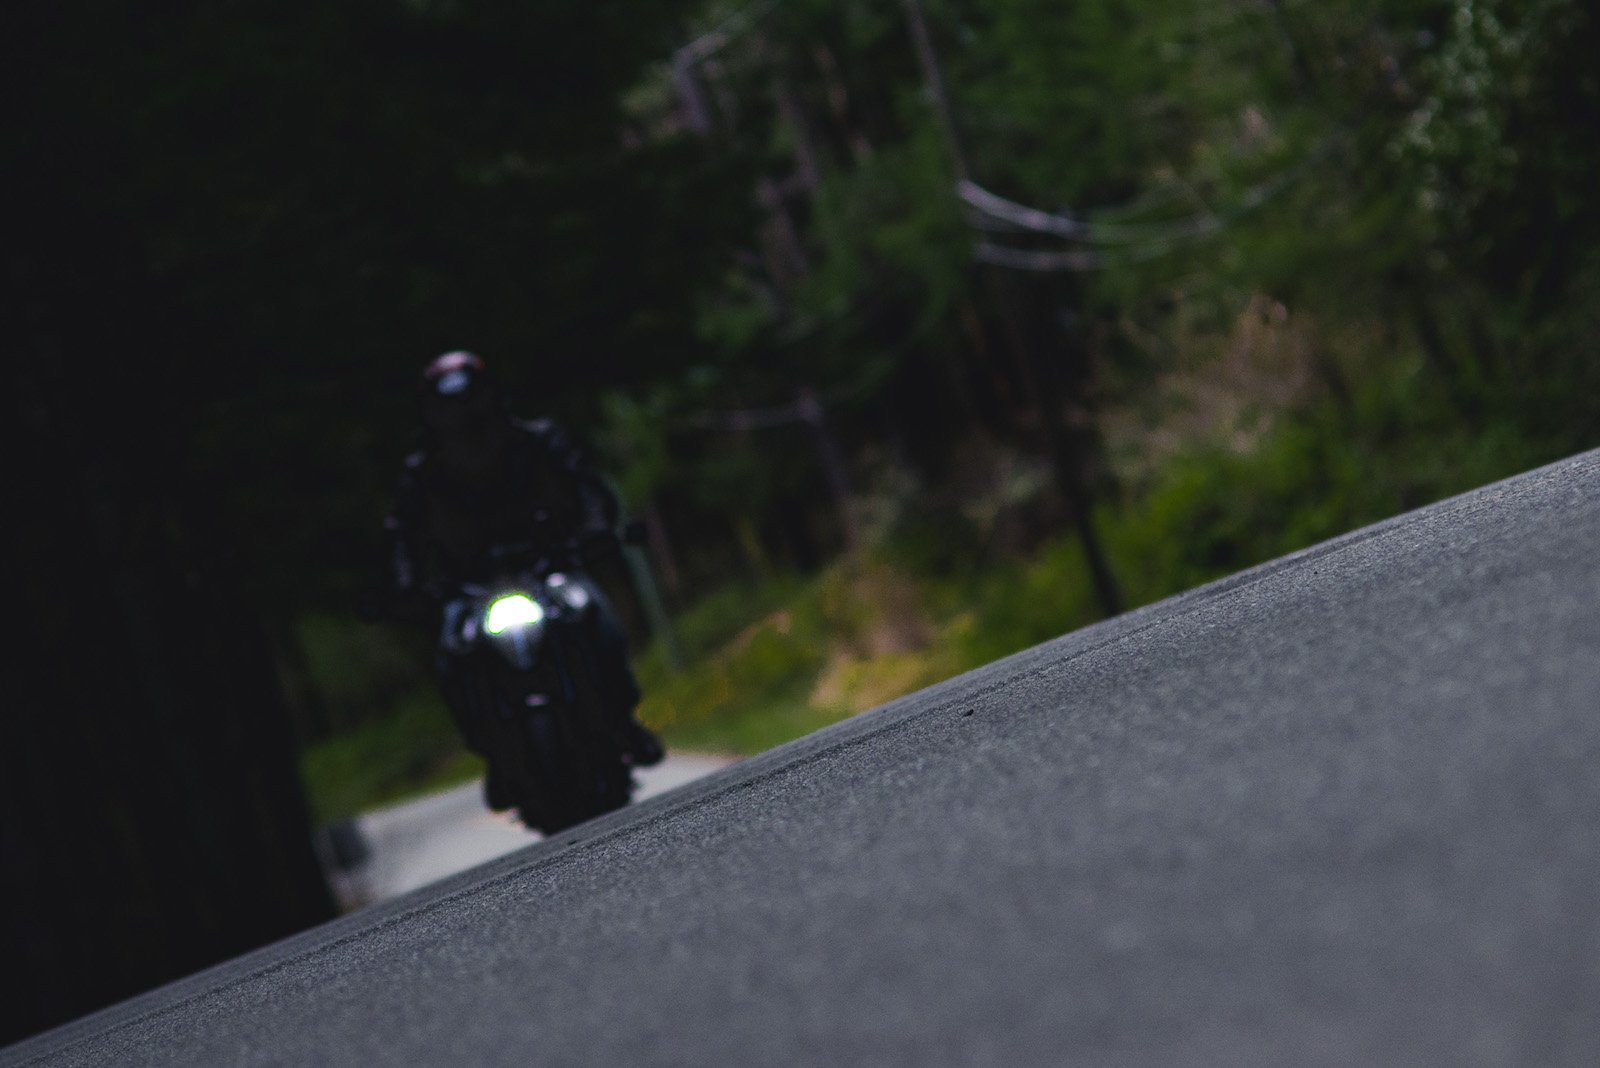
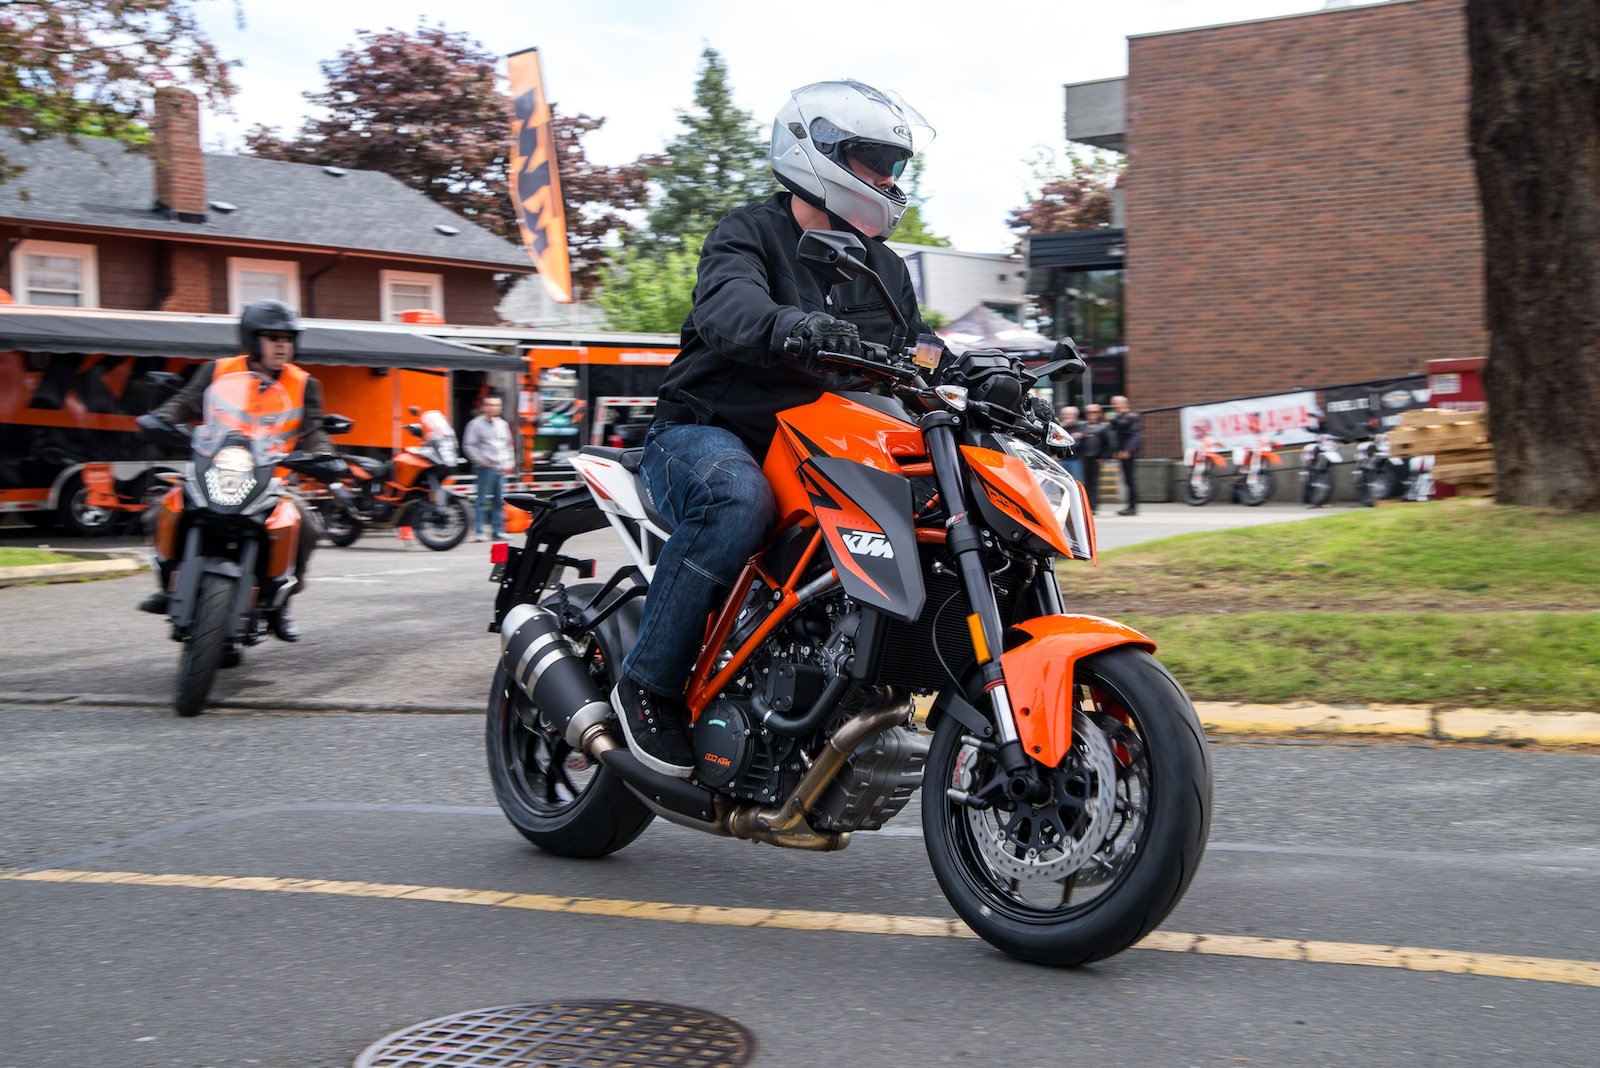
1. Colorful bikes are easy. Dark bikes are hard.
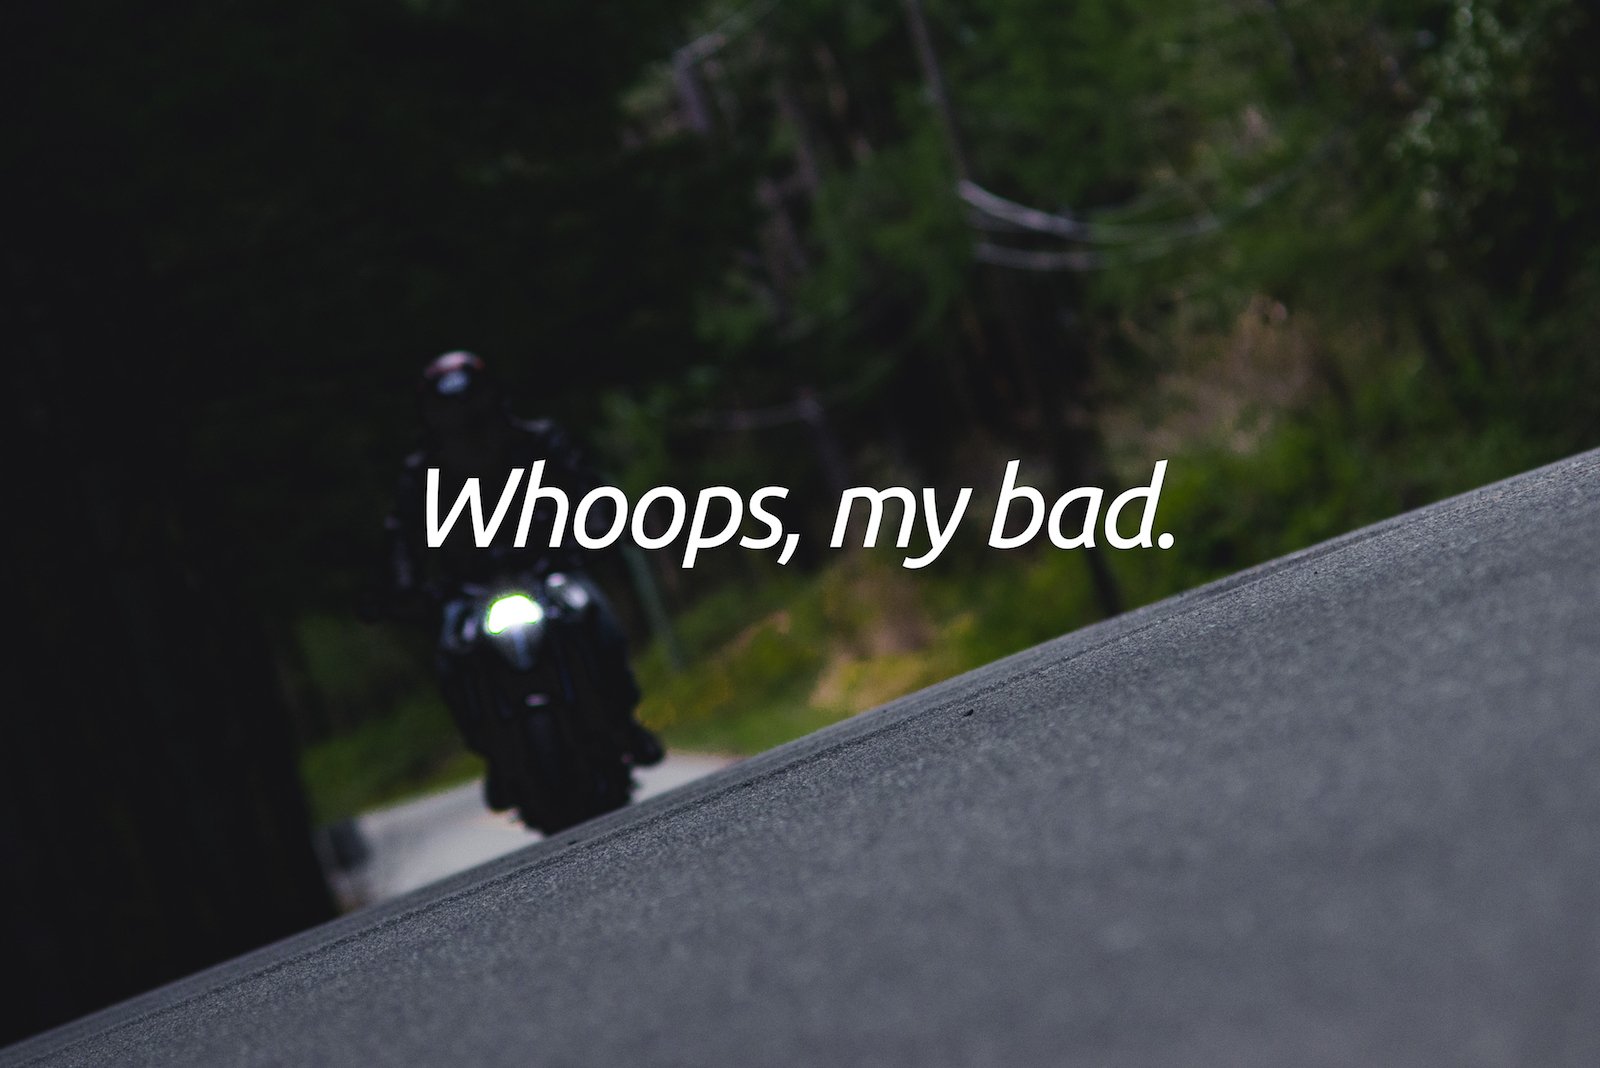
When headlights are involved, I’ve learned the hard way not to trust my D610’s metering. A bike’s headlights are brightest when it’s approaching you directly, and somewhat manageable if it’s coming at you from an angle.
I’ve found that I have these options:
- Stay manual, expose for the road. This might be hard if you’re not at a fixed focal length and your aperture varies with zoom (ig. 70-200mm f/4-5.6).
- Keep ISO’s low for more leeway in post-production.
- Set metering mode for background instead of spot.
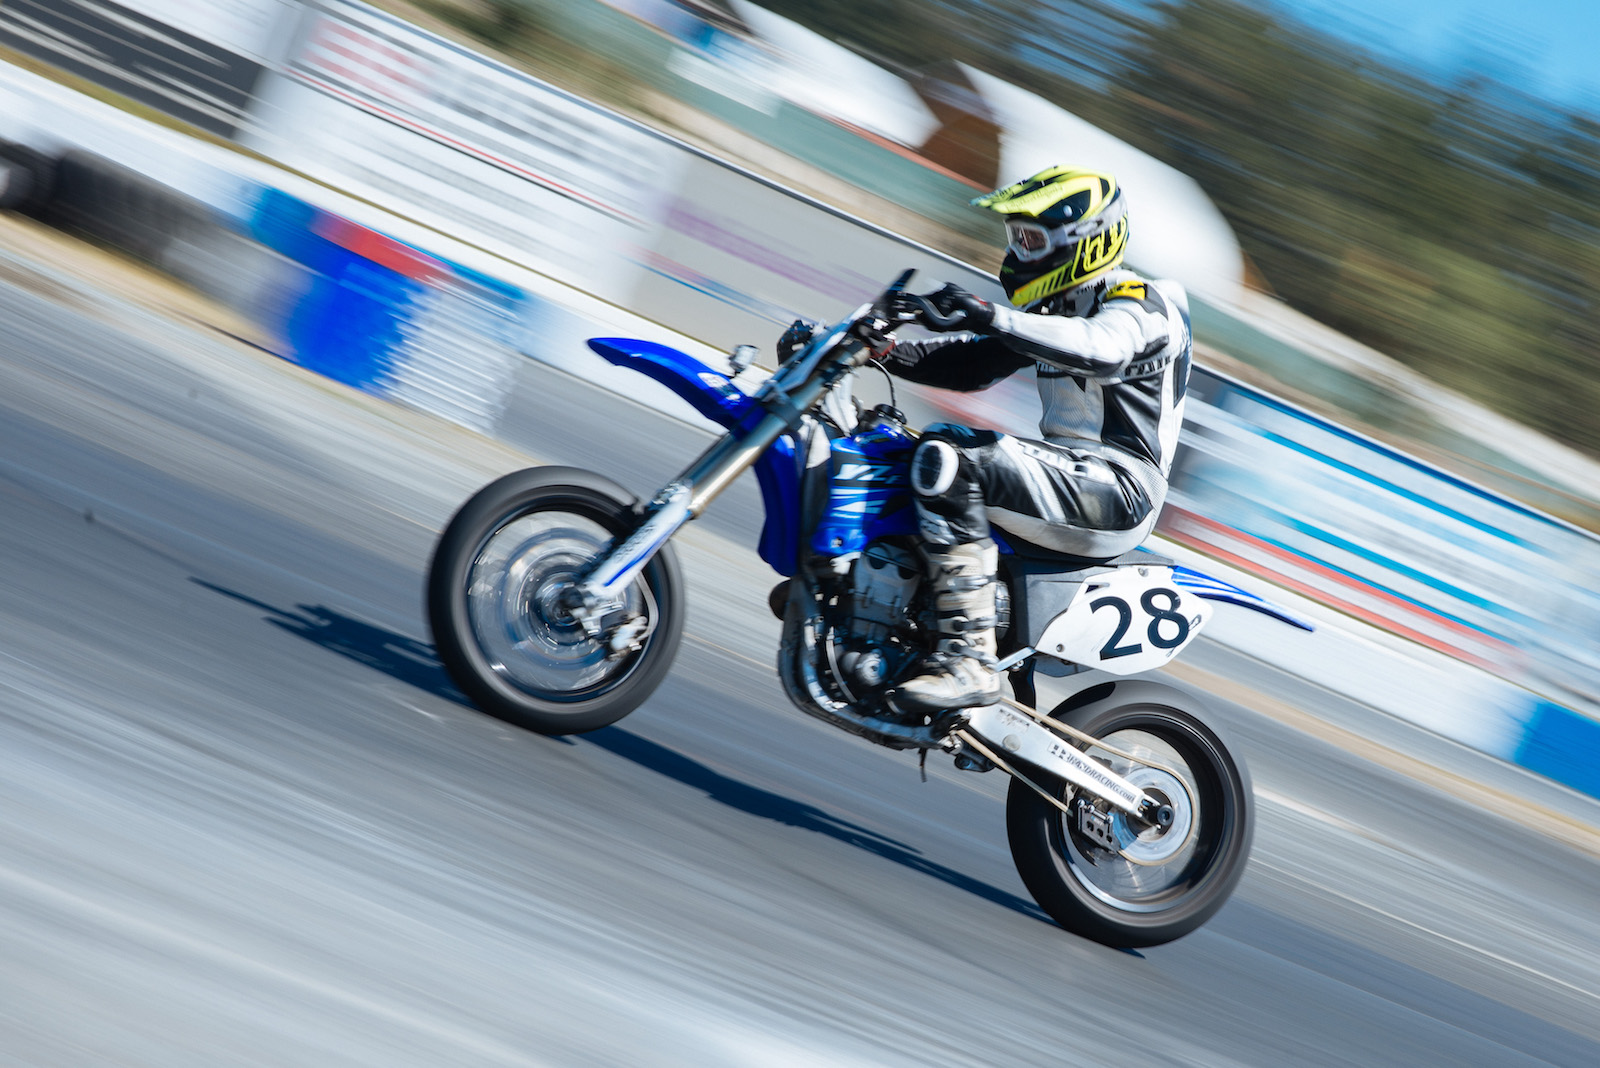
2. Motion Blur: None is more, less is worse, lots is great.
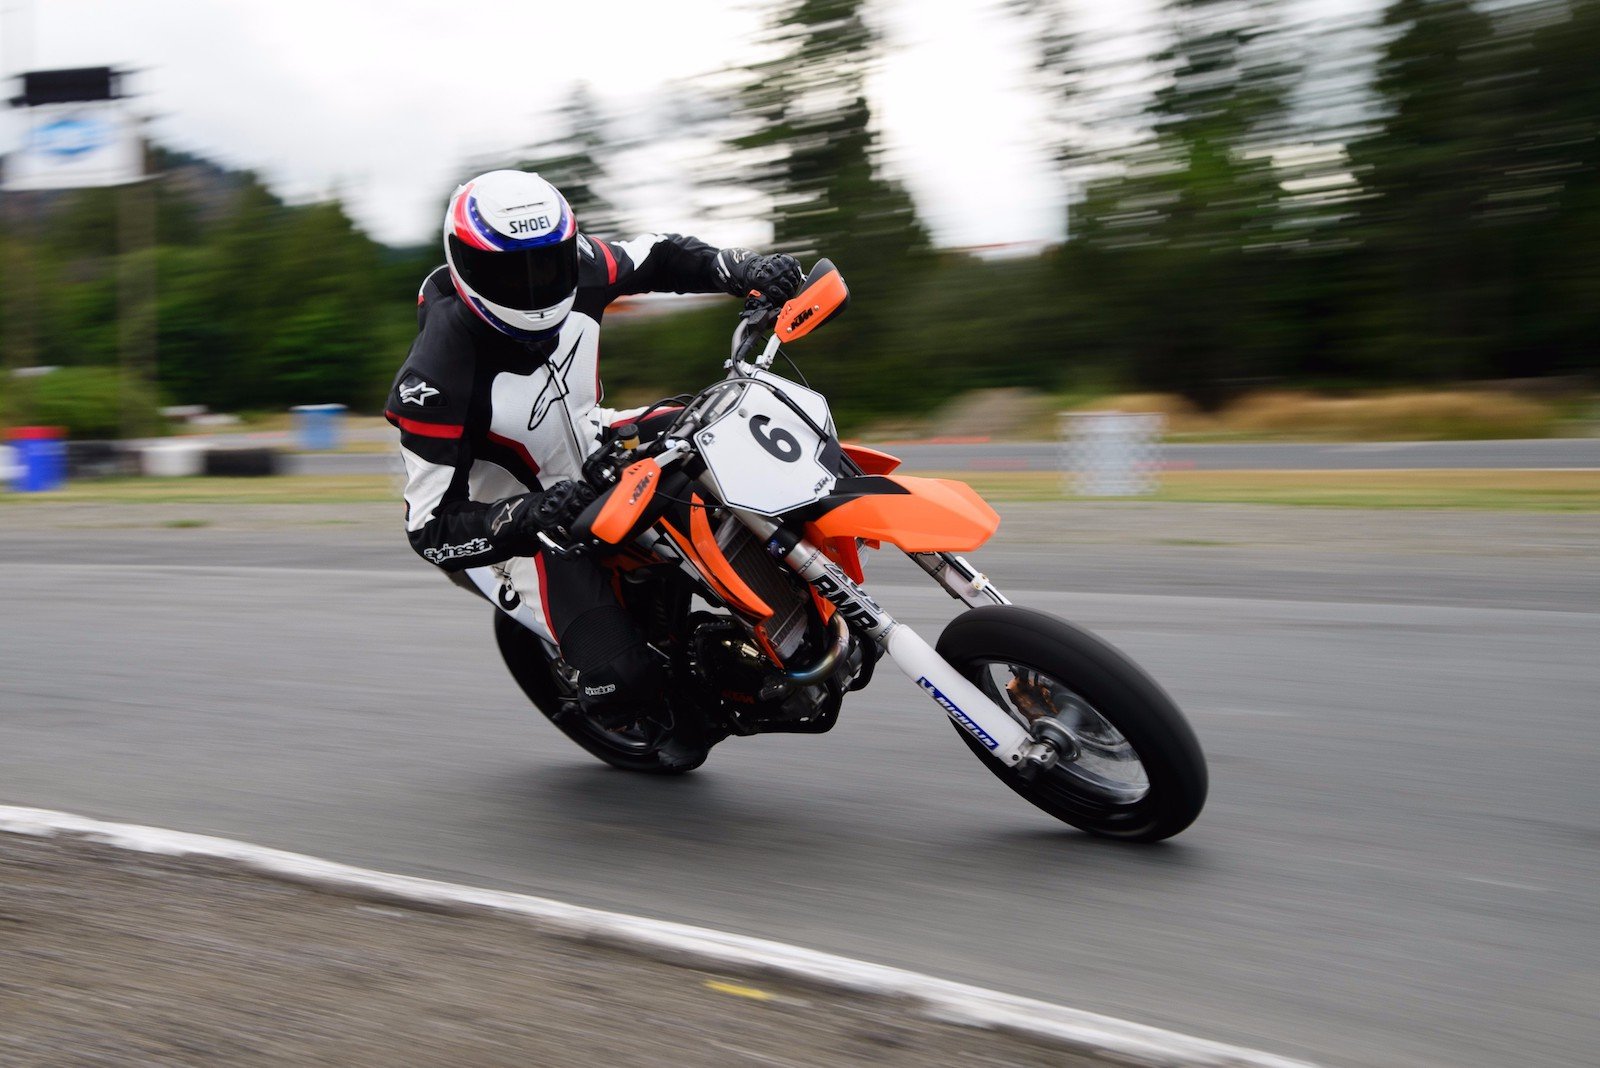
I’m not the best spokesman for action photography, but motion blur is hard. Well… keeping your subject sharp is.
I’m a big fan of panning and zooming at the same time to keep the subject framed while adding dimension and a sense of speed through simultaneous panning and zooming. You’re jerking around pretty fast when your bike is flying towards you in one instant, and flying away in another. Margin for error is pretty high, and your best bet for tack-sharp tracking is adding a little bit of speed to your shots.
The general rule of thumb for the slowest shutter speed on a handheld shot is:
1/(your focal length)
I’d modify this a little:
1/(your focal length + your general shakiness)
Or to be totally safe if you’re not a human vibrator:
1/(2 x your focal length)
If you have Vibration Reduction, or whatever your lens’s manufacturer calls it, you can probably get away with slower speeds. The faster your shutter speed, the more likely you are to capture your rider sharply.
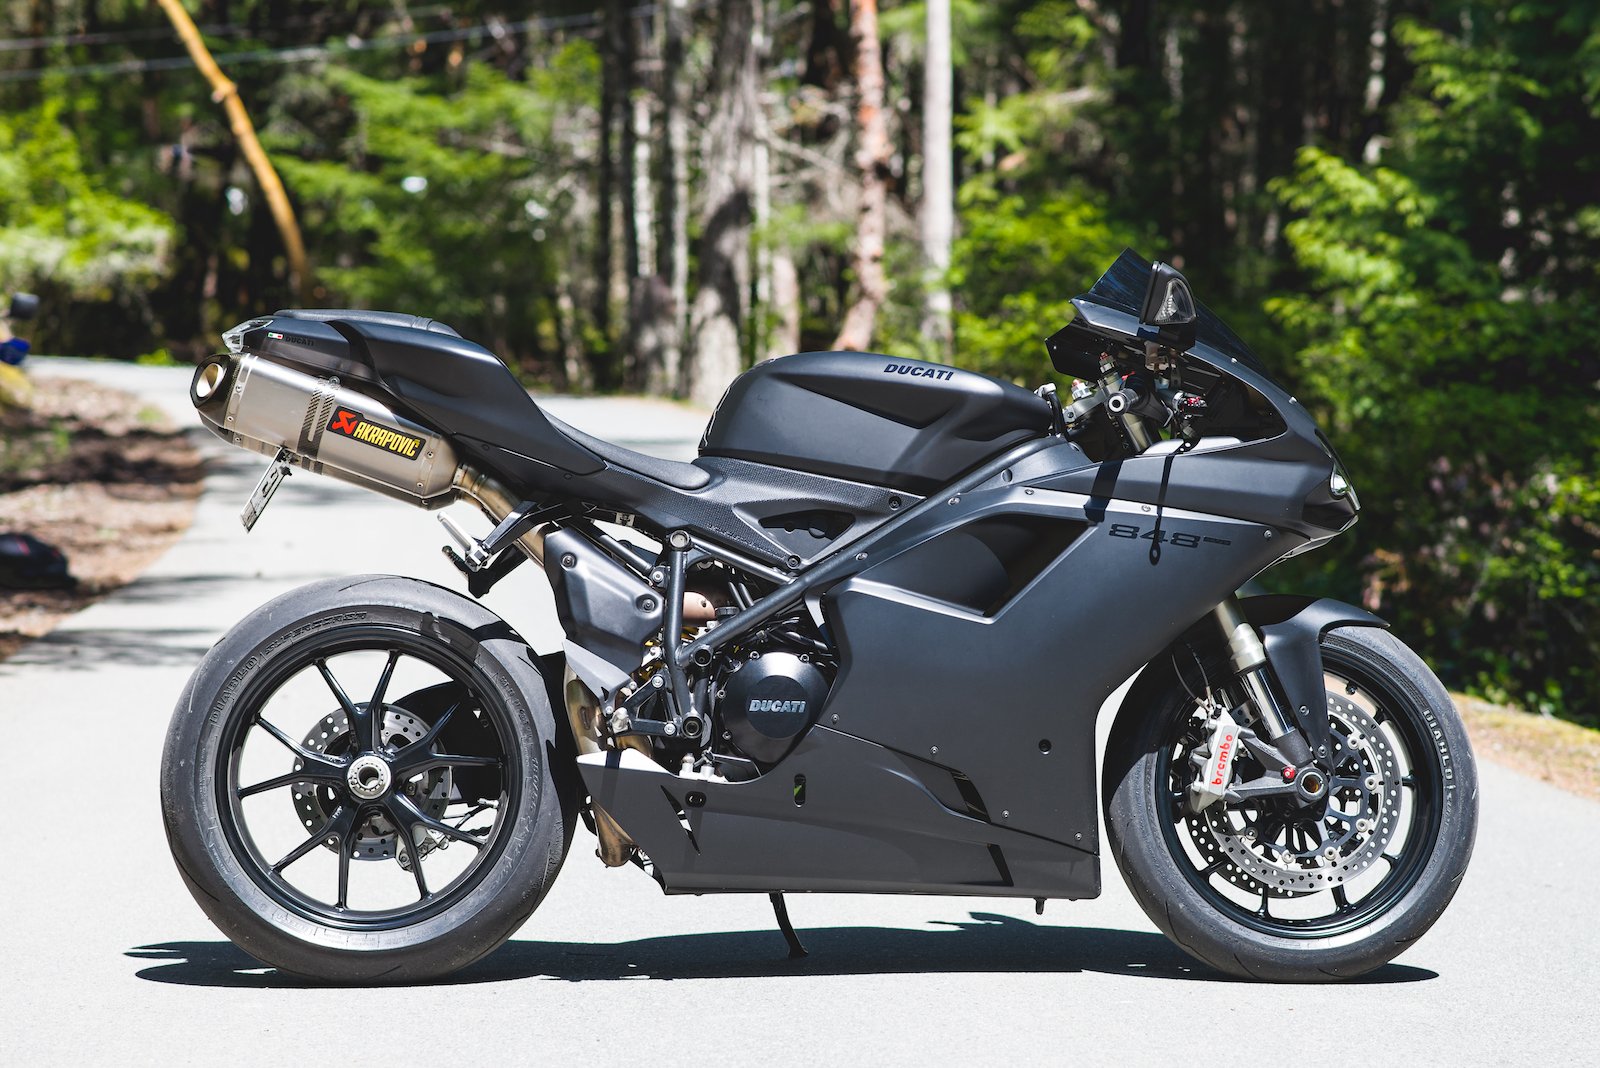
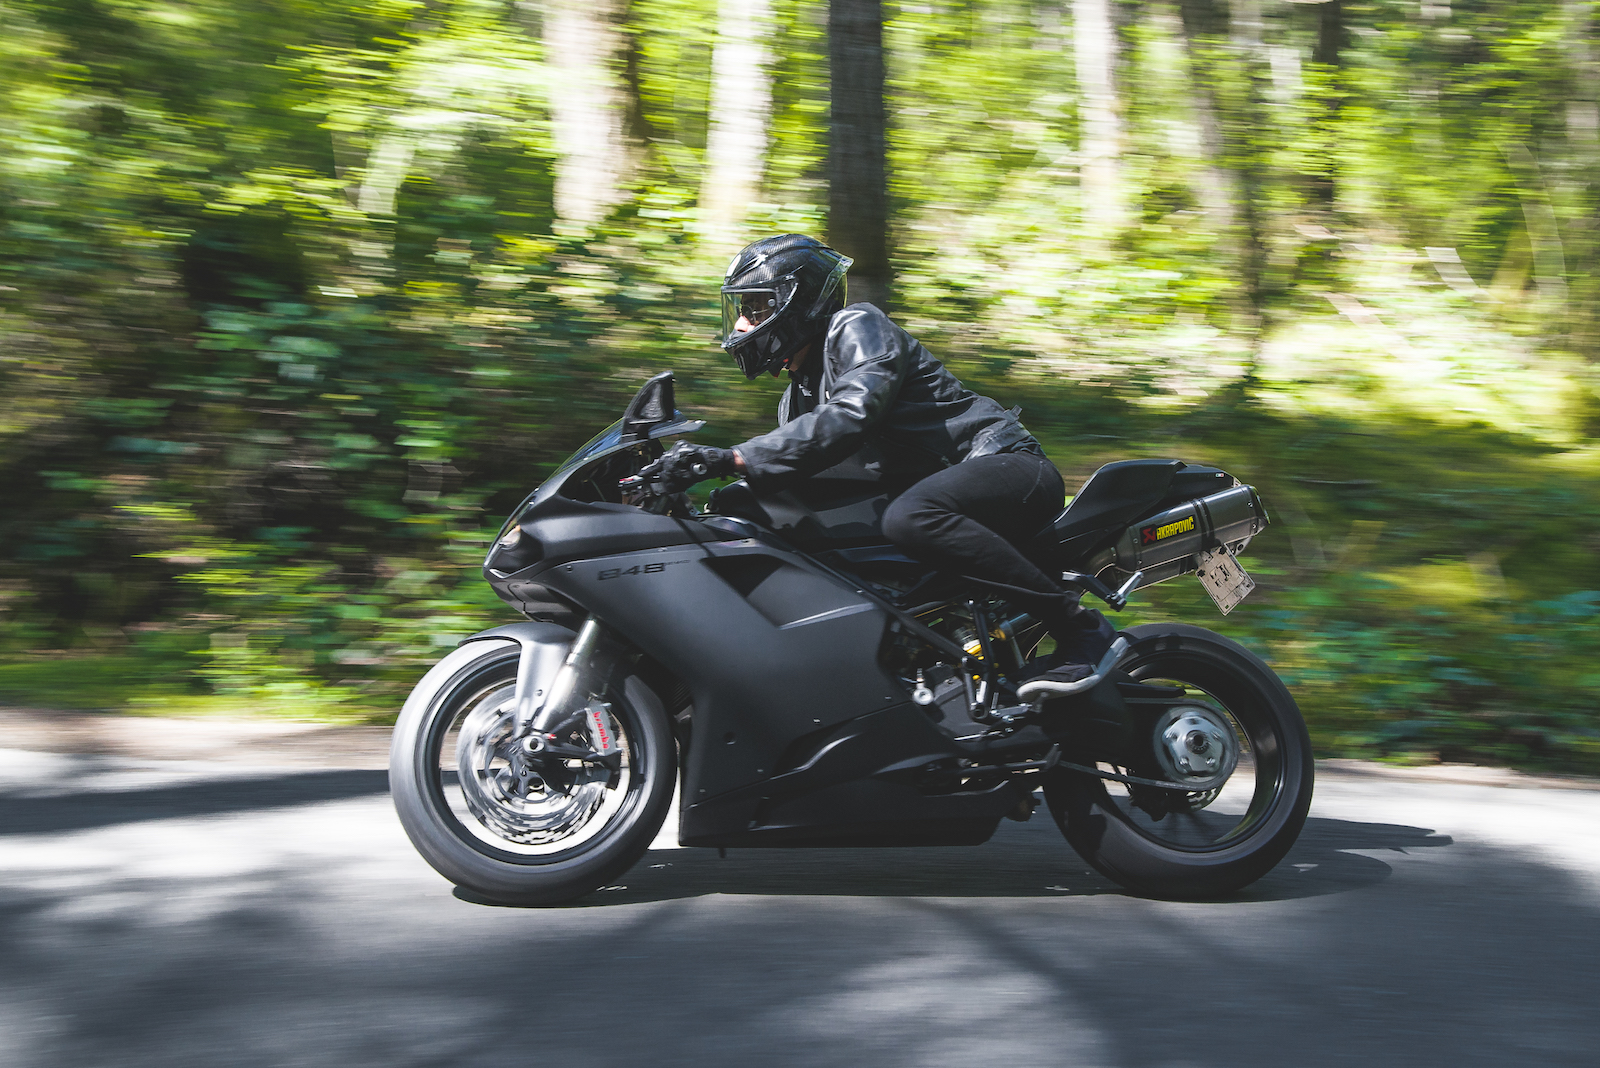
3. Matte is whack.
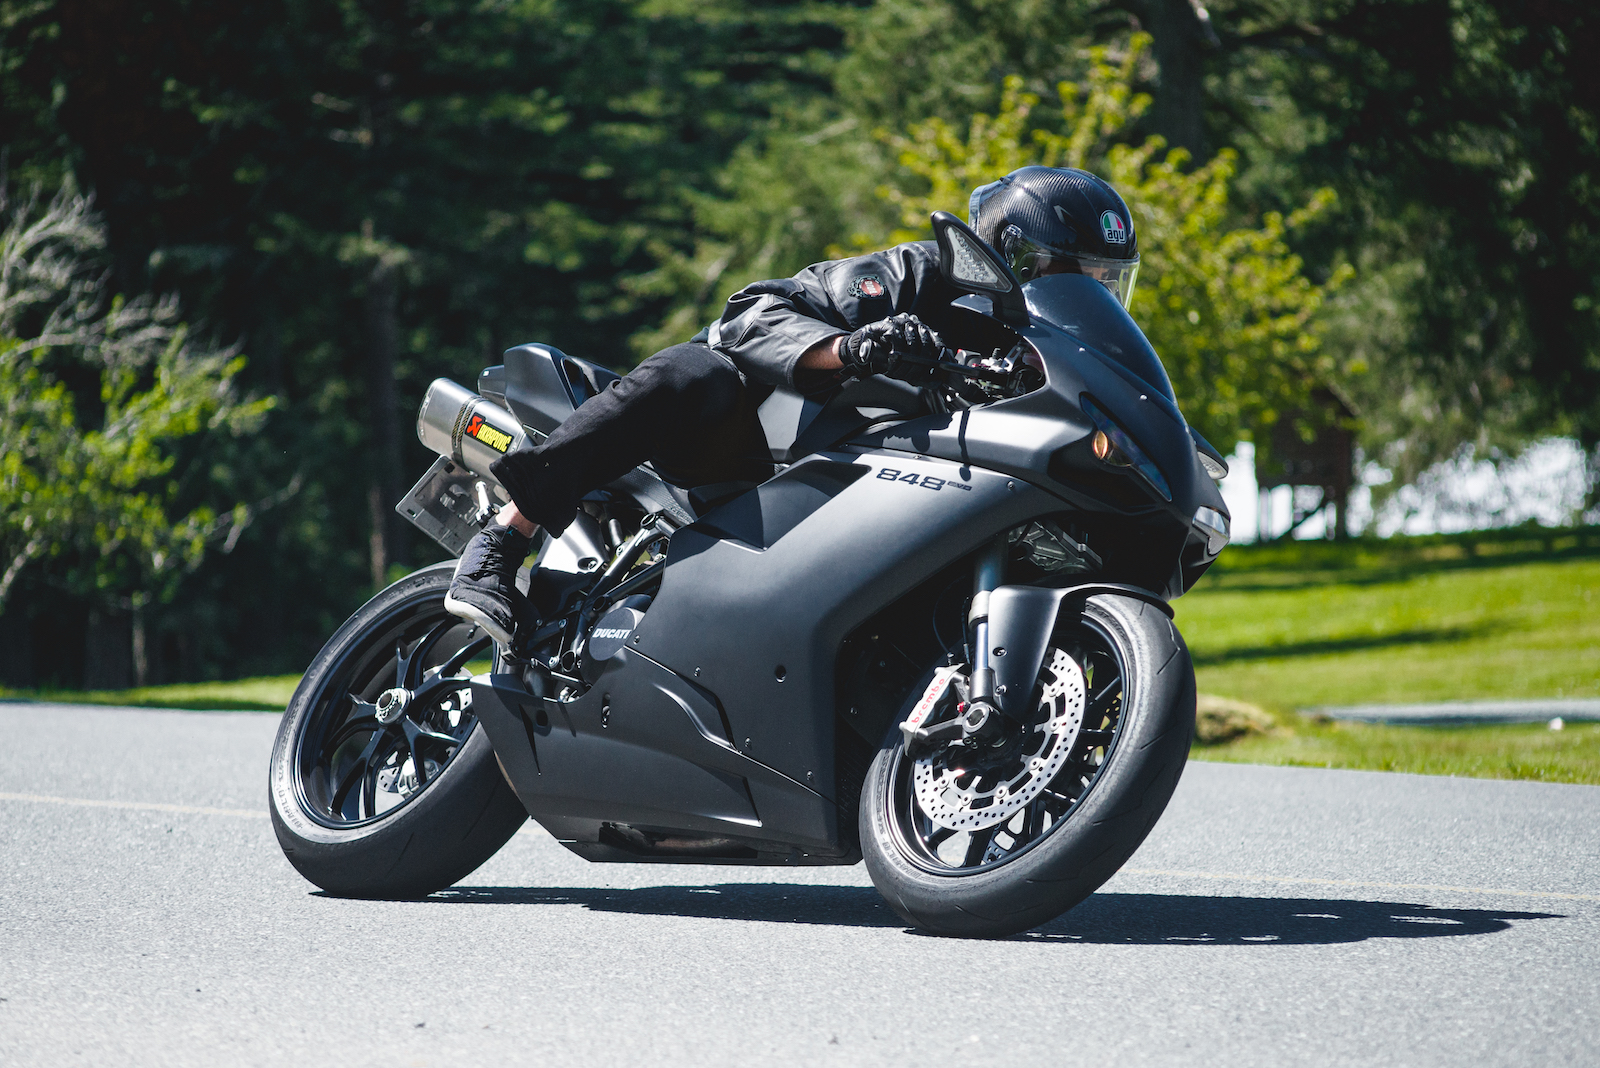
Matte bikes are tricky to photograph in direct sunlight. Intense sunlight will diffuse along the surface of matte paint and make editing really hard to do. Your brights are bright, and your darks are way too dark. Not to mention, your bikes stand out less, while the background pops a lot more.
In other words: the whole “murdered out” look might easily become overexposed and gross in the wrong lighting.
The above shot was taken at noon—which, as I soon discovered, was a really bad time to photograph a matte bike, especially while cornering. The above is my best effort to minimize the glare from the diffusion of direct light.
I’d love to share the curves I’d adjusted for some of these photos, but they were all over the place to keep the bike as black as possible, while not looking forced. That said, it may be more flattering on angular bikes with glossy paint.
Crank your aperture up to f/11 and enjoy some starry glares.
4. Foliage is your best friend.

I’m a sucker for bokeh—which is why my two favorite lenses are my old 1970’s Nikkor 135mm and my 85mm f/1.8. It’s also why I lust after crappy old Russian Helios lenses on eBay. At big apertures, bokeh does what it does, and surround your subject in flattering, but non-distracting blobs of light.
Trees are an asset to bokeh. The foliage breaks up light, adds dimension to your background, and will highlight your bike’s paint if you’ve found yourself the right spot.
The above photo is one of my favorites from shooting with a 1290 Super Duke, mostly because much of that bike is matte and non-reflective. The foliage accentuates the sharp lines of the headlight and tank in a way that a cloudy day would not.
5. Redo’s are your bester friend.
I’m an awkward weirdo a lot of the time, especially when I’m shooting with someone I’ve never met. It takes a lot to remind myself that I’m a strong beautiful man that can probably take a pretty good punch to the face if things go awry. Fortunately, there’s a reason someone agreed to work with you, or (even better) you’ve been asked to shoot for someone.
Checking your camera is known as “chimping.” There’s a reason camera companies make the displays on the back of your camera better and better every single freaking year. Sure, it’s to make you want a better camera that you probably also can’t afford, but hey—wouldn’t it be nice to see how tack-sharp the focus was on that shot without slamming your zoom button a billion times while your DSLR struggles to buffer the image in time?
If you’re shooting a moving target, agree on some safe turnaround points that will give you enough time to check your shots and convince yourself to do better on the next one. Tell your client to do ample passes in order to make your “spray and pray” odds that much better. They’re still going to have more fun than you will while you’re sifting through your takes in search of the perfect shot—but at least they’ll get a good one in the end.
6. Cloudy > Direct Sunlight.
Sun does bad things to paint, lenses, and general sanity. It adds weird shadows to faces, bright spots to paint, and highlights imperfections like a mean ex-girlfriend.
Be mindful of the time of day, and what your shadows are doing. Like in the above shot—his Pazzo levers drew a nice line right through the freaking name of the bike. What a rookie move. We placed his bike in a really dumb spot—half way down a dead-end street—so I kind of wanted to get out of there ASAP.
Snap, move, snap, move… done.
Shadows are much more pronounced in photos, and I’ve taken enough photos to know that people in hats, people with big noses, and dangly bits on motorcycles should probably require some special attention on sunny days.
Clouds do a beautiful job of diffusing your light uniformly around your subject. Mind you, if it’s too gross out you’ll probably flatten out your image—but at least you won’t have the shadow of a Pazzo lever going straight through the name of the bike.
7. Calm the f**k down.
When I’m at the track with my camera, I shoot a lot of photos between my own sessions. That is, I go from riding, sliding, and almost dying to gripping my camera and expecting myself to get tack-sharp motion blur. No, buddy. Not gonna happen.
When I shoot bikes on the road, I usually lead to the next spot I’m planning on stopping. I’m on a slow supermoto (sorry Suzuki), often just trying to keep up with the pace my client wants to ride to the next stop. I’m pushing that thing sometimes. Maybe you have more self control, but if you don’t—take some deep breaths before you start cranking the shutter speed down.
8. Sunlit greenery just looks bad.
I hate the above shot. Not just for the fact I’m getting flipped off, but for the laziness and lack of foresight I had in choosing a proper backdrop.
Aperture is a fine balance with vehicles. Too wide, and you’ll end up with a mirror in focus and the rest of the vehicle out of focus. Too tight, and your background runs the risk of distraction.
Roadside greenery is usually unkempt, unflattering, dying, and dull. Blur that crap out. Nobody wants to see it. As with the above shot. It’s just slightly out of focus, its colors and shades are everywhere. It’s maybe 6 feet from the rider, and when I’m at 85mm, that’s not enough to get any hope of bokeh. I could either have picked a different spot, or been mindful of the following.
9. Separation comes in 3 tasty flavours.
When you want to draw attention to your subject, it’s important to keep it separated from the background.
- Color: Whether it’s a clear sky, distant mountains, or graffiti covered wall, there’s a good chance it’s distinct from the thing you’re photographing, and there’s a good chance your subject will stand out.
- Bokeh: I say it weird, and I get made fun of for loving it. It’s created by two main things. Distance between your subject and its background relative to focal length and aperture. I highly recommend taking a look at this link to make sense of that last sentence. With moving targets, it’s really tricky. Set your camera to “continuous high”, focus on one spot, and wait for your bike to enter the shot. Don’t set your aperture too wide or you’ll have random bits in focus rather than the bike and rider. If your camera has a really fast focusing system (unlike mine), this might not be super relevant.
- Motion Blur: I’m a big fan of panning and zooming stuff. It adds depth and speed to your shot while keeping your subject at the core of the photo. Slow down your shutter and enjoy the results. It does a great deal at keeping your background a background and adding the perfect layer of separation from your rider and whatever nastiness is going on behind them.
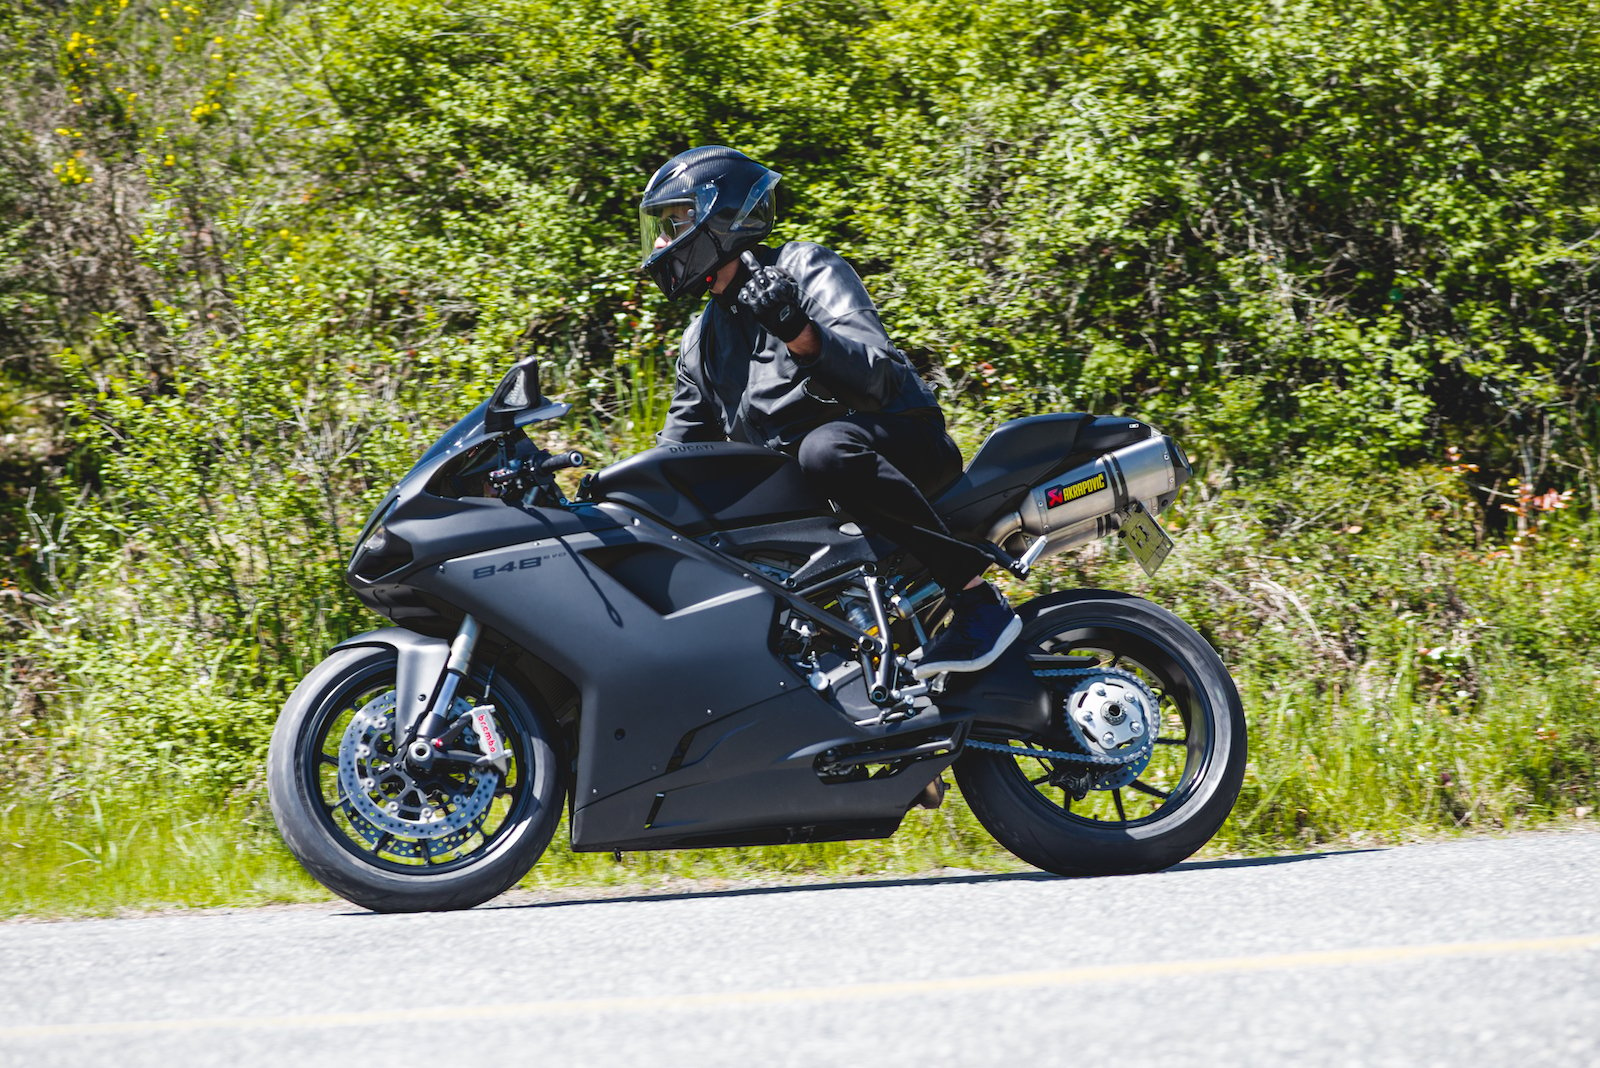
10. Be careful of underexposure.
On trackdays, a lot of my shots are keepers thanks to the general absence of headlights and the fact the weather is a fine mix of sky and clouds with nothing for shade.
On the Ducati shoot above, I had a tricky time because of the time of day—and also the fact we were in the shade with really inconsistent light. I wasn’t mindful of my metering, and pretty much paid the price. I was trying to keep the sky visible in earlier shots by shooting at -0.7 and -0.3 exposures. Bad metering choice plus a dark and inconsistent backroad resulted in some regrets.
In Lightroom, exposure was cranked to 3+ EV to compensate, and I’ll admit the noise in the image is pretty dang bad for 200 ISO.
Here’s what I would have done differently on this f/2.8 lens:
- Manually set everything to a happy medium of exposure
- Slow the shutter – the rider was riding slower because the roads were tighter
- Limit aperture choice to f/5.6 or something practical. This portion was mostly at f/11 for no good reason.
About the author: Quintan Neville is a Victoria, BC-based part-time student, full-time web developer, and weekend maniac. To see more of his work, visit his website or give him a follow on Instagram. This post was also published here.