Camera Settings for Concert Photography Beginners
This guide is intended for concert photography beginners. If you have a DSLR camera and are interested in how to control your camera settings to take great photos at concerts, this guide is for you. If you’re an experienced photographer who just hasn’t shot shows before, there may be some helpful info in here along with plenty of stuff you know already.
Every situation calls for different camera settings based on a countless number of factors How much light is there? Is the subject moving? How much of a depth of field do I want? Is it okay if my photos are grainy?
Music photographers are often asked specifically “what settings do you use?” Any concert photographer, or any photographer in general, knows that the answer won’t be very helpful, because your settings change constantly depending on the situation. What is helpful is getting a basic understanding of how each setting works, to what limits you can push each setting to, and a baseline to start shooting at.
A lot of photography beginners are drawn to concert photography, because it’s an alluring place to start! You get up close and personal with bands that you enjoy, have the opportunity to capture tons of “photo-worthy” moments, and get to work on your photography too. Despite the appeal to beginners, shooting a concert is one of the toughest set of conditions for any photographer. Very little light, constantly changing lighting conditions, and quickly moving subjects make it very tough to get great photos.
When you first start out in concert photography, you’ll likely begin with small local shows to build your portfolio. Sometimes these have some of the worst lighting conditions, making it really tough. But the good news is no one cares if you bring your camera in there, and you’re shooting for yourself so there’s no pressure and you can experiment at your own pace!
Thankfully, with the right camera and lenses for concert photography, along with the proper settings, you’ll be able to take some great live concert photos in no time. If you don’t have a “fast lens” yet, the Yongnuo 50mm f/1.8 is a solid budget lens to start with as your first lens for shooting concerts.
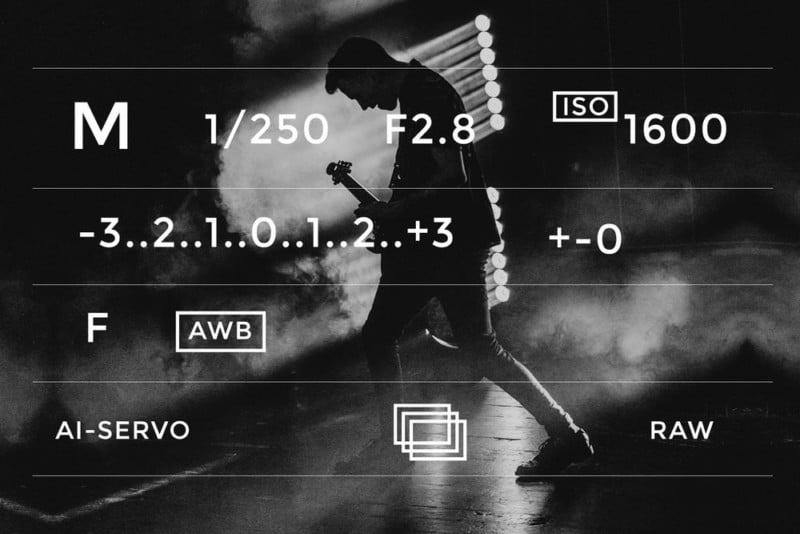
A Quick Look at Basic Camera Settings
Camera mode: Manual
Shutter Speed: 1/250 or faster
Aperture: Wide open (f/1.4-f/2.8)
ISO: As high as possible; 3200 max
White Balance: Auto WB
Autofocus: AI-Servo
Drive Mode: Continuous
Metering: N/A
Image Quality: RAW
Camera Settings for Concert Photography
All of your camera settings combine to result in a properly exposed image. Having a basic understanding of the exposure triangle is important, and helps you understand how you’ll need to change your settings for the situation.
Basically, the exposure triangle states that getting the correct exposure depends on three things:
ISO – How sensitive your camera’s sensor is to light
Shutter Speed – How long the shutter is open to let light in
Aperture – The size of the opening in your lens, allowing light in
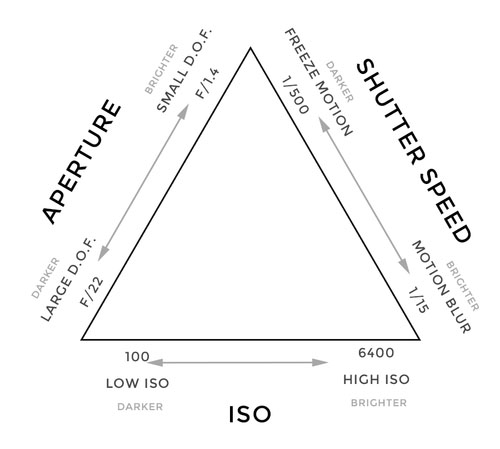
In concert photography, you’re constantly battling to let in the most light possible. So you want your aperture wide open, ISO high, and shutter speed low… but if you go too far there are consequences for each of these settings. We’ll go through each setting and the repercussions of pushing their limits below.
Camera Mode: Manual
Shooting in manual mode gives you the most control over exposing your image correctly. You want to be able to change your settings quickly to combat changing lighting conditions, especially when shooting concerts.
You may see some people recommend AV (aperture priority) or TV (shutter priority) modes for shooting shows, but I recommend against them as you really want full control over aperture, ISO, and shutter speed to adjust to the situation. There are too many factors to just “lock-in” your aperture or shutter speed and not worry about them. The other upside is that shooting manual will quickly force you to learn how each setting affects your image and you’ll become a better photographer because of it!
Shutter Speed: 1/250 or Faster
You ideally want your shutter speed to be as fast as it can be without having to push the limits of your other settings to get a bright enough image. If you reference the exposure triangle above, you can see that if you have a slow shutter speed, you’re allowing more light into the sensor resulting in a brighter image.
But if your shutter speed it too slow, you get motion blur when subjects move in your frame. This is a big problem in concert photography, where your subjects are constantly moving and you really need to freeze motion. When the most iconic moments of a set are a big jump or a swinging guitar, you do not want those images to come out blurry.
1/250 is a good baseline, but not a hard rule. It will capture most motion well, and let in enough light so you won’t have to push your other settings too far. If it’s a brightly lit show, and conditions allow you to increase your shutter speed to something like 1/400 or 1/640, you’re going to freeze motion really well.
In extreme low light conditions, you may have to lower your shutter speed below 1/250. You can do this, but I’d be very careful about going any slower than 1/100 even if the subjects aren’t moving much. It’s hard to tell on your camera’s preview screen if you’re getting a small amount of motion blur, but it will really suck if you get home and look at them and they all lack sharpness.
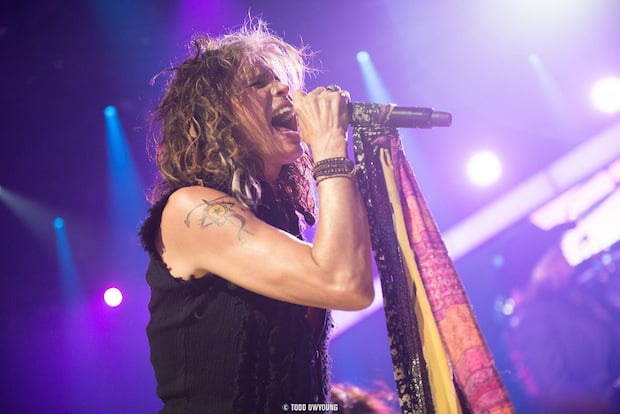
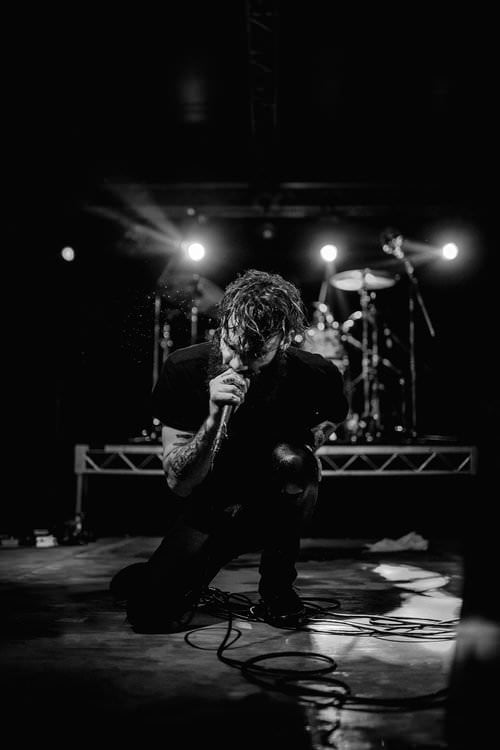
Here are a couple good examples of “freezing motion” for an iconic moment.
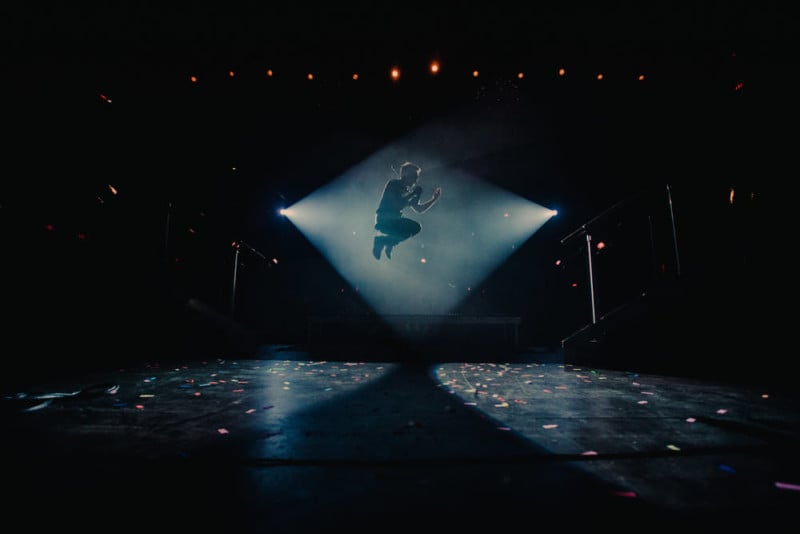
Settings: Shutter Speed 1/400, Aperture f/2.8, ISO 2000
Gear: Canon EOS 5D Mark II, Canon 16-35mm f/2.8L II
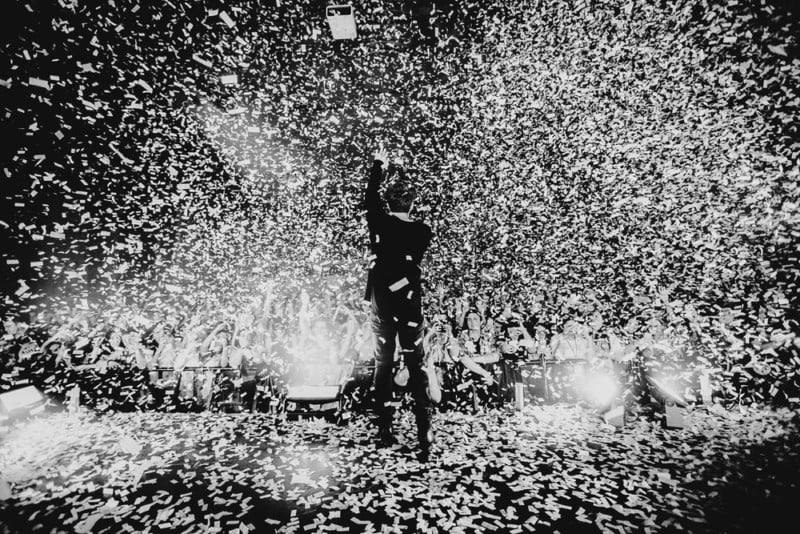
Settings: Shutter Speed 1/1000, Aperture f/2.8, ISO 1000
Gear: Canon EOS 6D, Canon 16-35mm f/2.8L II
Aperture: f/1.4-f/2.8+
To shoot concerts, you really do need a specialized “fast” lens that allows for a low f-number aperture. They’re often really expensive, but there are lens options for nearly any price. These lenses let in more light so that you won’t have to make your shutter speed really low or ISO really high (we’ll get to that in a moment) to get bright enough photos. You can see the correlation back up in the exposure triangle chart.
You’ll often shoot “wide open,” meaning the lowest f-number your lens allows for. The one downside of this is that the lower f-number you’re set at, the smaller depth of field you’ll have, and your image isn’t as sharp as a higher f-number. This can result in you missing your focus point, but good lenses and cameras make this less of an issue.
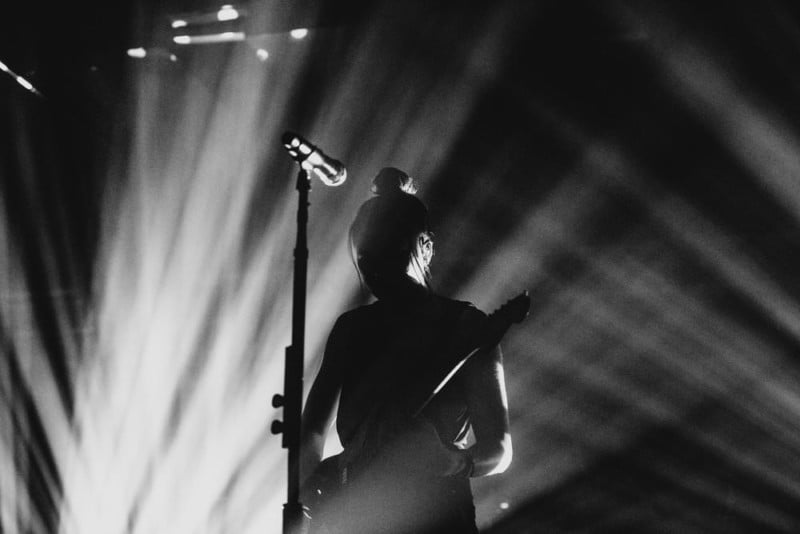
Having a low depth of field can be an awesome effect to utilize, even if it means missing a few more shots. It can make your photos stylized and more interesting, especially if you’re up close to your subject. It effectively separates your subject and the background. Here are a few examples.
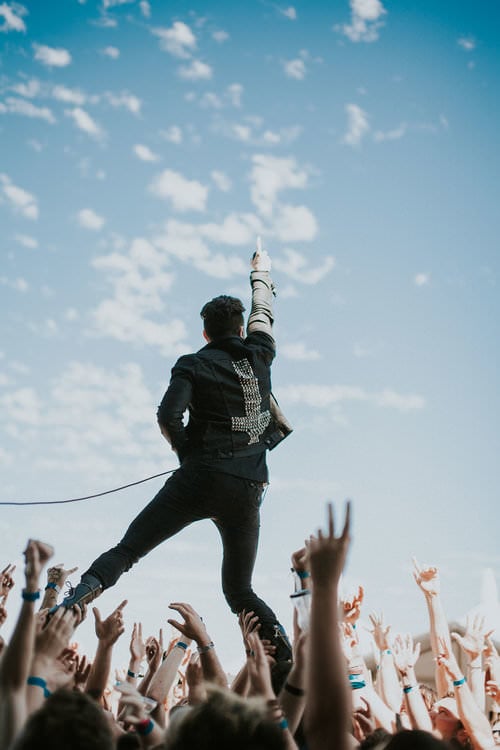
Settings: Shutter Speed 1/2000, Aperture f/1.8, ISO 100
Gear: Canon EOS 5D Mark II, Sigma 50mm f/1.4 EX DG HSM
Settings: Shutter Speed 1/500, Aperture f/1.4, ISO 1000
Gear: Canon EOS 5D Mark II, Canon 35mm f/1.4L
ISO: 500-3200
The effect of ISO on your photos is pretty simple; if your ISO is high, you’ll get grain or noise in your photo, if it’s low then you won’t.
If you’re struggling to take bright enough photos, ISO may be the first setting you want to adjust. A little extra grain in your image beats having a blurry photo of the most important photo of the night that you’d get from having your shutter speed too slow. Usually you’ll be shooting with a wide open aperture so you can’t adjust your setting further to get more light; that leaves ISO.
Some cameras handle high-ISO grain better than others. If your camera doesn’t handle ISO well, you’ll end up with a photo that has large, ugly grain that destroys detail and makes it unusable. Some impressive DSLRs performers on the Canon side include the Canon EOS 6D and Canon EOS 5D Mark III. With cameras like these, you’ll be able to adjust your ISO to high levels like 6400 without ending up with an image that is too grainy to use.
Regardless of your camera, I suggest starting your ISO at 500 or so, and then quickly adjust the setting up to 2000 if you need your image to be brighter. Your sweet-spot should be between 100-1250 before you start getting noticeable grain. You’ll want to test your camera out to see how it looks at higher ISO levels than that – if it doesn’t look great you’ll want to start adjusting your shutter speed or aperture to get additional exposure stops.
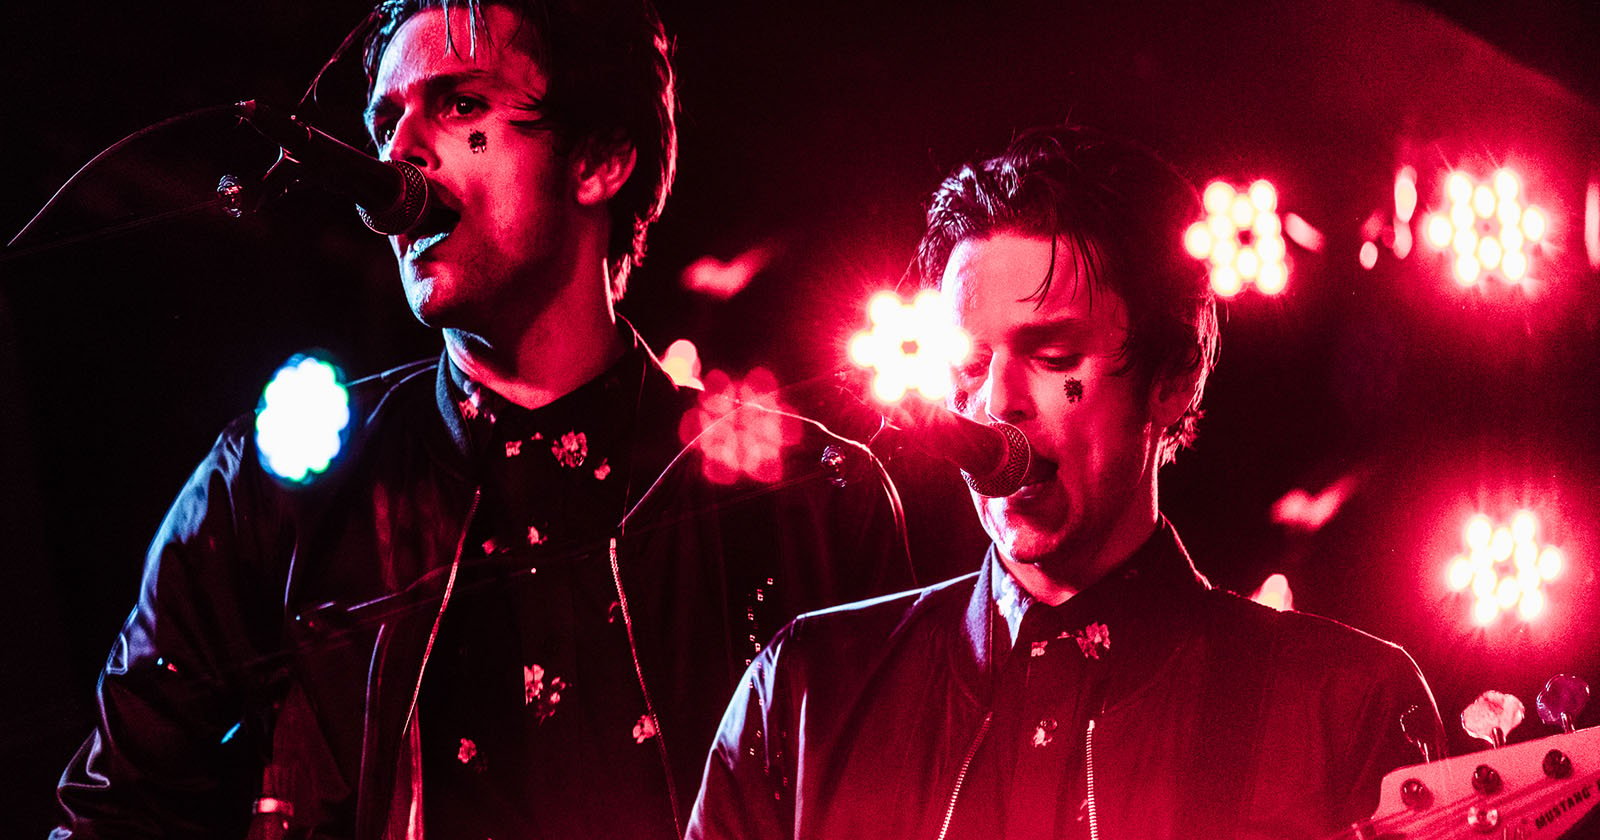
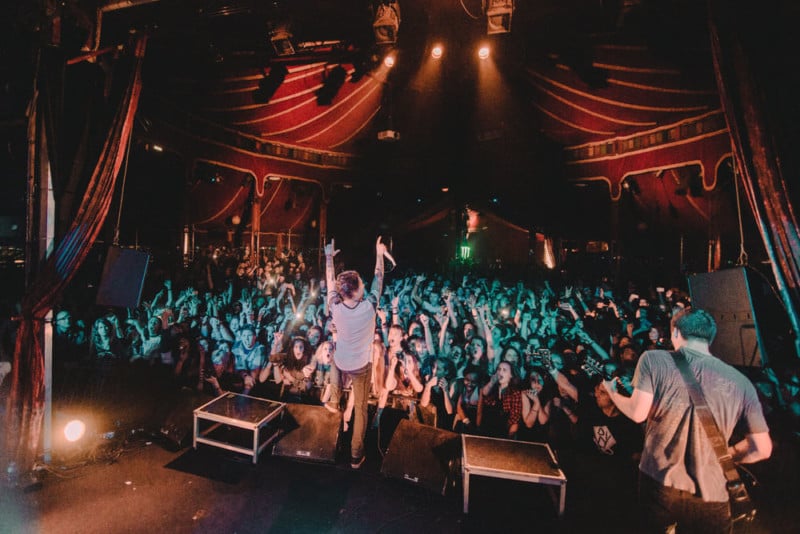
Here are some examples of high ISO photos:
Settings: Shutter Speed 1/160, Aperture f/2.8, ISO 5000
Gear: Canon EOS 6D, Canon 70-200mm f/2.8L IS II USM
Settings: Shutter Speed 1/320, Aperture f/2.8, ISO 1000
Gear: Canon EOS 5D Mark II, Tokina 11-16mm f/2.8
White Balance: Auto WB
Leaving your white balance on auto is the best thing you can do as a beginner. As you get a grip on the rest of your camera’s settings, you can start learning a bit more about how white balance works, and how you can adjust it to get consistent colors throughout your entire set of images. However in situations like concerts, the lights are often changing colors which make this less of a benefit. As long as you are shooting RAW and not JPEG, you’ll be able to adjust your color temperature and tint in editing software like Adobe Lightroom.
Autofocus: AI-Servo
The Nikon equivalent to AI-Servo on Canon is AF-C. This is a continuous focus mode, which helps to track your subject and focus point as they move through the frame. When shooting quickly moving subjects like concert photographers almost always do, continuous focusing AF is a big benefit.
A helpful technique for concert photographers to learn is back button focus, which allows you to set another button on your camera to be in charge of focusing. Check out my post on back button focusing where I explain it in detail.
Drive Mode: Continuous
Any DSLR will have a continuous shooting mode, where you’re able to take a ton of photos in succession. At first, you’ll probably accidentally take photos when you don’t mean to by pressing down the shutter just a little too long or too hard. You’ll quickly learn how to apply the right pressure to only shoot a bunch of frames in a row when you want to.
This is of course an important mode to capture the iconic moments of a set; a jump, spin, hair-flip, etc. You’ll want to make sure you get the highest point of the jump, for example, and instead of just taking one shot and hoping you got it, shooting in continuous lets you get a bunch of frames of the whole thing so you can select the best one.
Metering: Spot Metering
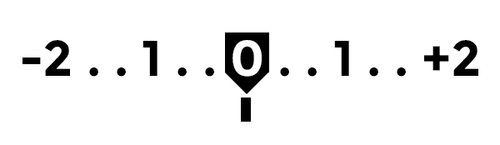
Your camera’s metering setting has no effect on the exposure you’re shooting in manual mode. If you’re using a different mode, like AV or TV, metering works by automatically changing settings on your behalf to get the correct exposure. However when looking through your viewfinder in manual, the meter can be used as a guide in figuring out how to expose your image well.
Because there’s so much contrast between the artist and background, some metering modes give you more useful readings than others. Spot metering is typically the most useful mode for concert photography, and it works by assessing how to properly expose only one point; your focus point. This is useful because your focus point will almost always be the artist’s face, which is the part of the image that is the most important to properly expose.
Other metering modes aren’t as helpful in a concert photography context. Evaluative (or “matrix”) metering calculates exposure with your focus point in mind, but also factors in other parts of the image as well. This can be excellent for other uses, but when shooting shows, the only exposure reading that matters is the artist’s face or specific feature you want to expose for. Center-weighted metering measures only the center of the frame. This is also not ideal, because we are not consistently framing our subjects in the exact center.
Image Quality: RAW
RAW images have some huge benefits over JPEG images. RAW files store much more information, which allows you to take your photos into an editing software like Adobe Lightroom and adjust white balance, exposure, and many other settings. This is an incredible advantage! You can get some of your settings wrong, or be slightly off, and still end up with a fantastic final photo. You’re also able to heavily adjust your shadows and highlights and retain a ton of detail, which makes editing much easier. Because of these abilities, RAW files are much larger than JPEG. Despite the size difference, it is not worth shooting in JPEG. SD and CF cards are inexpensive these days, and so are hard drives.
Here’s a non-extreme example of the flexibility shooting in RAW can give you:
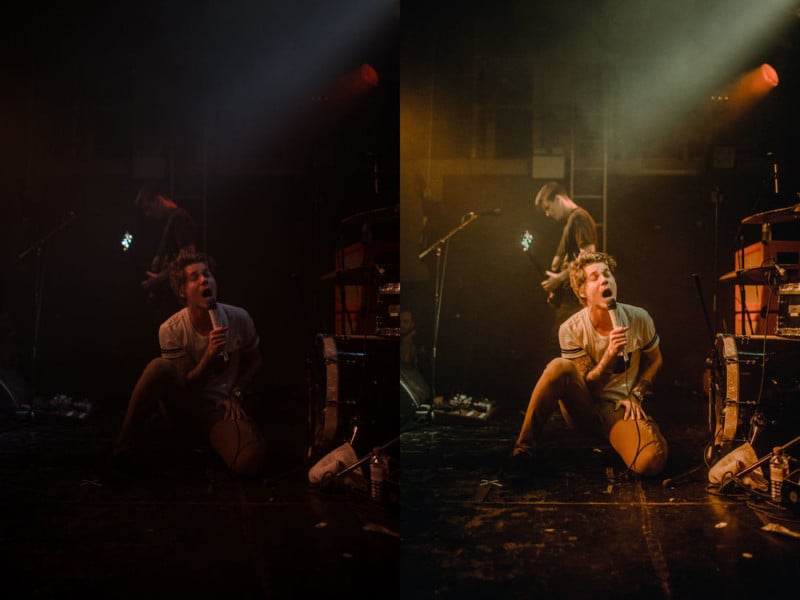
Settings: Shutter Speed 1/640, Aperture f/1.4, ISO 1250
Gear: Canon EOS 5D Mark II, Canon 35mm f/1.4L
Camera Settings in Practice
If you put together everything you’ve learned here, you’ll be shooting while adjusting your settings effortlessly in full manual mode in no time!
When I first get into the photo pit, I’ll usually start with my aperture wide open, my shutter speed to 1/250, and my ISO at about 640. As soon as the set starts, I will adjust my settings to fit the situation – if it’s too dark still and I need brighter images, I’ll turn my ISO up. If it’s too bright, I’ll adjust my shutter speed to be a bit faster. It’s all about experimenting and knowing how changing your settings will affect your final image.
Thanks for reading! I hope this is helpful for those beginners to photography in general, and concert photography in specific.