How I Faked Natural Window Light for a Photo Shoot
![]()
I definitely love do-it-yourself projects, especially those that help me out with a project in a niche way.
DIY Window Simulator Snoot to the rescue!
I’ve used snoots in the past, though usually of the rounded variety. Great for accents, and bringing focus to where you want it. What I needed here was a rectangular spot with hard edges, such as you would see if the sun or moon were streaming into a window at night.
![]()
To do this, I took a piece of foamcore I got from the dollar store, and made the contraption above. The distance from the flash head to the rectangular opening creates the sharp edge, the further the shape is from the flash head, the sharper the edge.
It was super easy to make as well. Cut two shapes with 2″ on one end, and 9″ on the other, 18″ long down the center for the sides. Do the same with 3″ and 12″ for the top and bottom. The front is just a 9″x12″ rectangle with a cutout for a mock window. Tape it all up, tape it to your flash head, and you’ve got a window.
![]()
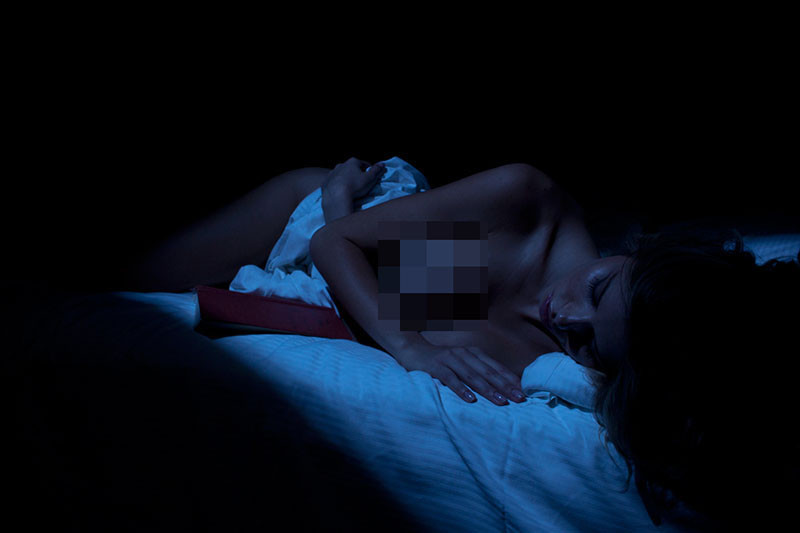
Change your white balance to make the scene blue and you’ve got a fake moonlight.
![]()

Quick, easy, cheap, and helps me stretch my creative muscles. The front cutout can be changed at will too. Since the distance makes the edge hard, you can experiment with the shapes. Heart shaped gelled for a Valentine’s Day studio shot?
Credits: Model was Autumn Faherty @autumn_bottom, and H/MUA was Sheena Zargari.
About the author: Jay Leavitt is a hobbyist photographer who tries to push himself as far as he can go. With many budget constraints around him at times, he does what he can to not let them hold him back at all. Leavitt blogs at Shooting on a Budget. This article was also published here.