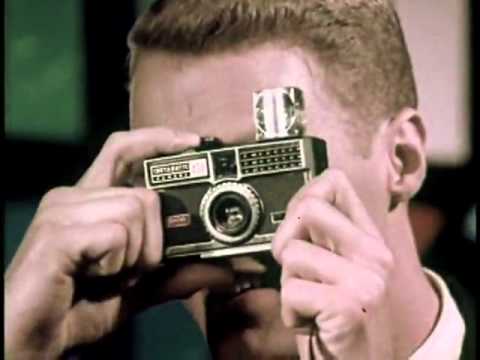
The Joy of Shooting with a 1965 Kodak Instamatic 104 Camera
Like many other photographers, I’m always on the lookout for gear and techniques that will stimulate my interest in photography and lead to new ways of shooting. Usually this means getting the latest camera and imaging software. But sometimes it is the opposite—going “old school” by getting an older camera and not using any software. With thoughts like these, I decided to embark on a new photography project, and travel down Memory Lane with the camera that sparked my passion for photography—a 1965 Kodak Instamatic 104.
Starting the Project
Fortunately, for me, shooting a hundred or so 126-film cartridges over a three-month period was satisfying and in its own way a cathartic experience. I know the word cathartic is often overused. However, taking a break from having to concentrate on white balance, custom function buttons, TTL flash, focus areas, and navigating endless camera menus, is indeed a cathartic experience. But to make this project work, it had to be about more than the process—the final images would need to be interesting to look at, showing the unexpected twists that set any great photo apart.
Adding a Creative Twist
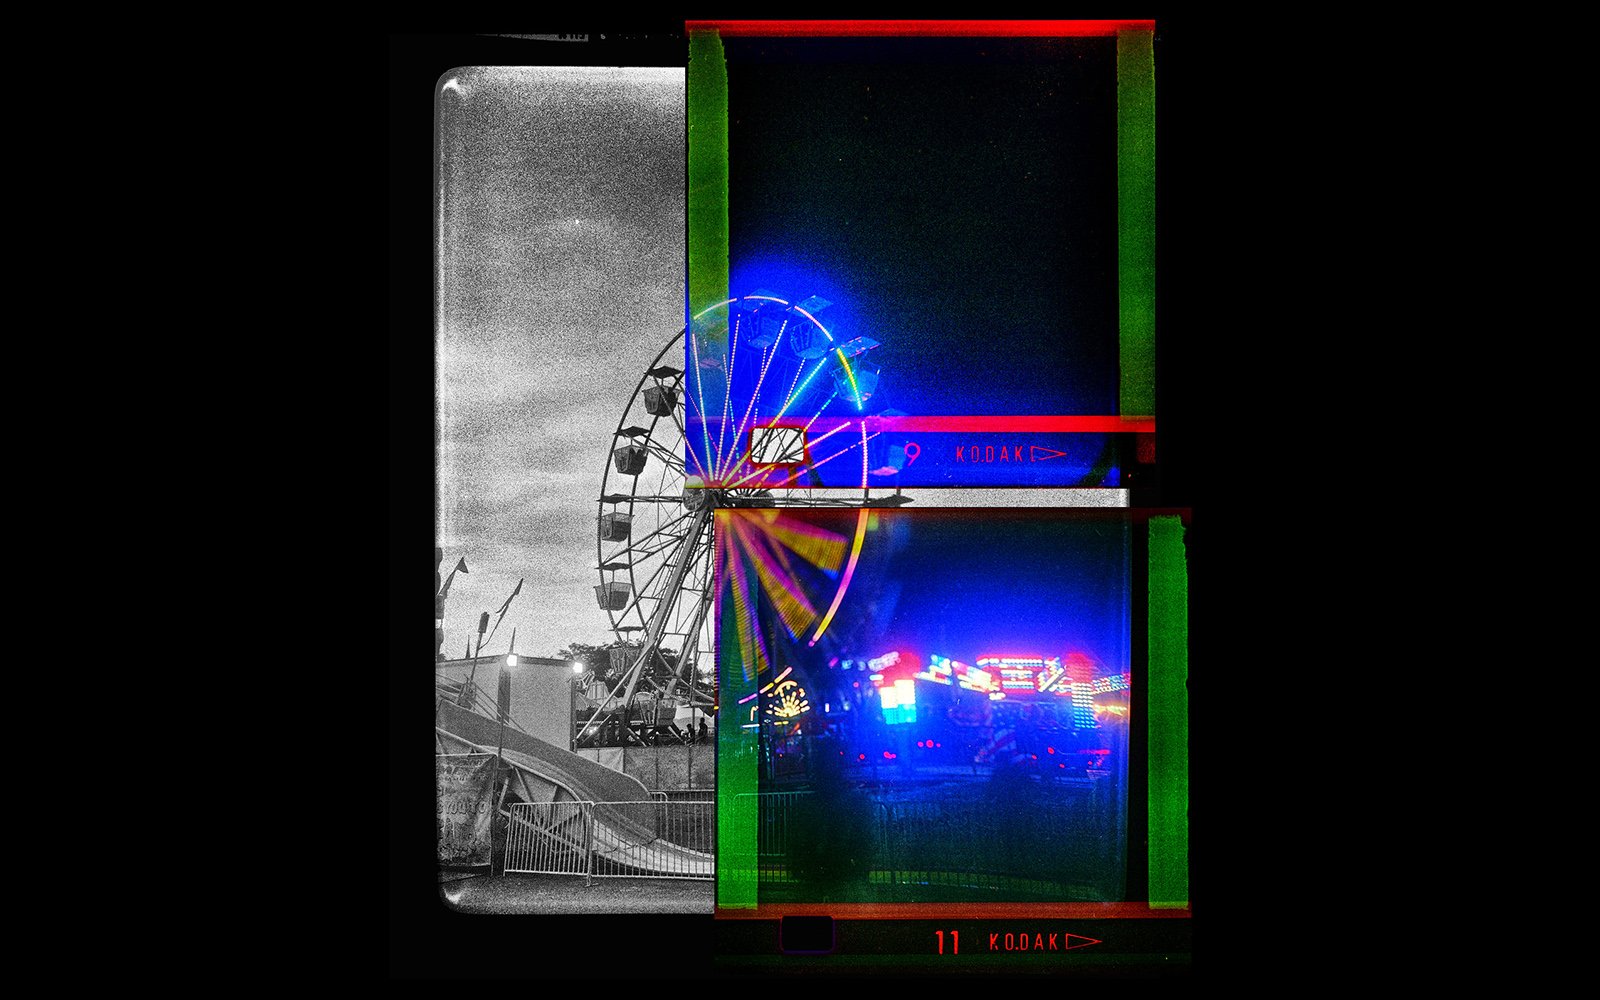
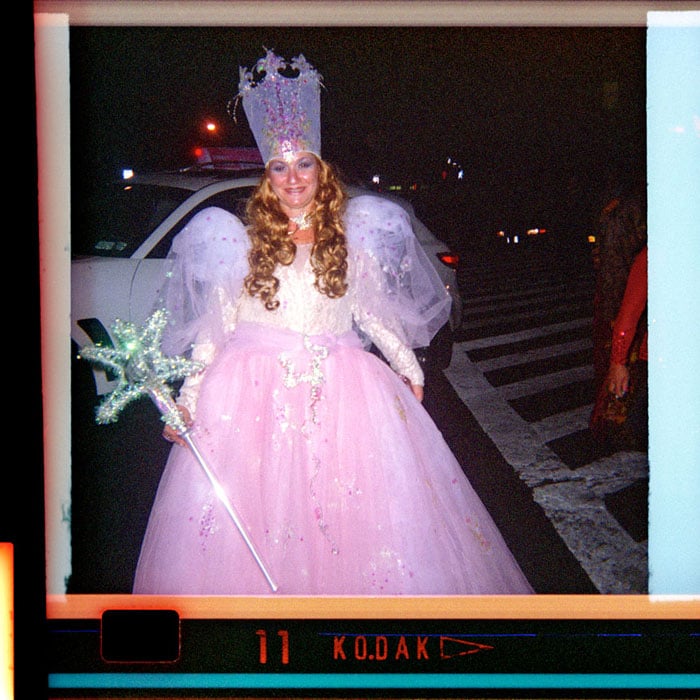
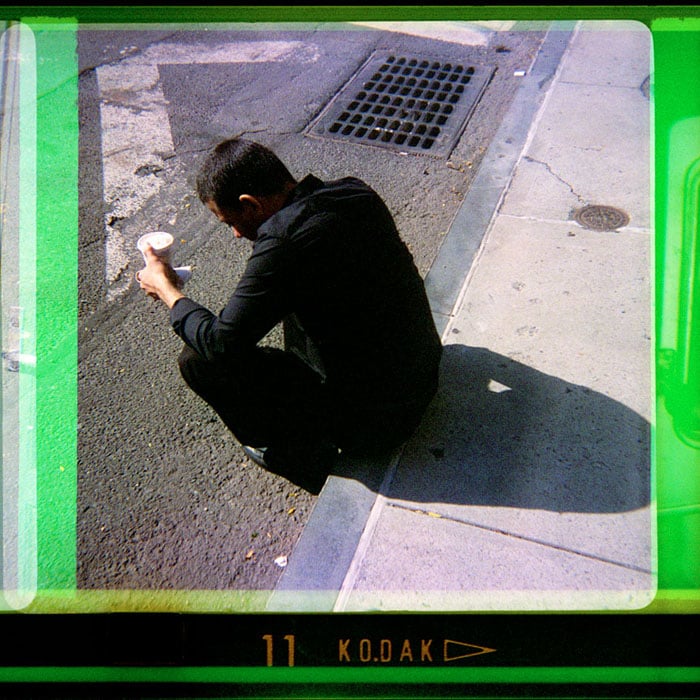
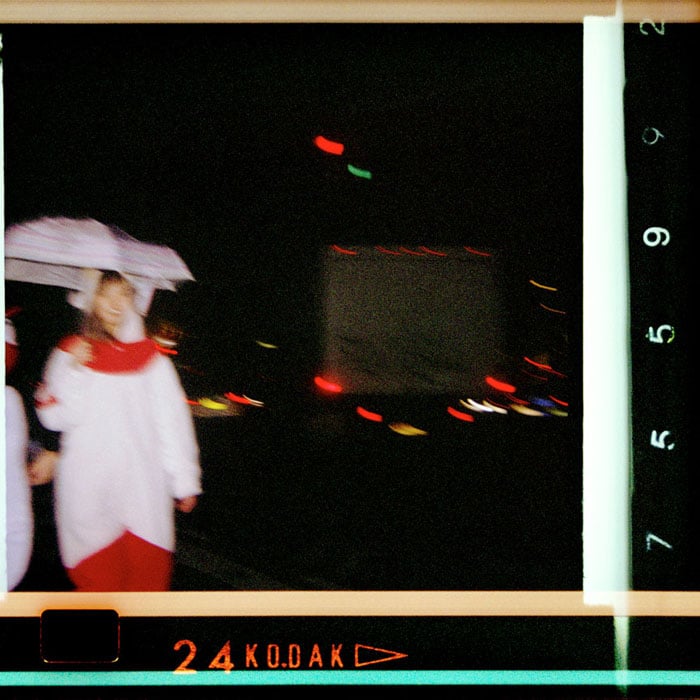
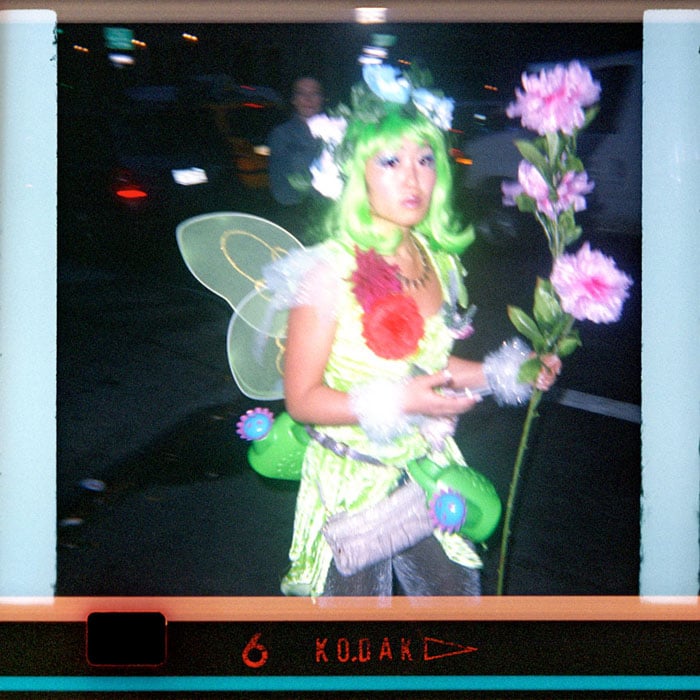
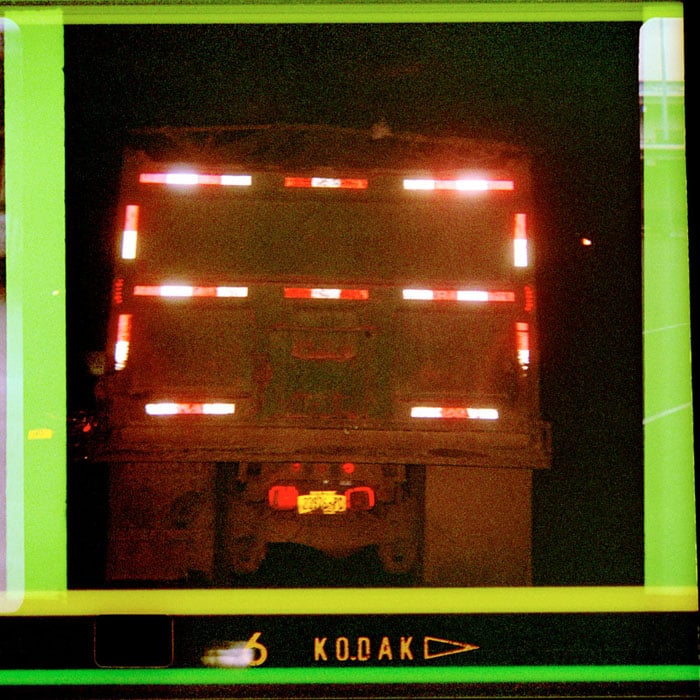
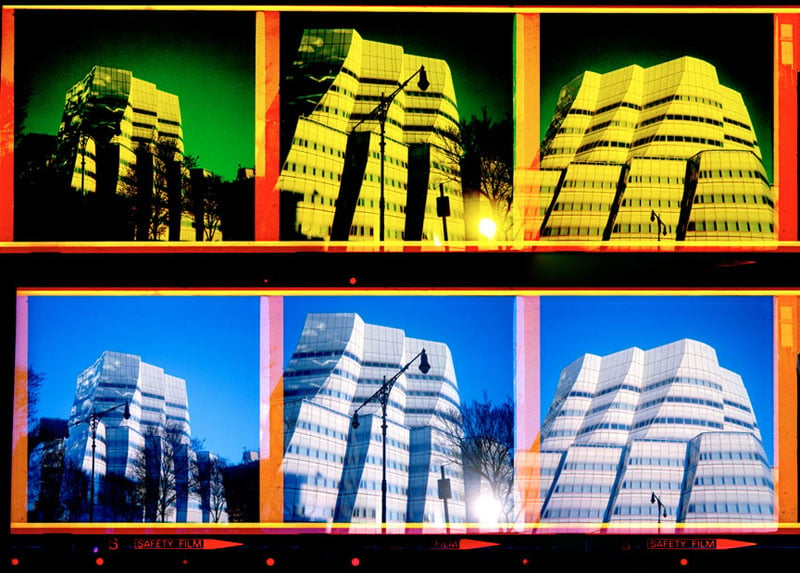
Knowing I wanted to shoot with a simple, point-and-shoot Kodak Instamatic was all well and good–but it wasn’t enough. What I needed was a creative twist that would take my project to another level. I decided that incorporating the sprocket holes, frame numbers, Kodak name, and other writing on the areas surrounding the image area would enhance the graphic element and look I was going for. Better yet, the writing could be colorful, unpredictable and would vary based on the film I was using.
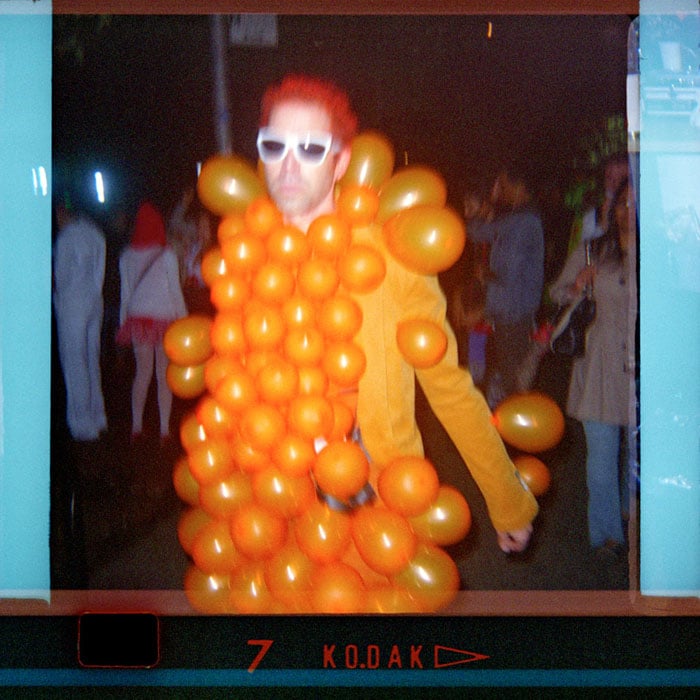
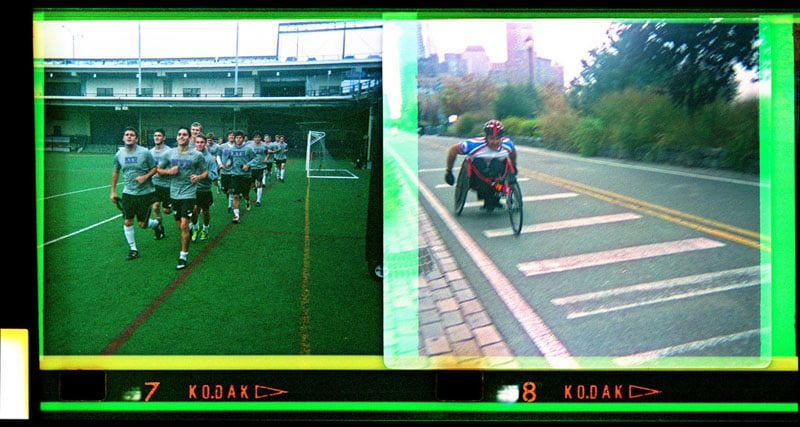
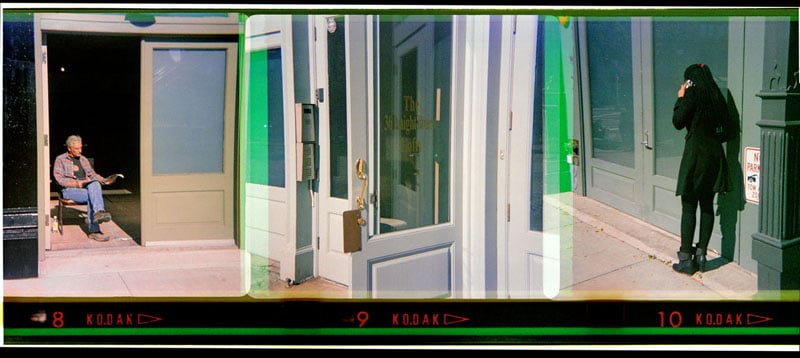
Taking it one step further, I decided to create diptychs and triptychs by printing more than one or two frames side by side. The relationship between images would be more or less spontaneous and involve a great deal of serendipity. To make sure I didn’t inadvertently ruin a sequence of images, I had to remember to tell the lab not to cut my negatives, and to deliver them in an uncut roll wrapped in clear plastic.
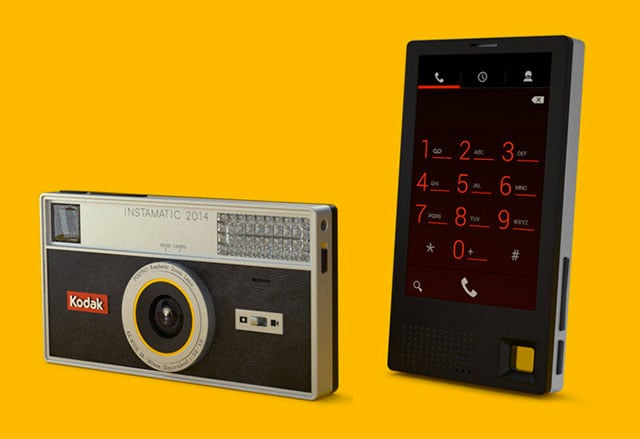
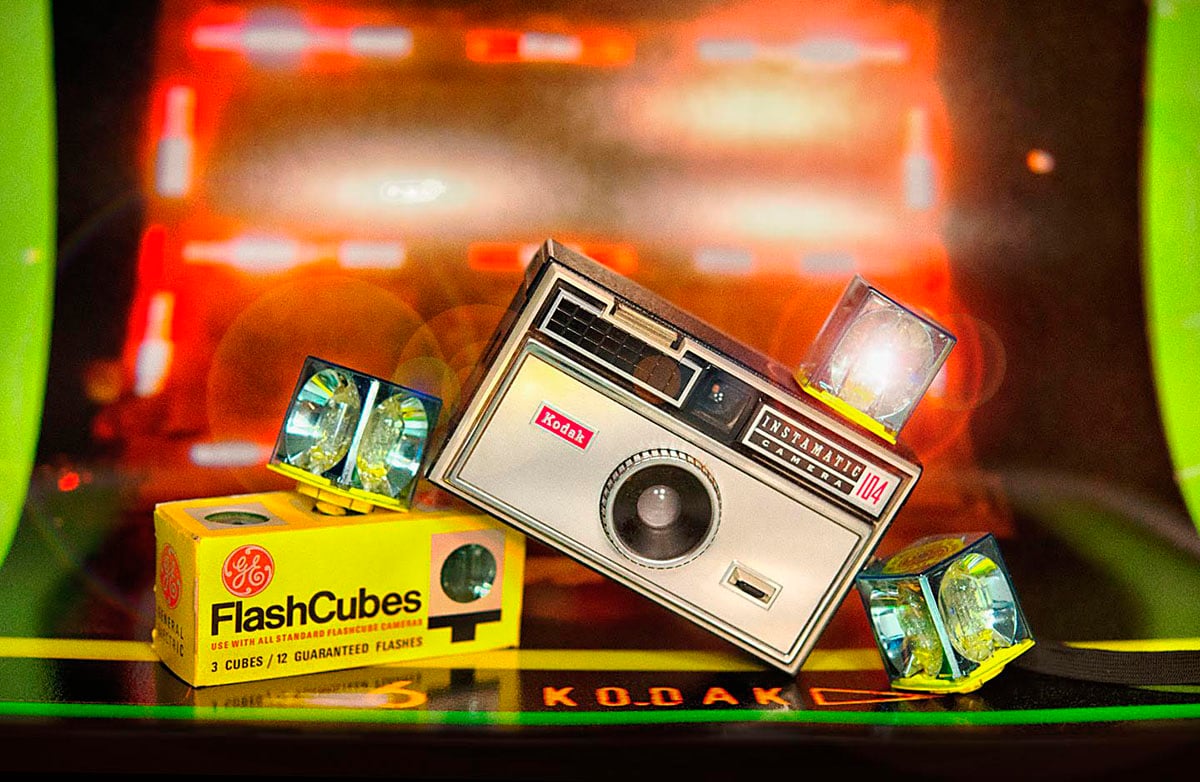
The Iconic Kodak Instamatic Camera
Kodak’s goal in manufacturing simple cameras like the Instamatic was to put an easy-to-use camera in the hands of as many people as possible. The cameras didn’t have to generate much profit, as the real money was in selling film and processing. So to make sure anyone could shoot with an Instamatic, it had one setting that was optimized for shooting on a sunny day, and a second setting for low light, flashbulb photography. The settings Kodak chose were f/11 at 1/90th of a second for sun and f/11 1/45th of a second for flash – both of which were good matches to the sensitivity of the film. As for focusing, anything from about three feet to infinity would be sharp.
To make film handling as foolproof as possible, the film came preloaded with drop-in, plastic cartridges with 12, 20 or 24 exposures. All you had to do was pop in a cartridge, point and shoot. While the number of exposures might be viewed as limiting, it worked out great for preserving a week of memories. At the time, many families would shoot a roll over the weekend, drop it off at their local lab or local drugstore, which would send it to a lab, on Monday, and pick up their prints a day or so later. To develop the film, the lab would break open the plastic cartridge in the dark and load it in a machine for processing. Each 126 mm negative resulted in a square print with the month and year printed on the narrow white border.
Shooting with flash requires flashbulbs, clean battery compartment contacts, and a fresh battery. Earlier Instamatics used a small flashbulb that had to be replaced after each shot. These flashbulbs worked best for photos taken six to ten feet away. To let people shoot up to four photos without a flashbulb change, cube flashes known by a variety of names such as Magicubes were invented. Cube flashes were inserted into a spring-loaded, rotating socket that turned after each shot to expose an unfired bulb. For compatibility, photographers had to know if their cameras required round base or square base cubes, as flash sockets would only work with one or the other.
Purchasing and Processing Outdated Film
The most important thing to remember when sourcing 126-color film for your Instamatic is to make sure you get C-41 compatible film. The reason for this is that older film requires the discontinued C-22 chemistry. In general, I found that film dated from the early 1990’s on worked pretty well. And for my purposes I didn’t care if the color was off or faded—that was part of the appeal. One of the aspects I liked most was the unexpected color of the type and areas outside the image. In fact, during scanning and PhotoShopping I often dialed the saturation way up for added emphasis.
The easiest place to find outdated film proved to be eBay. Generally, I looked for sellers who had four or more boxes of film with the same date. Sellers with boxes in clean condition and who stated that the film had been stored in a cool environment rose to the top of my list of potential purchases. Price was another factor. Costs per cartridge averaged around ten dollars each. Fortunately, I was able to locate a large variety of 126-film made by Kodak boxes, Fujifilm, GAF, and lesser-known manufacturers. Each time I purchased a new batch of film, I couldn’t wait to get the film back from the lab and see what the type and border colors would look like.
Scanning
Before I shot my first Instamatic exposure for this project, I knew the key to its success would be in the scanning. Fortunately, I own a Nikon Super Coolscan 9000ED with a 120mm negative carrier that can sandwich up to three 6×6 frames between anti-Newton glass. This optical-quality glass achieves several goals. First, it helps avoid Newton rings that create circular patterns on the scan. Second, the glass sandwich produces sharp focus across the entire strip of negatives by preventing waviness and keeping the film perfectly flat, and in focus.
The Process
My process was to explore the streets of New York City armed with my trusty 1965 Instamatic camera and a pocket full of Magicubes. Whenever possible, I would try to compliment a shot with second or third shots that might look good when presented together. This was more difficult than I had anticipated, so that in the end I found I often preferred sequences that owed their success to chance. If the shots went well together, then there would be a good chance that I might end up with a nice diptych or triptych. Interestingly, when the project was completed, most of the people I showed it to commented that their favorite shots were the ones with multiple images.
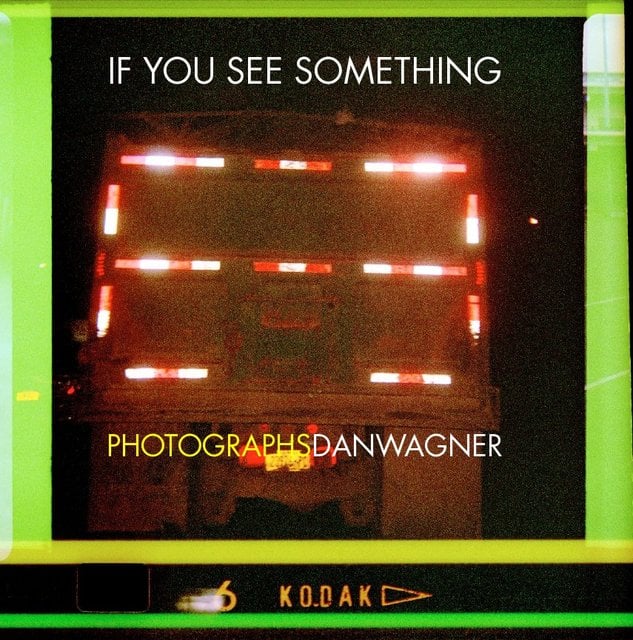
If You See Something, Say Something
After three months of walking the streets of New York City with my Instamatic, I had amassed a few hundred scanned photos. Each time I picked up a roll of developed film from the lab, I closely evaluated each image and the ones adjacent to it before cutting the roll into smaller strips of up to six exposures. This was especially important if the images related to each other or told a story when viewed together. My concern was to not separate images that would work out better scanned side by side.
The final step in my project was to put together a folder with my favorite images and make a photo book. Two of the things that help motivate me when I’m about to begin a project is looking forward to seeing the finished product and sharing it with others. It was with this anticipation of imagining how my Instamatic project would look that I noticed writing on the stairs in a New York City subway that read, “If You See Something, Say Something.” This seemed like the perfect title for my photo book.
For anyone contemplating making a photo book, my recommendation is to go for it – don’t hesitate. Online companies such as Blurb and others have simplified the process to where a complete novice can create a book in an hour or two. Selecting your favorite photos and exploring what you like and dislike about the images is a great way to sharpen your vision and technique. At least that’s how it has worked out for me. After completing the Instamatic project, I went back to my regular endeavors with a fresh eye, and renewed vigor.