I Mounted an Anamorphic Projector Lens to My DSLR
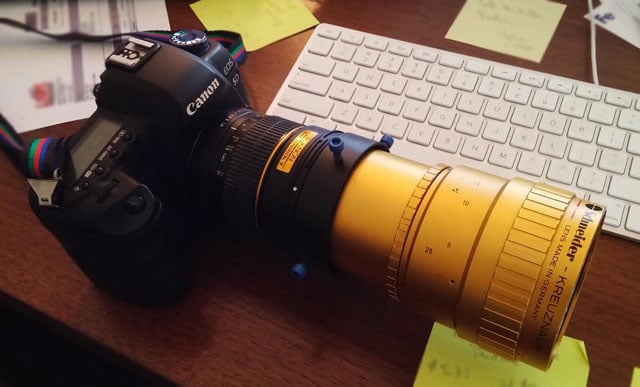
I’ve recently become obsessed with the idea of shooting (something close to) true, 2.35:1 ratio CinemaScope anamorphic on my DSLR camera. This is pretty easily done if you can spend $1,000+ on an anamorphic lens made specifically for a DSLR camera… but I don’t have that kind of cash, so I went another route.
After some research, I found that other DIY filmmakers are re-purposing old film projection lens, typically used in movie theaters, to “correct” the compressed anamorphic image into what we see on the screen as 2.35:1 CinemaScope.
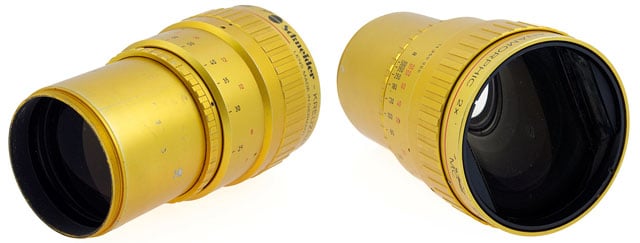
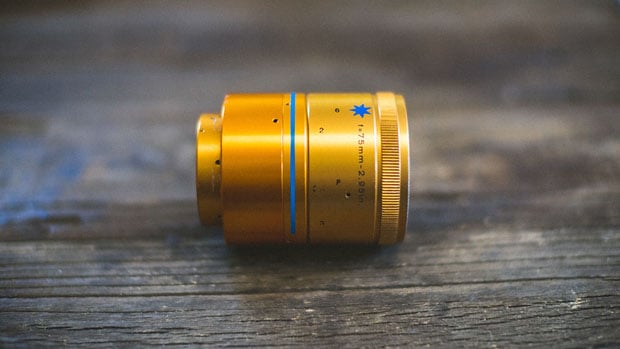
The Schneider Cinelux Anamorphic 2x WA lens is a specially developed front lens attachment for the presentation of anamorphically exposed films, such as CinemaScope films. The film image, which is compressed horizontally in this process, is corrected with the help of the Cinelux Anamorphic 2x WA and thereby projected on the screen with a width/height ratio of 2.35:1.
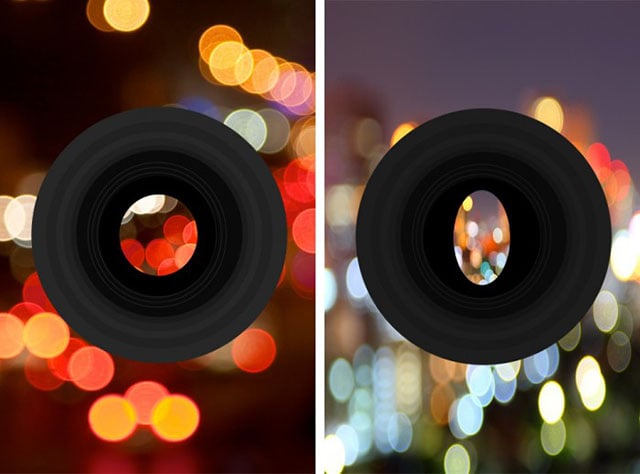
In the image on the right, you can see that the opening is an oval. Anamorphic lenses have to be adjusted so that the oval is vertical or the image will appear “wonky” and shifted diagonally. This oval is also responsible for the signature anamorphic “bokeh” you’ve seen in so many films.
Here’s a spherical vs. anamorphic bokeh comparison from an article by B&H Photo Video:
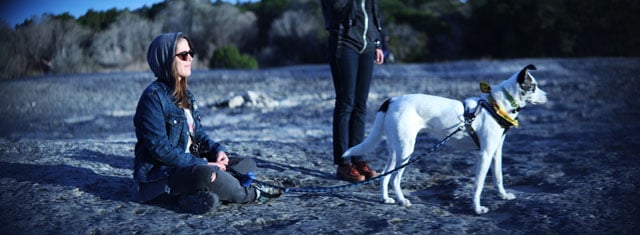
Unedited
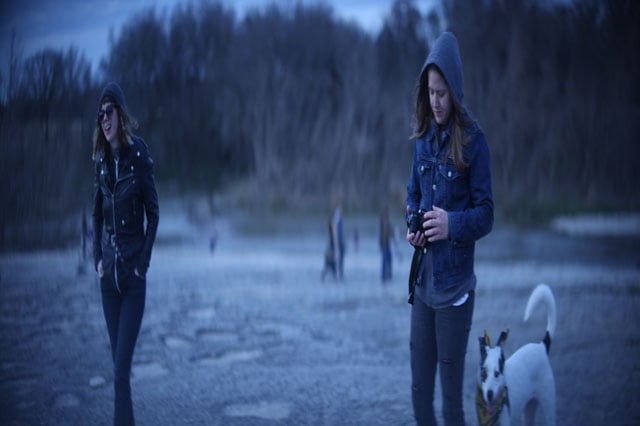
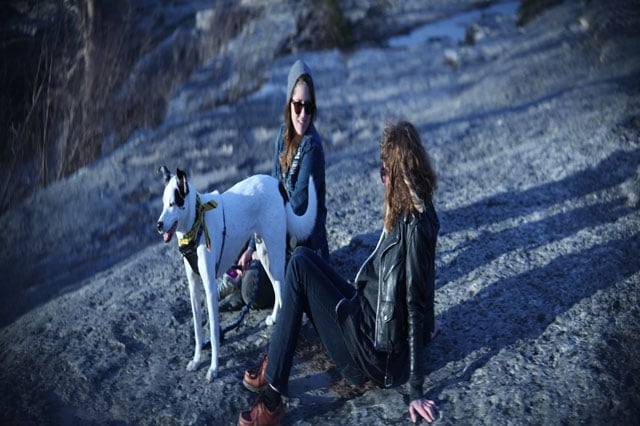
Once attached to the camera, the viewfinder will show a vertically stretched image of the scene. This is because the anamorphic lens is squeezing a much wider image into the frame of the camera’s sensor. 2x the width, to be exact.
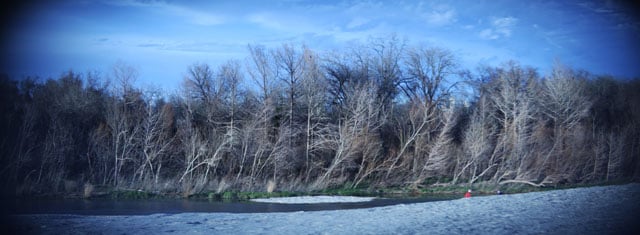
Decompressed
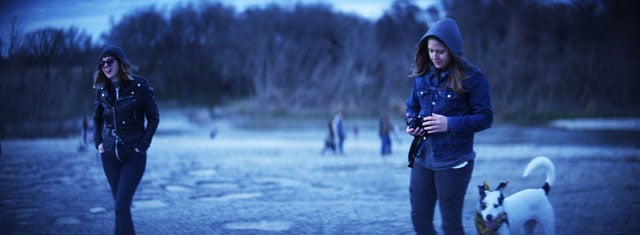
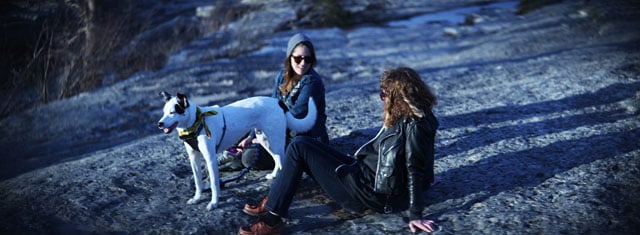
After importing, each image has to be adjusted to create the final product you see here. At this point you have an option. Which one you choose depends entirely on your needs.
Option 1: Change the height of the image to 55% of it’s original size, while leaving the width set to 100%. It’s logical to think 50% would work just fine because of the 2x compression, but 55% just looks more natural in my tests. This process is ideal if you are not looking for the largest possible image.
Option 2: Change the width of the image to 182% of it’s original size, while leaving the height set to 100%. Again, you would think 200% but 182% just looks better. As far as I can tell, there is very little noticeable loss of resolution even though you are technically stretching the width of each pixel. This process produces a massive image file that would be ideal for large format printing, but not so practical for Web use.
When it comes to video, I stick to Option 1 and only change the height.
More Examples of Unedited and Decompressed Images


The Vignette “Problem”
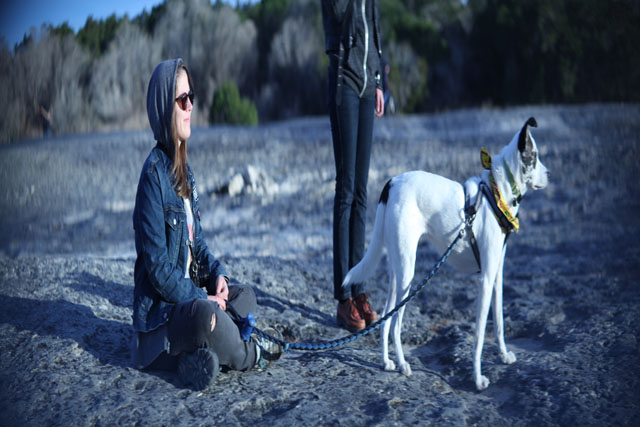
You may notice a lot of these images have a visible vignette at the corners. This is not a style choice. The anamorphic lens has such a long tube that you can see the rim when it’s not attached to a lens with a long enough focal length. I’m having trouble getting rid of the vignette using anything shorter than 85mm, which still does not fix the “problem”.
My anamorphic lens is attached with a clamp, but I have seen this problem solved by using a rail system that holds the anamorphic separately. The anamorphic lens can then be positioned to overlap the prime lens attached directly to your camera body, manually shortening the distance inside the tube from lens to lens. This also allows for the use of a prime with a shorter focal length, like a 50mm, increasing the field of view.
Focus Distance

The focus distance on the prime lens needs to be set to match that of the anamorphic, which has a minimum focus distance of 15 feet… that’s pretty far. The maximum on this particular lens is upwards of 80 feet (not sure of the exact figure) but either way, focusing the subject is a little more difficult than with a single lens.
If you want to use this lens setup for close-ups or simply anything closer than 15 feet, you will need to get your hands on a set of diopters. I’ve found that even a +1 diopter is too much for practical use, so i’ve ordered a +0.5 that I found on eBay, shipping from Greece. It’s harder than one might think to find a +0.5 diopter.
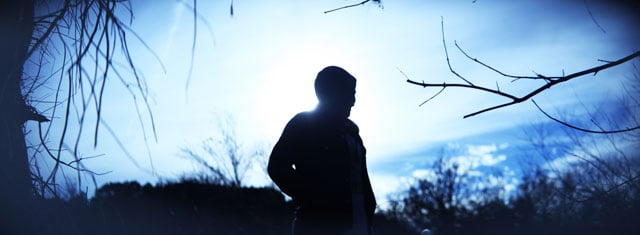
So far, my absolute favorite aspect of this 85mm portrait / anamorphic lens combo is the creamy swirl effect that is created in the background, most distinct at the edges of the frame. This shallow depth of field, coupled with a wide view has a very cool and unusual look.

Video and Conclusion
I put together a quick edit at full width, which is 2x the original 16:9 footage. The ratio here is actually closer to a super wide 3.2:1 without any cropping.
All in all, this has been an extremely rewarding project. I’m not a professional photographer by any stretch but I’ve learned more in this process than in the entire time I’ve spent with photography. Finding the right lenses, clamps, diopters and settings to make this work was not easy, but I’m very happy with the results and excited to see what else I can do with this setup.
About the author: Ben Clancy is a photo hobbyist, filmmaker, and designer based in Austin, Texas. You can find more of his work on his website here and here.