DIY: Creating a Super Simple Variable Speed Camera Slider
Editor’s note: This DIY tutorial uses a specific product called Compound 9, but you could use the same ideas/concepts with different materials and/or objects.
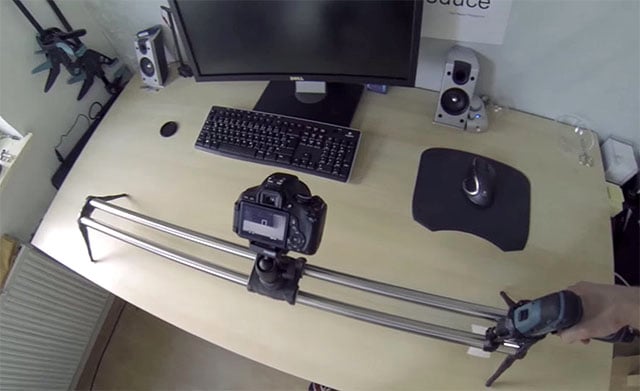
Hi, my name is Christian Segeth, and I’m the inventor of a product called Compound 9, which is hand-formable carbon that lets you 3D print with your hands and some hot water. Today I’m going to explain how I built an extremely simplest speed-controllable camera slider. My build offers a constant movement speed and butter-smooth sliding, which I’ve rarely found on YouTube’s DIY camera slider tutorials.
Here’s a list of materials I used:
- 2 steel pipes (25mm)
- 3m of fishing line
- A little steel ring
- 1/4″ (camera) screw
- An electric drill
- Felt from Ikea
- C9 or Compound 9
I’m living in a small city apartment without any fancy tools, a workshop or even a garage. So all the work happened on my desk with only these tools:
- Hot water
- Scissors
- Lighter
- Rolling pin
Step 1: The Base
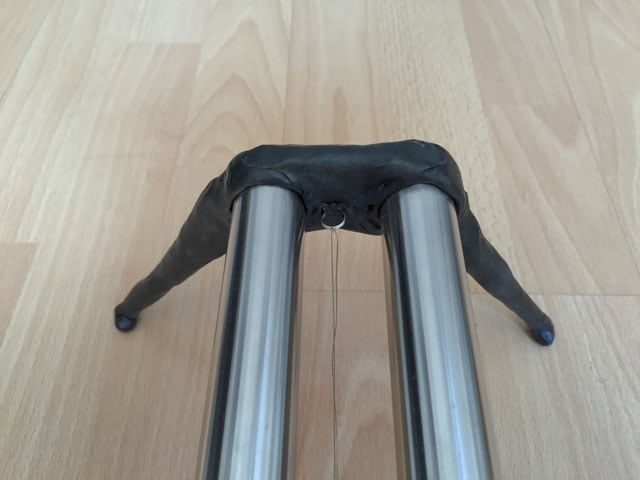
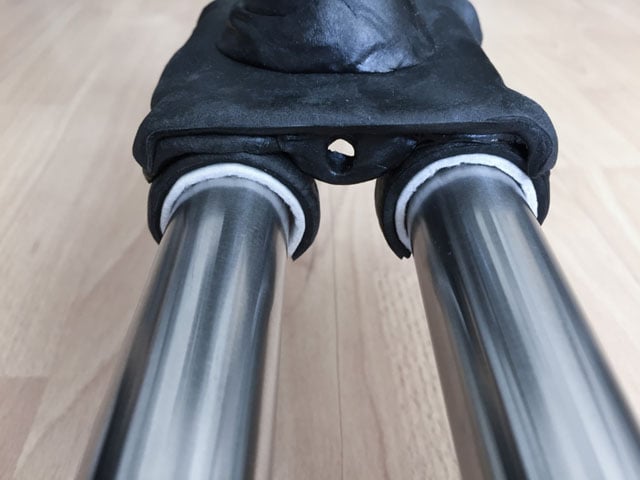
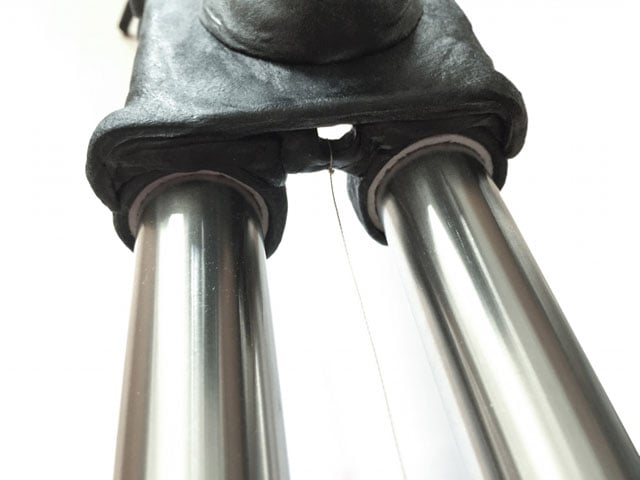
Heat up some C9, get rid of all excess water and wrap it around each of the 4 pipe endings. To make it sticky, you may need a form of dry heat. In the simplest case, take a lighter or little gas torch. But be careful, don’t overheat it. Now, lay down the two steel pipes on a flat surface, roughly in the parallel arrangement they should be later.
Fill the gap between each two sides with C9 to form a bridge between the two pipes. You’ll now have a few minutes to adjust the final position. I took a ruler to roughly adjust the parallelism. The whole setup will tolerate some error, so it doesn’t need to be perfect. While it cools down and becomes rock solid, you can form four legs like those shown in the picture above and weld them to the rest later on, by just dry heating up the areas that need to be connected. The legs can be made hollow or replaced by bars of wood, big nails or something else to save some material.
Step 2: The Slide
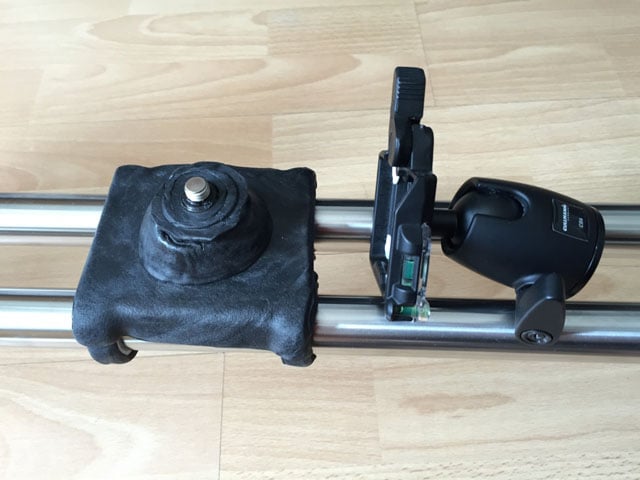
Make a sheet out of C9 and cut out four strips. Cover them with felt to reduce the overall friction and wrap those around the steel pipes. Let them cool and cut off some excess material. Form a base plate and cover the 1/4″ camera screw bottom with some C9. Now weld together those pieces until you get something like this:
Step 3: The Drill Mount
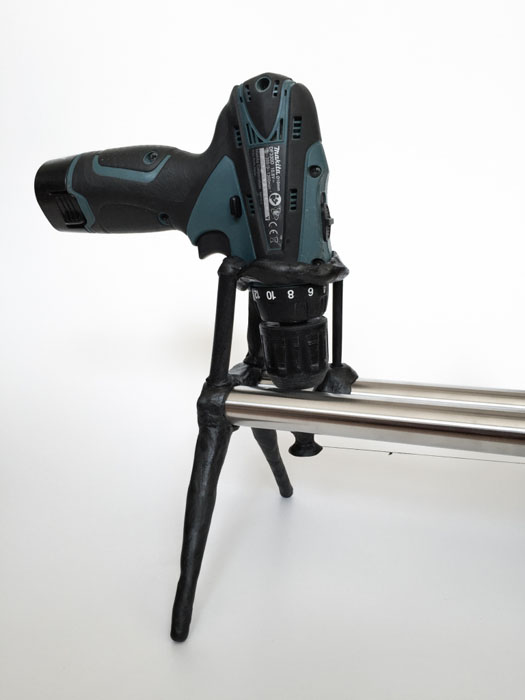
I didn’t put too much effort in this step and I also didn’t care about its look, so I just rolled 3 bars on my desk und wrapped a ring of C9 around the drill. But be careful here, C9 has a tendency to slightly stick to plastics. Some excess water will prevent it from sticking here. I then welded together those parts again. The pictures should be self-explanatory.
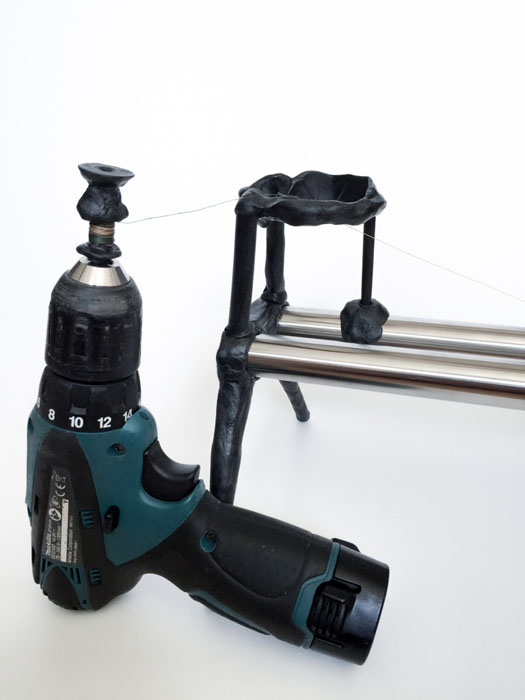
Step 4: The Transmission
The whole mechanism works like this: The drill rolls up the fishing line, which gets deflected by a little ring on the other side.
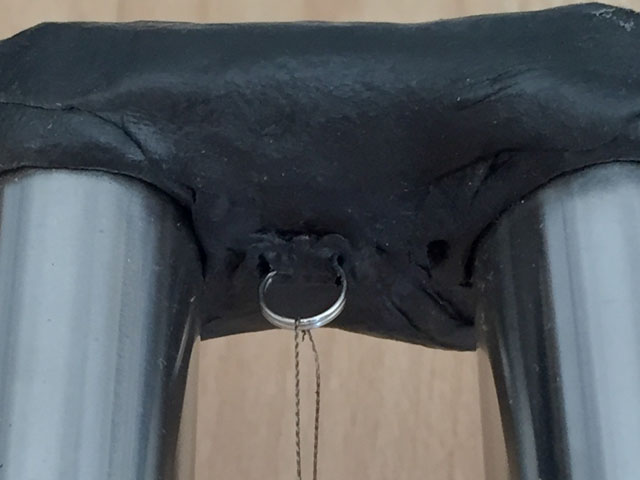
This line is connected to the slide:
Now if you turn the drill, it will move the slide away from you. If you want to get the slider back to it’s starting position, turn the drill the other way around and move the slide by hand. A two-way machanism would need a driving belt and is therefore much more complicated. My goal was to make this DIY slider as simple as possible.