Testing Out a Rosco Gel Kit for Creative and Colorful Photographic Lighting
I received a Rosco Gel kit a week ago, and after a few tests I can say I really love using all the awesome colors for my photography.
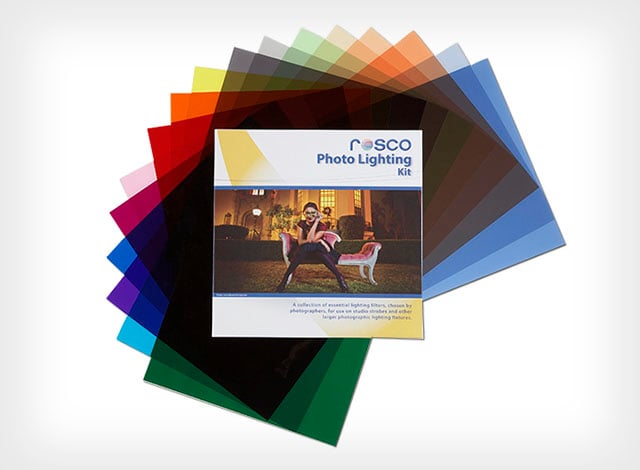
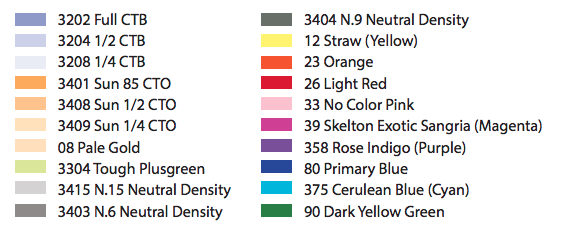
The kit includes 20 individual 30x48cm square sheets for color corrections (e.g. CTO, CTB, ND) and a range of different colors, all of them contained in a protected and resealable packaging.
First, I tested every one of the gels on the skin to see what the colors rendered.
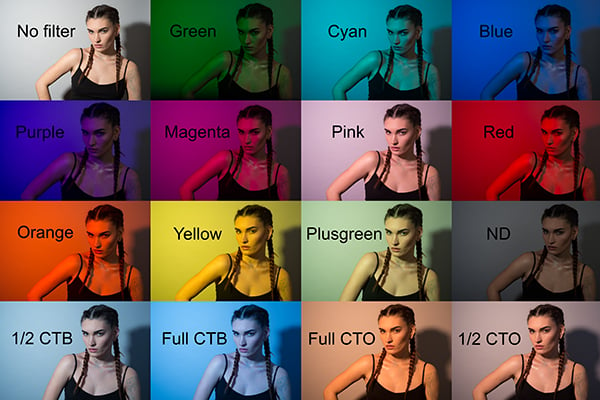
After spending half an hour taping different gels onto my reflector dish with some gaffer tape, I started to work on my first image.
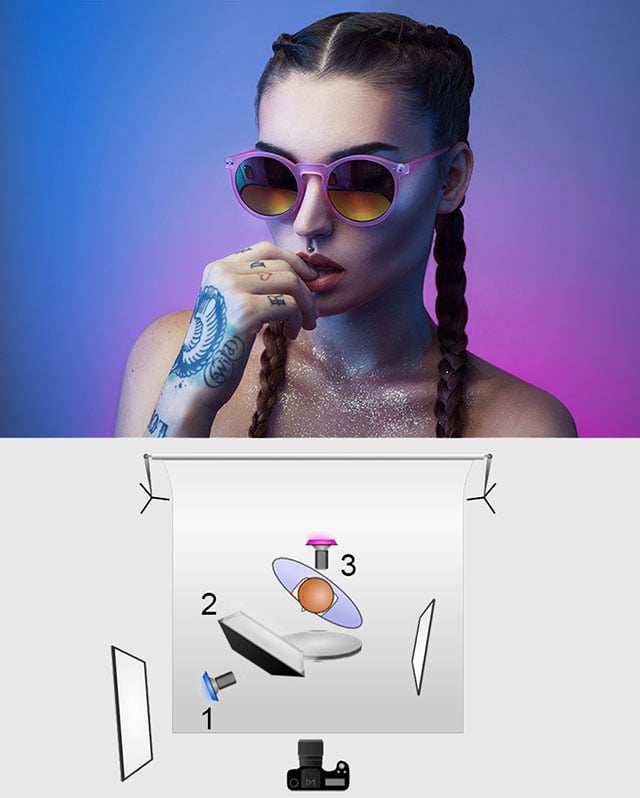
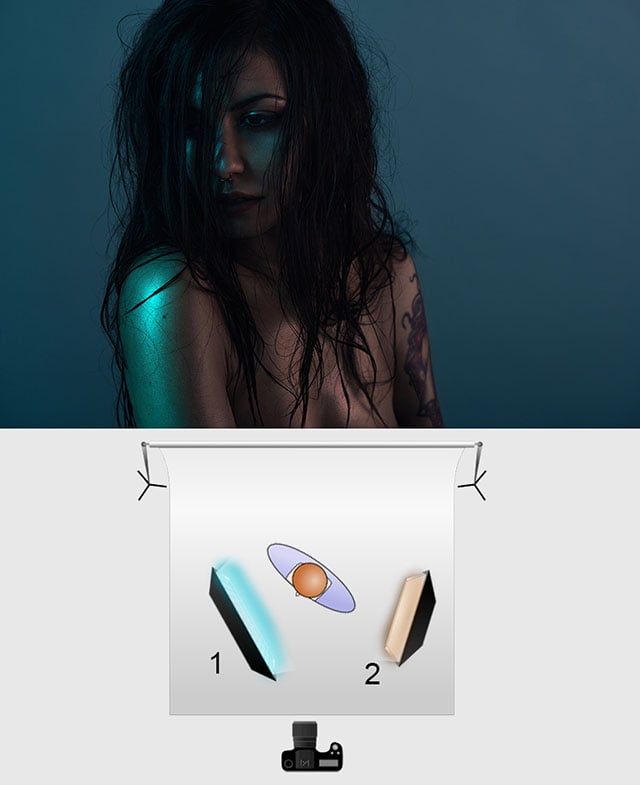
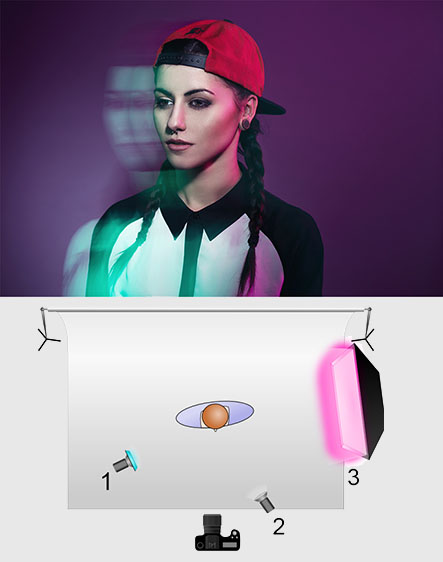
Since I had a very small space to work in, I stuck to shooting simple portraits using 3 lights sources: one reflector and two gels (one blue and one magenta).
The blue one was pointed directly towards a white wall to project the light in a very diffused way all over the room. The magenta was taped on a reflector dish with a grid, just behind the model for a slight touch of color on the background. The 3rd source without gels was a square 70cm softbox and a reflector just under the model to soften the shadows.
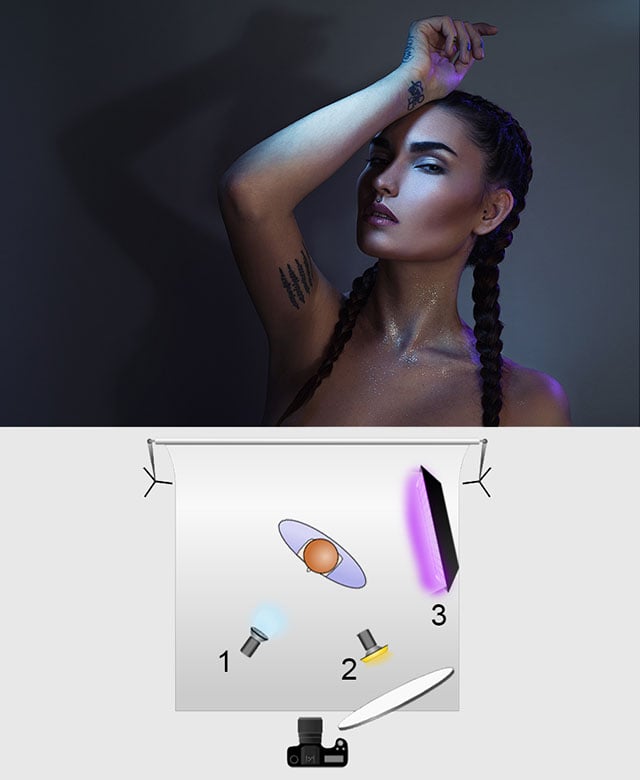
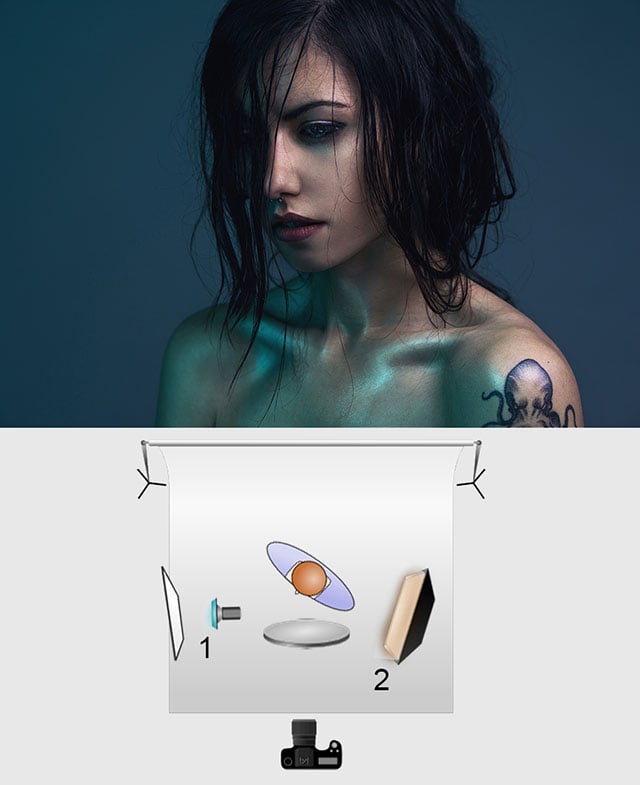
The second test with Morgane helped me more easily understand color correction using the CTO and CTB gels.
The CTB filter was placed on a reflector dish with a grid for a very focused light. The CTO was oriented towards a white reflector for a soft and diffused light so the skin could have an orange undertone. And finally, the purple filter was placed in a 135×30 Phottix Stripbox for a touch of color and a cold mood.
Here’s another example of the CTO filter, this time outside of a studio environment:
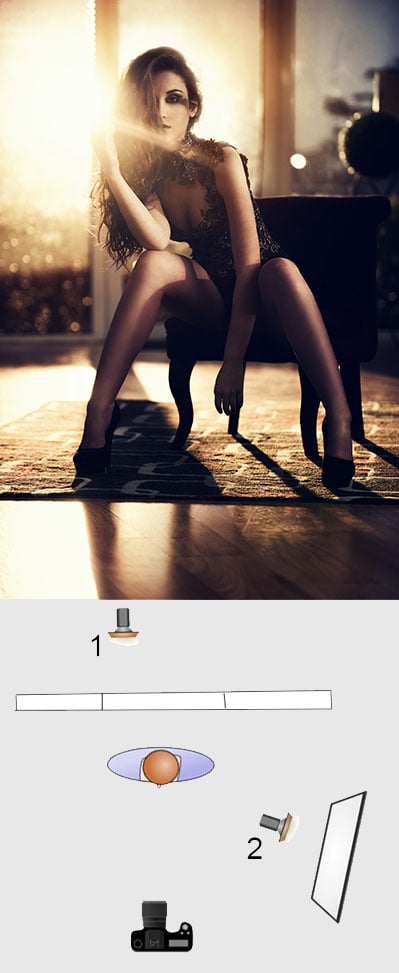
For this image I used the CTO to create the look of a sunset. Since there was no sun out that day, I figured I could create one myself with a flash and a reflector dish.
I placed my flash outside and another to my right so it could bounce on the wall. The CTO can reproduce the temperature of a sunset really well and allows a lot of possibilities.
Let’s move on the my favorite gel, the Cyan.
I really love this color, it gives a dark and cold mood that is really nice . The mix with the CTO is perfect to me. For this image I installed a Stripbox at 45° with the cyan, and a square softbox with a 1/2 CTO filter.
Using the same colors but a different lighting, we can have a softer render. Here the cyan reflects on a white wall and a reflector is added under the model.
Now let’s go outside.
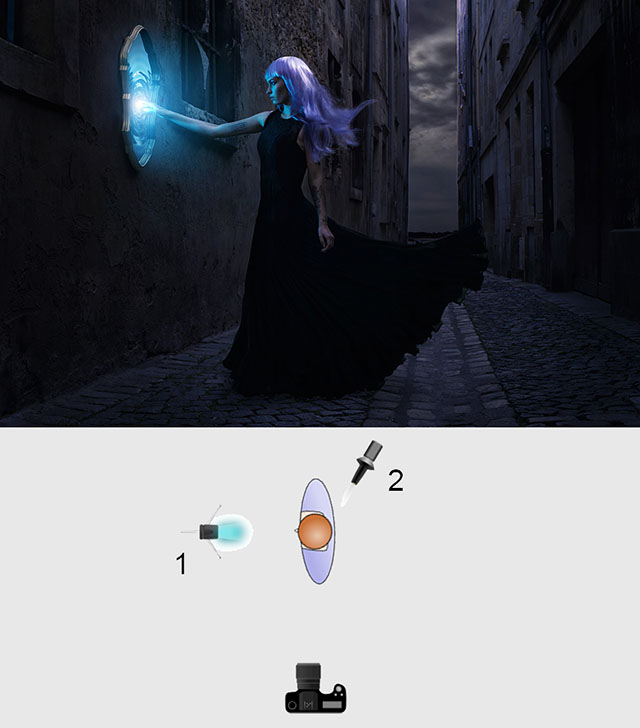
This is a more surreal picture with only one cyan gel on a speedlight. This image was a bit complicated to set up, but here the gel is very important because without it the image would lose a lot of sense and credibility. Just like the CTO seen above, the gels allows me to create some moods by lighting the model or not.
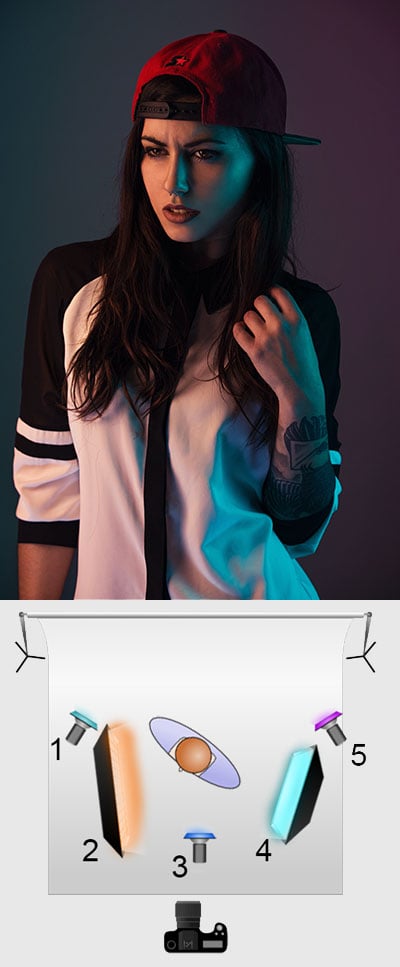
Using five light sources each of them with some gels.
Last technique with the colors: the long exposure. The cyan strobe here was used in a continuous light, while the other two were used in a classic way. The technique consisted of shooting with a slow shutter speed to have this movement effect and using the other flashes are here to congeal the movement (first or second curtains).
I used a speed of 1/2s and an aperture of f/11 with a camera movement during the posing time.
That concludes my personal tests of this gel system. I really hope you enjoyed it and that it will make you want try all these colors in your own photographs. It was a pleasure to mix all the gels in different combinations, and I want to thank Lovinpix for this essential and fabulous kit. You should always have it in your camera bag, whether it’s for portraits, studio or outside staging.