Sony a7S Astrophotography Review
As soon as the Sony a7S was announced, I knew I had to try it for astrophotography. With a full frame sensor and ISO 409600, is it the best low light camera out there?
Introduction
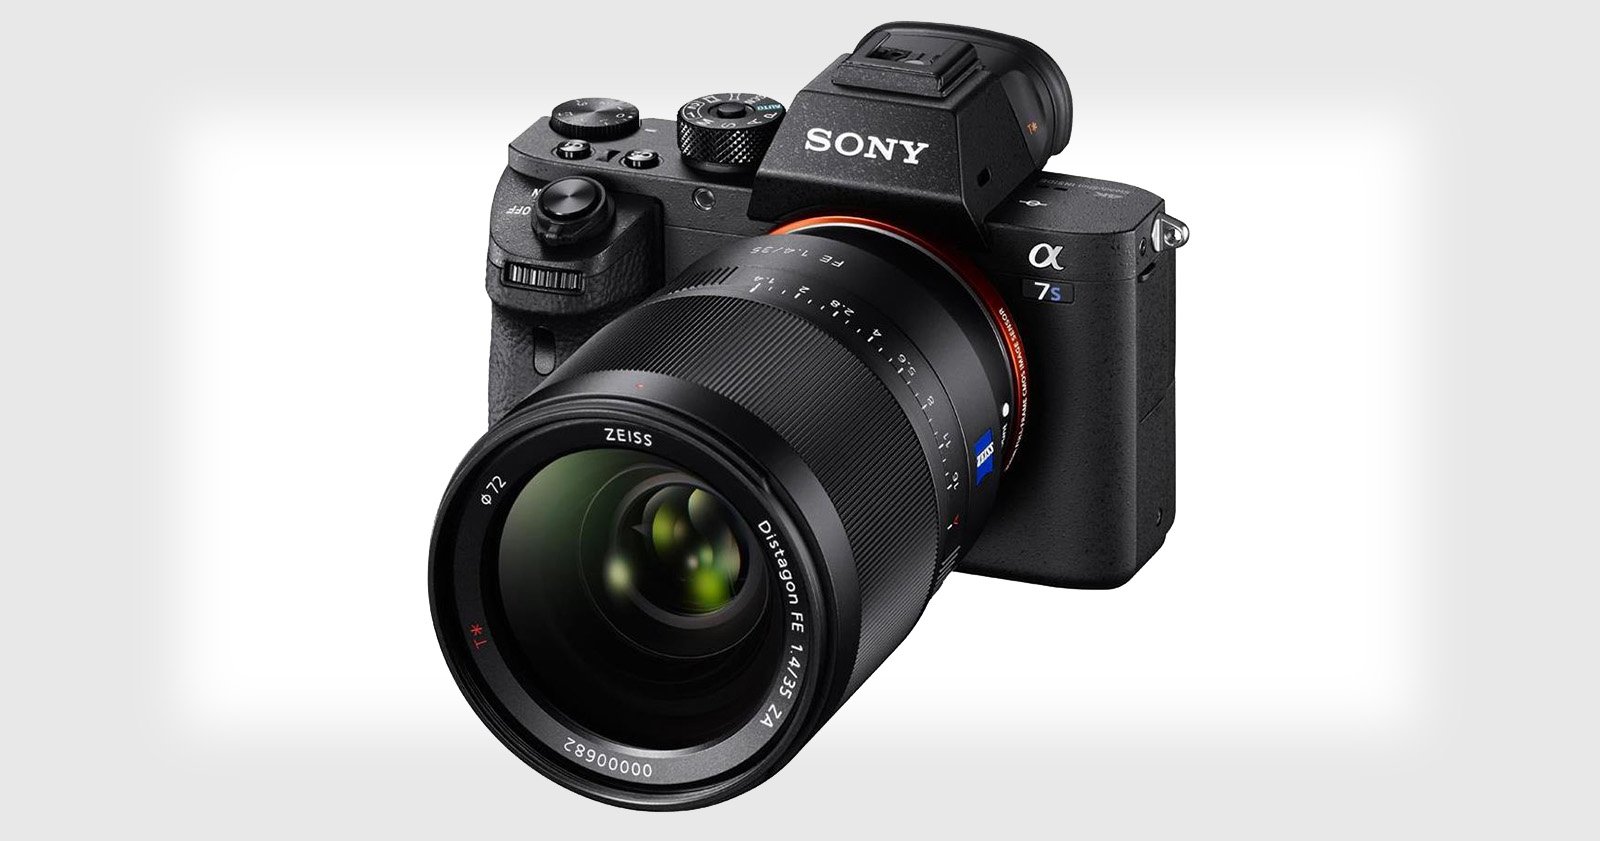
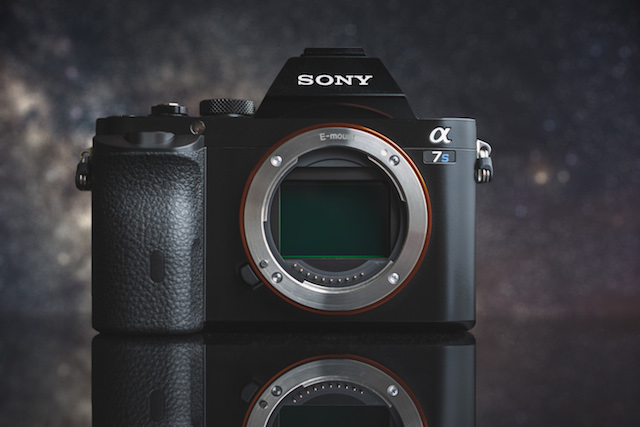
The Sony a7S is the third variation of the full-frame mirrorless a7 series of cameras that Sony has recently released. First Sony released the 24.3 megapixel a7 and 36.4 megapixel a7R, the first mirrorless cameras with full-frame 24mm x 36mm sensors. The recently released a7S seems like sort of the oddball of the three a7 variations: It has only a 12.2 megapixel sensor and at the time of this writing, it costs almost $1000 more than the a7 and $200 more than the much higher resolution a7R. But with that 12.2 megapixel sensor comes some distinct advantages, especially for low-light photography and video.
12.2 Megapixels
With the a7S, it seems like you’re paying more for less. But even with a sensor resolution that is a third the resolution of the cheaper a7R, the a7S offers two things in return: sensitivity and 4K video (sort of*). The A7s has larger pixels than pretty much any consumer level full-frame digital camera. The larger pixel size means that each pixel can collect physically more light. The more light per pixel, the better the signal to noise ratio for that pixel and so that pixel will more accurately detect the incoming light than a smaller pixel would. This means that, all other things being equal, the A7s should be capable of the best per pixel signal-to-noise ratio of any production camera. This means that it should arguably be the best camera for astrophotography yet.
Most high end DSLRs’ ISO sensitivity tops out at or 51200 or 102400. The a7S goes a full two stops more: it has a maximum ISO of 409600. Now for all practical purposes, 409600 is an ISO setting that’s probably not going to be used very much for final images, if at all, ever. ISO 409600 is only really applicable to really really dark scenes and the photos are sure to be really noisy, but it also indicates that the other higher ISOs of the a7S should be much cleaner than the competition.
*The a7S is capable of outputting 4:2:2 UHD 4K video via its HDMI port. This means that it’s not actually capable of shooting 4K unless you attach it to a portable external recorder. It can still record regular old HD video in 60i/60p/30p/24p at 1920 x 1080 and 120p at 1280 x 720 directly in the camera. In order to record the full 3840 x 2160 UHD 4k video, you need to plug the a7S into a separate video recorder like the Atomos Shogun which will be available in late September. It should also be compatible with the soon-to-be-released production oriented Black Magic URSA HDMI.
A Low Light and Astrophotography Review
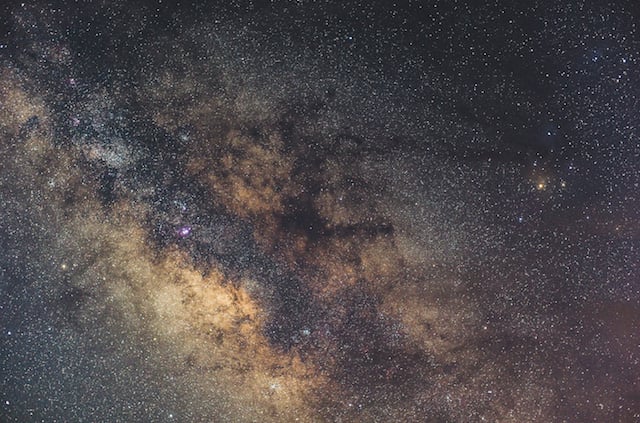
Per the usual Lonely Speck article, I’ll be concentrating almost exclusively on the low light capability of the a7S, particularly for landscape astrophotography. I wanted to push the a7S to some exposure extremes so I also got it with the fastest lens I could get my hands on: the Voigtlander 50mm f/1.1 Nokton. The extremely high sensitivity of the a7S in combination with the f/1.1 aperture of the Voigtlander should give us some ridiculous low-light capability for this review.
First Impressions
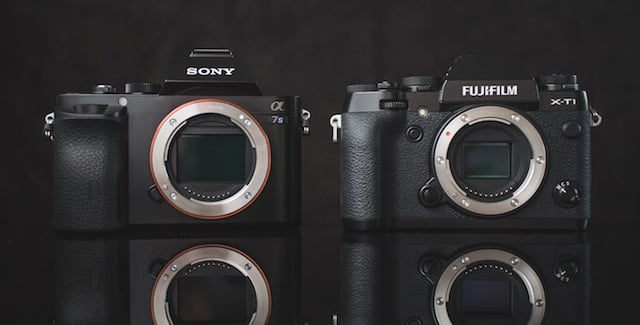
My current full-time travel kit is all Fujifilm, with the Fujifilm X-T1 as my primary body. By comparison, the a7S is very similar in size to the X-T1. Despite their visual similarities, they’re completely different cameras. Obviously the a7S has a larger full frame sensor than the APS-C sensor on the X-T1 and in turn they each have a completely different lens system. Everything about these two systems speaks of different design priorities. The X-T1 seems more oriented toward the still photography purists. The X-T1 has all dial controls with dedicated dials for all the major exposure settings while the Sony a7S has the standard M-S-A-P mode dial and a dedicated movie mode, just like pretty much any modern DLSR. As a result, the basic control layout of the a7S is very similar to pretty much any Canon or Nikon that I’ve used.
The a7S comes with two batteries, a welcome inclusion, especially since the battery life is rather short compared to most DSLRs (340 shots per charge). The included charger is also nice and compact, much nicer than the huge brick that came with my X-T1. In the a7S’s Time-Lapse app I was able to make 525 photos on a single charge, which is on par with what I can get shooting timelapse with my Fujifilm X-T1. I’m also happy to see that the a7S can be charged via micro USB, which is something that makes travel with the camera that much more convenient.
Build and Handling
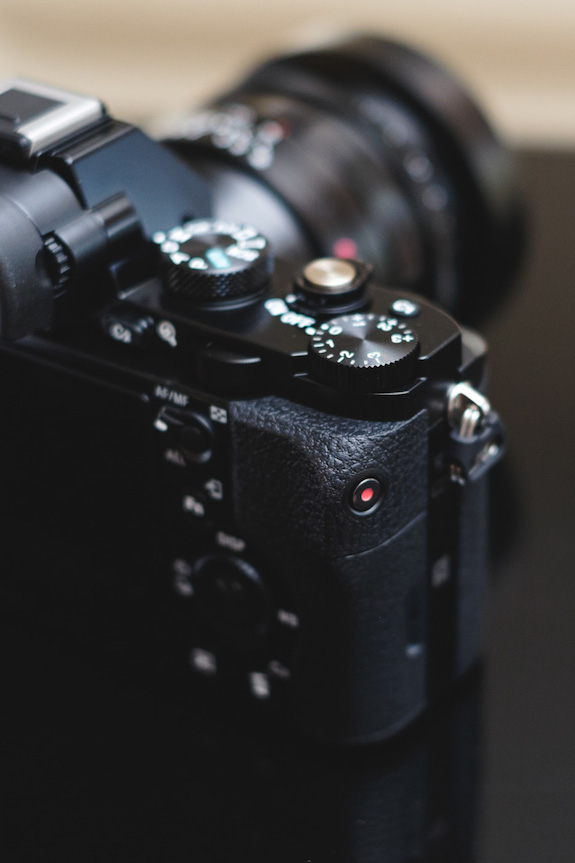
The a7S looks and feels of extremely high quality materials. There’s just something about it that makes it feel more solid than pretty much any other camera I’ve used. It’s small size makes it very nice to handle. Paired with a small lens (i.e. not the Nokton), the a7S would be very nice to carry around all day. The grip is wider than the grip on the X-T1 and I think that it’s just as comfortable, just different. It has a nice rear thumb protrusion just like the X-T1 to make single-handed holding much easier. Where the grip could use improvement is when a7S is paired with larger full frame lenses, adapted from other camera mounts (a popular thing to do with the a7 series as the FE mount lens selection is rather small at the moment). With large third party lenses attached, the a7S feels a little bit imbalanced.
Unfortunately, the a7S is not weather sealed, unlike most other cameras in its price bracket. I shoot a lot in dusty conditions and weather sealing would have been a welcome feature for this camera. For now, I’ll keep the X-T1 as the hard-use camera.
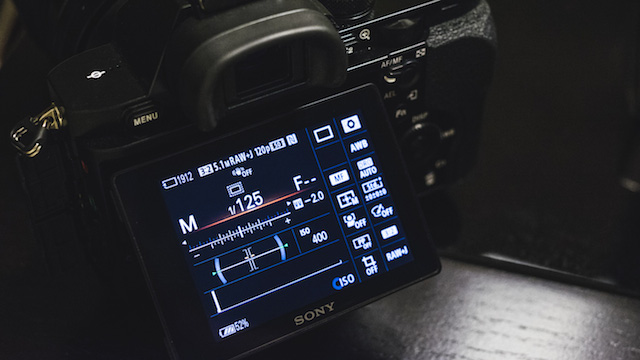
The EVF and LCD
The electronic viewfinder (EVF) is excellent. It seems very similar in quality to the X-T1′s EVF. Transitioning between the two cameras, there’s almost no noticeable difference in the quality of the EVF picture; they’re both excellent. The LCD on the back of the a7S is also very nice and I’m super happy that it’s tiltable both up and down for low mounted or overhead shots. I use the tiltable LCD on my X-T1 for nearly all of the astrophotos that I shoot so it’s great that Sony included one on all the a7 series of cameras.
Unfortunately, there is no way to completely turn off the back LCD. I would prefer the ability to shoot with the EVF only in order to reduce power consumption for most daytime shooting. Turning off the LCD would also be helpful for night timelapses, but there’s no way to do it.
In very low light the image feed from the sensor on the a7S is MUCH cleaner than the X-T1 and any other camera I have used. This feature makes it substantially nicer to focus in the dark which is a killer feature for astrophotography. More on this later.
Menu Interface
I have heard rumors about the Sony line of mirrorless cameras having clunky interfaces, so at first I was pretty skeptical of what the camera had to offer. My conclusion: it’s just different. Any user transitioning from Canon or Nikon or any other manufacturer will probably need an hour or so with the camera to familiarize themselves with the functionality. The same could be said of transitioning to any new brand. There are definitely some small quirks, but the a7S operates just as I would typically expect from any camera. The biggest thing for me was just getting used to the button locations (important when shooting in the dark) but it was pretty quick to learn. There’s also a lot of menu customization options, much more than pretty much any other camera I have used.
The camera also has a dedicated function (Fn) button. This is sort of like the “Q” button on Canon and Fuji cameras, used to quickly access certain functions of the camera. A step up from Canon and Fuji, the Fn button menu can be programmed with whichever functions the user desires. Similarly, the DISP button can be programmed to cycle through any number of alternate displays for the EVF and LCD.
Controls
By default, all of the most important exposure functions like ISO, shutter speed, and aperture are adjustable via three control dials. The front dial near your pointer finger is for aperture, the rear upper dial above the AF/MF button is for shutter speed, and the rear lower dial around the directional pad is for ISO. Exposure compensation has its own dedicated dial and allows for +/- 3 EV of compensation. I’m also happy to see that many of the buttons can be remapped to alternate functions. All of the most important quick access functions like Auto Exposure Lock, Live View magnify, White Balance, and Self-Timer/Continuous have dedicated positions. I added a function to the C3 button for changing metering modes and the down arrow for enabling focus peaking.
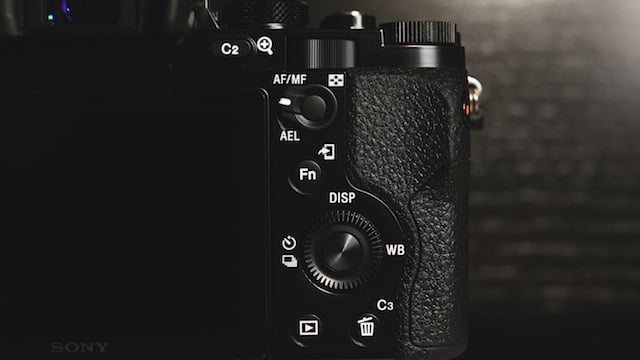
I was unhappy to find that the shutter button has no tactile feedback. There is no noticeable half-press or full-press click on the shutter button, it’s just a spongy, springy button. I wish that it had an affirmative click so that it’s easier to “feel” when the camera is going to shoot. Where it felt the strangest was when using a long exposure with the first curtain electronic shutter enabled. In this scenario there is absolutely no audible or tactile feedback that the camera has started taking the photo. The only indicator is that the LCD will change to a black screen when exposing but it’s still a little strange starting an exposure and not being sure whether the camera is actually shooting. It was a little bit annoying at first, but like all things on the camera I got used to it pretty quickly. The alternative is to disable the electronic first curtain but I just left the default setting for most of my time with the camera.
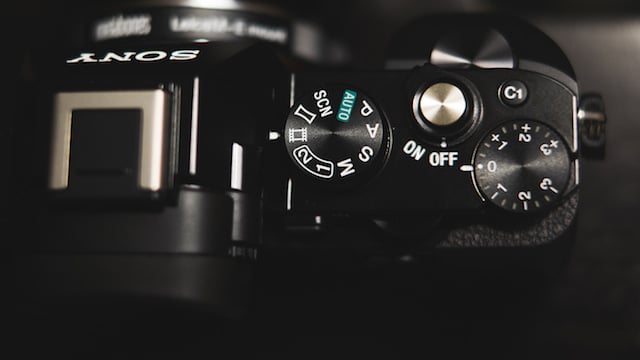
The video record button is in the strangest of locations, especially for a camera that touts its 4K video capability. It’s on the side of the thumb grip, not a place where you can quickly mash it to start recording. What’s even more of a bother is that when the mode dial is set to movie recording, it completely disables the shutter button and instead just pops up a message on the LCD, a strange design decision on the part of Sony. For more practical movie shooting, I just leave the camera on the M, S, A or P mode for exposure and have the movie recording button enabled just in case I need it. This way, the camera can still take stills as usual but will start recording if I press the record button.
The mode dial also includes two memory mode settings, M1 and M2, which are programmable to recall any mode dial setting you wish to store. For example, if I wanted to have a mode dedicated to astrophotography, I would switch to M mode, program all my settings (long exposure, low f/number, high ISO, white balance, etc.) and then enter the camera settings menu and save it to one of the memory modes.
I’m disappointed that it’s not possible to re-map a more convenient button to be the record button. I’m sure that this complaint has been made by many other a7/a7R/a7S users. Hopefully Sony will listen to its customers and allow the function to be mapped to a more convenient location via a firmware update. Fingers crossed.
Shutter Sound
In the default electronic first curtain mode, the a7S shutter sound makes a satisfying click that has a fast feel. I wish that my Fujifilm X-T1 had an electronic first curtain because it makes the a7S feel so much faster in operation for most daytime shooting. But as I mentioned before, first curtain shutter can make long exposures “feel weird” as there is no audible indication that the exposure has started; a sound is only heard when the shutter closes in first curtain mode.
In regular non-electronic curtain mode, the shutter sound is loud and feels slower. Overall, the shutter is noticeably louder compared to the Fujifilm X-T1.
Luckily the camera has a silent mode that’s actually completely silent. The only camera that comes close is the Fujifilm X100s but even the X100s has a noticeable click. I have wondered for a while when professional oriented still cameras would start incorporating fully electronic shutter capability and the a7S is the first camera I’ve personally used that has it. The silent shutter mode will be an excellent feature for timelapse photographers in order to reduce shutter wear and it should be perfect for event photographers (like wedding or performance photographers) who want to keep completely silent during the event.
Image Quality
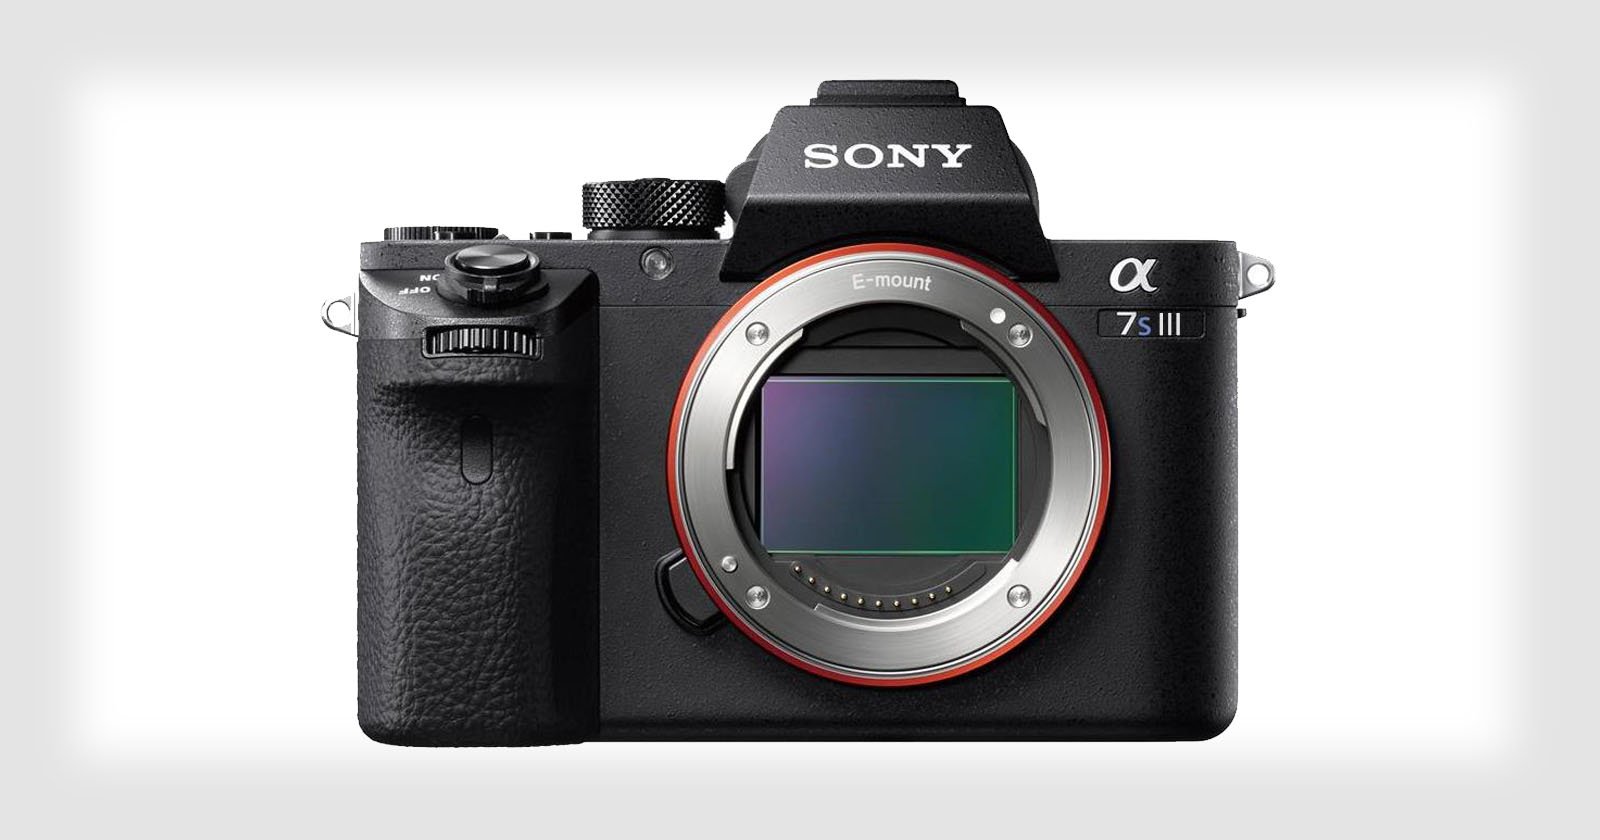
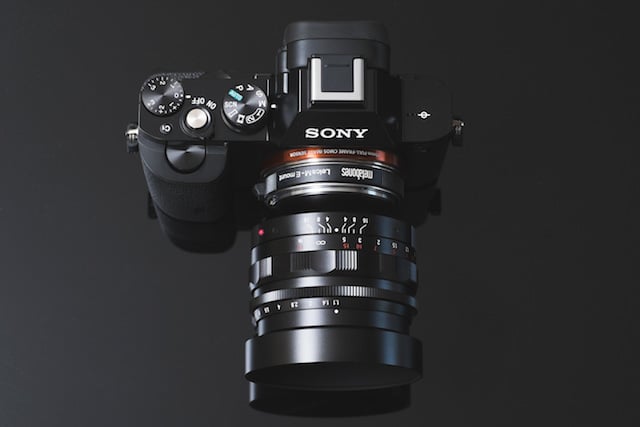
With a full frame sensor, the Sony’s a7 line already has an advantage over nearly every other mirrorless camera system. The larger sensor means that the a7S can take advantage of larger, full frame lenses. But as a new system, Sony only has 5 dedicated full-frame lenses available for the FE mount. Hopefully we will see Sony fill out their lens lineup with more competitive lenses in the near future. In the meantime, its short flange focal distance also allows the a7S to use many other full frame lenses from nearly every other manufacturer via the use of adapters like the Metabones adapter I’m using here to mount the Voigtlander 50mm f/1.1 Nokton. I am also glad to see that most of my recommended lenses for Milky Way photography by Rokinon/Samyang are now available in the Sony E mount as well. The a7S’s built-in focus peaking feature also makes it very easy to manual focus lenses like the Voigtlander or Rokinon lenses.
Initial impressions of image quality are very high. The camera retains a tremendous amount of dynamic range when shooting in RAW format. Shadows retain very clean details and “Low” ISO images all the way up to ISO 12800 are practically noise free. Mounted with a fast lens, the photos from the a7S are just sublime. Let’s see how it does at the higher ISOs.
ISO Performance
Straight away, I wanted to try out ISO 409600. It’s hard to really grasp just how sensitive this ISO setting actually is until you can use it in real life. In this example, I was using an exposure of 8 seconds (just about typical for a full-frame 50mm Milky Way exposure). At ISO 409600 I was able to stop down to f/8. f/8! That’s just ridiculous. Now I wouldn’t recommend shooting the Milky Way at f/8 ever, but the fact that the a7S can capture this much detail at such a small aperture is mind-blowing. Sure, it’s grainy and gritty but honestly not far off from ISO 25600 from any other camera I have used.
I think that the practical, clean limit of the A7s is ISO 51200. At ISO 51200, shadows remain relatively clean and most of the fine detail in the image is retained. A clean ISO 51200 can allow users to use lenses as slow as f/8 for Milky Way photography (not that I would recommend it).
That I was able to make as clean of images on the a7S at such high ISOs and small aperture settings is downright impressive and speaks to the quality of the camera’s sensor. Coupled with a fast aperture, astrophotos from the a7S are buttery smooth.
ISOless?
The sensor on the a7S is relatively ISOless between ISO 3200 and 51200. This means that for any given shutter speed and aperture setting, changing the ISO between these values shouldn’t change the relative level of noise in the image. The only thing that should change is the brightness of the overall image, signal and noise alike. Many new sensors like the Exmor CMOS sensor in a7S and the X-Trans II CMOS sensor in the Fujifilm X-T1 exhibit this behavior. What’s essentially happening inside the camera is that it’s exposing at a single sensitivity and then applying post-exposure gain to the data in order to brighten up the image to match the ISO setting that the user set. In order to demonstrate this behavior, I made a series of exposures all at the same shutter speed and aperture, varying only the ISO from 1600 all the way up to 409600. Then, in post processing, all of the exposures were equalized for brightness in Adobe Lightroom and then placed side by side for comparison. Here’s what that looks like:
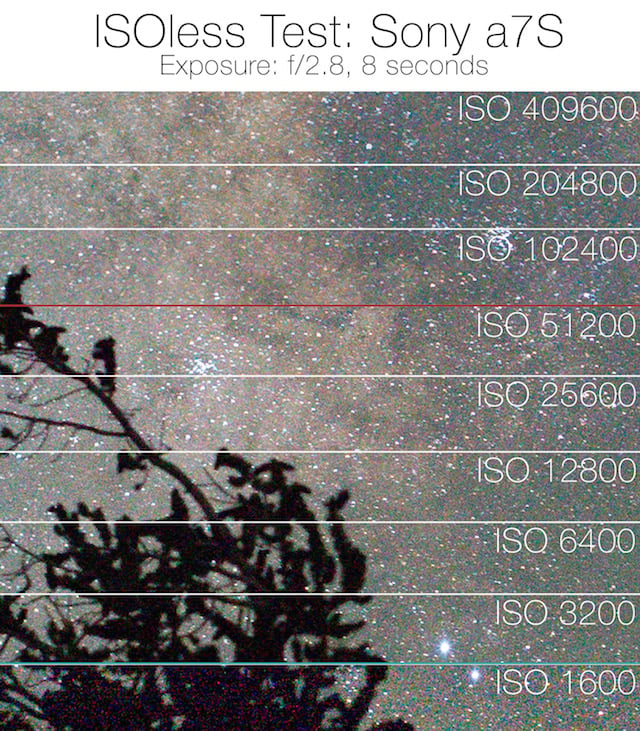
This exercise allows us to evaluate the noise floor of the sensor at reasonable exposures and see how the a7S handles the highest of ISO settings. Below the blue line, we can see that the a7S is using a lower gain on the sensor and this resulted in overly noisy shadows and extra color noise at ISO 1600. Essentially, the lower ISO of 1600 is throwing out useful photon data. But once we get between the blue and red lines from ISO 3200 all the way up to ISO 51200, the image looks relatively clean by comparison. Noise levels are best between ISO 3200 and ISO 51200 and the photos look nearly identical, indicating that they are all made at the same sensor gain and then pushed in the camera. Basically it seems that the “true ISO” or unity gain ISO of the a7S is around ISO 3200 or so. Once we get above ISO 51200 we can see that the camera must be applying some kind of noise reduction because faint stars start to get lost and overall details look slightly muddier and overly smoothed.
From this test, we can see that there is little benefit from actually shooting above ISO 3200, so long as shadows aren’t clipped. It also supports my initial thoughts on the practical ISO limit as being ISO 51200. Even though the test shots were all shot in raw with no noise reduction applied, it’s apparent that the camera is still applying some post processing noise reduction above ISO 51200. What all this means is that I would recommend that a7S users shooting the stars stick to their typical shutter speed and aperture settings and use ISOs between 3200 and 51200, just adjusting as necessary just so that the histogram of the final exposure is relatively centered on the graph without clipping highlights or shadows.
Compared to the X-T1
Let’s try and see how much of an advantage the larger pixels on the a7S are when shooting at practical ISOs. I’ll compare the ISO performance of the Sony a7S directly to the Fujifilm X-T1. Some might think this is unfair because the sensor sizes are different, so the a7S is at a distinct advantage, but the X-T1′s X-Trans II sensor has some of the cleanest straight-out-of-camera high ISO photos of any camera on the market (if you don’t believe me, check out DPReview’s comparison tool) so I think it’s actually a really good match up.
I did not have the Canon 6D to make a direct comparison to the a7S, but the DPReview link above will allow you to directly compare the two.
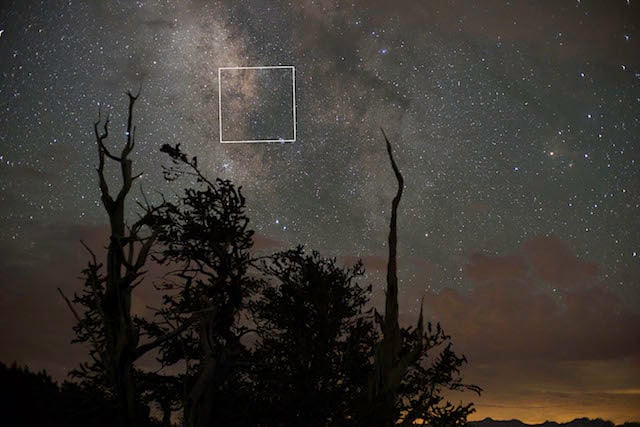
In order to equalize the comparison between the X-T1 and the A7s, I will make sure the lens is at the same exact aperture diameter so that light gathering between the two cameras is identical. This should ensure that we’re getting the same amount of photons to each sensor and the only differences between the shots should be from the sensor. The test sensitivity setting is ISO 6400 for both cameras and the exposure length is 10 seconds. Both of these cameras are relatively ISOless above ISO 1600 so it doesn’t really matter which ISO is chosen as long as it’s high enough to not clip the shadows and low enough to not blow out the highlights. ISO 6400 is a good practical number for this test because it makes for a relatively natural looking exposure of the Milky Way with an f/2.8 lens. It’s also the highest setting the X-T1 can go for RAW comparison purposes. The test scene is the same as the shots above and I’ve highlighted the 100% crop area which covers a 6° field of view of the sky.
The files were equalized for gain differences, just like the ISOless test, and all noise reduction was disabled so the comparison is representative of the RAW files.
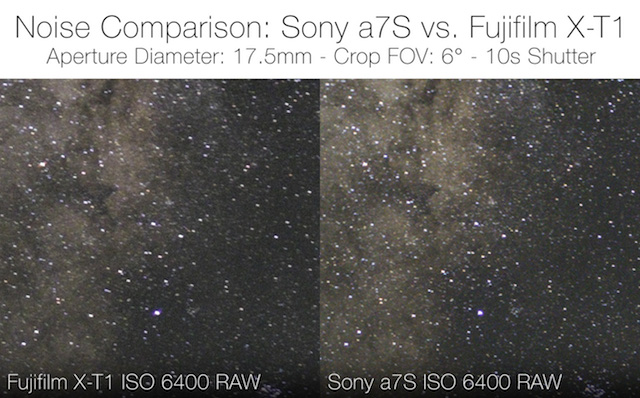
The results are not as drastically different as I would have thought. The a7S resolves a slightly cleaner image: fainter stars are more visible and it actually looks a little sharper, even though the original a7S file is 12.2 megapixels versus 16.3 megapixels for the X-T1. This difference in resolution could also be due to a number of other things like camera shake, shutter slap, Lightroom’s de-mosaicing of X-Trans II files, or just missed focus with the X-T1.
The a7S image has more color noise than the X-T1, but the luminosity grain is cleaner on the a7S than the X-T1. The X-T1 image seems to have a fine smattering of grain that’s not present on the a7S. Overall, I like the image from the a7S slightly more, but I’m surprised that it’s not more substantially ahead of the X-T1. Compared to most other cameras, the a7S and the X-T1 are both spectacular performers. Where the a7S will gain a distinct advantage over the smaller sensor in the X-T1 is in the use of larger full-frame lenses for their full field of view and larger aperture diameters that can’t be found for smaller sensor cameras.
High ISO Live View and Video Feed
Where the Sony a7S really excels as a tool for astrophotographers is its live view feed. The fact that it can push to ISO 409600 makes it possible to see and record real time video of the Milky Way. While this seems like somewhat of a novelty, it has a practical implication too: it’s possible to see and frame the Milky Way right from the Live View feed on the LCD. This makes it really really easy to focus and frame astrophotos with the a7S, more so than any camera I have ever used. I put together a video to demonstrate this capability and show you some of the video and timelapse results from the a7S.
Timelapse App
The a7S does not come with a built-in intervalometer by default, but it does have the capability to add an application called Time-Lapse through the Sony PlayMemories App Store for $9.99. The download of the app required creating an account with Sony and could be downloaded directly to the a7S via my home Wi-Fi network, just like a smartphone (cool!). There are a number of additional applications available for the a7S. For example: Multiple Exposure, Live View color grading, and even a Flickr app that allows you to share directly to your Flickr account from the phone.
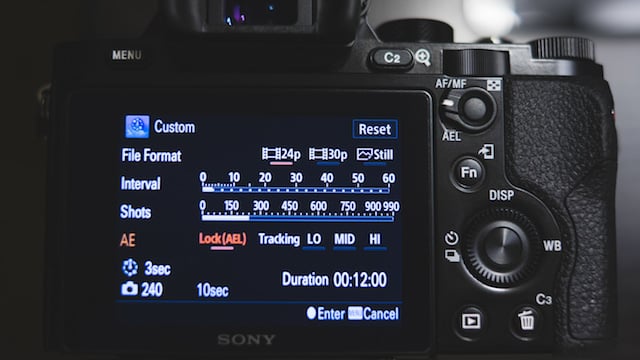
The Time-Lapse App has a number of different presets, including a Night Sky preset. I mostly used the Custom function which allows setting all of the intervalometer parameters: the interval, total number of shots, whether or not the camera uses auto exposure (AE), and how quickly it will track changes in light. I tried using the AE functionality but didn’t shoot in any conditions with drastically changing light, so it wasn’t apparent to me how well it worked, as the exposure never needed to change. It allows saving the timelapse in either a 24p or 30p video file or to just save the stills. I recommend saving the stills as RAW and compiling in the computer for the best results. Unfortunately, it’s not possible to save both a video file and the stills at the same time within the app.
Functionality of the application is just as you would expect, but one strange behavior is that once the app is open, all the other functionality of the camera is disabled. Even turning the camera off and then on again will just open into the Time-Lapse app again. Users must exit the app by opening the menu and navigating to “Exit Application” before the normal functionality of the camera can be restored. While this doesn’t seem to be a big deal, it means that if you put the camera away in your bag without exiting the app, it will open up in the app the next time you use the camera, preventing you from shooting normal photos right away. Definitely something to get used to.
All of the main exposure settings set within the Time-Lapse app are saved separately from the main camera user interface, too. This means that when you start the Time-Lapse app, it remembers the settings from your last timelapse, rather than pulling the settings originally set on the camera. This is a double-edged sword because it can mean that you can’t necessarily do a quick switch from regular shooting to Time-Lapse shooting and have the settings stay the same. You may need to reprogram all exposure settings for the current conditions once you enter the app.
Altogether it works just fine, and I’m happy with the overall functionality of the camera apps. I’m interested in seeing what applications will be offered in the future for Sony cameras.
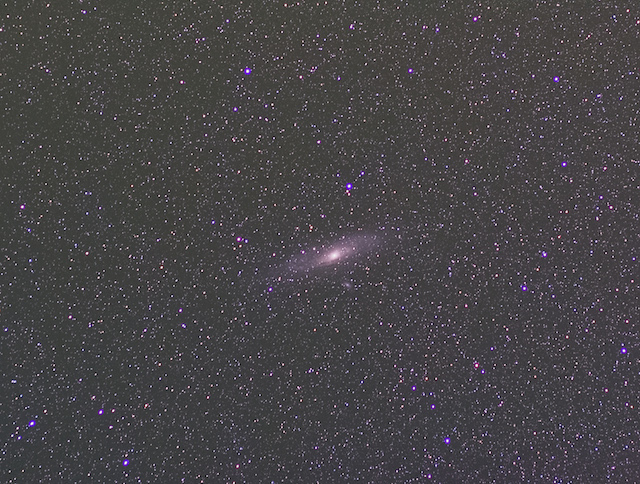
Shooting Andromeda
The Time-Lapse app also allowed me to easily make a series of photos of Andromeda, the nearest full size galaxy to the Milky Way. A quick stack of the images made for a really clean shot of the galaxy all without any kind of tracking equipment, guiders or telescope stuff. Just the a7S and a 50mm lens.
Example Photos
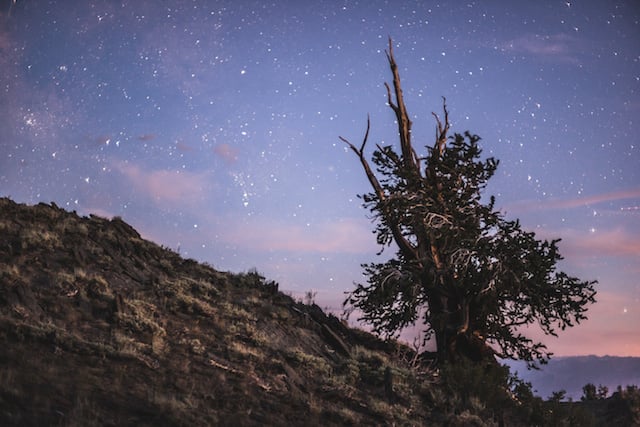
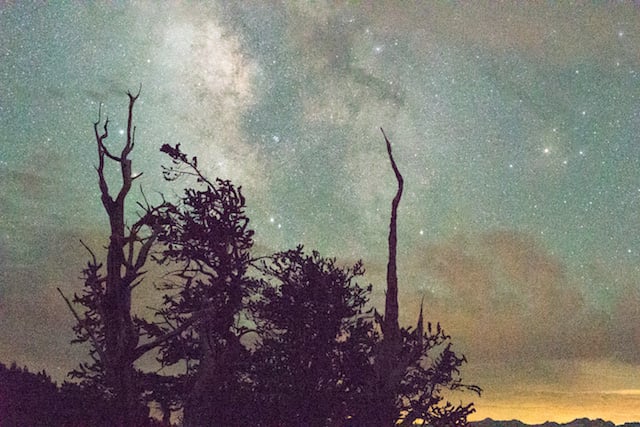
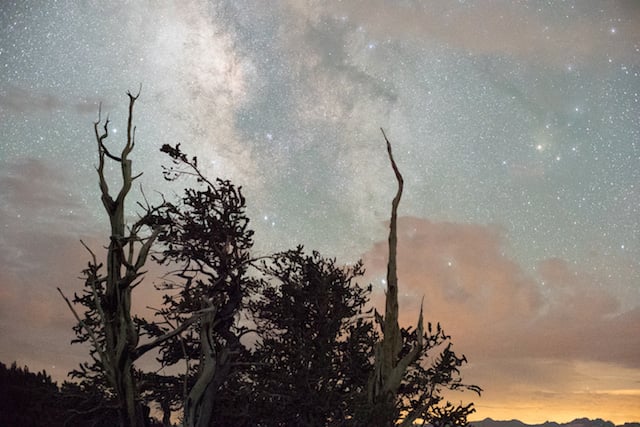
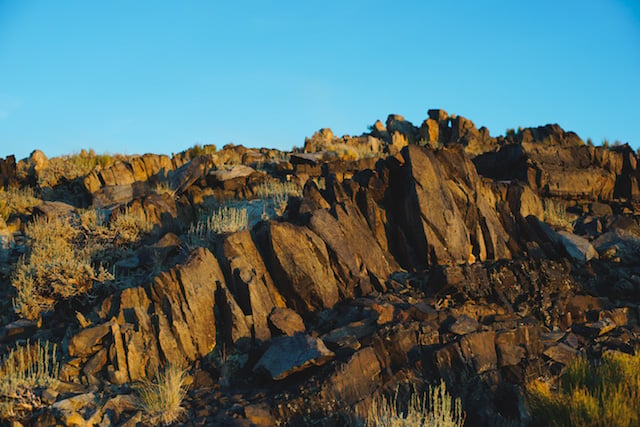
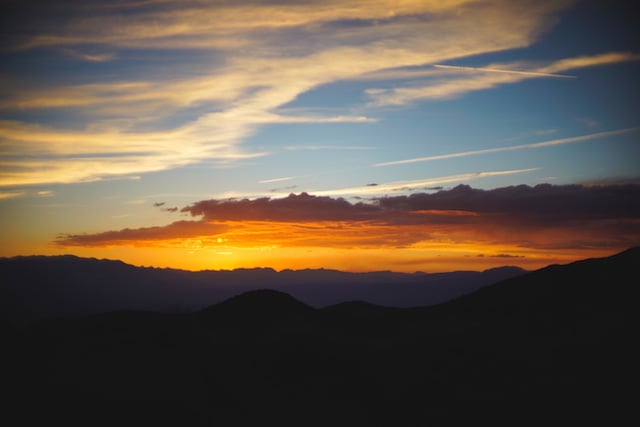
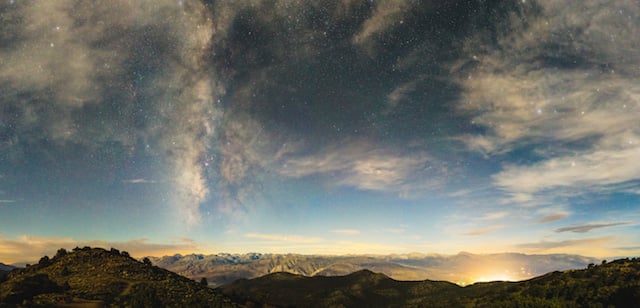
The photos from this review were all made from either the Ancient Bristlecone Pine Forest and Trona Pinnacles in California. The trees of the forest are the oldest living things in the world, the oldest of which has been dated to have been alive for more than 4,700 years. We had rather cloudy skies during the forest night, so it was a constant battle to find clear views of the Milky Way. The moon was also a crescent after its last quarter, and it started rising a couple hours after midnight, which made for a nicely lit landscape for the final panorama stitch.
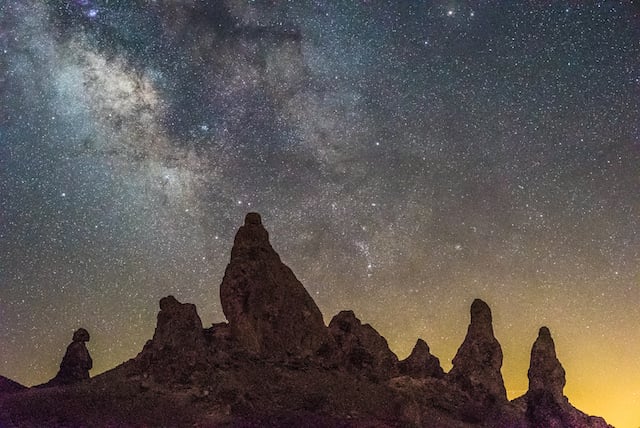
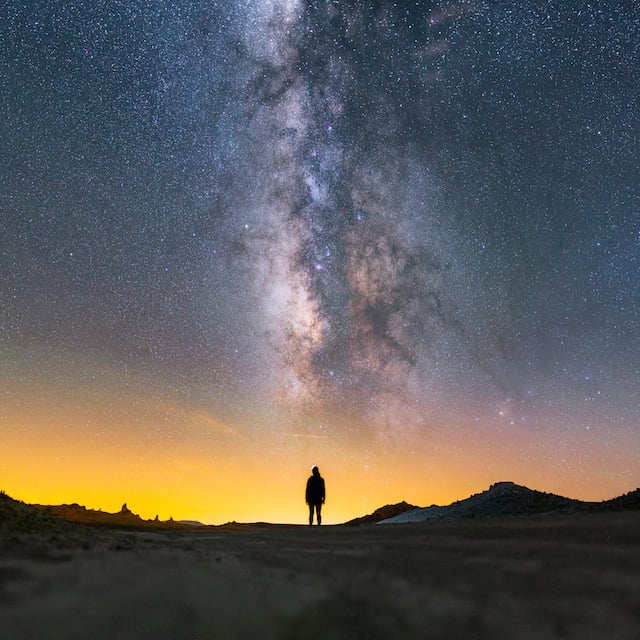
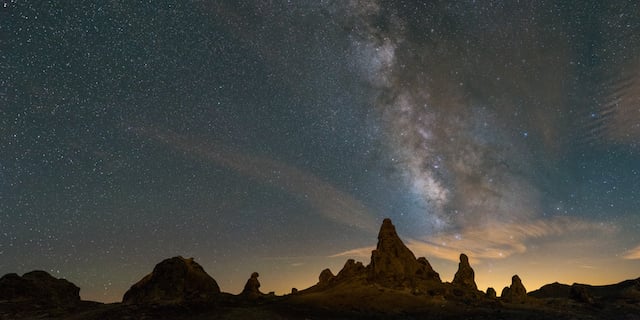
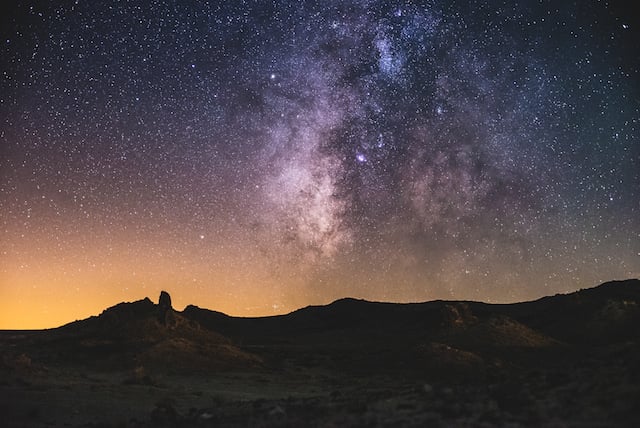
For Trona Pinnacles, the night was much clearer, and we had a nearly new moon, so the only thing lighting the foreground was the light pollution from the distant town of Trona. The Trona Pinnacles are calcium carbonate tufa formations left over from an ancient endorheic lake. All of the images here were made with the Voigtlander 50mm f/1.1 Nokton.


If you want to learn how to make photographs like the ones above, check out my article on How to Photograph the Milky Way.
Conclusions
Overall, I’m pretty happy with the performance of the Sony a7S. Results can be spectacular even with modest lenses. ISO 409600 seems to be there more for bragging rights than anything else and I wouldn’t recommend anyone to try and shoot real photos at that speed if they can help it. But ISO 409600 also ends up becoming the a7S’s standout killer feature for astrophotography because it allows the camera to see the Milky Way in real-time for framing and focusing. This feature alone makes it easier to make astrophotos with the a7S than with any other camera I have used. Photo noise levels are excellent up to ISO 51200, above which details start to get muddied up by some sort of built-in noise reduction that cannot be disabled in the settings.
For astrophotography the a7S seems to offer the cleanest image of any camera I have used so far. The larger pixels make for a slight bump in the cleanliness of the image at high ISOs that I haven’t seen in another camera. I wouldn’t say it’s a tremendous improvement in image quality over other very low noise offerings, but it’s still the best full frame camera I have seen. I had no hesitation shooting photographs stopped down to f/4.0 and ISO 12800 with the (relatively aberration heavy) 50mm f/1.1 Nokton.
Build quality is top-notch and the overall experience with handling is just fine after getting used to it. Custom button settings and programmable function menus make the camera easy to customize to your style of shooting. The grip is very comfortable and most buttons and knobs are easily accessible. I had no problems using it in the pitch black night. The built-in applications are a welcome technological upgrade from the typical camera, and I’m happy to see that the Time-Lapse app makes for a functional, reliable built-in intervalometer.
The a7S has its quirks. The shutter button is spongy and the record button is in the most awful position and it’s not possible to use the shutter button to start recording when in movie mode. I’m also a little bit disappointed at the small number of dedicated full frame mirrorless FE mount lenses that are currently available for the a7 series of cameras. The lens lineup is slowly growing but it seems like it won’t be fully rounded out for another year or so.
It is, of course, possible to adapt numerous lenses from other lens mounts like Canon EF and Nikon F/G to the FE mount, but usually these lenses tend to be larger and more cumbersome to carry, especially when mounted on such a small camera body. The more practical choice for third party lenses for the a7 series seems to come from the Leica M Rangefinder system. Lenses from Zeiss, Voigtlander and Leica for the M mount are relatively small but also are manual focus only and tend to come at comparably higher prices. That said, even the slower (f/4) FE mount zooms would work just fine for astrophotography with the Sony a7S since the ISO performance is still pretty clean from 3200 to 51200, so maybe I shouldn’t complain too much.
Again, the real killer feature is the fact that it’s possible to see the Milky Way in real time on the LCD or EVF. This makes focusing and framing super easy, far more than any other camera I have ever used. If you want the easiest to use camera for astrophotography, the a7S fits the bill.
If you have any feedback or questions about the a7S, let us know in the comments below.
About the author: Ian Norman is a photographer, engineer and entrepreneur based out of Los Angeles, CA. He is deeply passionate about photography, and takes great joy in teaching others what he has learned over the years. You can follow him on his website, Twitter, Google+, Instagram, Vimeo and Flickr. You can also support him by purchasing his online Skillshare class on photographing the Milky Way. This review originally appeared here.