40 Tips to Take Better Photos in 2026
Many years ago when I was a starry-eyed undergrad I would ask every photographer I came across the same question: “How do I take better photos?” I was extremely lucky to have many talented and generous photographers take me under their wing to show me the ropes. Without their valuable advice, there is no way I would have become the photographer I am today.
So along with some tips that I’ve picked up over the years, I’ve recruited some outstanding snappers across Australia to share their own secret techniques about how they take their photos to the next level.
1. Get in Close
It was the famous photojournalist Robert Capa who once said “If your photographs aren’t good enough, you’re not close enough.” He was talking about getting in amongst the action. If you feel like your images aren’t ‘popping’, take a step or two closer to your subject. Fill the frame with your subject and see how much better your photo will look without so much wasted space. The closer you are to the subject, the better you can see their facial expressions too.
2. Shoot Every Day
“The best way to hone your skills is to practice,” says photographer Leah Robertson. “A lot. Shoot as much as you can – it doesn’t really matter what. Spend hours and hours behind your camera.
“As your technical skills improve over time, your ability to harness them to tell stories and should too. Don’t worry too much about shooting a certain way, to begin with. Experiment. Your style – your ‘voice’ – will emerge in time. And it will be more authentic when it does.”
Leah Robertson is a super talented Melbourne-based photographer and videographer, specializing in music and documentary photography. You can see her work here.
3. See the Light
Before you raise your camera, see where the light is coming from, and use it to your advantage. Whether it is natural light coming from the sun, or an artificial source like a lamp; how can you use it to make your photos better? How is the light interacting with the scene and the subject? Is it highlighting an area or casting interesting shadows? These are all things you can utilize to make an ordinary photo extraordinary.
4. Ask Permission
“When photographing people, especially while in countries with different cultures and languages, it can be hard to communicate,” says photographer Andrea Francolini. “In certain countries, if you photograph someone you are not ‘supposed’ to photograph, it can get ugly and rough very quickly if you are not careful. So out of respect, you should always ask permission.
“I have started shooting a series of school children in Pakistan. These are all posed portraits and they are looking down the lens. My guide helps me with the language and I limit myself to smiling, shaking hands, giving ‘hi-five’, and showing them the image on the back of my camera once it is done. You would be amazed how quickly people open up.”
Andrea Francolini is a well-known Italian-born, Sydney-based sports photographer. He is also the founder of My First School, a trust that has the aim to facilitate education in Northern Pakistan. You can see his work here.
5. Use Flash During the Day
You might think that you should only use flash at night time or indoors, but that’s not the case at all. If it is an extremely bright day outside and the sun is creating harsh shadows on your subject, switch on your flash. By forcing extra light onto your subject, you will be able to fill in those ugly shadows and create an even exposure.
6. ISO
There are questions to ask yourself when deciding what ISO to use:
What time of day are you shooting? If you are shooting outside during the middle of the day you will need to use a lower ISO such as 100 or 200. If you are shooting at night time without a tripod you will have to increase the ISO to a higher number to be able to record the light on the camera’s sensor.
Will the subject be well lit? If your subject or scene is too dark you will need to use a higher ISO such as 800 or 1600.
Do you want a sharp image or an image with more movement in it? Using a high shutter speed to capture fast movement might mean that you need to use a high ISO to compensate. Likewise, if you’re using a slow shutter speed to capture blur you will need a low ISO to compensate.
Don’t forget, increasing your ISO increases the grain or pixel size in your photo. So don’t use an ISO of 3200 or 6400 if you don’t want a photo with a lot of ‘digital noise’.
7. f/4
“f/4 is my ‘go-to’ aperture,” says photographer Peter Wallis. “If you use a wide aperture with a long lens (200mm-400mm) you’re able to separate the subject from the background. This helps them stand out. Works every time.”
Peter Wallis is a sports photographer extraordinaire, working for The Courier Mail in Brisbane. You can see his work here.
8. You’ve Got to Be Joking
“A well-timed joke will always yield a more natural smile, than simply saying ‘smile,'” says photographer Dean Bottrell.
Dean Bottrell is an Emerald-based photographer who specializes in portraiture. You can see his work here.
9. Buy Books, Not Gear
Having expensive camera equipment doesn’t always mean that you’ll take good photos. I’ve seen some absolutely amazing images shot with nothing more than a smartphone. Instead of having ten different lenses, invest in some fantastic photography books. By looking at the work of the masters, not only do you get inspired, you come away with ideas to improve your own photos.
10. Read Your Camera’s Manual
The best way to know what to do with your camera is to actually read the manual. So many people miss this really important step on their photographic journey. Every camera is different, so by reading the manual you’ll get to know all the funky things it’s capable of.
11. Slow Down
“Take time to think about what is going on in the viewfinder before pressing the shutter,” says photographer Brad Marsellos. “How are you going to compose the shot? How are you going to light it? Don’t jump straight in without giving it some thought first.”
Brad Marsellos is the Wide Bay über Open producer. You can see his photos, videos and musings on life here.
12. Stop Chimping
It’s a bad habit digital photographers can develop. Time and time again I see photographers take a photograph and then look at the back of the screen straight away. By doing that you could miss all the special moments. You can look at your photos later. You can miss ‘the shot’ and it affects the flow of your work, so just keep shooting! – Marina Dot Perkins
The lovely Marina Dot Perkins is a news, travel, and wedding photographer who worked for The Canberra Times and is now based in Newcastle.
13. Framing
This is a technique to use when you want to draw attention to something in your photograph. By framing a scene or a subject, say with a window or an archway, you lead the viewer’s eye to the primary focal point.
14. Shape with Light
“Never shoot with the sun directly behind you,” says photographer Patria Jannides. “It creates boring, flat light on the subject. If you shoot with the light source to the side or behind the subject, you are able to shape with the light, creating a more interesting photo.”
Patria is not only a talented news photographer, she is also my long-term friend, mentor, and personal cheer squad. She even helped me to land my first job as a paid photographer.
15. Watermarks
This tip isn’t in direct relation to TAKING photos, but it does affect the look of photos. When it comes to watermarks, the smaller the better. And if you can avoid using them, do.
Chances are unless you are a paid professional, there’s not much of a chance of your photos getting nicked. But in reality, they won’t prevent your images from getting stolen. They only distract from the fabulous image that you’ve created, because once you’ve slapped a watermark all over it, that’s all the viewer will be looking at. The only way you can prevent your images from being stolen is to not publish them on the internet.
Read Open producer Luke Wong’s blog post on watermarks here.
16. Be Present
“This means make eye contact, engage, and listen to your subject,” says photographer Heather Faulkner. “With the eyes – lower that camera and be human. Bring the camera up for a decisive shot. But remember to lower it, like you’re coming up for air, to check in with your subject.
“Don’t treat them like a science experiment under a microscope. Being there with your subject shows them respect, levels the playing field in terms of power dynamics, and calms them down. You’ll get much more natural images this way.”
Heather Faulkner is a photographer who convenes the ePhotojournalism major at QCA, Griffith University. She is also the executive director of The Argus, a student-run, visual journalism online magazine. See her personal work here.
17. Shutter Speed
Being aware of your shutter speed means the difference between taking a blurry photo and a sharp photo. It all depends on what you are after. If you are shooting a sporting event or children running around in the backyard, you probably want your subjects to be in focus. To capture fast action you will have to use a shutter speed over 1/500th of a second, if not 1/1000th to 1/2000th. On the opposite end of the scale, you might want to capture the long streaks of a car’s tail lights running through your shot. Therefore you would change your camera’s shutter speed to a long exposure. This could be one second, ten seconds, or even longer.
18. Charge Your Batteries
This seems like a simple one, but pretty much every photographer on the face of the planet has been caught out before. Including myself. The trick is to put the battery onto the charger as soon as you get home from your photo shoot. The only thing then is to make sure you remember to put it back into the camera after it has been recharged…
19. Focal Length
“Keep it simple,” says photographer Justin Wilkes. “I shoot with two prime lenses and one camera; A 28mm and a 35mm. For everything. I use the 35mm lens 70% and the 28mm lens 30% of the time. It takes some time to get used to it, but once you work it out, shooting primes is the only way to go. It means you have to work with what you have and you can’t be lazy.
“Basically, this means more pictures and less fiddling around with zooming and maybe missing moments. It also helps for consistency. If you’re working on a project or a series, keeping the same focal lengths is a great way to maintain a powerful sense of consistency.”
Justin Wilkes quit his job in Sydney this year to cover the political and social change in post-revolution Egypt. He has since had his photographs published in The New York Times, TIME magazine, and The Jakarta Globe, to name but a few. You can see his amazing documentary work here.
20. Be Part of a Photographic Community
Like ABC Open! Not only will you be able to publish your photos for the rest of the country to see, but you’ll also be part of an active group that offers feedback on how great you are going. You can learn new things to help you improve your technique, and you might even make some new photography buddies.
21. Shoot With Your Mind
“Even when you’re not shooting, shoot with your mind,” says Leah Robertson. “Practice noticing expressions and light conditions. Work out how you’d compose a picture of that scene over there that interests you, and what sort of exposure you might use to capture it best.”
22. Return the Favor
“Always remember that if you are shooting people in a different country, they are probably doing you a favor by posing,” says Andrea Francolini. “So the least you can do is return this favor some way or another.
“I often return to the same places year after year, so I bring along prints and look for the people I photographed previously. In some areas, people do not have a picture of themselves. Imagine not having a picture of you and your family? Strange don’t you think? Yet many people don’t. So a $0.50 print can really make someone happy. It also opens doors for more photography further down the track.”
23. Have a Camera on You at All Times
You can’t take great photos if you don’t have a camera on you, can you? DSLR, point-and-shoot, or smartphone, it doesn’t really matter. As long as you have access to a camera, you’re able to capture those spontaneous and unique moments in life that you might have otherwise missed.
24. The Golden Hour
“Shoot portraits and landscapes in the golden hours — the light is softer and the colors are more vibrant,” says Dean Bottrell.
25. Keep it Simple
Don’t try to pack too many elements into your image; it will just end up looking messy. If you just include one or two points of interest, your audience won’t be confused about where they should be looking or what they should be looking at.
26. Don’t Get Bogged Down by Equipment
We’ve all seen these types of photographers out and about. They usually have three or four different cameras strapped around their necks with lenses long enough for an African safari. In reality, there’s probably no need for all that equipment. One body with one or two lenses means that you’ll be freer in your movements to capture interesting angles or subjects on the move.
27. Perspective
“Minimize the belly-button photograph,” says Heather Faulkner. “This is a reference to Moholy Nagy of the Bauhaus movement in photography (which was all about lines of perspective).
“In other words, perspectives are more engaging when we crouch down, or lie down, or elevate our position in reference to the subject. Look at how changing your perspective can change the visual language and implied power dynamics of the image. Crouching low can make your subject more dynamic, whereas gaining height on your subject can often minimize their presence in the image.
“One of my favorite exercises is to make my students lie down and take pictures, often in the dirt. I am a little cheeky.”
28. Be Aware of Backgrounds
“What’s in your frame?” says Marina Dot Perkins. “So often I see great photos and think ‘didn’t they see that garbage bin, ugly wall, sign, etc?’
“It’s not just the person or object in your frame, it’s everything else in the background that can make or break a great photograph. So don’t be afraid to ask the person to move (or move yourself) to avoid something ugly in the background.”
29. Shade
Shade can be your best friend. If there is no way you can make the available light work for your photo, shoot in the shade. You’ll get a nice even exposure with no patchy highlights throughout your shot.
30. Rule of Thirds
This is one of the most common tips that pop up when it comes to improving your photos.
To break it down, you cut your frame into thirds by using both horizontal and vertical lines. You then place your point of interest over the cross-sections of the grid.
Check out this article for further details about using the rule of thirds.
31. Exposure
“I’ve been shooting a lot of protests lately,” says Justin Wilkes. “Basically, they’re just a lot of people really close to one another; often moving. After having made many mistakes with getting my exposures right, I worked out that if the sun is behind me and in the face of protestors I will set exposure compensation to underexpose by a stop to bring out even tonal range.
“When the sun is behind the protestors I like to overexpose just slightly to bring out the shadow details on their faces. This could apply to street photography when the light is in front or behind your subject.”
32. Don’t Spend Too Much Time Post-processing
The key is to get it right in the camera first, so you don’t HAVE to spend time editing. Overworking a photo in editing software very rarely looks good unless you are trying to achieve a super-artsy effect. If it takes you longer than ten minutes to alter your photo, maybe think about going back out into the field to re-shoot it.
33. Variation
“Variation is key,” says Heather Faulkner. “I often use a recipe from Life Magazine picture editors for building a story narrative.
“I look for: overall shots or scene-setters, interaction, action, portraits, details, medium shots, and of course the signature image. Having this list in my head helps me start photographing a story that sometimes isn’t visually apparent until you get into it. This is great when you’re in a crowded or busy place.”
34. Become One With the Camera
“Push the button regardless of the outcome so the camera becomes part of your hand,” says photographer Dean Saffron.
Dean Saffron is a photojournalist and an ABC Open superstar. His video The Spokesman, has had over 170,000 views. Woah!
35. Hold Your Camera Properly
You might not know it, but there is a right way and a wrong way to hold a DSLR camera. The correct way is to support the lens by cupping your hand underneath it. This is usually done with the left hand, with your right hand gripping the body of the camera. This helps to prevent camera shake. If you are gripping your camera with your hands on either side of the camera body, there is nothing supporting the lens, and you might end up with blurry photos. To get an even stabler stance, tuck your elbows into the side of your body.
36. Limit Your Palette
When photos have too many colors spewing out from them, they’re often hard to look at. Unless it’s a photo of a rainbow or the Mardi Gras. Try to focus on having one or two colors predominately featured in your photograph. It will be more pleasing to the eye and will help set the tone of the image.
37. Get Your Subject to Relax
“This applies mostly to portrait style photography,” says Marina Dot Perkins. “As a press photographer, I spend most of my time doing one on one portrait shoots. I think it’s really beneficial to take the time (if you have it) to talk to your subject, ask questions, and show an interest in whatever it is they do. I find it really helpful in relaxing the person and often they’ll say something and that can lead to a better photo opportunity.”
38. Inspiration From All Forms
“Take in as much photography as you can–online, and in books and magazines,” says Leah Robertson. “But not passively. Look at different styles. Work out what you like or don’t like about them. Look at the technical elements of pictures and think about how they were made, and what the photographer is trying to say. The more you take in, the more arsenal you’ll have when creating your own work.”
39. Be Patient and Persevere
With time, patience, and perseverance, you will get better; with each and every photo you take.
40. Break the Rules
Now that you know some of the rules, go ahead and break them! Experiment. Have fun. Learn from your mistakes. Make up your own tips and techniques for taking fantastic photographs. I’d love to hear them.
Go forth and shoot!
A special thank you to all the amazing photographers who made this blog post possible.
About the author: Lisa Clarke is a photojournalist based out of the Capricornia region of Australia. In the past five years, Lisa has contracted dengue fever in Indonesia, broken her big toes climbing the summit of Mt Fuji in Japan, snapped British chef Gordon Ramsey in a Thai transsexual bar, been bedridden with bacterial conjunctivitis in Burma, partied with Dennis Rodman, hung out the door of more helicopters than she would like to remember, thrown up violently with food poisoning in Cambodia, and was detained by the police in Zimbabwe for practicing journalism without accreditation during the Mugabe reign in 2007. You can follow her ongoing exploits on Twitter.
About ABC Open: ABC Open invites regional communities to produce and publish photos, stories, videos, and sound through the ABC. We all know the media is changing, with more and more people making their own videos, writing stories, and sharing photos and ideas through social media. ABC Open is an exciting initiative that provides a focal point for Australian regional communities who want to get involved in sharing their experiences through the ABC via websites, radio, and TV.
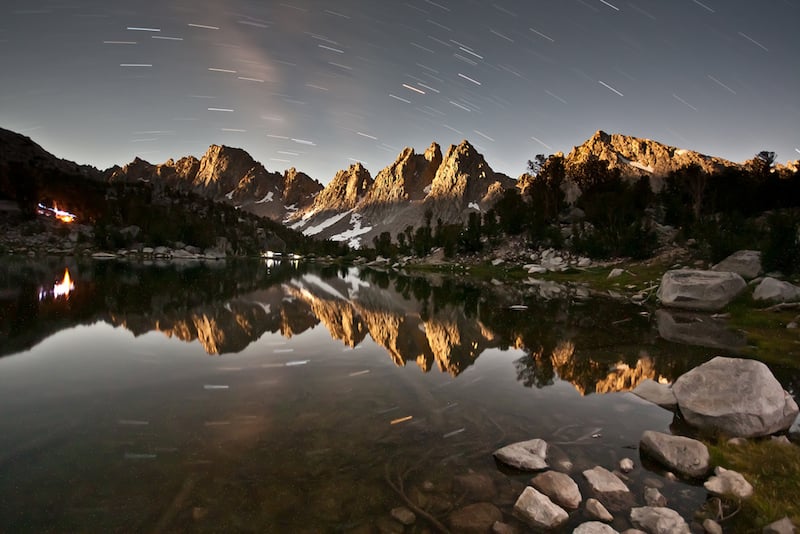
Image credits: Kearsarge Pinnacles by Moonlight by Jeff Pang