How to Scan Your Film Using a Digital Camera and Macro Lens
Yesterday I wrote a post showing the high level of image quality you can achieve by scanning film using a digital camera rather than a film scanner. This post will describe my personal technique for digitizing film using a DSLR and a macro lens.
The Setup
The nice thing about this technique is that you’ll be able to extract all the information on the film even with a low-res digital camera, as long as you can increase the reproduction ratio and get used to compositing multiple files in one, like when doing a panoramic image. For the details please take a look at the previous post linked above.
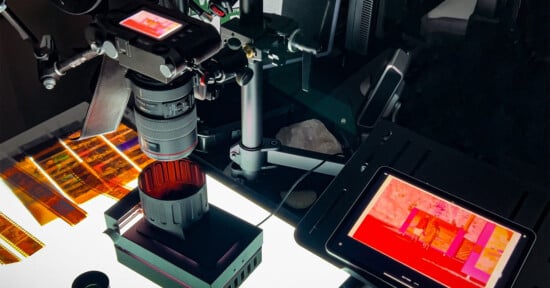
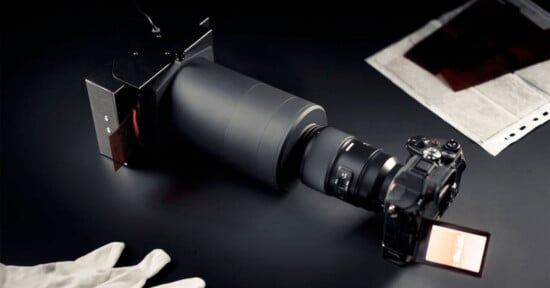
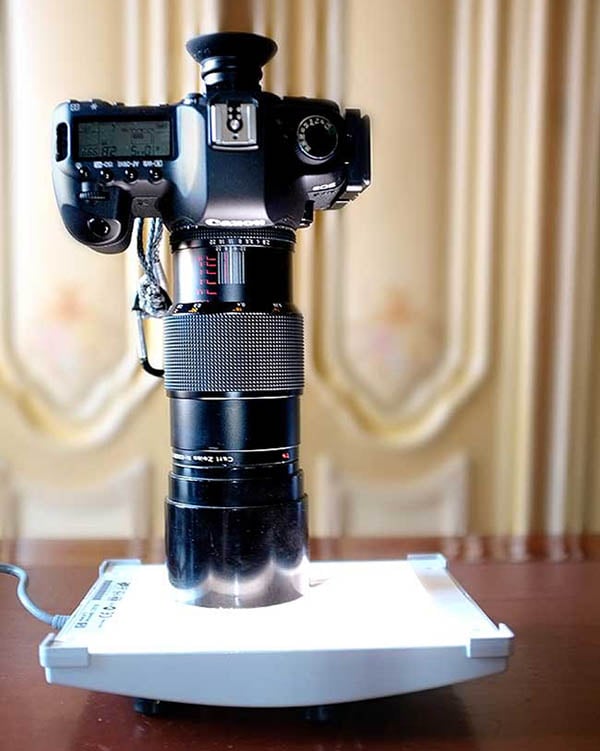
The setup is really, really simple: simply place you camera vertically on top of the film (which is taped on a slide viewer) using a metal lens hood that acts as spacer, camera support, and light screen. Then you’ll use the Live View to focus on the film grain, and the self timer set at 2 seconds (or a soft shutter release) to avoid vibrations.
The secret is taking multiple shots of each film frame, and then combining the individual photos using panoramic software. How many shots you’ll need will depend on:
- The reproduction ratio you (and your lens) will use
- How detailed the picture is
- The resolution of your camera
- The sensor size of your camera (full frame, APS-C, or smaller)
Generally I use a 1:2 enlargement ratio on medium and large format film and a 3:1 ratio on 35mm, and I get more or less these results:
35mm -> 4/6 shots
4.5×6cm -> 3/6 shots
6×6 & 6×7 -> 6/8 shots
4×5in & 13x18cm -> 20/30 shots
Here is an example of a single piece of film captured with multiple macro photos:
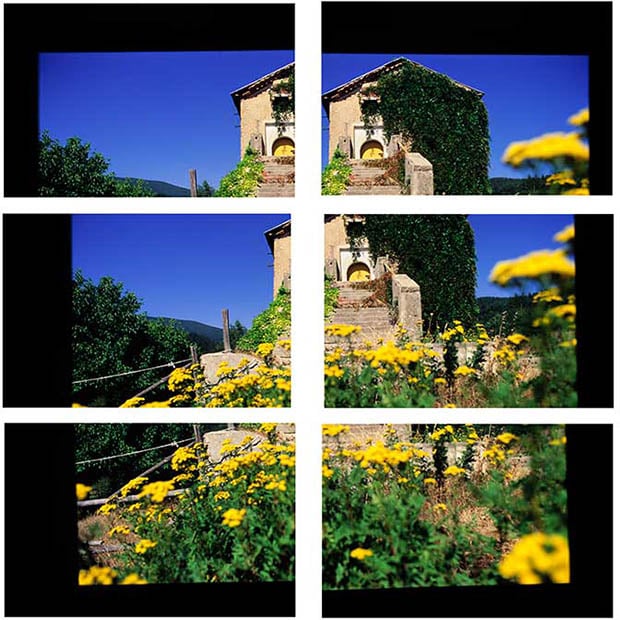
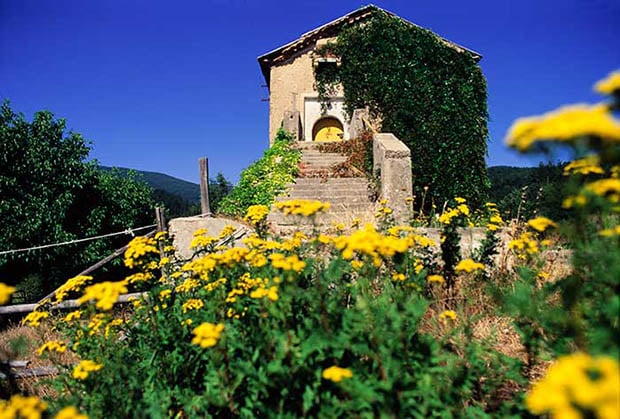
…and the resulting “scanned” photo that resulted after combining the shots:
The shooting the photographs of the film generally takes about 15-30 seconds for each film; how much time the computer will need to join the shots will depend on your computer’s processor power, RAM, and the number of shots that need to be joined. Just to give you a rough idea, though: my 2011 iMac with 24GB of RAM generally takes 30-50 seconds to join 6 shots and up to 10 minutes to join 30 shots.
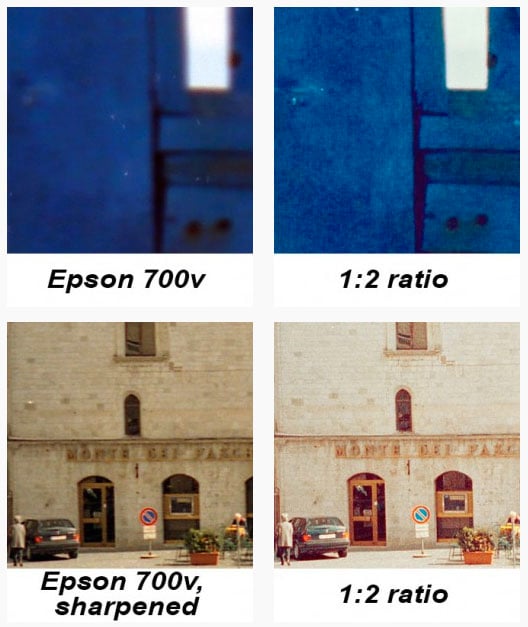
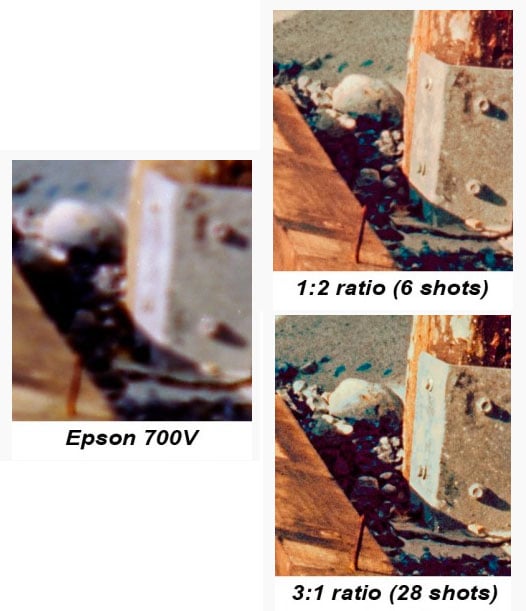
Using an higher reproduction ratio is more time consuming (you’ll need more shots to cover the same area), but as a result you will be able to extract the most detail from the film. Here are some examples showing my Canon setup at various reproduction ratios, compared to the results of a well-respected flatbed scanner, the Epson v700:
The Tips
That’s all for the general gist of how I digitize using a DSLR. Now, on to some tips on how to optimizing this process:
Focus
- Don’t try to shoot wide open; even an excellent lens like the Zeiss Makro Planar has its problems, and all your pictures will look mushy. Close the lens a couple of stops from the maximum aperture (remember, set the Live View to compensate automatically for the light loss if you want to see anything at all!)
- If possible, focus on the film grain, not on the details; this way you will be sure to extract all the information there is on the film, and it’s easier. If you can’t seem to see the grain, just look at a dark out-of-focus area, the grain will stand out!
- Focus independently for each shot; even if they are on the same strip of film, they will more often than not require an adjustment in focus
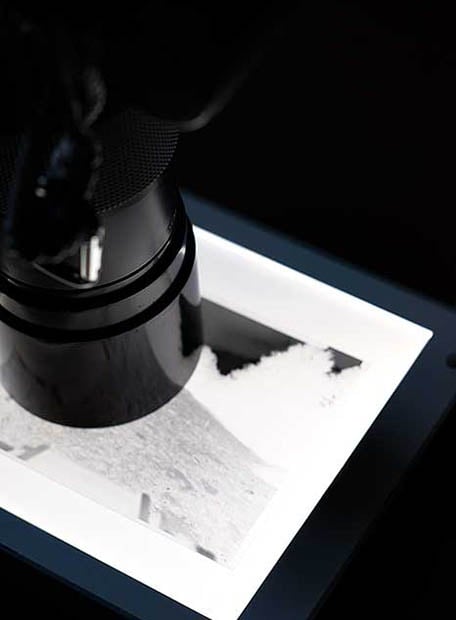
- For maximum sharpness, tape the film to the viewer, tensioning the film itself a bit to ensure maximum flatness; use painter’s paper masking tape — the kind that leaves no residue
Exposure
- If your computer is powerful enough, shoot in RAW; you will benefit not only from more detail, but also from extended dynamic range and better grays/colors
- Close the lens a couple more stops from the aperture you used to focus – use f/8 or, better yet, f/11 – to take the shot. This way you will hit the sweet spot of your lens and avoid vignetting-related issues
- Do custom white balancing using the viewer surface, without the film. This way your colors will be almost perfect without the need to mess with the curves later in Photoshop or GIMP
- Shoot in manual mode in order to have the same exposure and density on all sections
- “Expose to the right”. In other words, increase exposure until the histogram for all the colors almost touches the right side of the histogram. This will ensure that you will have as little noise as possible and that you will exploit the entire dynamic range your camera is capable of. Be careful to not overexpose too much — this is another good reason to shoot in RAW
Setup
- Shoot in some kind of order (clockwise, counterclockwise, whatever), to avoid forgetting same part of the film frame. After a while it will became routine, and you will become very efficient
- To avoid scratching the negatives, put them down with the shiny side up – it’s called the “protective layer” for a reason. Having the opaque side – the emulsion – in contact with the viewer surface will give you the added benefit of avoiding newton rings
- If the picture you’re about to “scan” doesn’t have many details – vast areas of sky, water or out-of-focus zones – take closer knit shots to help the panoramic software identify meaningful “anchors” that will be used in the merging process
- If you don’t have a slide viewer and are comfortable around electricity, you can easily build on using an old scanner (there are plenty of DIY projects like this on the web)
Software
The panoramic software you use is up to you — there are hundreds of them out there. The only important thing is that it has to let you join the files in a “matrix” fashion, not only in rows. Here some of the one I have tried or currently use, and a few notes for each one:
- Adobe Photoshop’s Photomerge function: Really good 90% of the time. Use the “reposition” option, because you are not shooting a panorama, so there is no parallax error to take care of. Its biggest downside is the lack of manual correction options. On the bright side, it is still one of the fastest panoramic programs I’ve ever used, as it is able to “digest” even 110 files at once without a hitch.
- ArcSoft Panorama Maker 5: Really good for the 10% of the times in which Photoshop’s Photomerge goes nuts. Its biggest drawback is that it’s impossible to maintain the 16bit in the output TIFF. On the bright side, it’s very cheap (€13.99 on the Mac App Store).
- PhotoStitch: This one comes free with every Canon digital camera. It would be really good, except that has a strong tendency to crash if used with 6 files or more (at least with Canon 5D Mark II files, could also be some kind of incompatibility. I don’t know). As with Panorama Maker, it doesn’t support a 16bit output. It does support 16bit on paper, but the resulting TIFF files will be an ugly mess.
- Hugin: Free and extremely complete. This program is a bit complicated and intimidating at first, even though it offers an “assistant” to guide you. It’s excellent for general panoramic photography, but I found it a bit of an overkill for just joining a few shots.
So there you have it: a way of digitizing film using a digital camera and macro lens instead of a dedicated film scanner!
About the author: Gianluca Bevacqua is a fine art photographer based in southern Italy who runs the website Addicted2light. This article was originally published here.