How to Turn a Photo Into a Painting with Photoshop
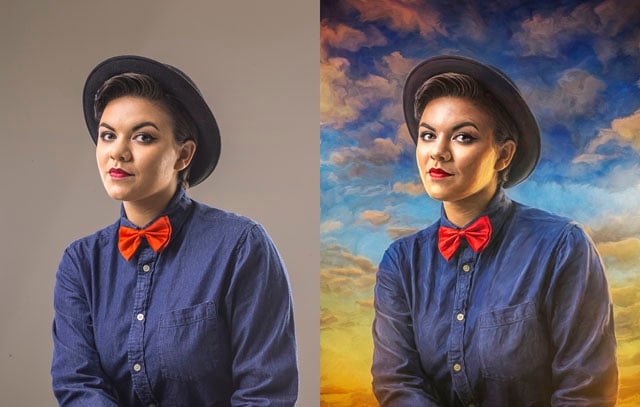
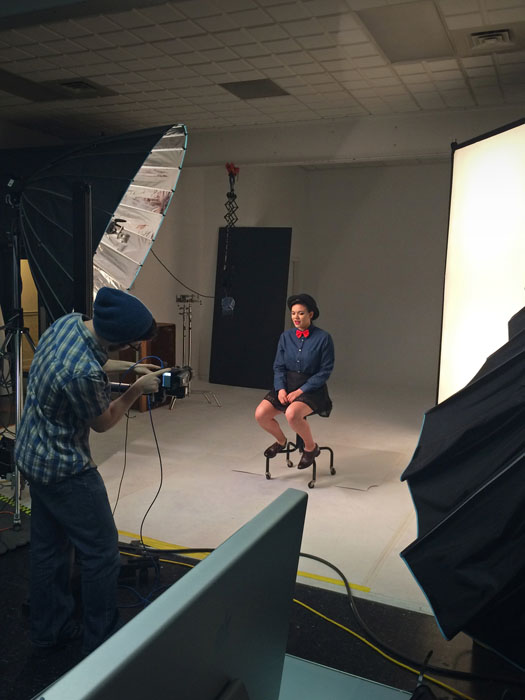
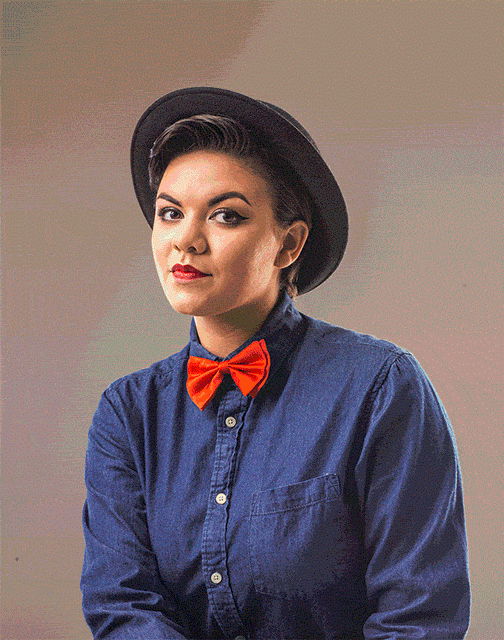
I recently had the absolute pleasure of meeting and shooting with Mackenzie Johnson! Today I’m going to share how I turned my portrait of her into a painting. Not everyone is a painter, but with a little time and patience — and Photoshop — I believe anyone can achieve this effect.
So as I’m hoping you’ve gathered, she is an incredibly talented singer and songwriter and a sensational YouTube star.
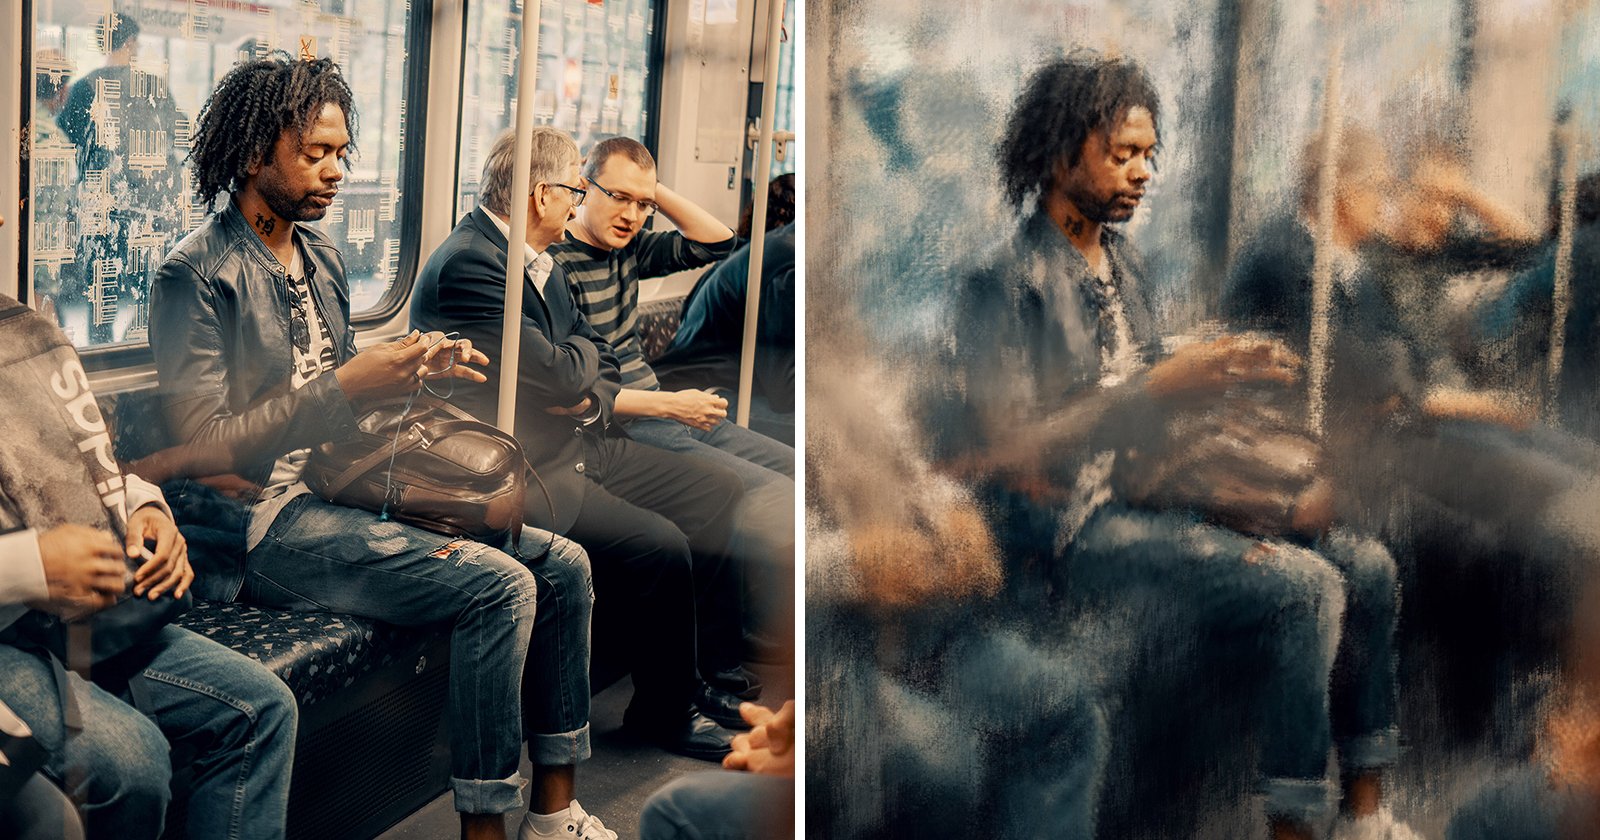
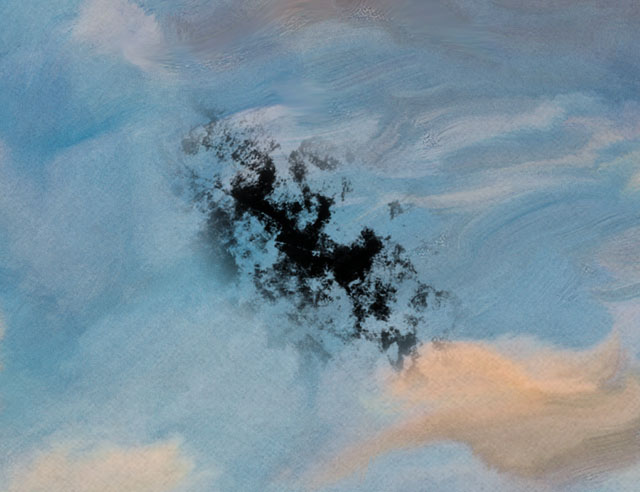
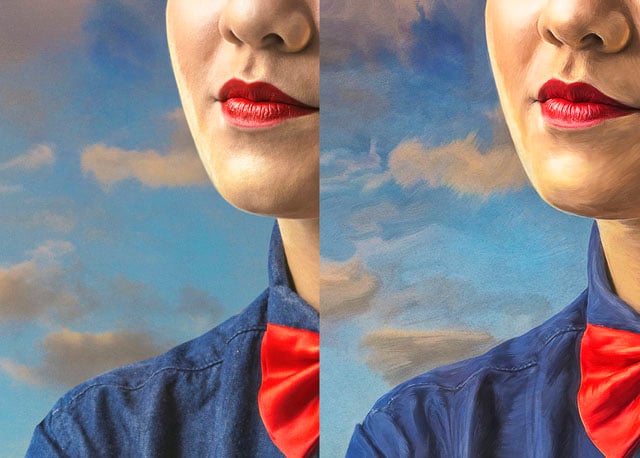
Turning a photo into a painting is such an engrossingly fun technique — or at least it was for me. What you are going to do is smudge the crap out of your image. That’s it.
Well, it’s not quite as simple as that, but really that’s the main trick!
You don’t want to just go with any brush: you need a brush with some “grit.” If you use a regular default Photoshop brush, all you’re going to do to your image is smooth it out. The effect we’re going for with this technique is to recreate brush strokes that an actual paintbrush would make if this were indeed a tangible painting, as if you can see the detail left by all the little bristles of your brush.
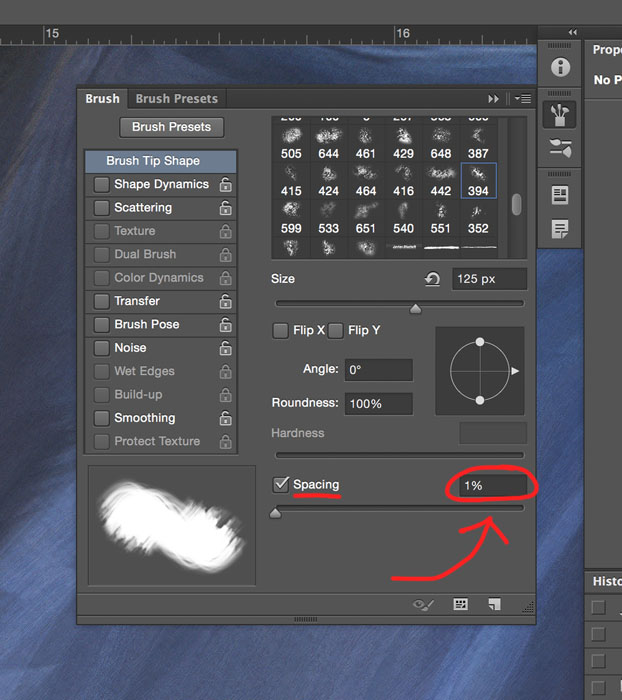
Below you can see the brush that I used to smudge with (I just clicked once with black paint so you can see the shape), but any rough-edged brush should do nicely.
You’ll want to make sure that you set the spacing to 1% in your brush palette under “Brush Tip Shape.” Turn everything else off; we don’t want any scattering, jitter, and so on.
Now set your smudge strength to somewhere around 70% and get ready to go crazy. Duplicate your layer so you still have the original image underneath and you’re ready to start “painting.”
I’m normally such a perfectionist, so this was quite fun for me to just let go and allow my brush strokes to flow organically. If you don’t have a Wacom tablet, this is the perfect opportunity to go and get one. You could do this with a mouse, but it’s way easier (and definitely more fun) with a tablet.
Work your way around the entire image pushing and pulling the pixels as you see fit. Don’t be afraid to get a little messy with your strokes; that adds realism and character to it. Follow along the lines and shapes of things, stroking fluidly with the edges of the jawline, swirling the “paint” around the lips, ears, bow ties, etc.
It’s like you have some paint on a paint brush and you’re dragging it around a canvas, except this is way easier because all the colors are already in place… and of course there’s an “undo button.” (Thank god.)
You will probably want a much smaller brush while going around more detailed areas like the eyes, mouth, and nose, but a slightly larger brush for the cheeks, shirt, and background. However, you don’t want your brush to ever be too big or the effect doesn’t work as well – no cutting corners and trying to do entire larger areas with a way larger brush.
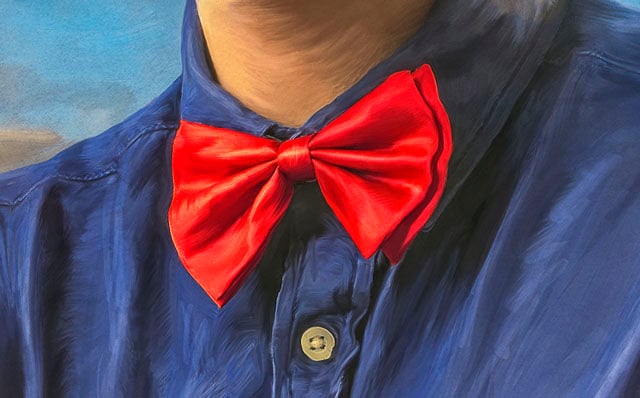
Once you’ve gone all the way through your whole image mushing the colors to and fro, you could call it done, but being the detail-oriented spaz that I am, I of course had to put several more hours of work in. What you want to do is to create a new layer, set the blending mode to “Overlay,” and start actually painting on top of your smudged image.
Take time to play up shadows and highlights of the eyes and lips, adding more detail and contrast to the areas you want the viewer to focus on. It’s also great to select colors right from your image and use those to paint with on your overlay layer. This will slightly saturate and exaggerate your colors.
To finish things off, I duplicated and merged all of my layers (stamp visible) and then ran that layer through the HDR Efex Pro 2 plugin from the Nik Collection. This really accentuates the tiny detailed lines of your brush strokes and gives the overall image an even more painterly look. As usual I turned that layer down a bit so it’s not too overdone.
If you don’t have this plugin, don’t worry, you can achieve a similar effect by using the “Shadows/Highlights” tool (from the “Image” drop down menu, under “Adjustments”), and then applying some sharpening. (I tend to do this with the high pass sharpening technique.)
As a last step, grab yourself a nice paper texture image, or even a canvas texture (or both), and throw it (them) on top. Set your blending mode to “Multiply” (or possibly “Overlay” or “Soft light” it all just depends on how dark your texture image is). Turn the opacity down to your liking and mask it slightly off the face if needed.
This last step really does a wonderful job of melding everything together and gives it a more believable painting look, because paintings do have a slight bit of texture depending on what they are painted on.
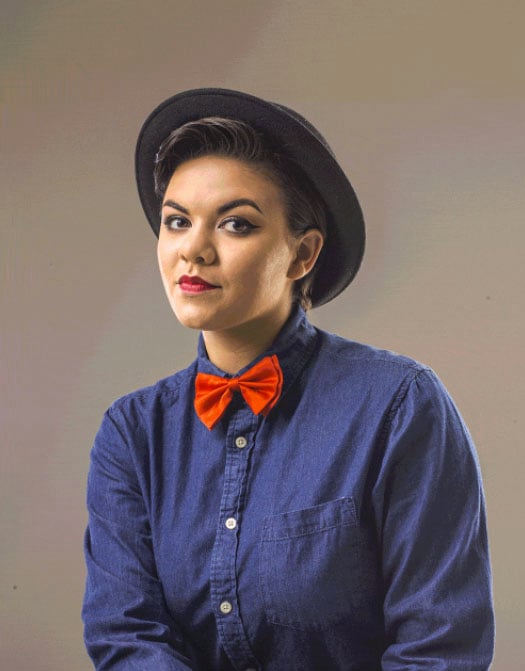
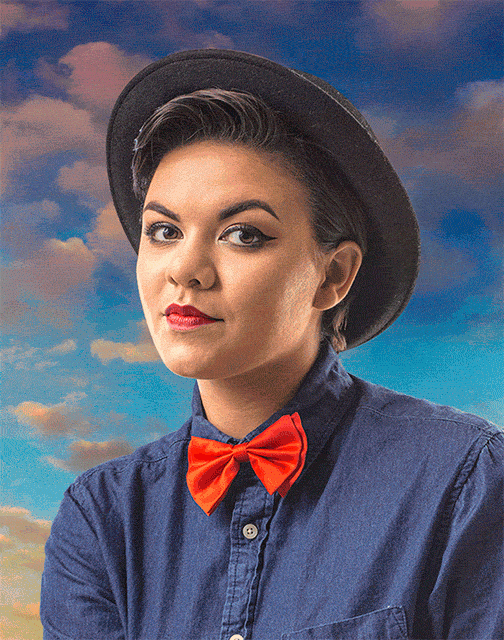
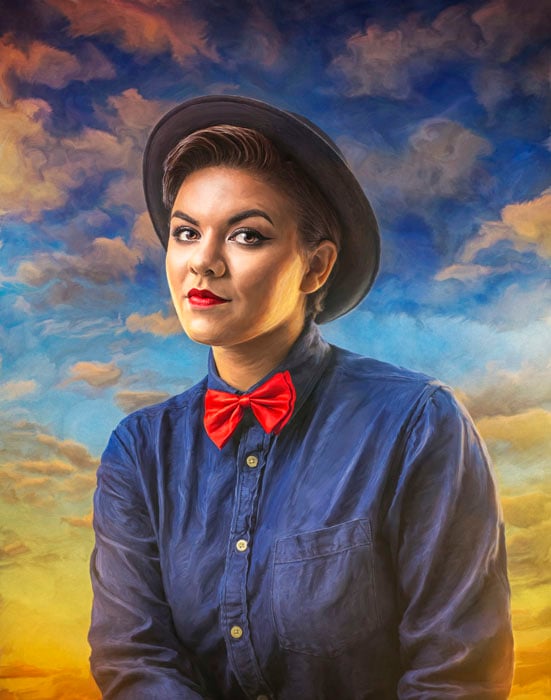
Here’s the final result:
Here’s a speed edit video for this photo, titled “Bowties and Alibis”:
So next time you’re in a creative rut or just feel like trying something new, grab an image, a tablet, the smudge tool and have yourself a good old-fashioned painting session!
About the author: Robert Cornelius is a photographer and an award-winning Photoshop guru based in Lebanon, Pennsylvania. You can find more of his work on his website and read more of his writing on his blog. This article originally appeared here.