How to Capture Stunning Star Trail Photos in Light Polluted Places
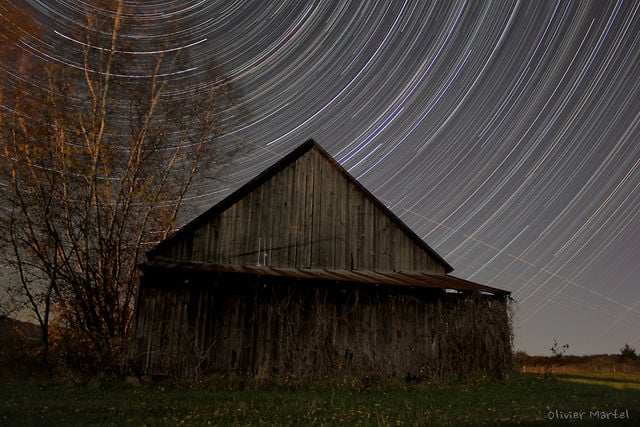
I’ve always found photos of star trails — the arcs the stars paint across the sky as the earth turns — fascinating. They’re one of the things that we can “see” with a camera that we can’t see with our eyes. Technology has changed how we shoot star trails, making star trail shots in locations we previously thought impossible possible.
However, holding the shutter open for a long time can create problems such as noise.
The most common way to shoot star trails now is to take a bunch of short exposures (short generally means minutes) and composite them together with Photoshop actions like StarCircleAcademy.com’s Advanced Stacker or a free app like StarStaX. This gives great results with very low noise.
Conventional wisdom says that for star trail shots, you need to be away from light pollution, meaning the subjects in these photos are usually mountains, lakes, cliffs, illuminated tents, trees, etc… However, a few years ago, I was walking out of Pixar Animation Studios (where I worked) and when I looked up and saw an amazingly clear night sky.
I wanted to take a star trail shot with the beautiful Steve Jobs Building as the subject. This set me on a quest to figure out how to shoot a star trail in a city, and after 5 tries, I finally succeeded.
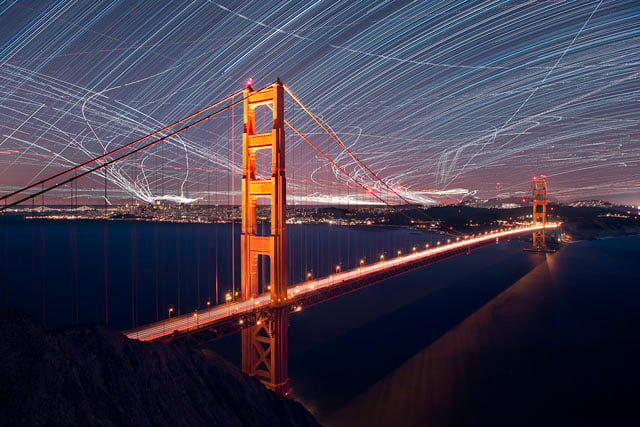
What I found is that high-res, very light-sensitive digital sensors combined with large storage cards and computers with a lot of horsepower have made it possible to take star trails in cities: the trick is to take many very short exposures (seconds) over a long period of time (hours) and composite them.
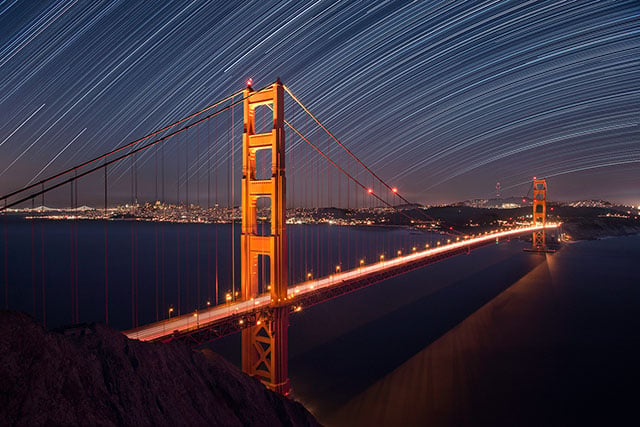
A while ago, I realized that I live in a beautiful city (San Francisco) but I rarely shoot here because it feels like everyone is always out shooting, and I don’t like shooting what everyone else does. I started trying my urban star trail technique with SF landmarks. My dad graciously loaned me his Nikon D800E since at the time it was the highest resolution 35mm camera around, even though all the controls were backwards from my Canon gear. I knew I wanted the D800’s resolution to capture more stars and because these shots would be cool: I’d want to print them big.
Taking these shots is a bit tricky as they’re very weather dependent, you have to pre-visualize something that’s not visible, and you have to have perfect technique. A small tripod bump, slightly missed focus on the stars, a tilt/shift lens’ shift mechanism moving slightly, unexpected street lights, and more can easily ruin the shot. I found I needed at least two tries per location! Hearing my procedure will help you get started.
Setting Up
First, picking a day is key. You need a dark, ideally haze-less night, and as clear of sky as possible. Low clouds can be OK if you are shooting wide enough (clouds block stars). An occasional quickly moving cloud won’t affect the composite much either.
Once you have an ideal day, make sure you have plenty of time to get to your location, as I found I’d be going to each location around rush hour. I aim to be setup just before sunset, and my setup includes a tripod, a remote release/intervalometer, and an external battery pack (I use a Goal Zero Sherpa 100). The power pack is important because, especially on a cold night, you’ll be shooting longer than your battery lasts, and swapping batteries can bump the camera and cause a gap in the star trails. (It’s also possible to start shooting in the middle of the night and finish around blue hour, but I found it harder to get precise focus during the dark night and harder to wake up at 2am than staying up late.)
Shooting
Shortly after sunset, when the city lights turn on and there’s still some blue in the sky, I take my base exposure as a RAW file. This is what I’ll composite the stars onto. Depending on the situation, I’ve had to use various graduated ND filters or multiple exposures to create that base image. I’ve also found it valuable to keep tape in my bag, as I had to create a flag around my lens with a filter case to avoid flare when an unexpected light turned on.
An hour or so later, when the sky’s dark, I switch to shooting around f/4-5.6 or so, set my ISO to 800, set my white balance to incandescent, and set my camera to shoot fine-resolution JPEGs. I found incandescent to look the best, but the key point is to not be in auto white balance since you don’t want any shot to shot variation. I didn’t shoot wide open because I wanted better optical performance with my lens, and these settings often picked up plenty of stars.
I use manual mode, set on bulb, and I’ll take a couple guesses as to the right exposure, wanting my histogram to indicate that the sky was dark but not pure black. Generally I had 5-10 second exposures. I found that brighter exposures caused the light pollution to become too bright and to blend with the stars. Once I found the right exposure, I’d start the intervalometer and wait. And wait. And wait. The shortest of these shots was about 3.5 hours of shooting plus setup, base exposure, and “wait until dark” time. The longest was about 8 hours (limited by storage space). I generally came home with 1,500 to 4,500 frames.
Post-Processing
At my computer, I start with a test star stack and do a rough composite onto the base exposure to make sure the shoot worked and the shot has potential. This step is always the most nerve wracking because it’s where you discover problems.
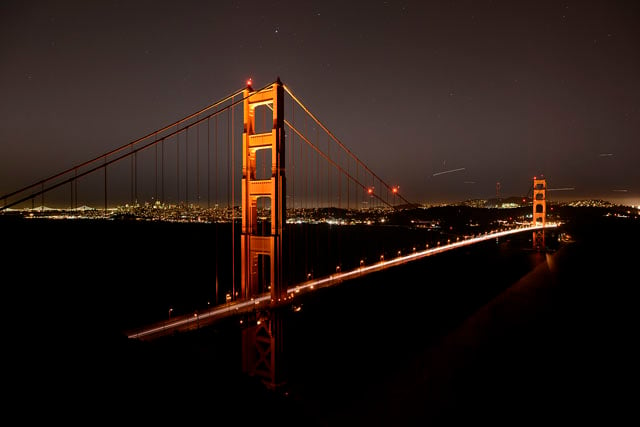
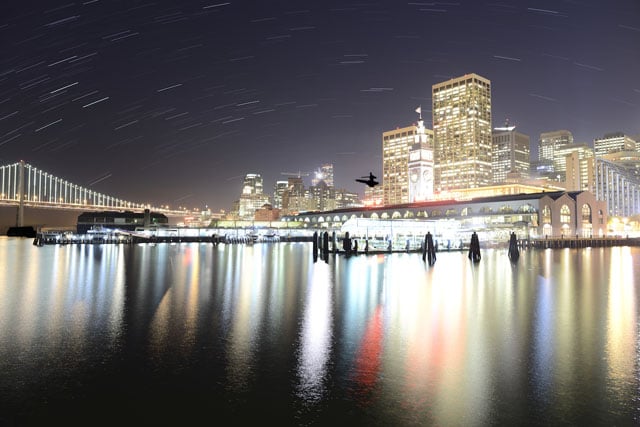
Even when everything works, it can be demoralizing as you see just how much air traffic is in the sky, such as in this composite from Battery Spencer:
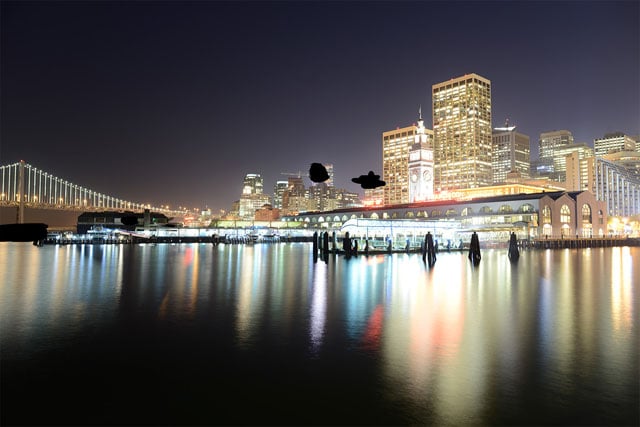
The next step is to go frame-by-frame through the star frames, and wherever you see an airplane, paint it out with a black brush. Fortunately with stacking, removing planes is easy, albeit tedious. (As an aside, I did briefly play with OpenCV to automate this but found many edge cases. If a vision expert is reading this and wants to work on automating plane removal with me, ping me!)
Once you’ve cleaned up the star frames, stack them together. I liked the results from StarStaX the best, as it has a gap filling mode to minimize the dark spaces that appear in-between the composited stars (there’s a tiny gap in time when your camera isn’t shooting between each exposure where the stars still move).
Then, in Photoshop (or your editor of choice):
1. Open up your base exposure and clean it up as desired.
2. Insert the star stack as a new layer on top of the base.
3. Change the compositing mode for the stars to lighten (so the stars brighten up the deep blue sky).
4. Create a layer mask so that essentially only the sky is affected by the stars.
5. If the stars aren’t bright enough, add a levels adjustment layer with a clipping mask so that it only affects the stars, tweaking the white point to brighten the stars.
6. Perform any needed cleanup/compositing like you would with any other image.
7. Amaze your family, friends, and followers!
One extra trick is that if the sky does become a bit hazy, it’s possible to “subtract” the haze from the star stack, giving you a cleaner image to composite. To do so with Photoshop:
1. Select File > Scripts > Statistics.
2. Choose Median.
3. Select a number of frames from when the haze rolled through and click OK.
4. Rasterize the resulting layer.
5. Layer the star stack image above the median layer.
6. Change the blend mode to Difference. This effectively subtracts the haze from the composite, leaving you with the brighter stars.
7. If any haze remains, make a new layer and use a black brush to remove it.
8. Flatten the image or use Stamp Visible to create a new layer, and composite that result on the original base exposure. You might need to use a levels or curves adjustment to make the stars brighter.
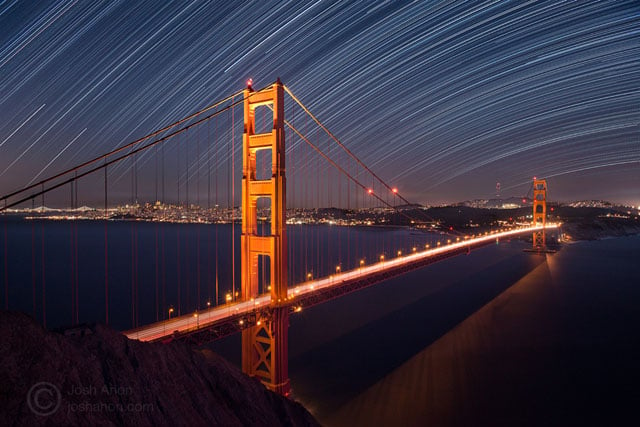
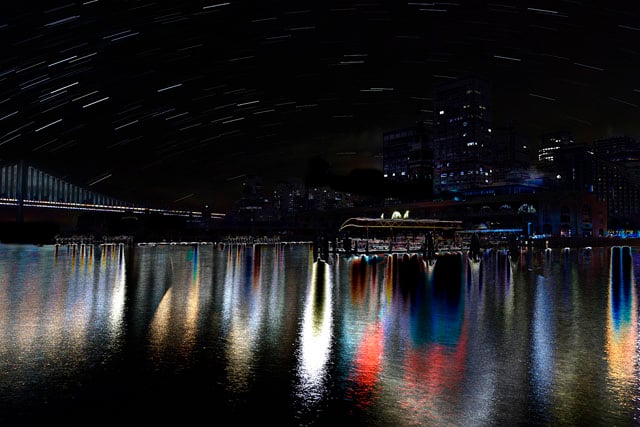
Here’s the final shot that I created:
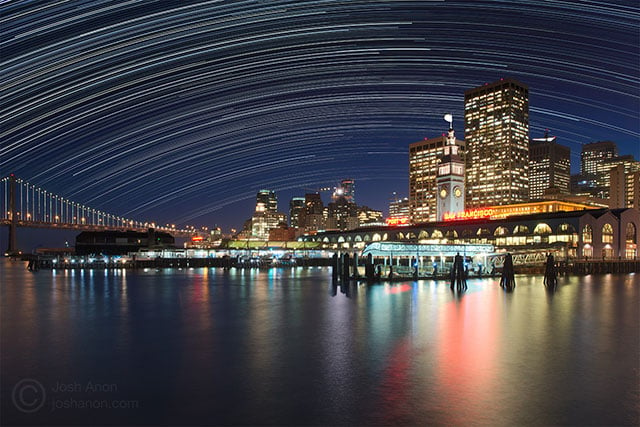
That’s it! If you do go out and capture some urban star trail photos, be sure to share them with us in the comments below. Also, if you’d like to improve your compositional skills, my mom and I wrote a book on the subject that may be helpful to you.
About the author: Josh Anon has been a wildlife, landscape, and travel photographer for 20 years. He has traveled around the globe, looking for the next great image, and his work has been shown in venues and publications around the world. He’s also been teaching photography and co-authoring photography books for about 10 years. You can find his work on his website, blog, and 500px. This article originally appeared here.