How I Shot a Triple Transit of Jupiter’s Moons from My Driveway With My DSLR
A few days ago I was lucky enough to capture Jupiter’s triple moon transit right from my driveway in Denver.
To create this (click it to see it larger):

All while trying to convince you that you can and should attempt to do something similar from your own driveway. I’m going to assume that you don’t have a telescope and that you have no idea where to start. Let’s begin.
First off, why don’t you have a telescope yet? It’s the most amazing hobby in the universe. When you see Jupiter or Saturn for the first time it’s… It can be life changing. Hurry up and get one already!
You may be looking at my telescope and thinking that I’m insane and it will cost 15k for a setup like that. Maybe you think you’ll have to get a PhD in astrophysics to understand how it works. Thankfully, you’d be incorrect on both thoughts. It’s likely cheaper and relatively easier than you might think. I’ll get to the cost soon and I’d like to stress the relatively easy part, as there can be some elements to this process that will require your grit and determination.
But always remember: “What one man can do, another can do!”
You Need a Scope
You specifically need a decent OTA (optical tube assembly). The larger the aperture (opening for light), the better. These are hugely varied in cost, size, type and quality. You have 3 basic types.
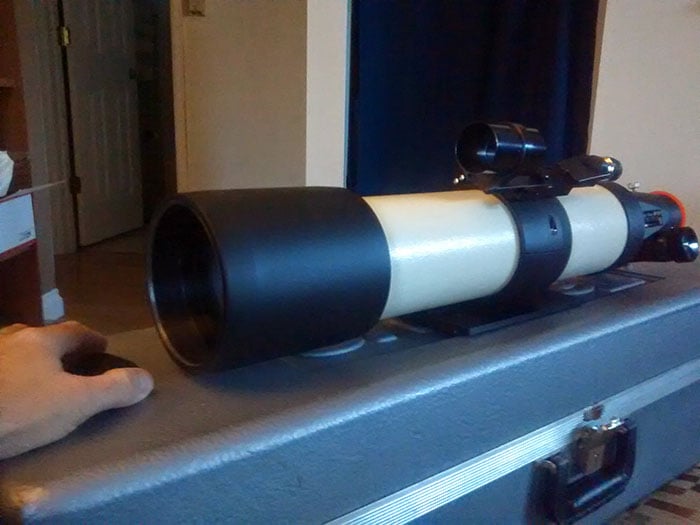
Refractors (lenses only). Here’s my favorite scope, it’s also the most expensive OTA that I have. Also, not good for planetary work.
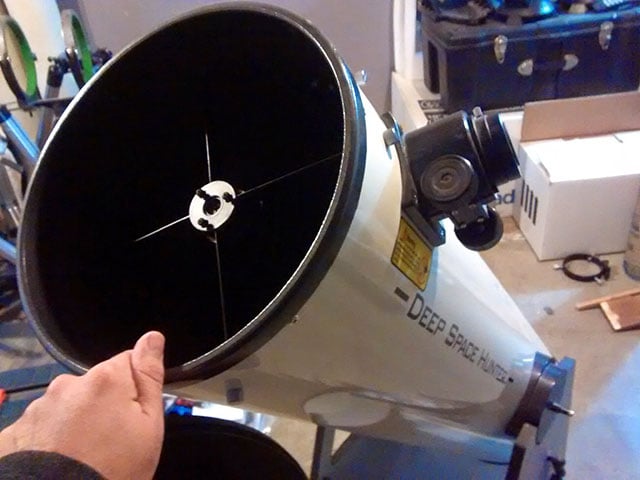
Reflectors (mirrors only). Here’s one that I use for observing only, no pics from this one. It’s also the cheapest by far and the best for just looking at the universe.
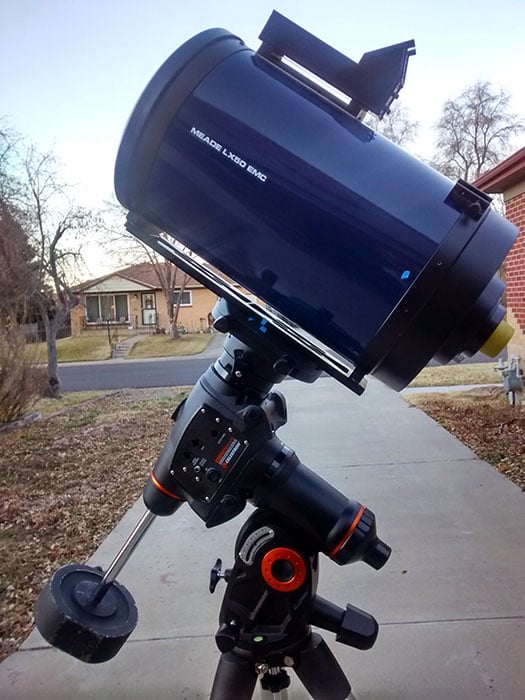
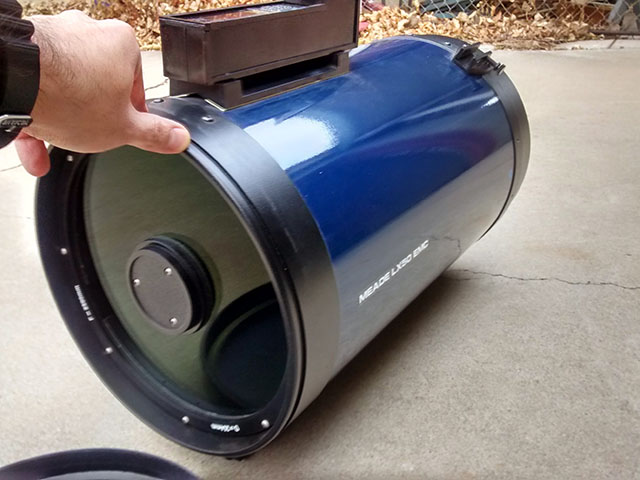
Catadioptric (lenses & mirrors). Here’s the one I used for this project. These are ideal for planets. This one gathers a bunch of light with an aperture of 10 inches. More light equals more detail and that equals better images. These are middle of the road as far as cost is concerned.
Ok, obviously I have a bunch of telescopes. Don’t judge me. Look up “aperture fever” in Google. I’ve got it pretty bad.
You Need a Mount
Once you have an OTA in hand, you’ll need to put it on top of something that’s sturdy enough to hold the thing. That Meade I used weighs in at 35 pounds. The mount also needs to track the sky as we spin around in space on a gigantic floating rock that’s orbiting a multi-billion year old nuclear explosion…
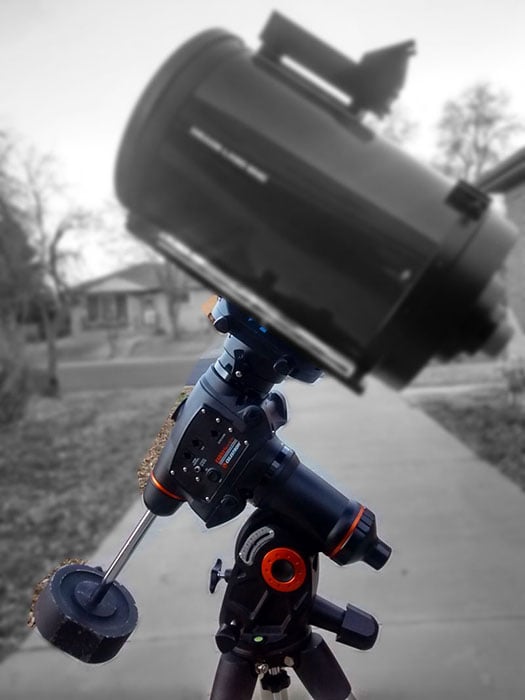
I used Celestron’s cgem for this purpose. It can hold my OTA and it can track the sky quite well:
A note about mounts: They tend to be the most expensive piece of equipment and rightly so. The Earth is spinning fast — much faster than you might realize. It always shocks people when they look at planets or the moon through a telescope that’s not tracking. Mounts are also the reason why I stressed the whole “relatively” easy to learn part. It’s a bit of a learning curve but a few practice sessions and Youtube tutorials later and you should be up and running in no time, or at least some time.
You Need a Camera
Let’s go over some options here and I’ll try to make some recommendations. Maybe even clear up some misconceptions. I used my Canon 60D for this shot. I plugged it into the back of the OTA using an adapter and then connected it to my laptop with some cables. Here it is with a 2” telescope adapter attached.
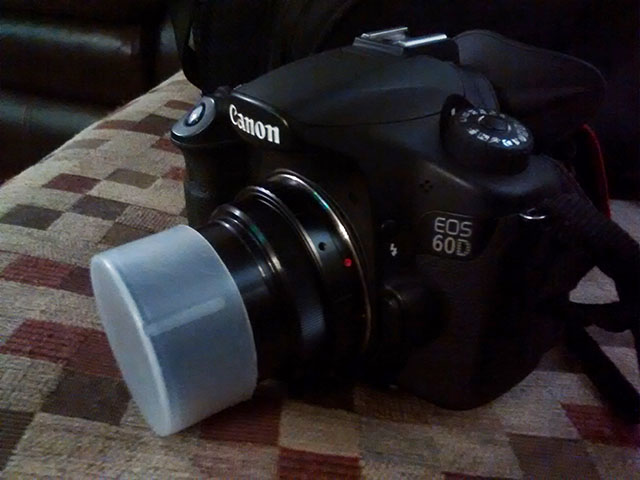
I bought a DSLR so that I wasn’t stuck just taking pics through a telescope. I wanted to be able to shoot some “regular” pictures as well!

Ok, so I still managed to get space in there… Can’t help it!
Here’s what’s important about using cameras for planetary shots. You’ll want one that can connect to a laptop in order to stream video. That’s right, video. Not individual pictures. The higher the frame rates the better. In fact, my Canon isn’t the best for planetary work as it shoots a max of 60fps for video. I’ve seen people use a modified web cam for 100+ fps and pull off amazing planetary images.
For example, this one by Emil Kraaikamp:
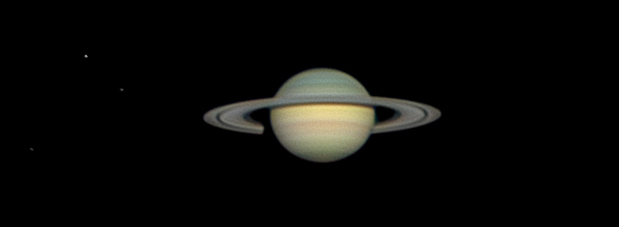
He used a “modified” Phillips SPC900nc web cam for that shot! (Probably well under $100). Amazing, right?
You Need Software
A note about software: Again, you don’t have to use these to get a planetary image. This list is simply what I used to create the GIF and images of Jupiter. But, you’ll obviously have to do your own research to find another process if you choose to not use these.
Any Sky chart app. I use Sky Safari.
Backyard EOS (BYEOS) or Backyard Nikon. This is an amazing program and worth the price of admission ($35). Again, you don’t have to use this. All you need to do is figure out how to get the frames onto your computer and make sure that Registax (see below) can read them.
Registax. Free is for me! I’ve also heard good things about Autostakkert, but I’ve never used it, so no comment.
Photoshop? Gimp? If not Photoshop, then some sort of image manipulator. Yes, MS paint will work, but god help you.
Obviously, you’ll need a laptop or desktop, but I’m gonna assume you already have one since you’re reading this. Disregard that last sentence mobile people.
That pretty much does it for equipment. There’ll be some accessories that you’ll need like adapters to connect the camera, cables to stream video, star charts and star apps, etc. etc.
Total Cost
Canon 60D: Used for $480.00 – friend of a friend
Meade LX50 OTA: Used for $500 – craigslist
Celestron – CGEM: Used for $900 – astromart
As you can see, I spent around $1,880 on my setup. Now let me stress something. Buying this stuff, especially used, is a whole different animal! I could write an entire article about diving into the world of used telescopes. It’s been quite the journey for me. I’ve scored some absolutely amazing deals, and I’ve also been burned pretty badly. It will require some diligent research and even more patience if you choose to purchase used equipment, like I did.
One other thing about that process: I ended up loving it! I look at Craigslist every day for used scopes. I can’t get enough! It’s my own fun separate hobby, like panning for gold. But, you gotta pay to play, and you’d better know what you’re looking for. Regardless, I recommend finding a local astronomy club and talking to some friendly astronomy folks there. Take a look through their scopes and just be willing to learn. They’ll point you in the right direction.
So that should wrap up the equipment, for now. The main thing’s you’ll need in order to embark on this adventure is a little cash to burn, a metric ton of patience, and a border line psychopathic stubbornness to make it all work together.
My Process for Jupiter
First, I bring everything out to my driveway and then I cry for a bit. Lift with the legs, people!
I set up the mount, make sure it’s level and then I point the whole thing at the North Pole. If I was below the equator I’d be pointing it at the South Pole. Then I put everything on top of it. The OTA with the camera and any accessories attached. Finally, I balance it all out like a couple of kids on a seesaw.
A note/disclaimer about setting up the mount: I really just skimmed the most difficult part. This is where you’ll need YouTube and Google. That process will be slow moving the first few attempts and you’ll probably fail once or twice. I know I did. Do not be discouraged, it’s worth learning how to set it up properly and it will teach you so much about how space works!
Here’s where it starts to get interesting. I plug my attached camera into the laptop and stream the live view to BYEOS. Now I have to pick some alignment stars using the mounts controller. Assuming we’re not clouded out, of course. I use my sky chart apps to help me make sure I’ve got the right star lined up.
I center them by using the controller and watching them in the BYEOS’s live view. It usually takes about 5 aligned stars before the mount is finding things in the sky without a problem. Jupiter? Saturn? Galaxies? Nebula? Double Stars? All of that is now available to see and take pictures of! Technology is amazing.
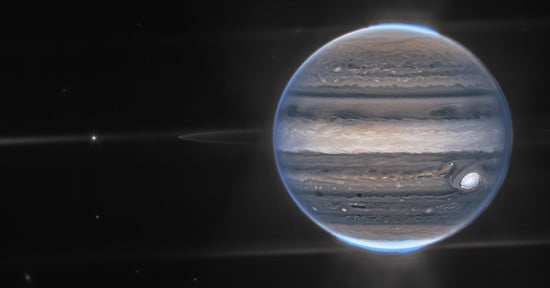
Now what made that night particularly special was that Jupiter had a triple moon transit happening. It simply means 3 of Jupiter’s 4 main moons crossed between Jupiter and us. This won’t happen again for another 17 years. But, Jupiter’s moons cross individually quite often and it’s always amazing to see it live and in person.
FYI, I originally found out about the transit through this article at
Fortunately the skies started to clear for me around 10:30pm. But again, they cleared up because of the winds… Thankfully, the sky gods were kind to me this night and the seeing wasn’t all that bad. As a result I was able to get some decent shots of Jupiter.
Jupiter is so bright that I was able to capture these images from my driveway under the horribly light polluted skies of Denver, Colorado. No need to drive hours to dark skies, you can do this anywhere that you have clear skies. I simply made sure my focus was spot on and set BYEOS to planetary image mode. It’s a big button that you can’t miss in the program. It gives you a live preview of the image and I can adjust things like the shutter speed or the ISO of the camera.
I adjusted my ISO until Jupiter showed up nice and bright and set BYEOS to take 1000 frames of video. By the way, my camera was set to manual mode on the dial. I also used the 5x digital zoom setting in BYEOS which, when combined with the inherent magnification of my OTA, it created a nice sized Jupiter to work with. I did 25 loops of 1000 frames each. I actually have more frames to process, but thankfully 25 frames is enough to show plenty of movement.
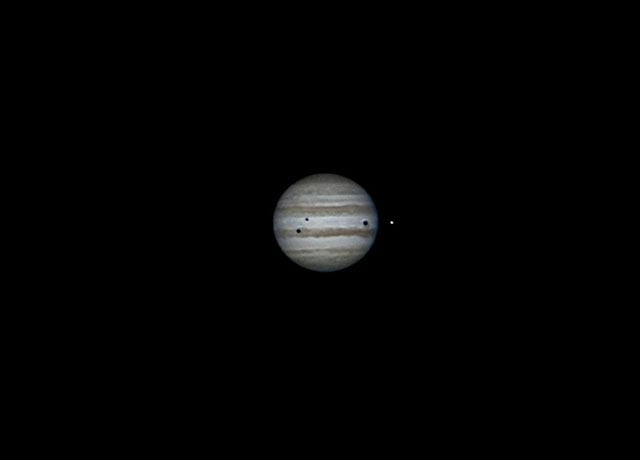
Here’s an example what I saw as I was gathering images in BYEOS. This was my real-time view:

Once I finished capturing my frames with BYEOS, I opened up Registax and began processing. As the name implies, it stacks your images to bring out more detail. Don’t ask me how. All I’ll say is “algorithms” and then walk away. In Registax I select a batch of 1000 images, and then tell it to use the best 30% of images from each batch. So, about 300 images on average. It aligns them and then stacks them using it’s magical algorithms.
Once it’s done stacking, Registax allows you to start adjusting the image by using sliders to tweak the contrast, brightness and sharpness of the image you’re working with. This might be the most satisfying part of the process. To have a blurry image become tack sharp with the touch of a button will never cease to amaze me.
Here’s an example:
Note: Registax does a whole lot more and you’ll need to look up some tutorials to learn the interface. Here’s one that I just found.
I ended up doing this 25 times. I save each processed image out to a folder on my desktop and now I’ve got a folder with 25 lovely Jupiters. Photoshop is now on deck. As you can tell from the GIF above, Jupiter wasn’t centered, rotated or even displayed in the right direction… let alone across all 25 individual images.
Catadioptric telescopes flip the image of whatever you’re looking at. So, I had to align each of the 25 frames in Photoshop, flip them around and rotate them to show the proper orientation as you would see it in person.
This should give you an idea of how the GIF would have looked if I hadn’t aligned things in Photoshop:
Now that I have everything lined up, I save each frame out in their proper order to a folder on my desktop. I then went to makeagif.com, selected that folder and uploaded my images for the site to generate the final GIF.
A note about GIF making: For any future planetary stuff, I’ll just simply use Photoshop to make the GIF. I was under the false assumption that Make a GIF would be faster and would create smaller files than Photoshop. I was wrong and quite frankly lazy. I forgot that Google and YouTube are my friends.
Here’s the final animated GIF that resulted (click for a larger view):
That, as they say, is that. Hopefully it wasn’t too painful and hopefully I didn’t overwhelm you with information. There is a lot to learn. If you take this challenge on, you will find it’s one of the most fulfilling things to participate in. Most people have no idea what is available to them through telescopes. The universe is out there, friends.
Please don’t be discouraged if you run into any road blocks, and trust me you will. Remember, Google and YouTube are your friends. Find an astronomy club and talk to some people. And always remember, “What one man can do, another can do!”.
Good luck!