How I Replaced the Shutter in My Canon 5D Mark II By Myself and Saved $400
The shutter on my old Canon 5D Mark II died while on a trip to Fiji earlier this year. It happened quickly; I was shooting a panorama when horizontal black bars started appearing in some of the shots. After about 10 more photos in between turning the camera off and on again, it was dead. The shutter was stuck closed and powering the camera on yielded a helpless sounding soft ‘clunk’ and an “Error 20″ message.
I was quoted around $500 to get this fixed at a repair shop. But.. an OEM replacement shutter is only $90 on eBay. So, after about 6 months of putting it off I finally built up enough #YOLO fever to have a crack at fixing it myself, saving $400 and learning a few things along the way.
My verdict, for anyone else who is interested in attempting the same repair – it’s totally doable. Allow the good part of a day to plan, prepare and do the repair at a steady pace. Doing it a second time should take MUCH less time than this.
Note: I also watched a Canon 40D shutter replacement video while I was doing this and the steps were almost identical, hence this guide MAY be useful for other Canon models but I can’t guarantee this.
Things You’ll Need
- Phillips #00 screwdriver
- Torx T7 screwdriver: required for 3 screws – to remove the sensor unit
- Tweezers and/or some very small needle pliers
- A piece of sticky tape
- Double sided adhesive or glue (to reattach the rubber grips)
- Soldering iron: if the replacement shutter does not come with wires connected to the motor you will need to desolder the wires from the old unit and solder onto the new
- A sense of bravery.
How It’s Done
Caution: Be wary of STATIC ELECTRICITY. Although the majority of the steps are simply undoing screws or unplugging ribbon cables you are working in proximity to sensitive electronics. Keep yourself grounded at all times to prevent static discharge from turning your camera into a brick.
Caution: Static discharge isn’t the only thing that will kill your camera! Slipping and sticking the end of the screwdriver through the main board, kinking a ribbon cable or scratching the exposed sensor will all have the same effect.
Note: Have a method of recording what goes where. There are a lots of different sized screws but all of the holes look the same. I had a container with lots of compartments and started by writing down a description of what I was putting into each one. This wasn’t visual enough! I ended up just putting all of the components clockwise in order of dissassembly around my desk with the screws placed in their original location, so that I knew when re-assembling to just work anti-clockwise. I also referred back to the timelapse images I was taking with my webcam when I was unsure.

The Canon 5D Mark II Parts Catalog (Google can dig it up) is handy to refer to while going through this guide.
OK, let’s go.
1. Rubber grips: Just stick a fingernail in there and pull them all off.
2. Time & date battery: Lift up the rubber flaps covering the aux inputs, remove the single screw at the bottom and pull out the battery holder.
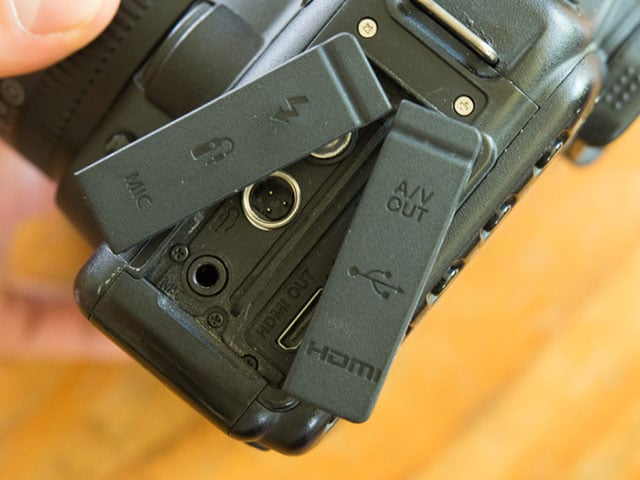
3. Rubber flaps/aux covers: Remove the three screws. For reference the two long silver ones are at the top.
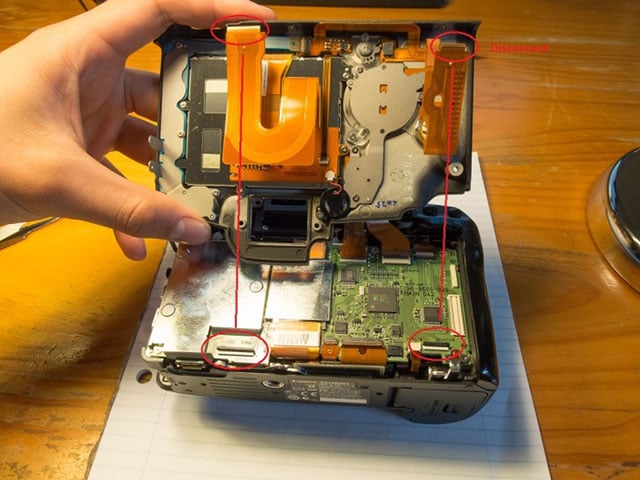
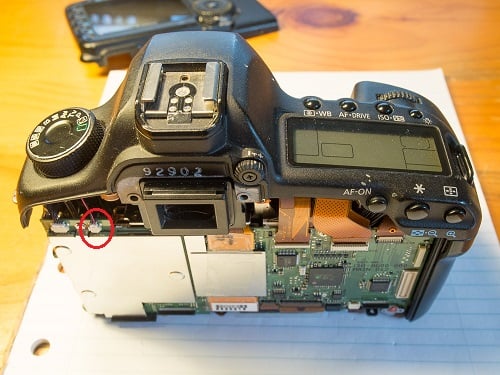
4. Rear casing & LCD screen: Remove all screws: two long ones on either side of the eyepiece. the single silver screw goes to the left of the CF slot cover. Three screws on the bottom of the camera, note the one next to the plug on the bottom is shorter than the other two. Before you can detach the rear cover, two ribbon cables will need to be disconnected. The connectors have pop-up tabs to release the ribbon cable.
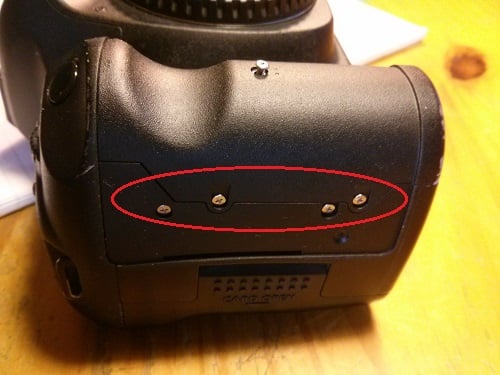
5. Front casing: On the grip side: 2 short silver screws (of the 4). From the front: 3 around the lens mount. 2 more in the indent between the grip and lens mount. On the back: a two pin connector (red/black wires) is connected to the main board; disconnect this. I wasn’t able to get enough grip using tweezers and had to use a razor to pry/lever the connector off.
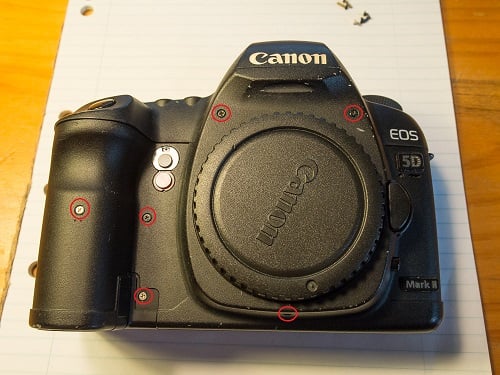
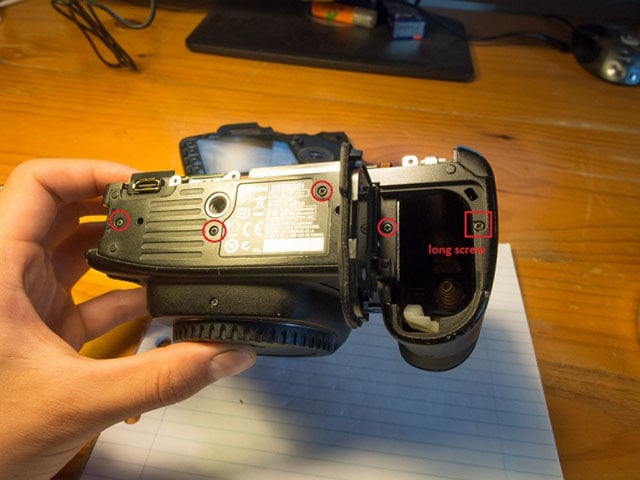
6. Bottom casing: 5 screws – 4 short screws & a long screw to the right of the battery slot
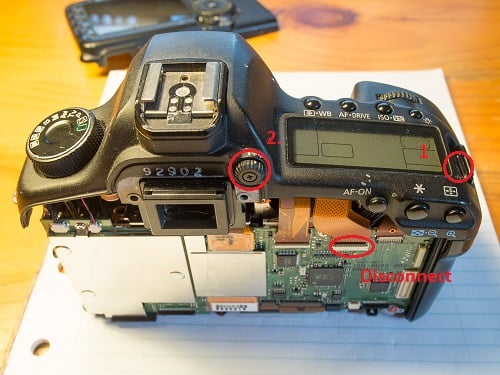
7. Top casing: One screw next to the right strap mount & one on the underside of the left strap mount. Also remove the viewfinder diopter. There is one ribbon cable connecting to the main board, this has a pop up tab to unlock.
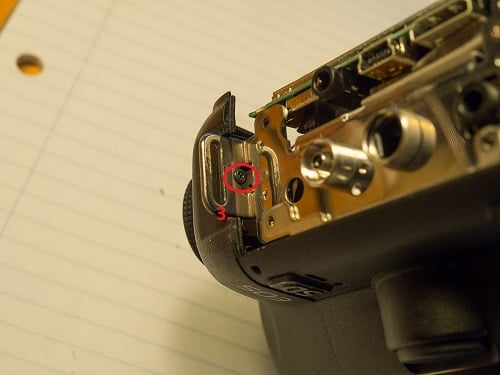
8. CF door: Actually I am not sure if this needs to be removed, I removed it anyway. The remaining 2 short silver screws in the grip side.
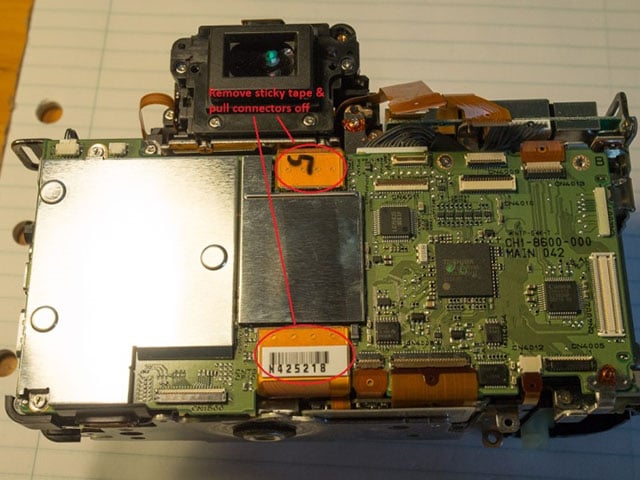
9. Main board: Remove the screws, one of which is hidden beneath the wide ribbon cable at the bottom of the board (second from right). Two of the ribbon cables are a pull-off connector, with sticky tape on top. Remove the tape. 5 of the remaining ribbon cables have the plastic pop-up release, the final one needs to be pulled out. There is a 4 pin black cable at the top left of the board – I needed to use a razor to wedge and pry it out. There is also a bundle of grey cables connected to the back of the main board.
10. Bottom plate: 6 screws, one may be covered by a black plastic tab.
11. Bottom board: 3 screws, the one towards the rear of the camera is the short one. I found the connectors (2x 2 pin, 1x 3 pin & 1x 4pin) easy to disconnect by placing my finger over the connector itself while pulling upwards on the wire as close as possible to the connector, levering them out. When re-assembling, simply push them down into the socket to reconnect. Also there are 5 ribbon cable connections to disconnect. The biggest one has a black plastic tab on the connector that needs to be flipped up to release the ribbon cable.
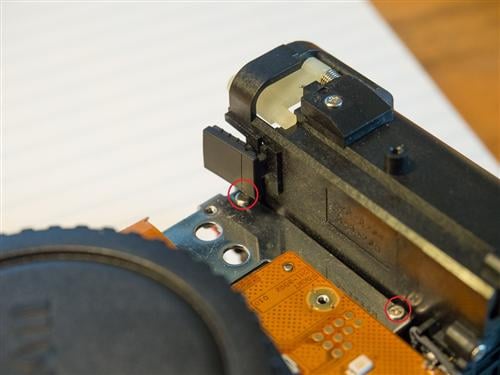
12. Sensor unit: Have somewhere safe to put this where its delicate surface won’t get coated in dust or scratched. The three screws (tacked with glue) are torx T7 screws. There is also a metal strap to unscrew.
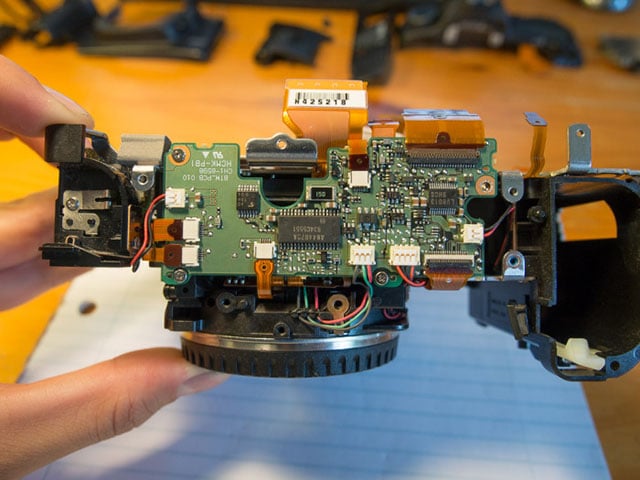
13. Top circuit board: 3 identical screws. 1x 4 pin and 2 pin connectors.
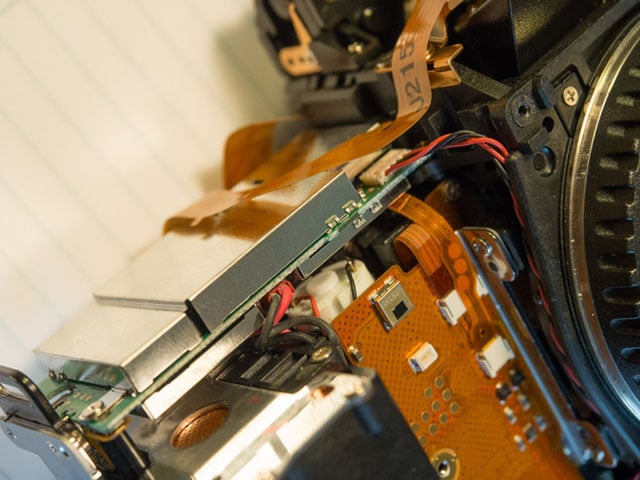
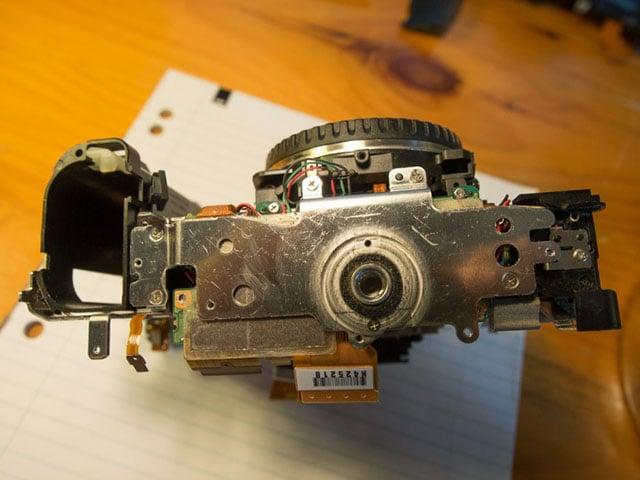
14. Metal chassis: 6 identical screws, 4 on the back and 2 on the front near the grip. The bottom screw on the front may be blocked by a black rubber tab, if so you can pull this out. You can then separate the chassis from the mirrorbox/shutter – it may take a bit of persuasion to separate.

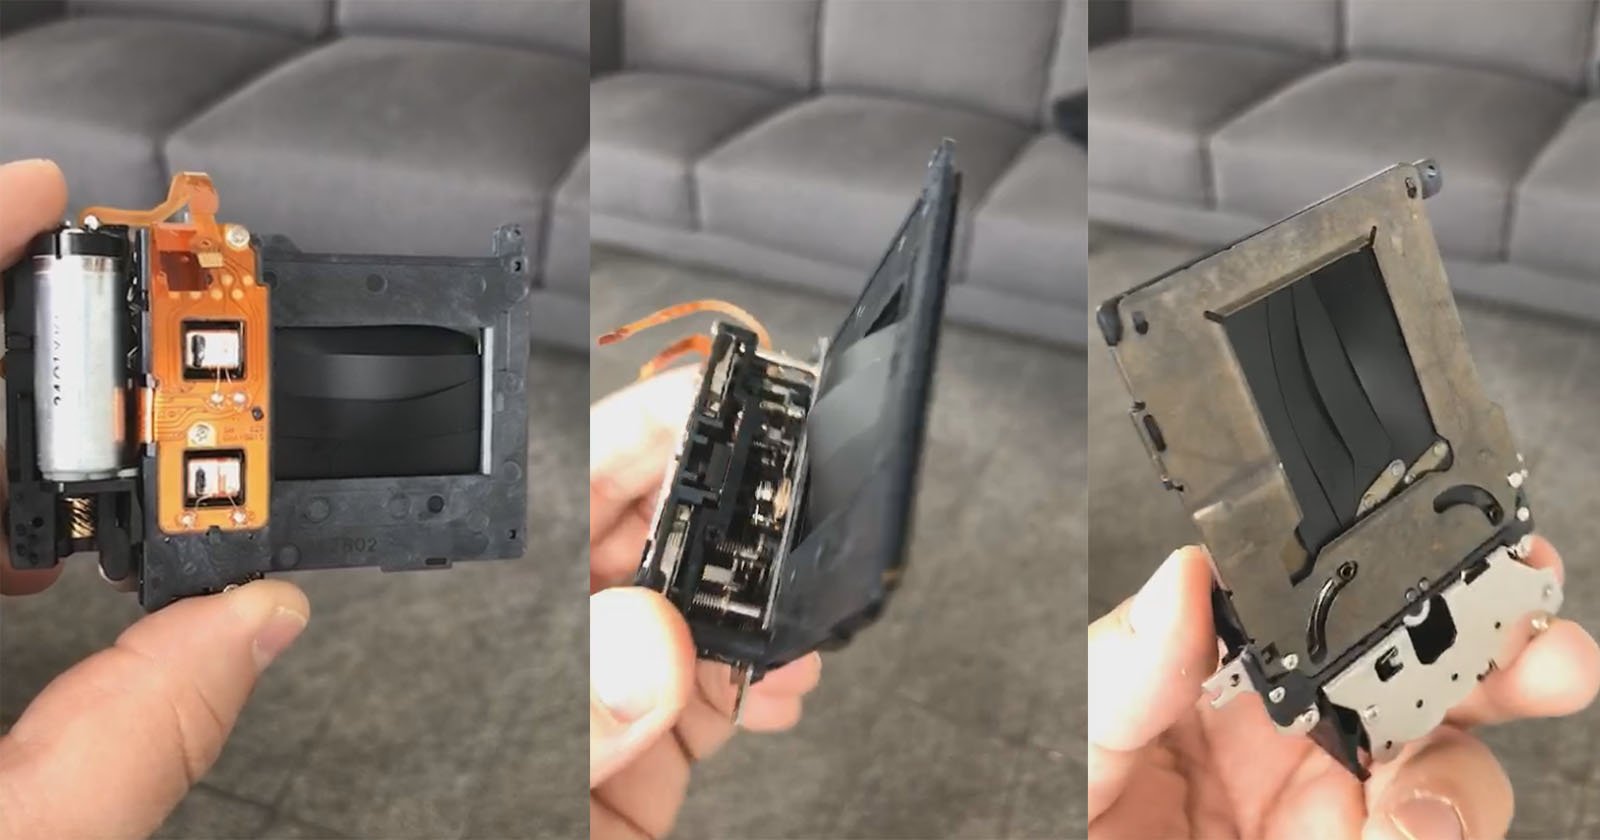
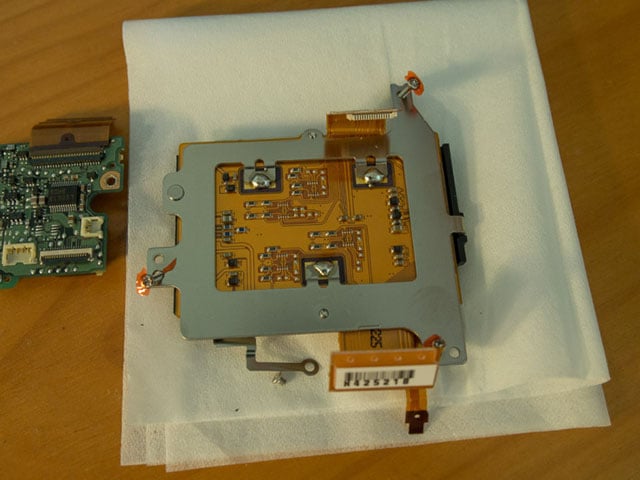
15. Shutter unit: Remove the two ribbon cables, the smaller one is a bit hard to get back in. 3 identical screws to remove. My replacement unit did not have any wires connected to the motor: if so, de-solder the old ones, take them off the poles they are glued to, and connect to the new shutter unit.
16. Re-assemble! Do everything in reverse.
Apologies if I’ve missed any specifics, these steps were written after the fact, but any omissions should be fairly obvious. Just remove the components in this order and remember which screws go where!
About the author: Myles Dunphy is a twenty-something male photography enthusiast who’s a full time engineer and part time dreamer and wanderer. Digital photography is his creative outlet. You can find his work and his writing over on his website. This article originally appeared here.