Shooting Color Photos with PhaseOne’s $45,000 B&W Digital Back
The announcement of the PhaseOne IQ2 series introduced a clear functionality based stratification of the IQ line up of digital backs. The PhaseOne IQ280 still reigns supreme providing the highest resolution single capture of the bunch. The bigger and more interesting changes however, are within the IQ260 “series” of backs. Now there are two different versions of a 60MP full-frame medium format digital sensor; both of these two versions offer their own vastly different “skill sets” for different types of photography.
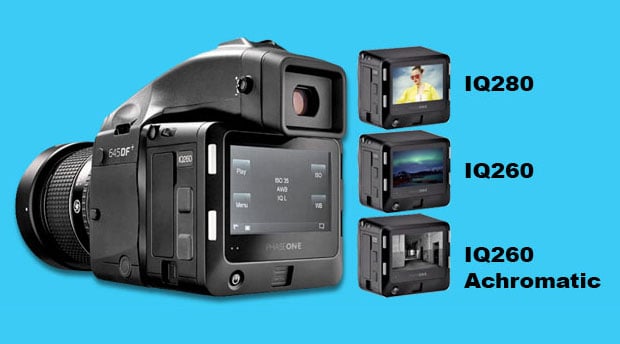
Firstly, the IQ260 version introduces exposure times of up to one hour (the same as on the oft lauded P45+) in a 60MP variant housed within the superior chassis of the IQ series. This development could be said to be somewhat expected since there had to be an eventual successor to the P45+ and although it took a while, early results show that it was worth the wait.
The other more curious version of the IQ260 is the new PhaseOne IQ260 Achromatic housing a fully monochromatic full-frame medium format sensor. It is, with a bit of irony, worth noting that imaging which started as grains silver-nitrate yielding black and white images has progressed through color films, back to black and white digital (a la early cameras), through color digital and is now seeing a resurgence in interest in digital black and white imaging.
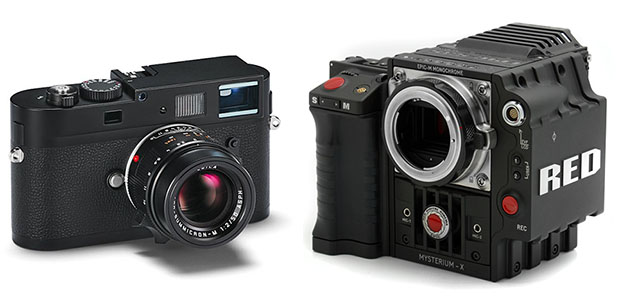
We have certainly come full circle seeing within the last year the Leica M9 Monochrome, Red Epic-M Monochrome, and now the IQ260 Achromatic. The first “modern” digital back of note for monochromatic imaging was the PhaseOne Achromatic+ (based on a 39MP chip) produced for Bear Images.
PhaseOne now brings a far more versatile offering to the table for all fields from photographic to scientific — the new IQ260 Achromatic can and will have some far reaching implications. However, none of this is the purpose of this article. This article, is in fact (as the name suggests) about color.
This may seem to be a peculiar subject to be discussing with regards to a monochromatic sensor like that housed in the PhaseOne IQ260, but in fact it is a subject which this camera can open up some new possibilities in. Monochromatic sensor harken back to B&W film in that they allow for the use of colored filters in front of the lens and sensor to achieve varying effects both stylistically and technically with their varying filtration.
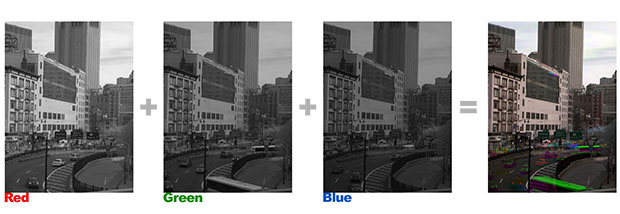
Early color images were created by taking black and white images filtered through Red, Green, and Blue filters. In this form, the process desired to create a perfect still image in color and was achievable with subjects who were capable of standing still for a long enough time for all three filters to be utilized. A difficult task, to say the least.
Other examples show what happens when the subject moves and causes the 3 images to be mis-aligned when combined, in these images the differing colors of the filters will show through as colored “ghosts” around areas where there is movement in the image between frames or filters.
Robert S. Harris invented a device called the “Harris Shutter” for Kodak. This video shows a some-what simplified version of this device:
This gave rise to the “Harris Shutter Effect” which has been popularized through facsimile’s of the process which digital cameras and Photoshop have allowed us to make.
To truly complete this process, images must be taken with the varying color filters in front of a black and white emulsion or sensor and then processed for the desired effect. I mention the Harris Shutter Effect because it is exhibited in the image above, and the images that we will be looking at further and discussing.
There is a download link bottom of this article which contains the RAW PhaseOne IQ260 Achromatic IIQ files, labeled as to which filter was used with them. This images are my property and for personal use only and may not be used in print or online for any other purpose.
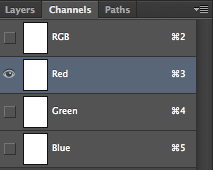
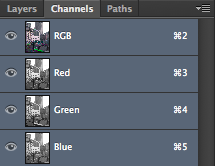
 When you look at the channels of any RGB color image, you will naturally see Red, Green, and Blue channels respectively. Each of these channels, as you can see is its own black and white image. The Bayer pattern on the a digital color sensor acts as the three different colored filters which are required to filter the incoming beam of light properly so that all of the information is there for the camera (or in our case Photoshop) to create the resulting color image.
For this test, three different circular-threaded color filters were used to create the Red, Green, and Blue filtered images. These were a Red R25A filter, Blue B47 filter, and a Green 58 filter. Filters of varying strengths will yield differing results.
The back is inherently sensitive to UV / IR light which is typically filtered out by the IR filter in front of a digital sensor. However, the PhaseOne IQ260 Achromatic is totally devoid of any filters and consequently some of this light sneaks through. This was one of the problems with the Leica M8, and it was why you had to purchase UV / IR Block filters.
The more technical name of this filter is a “hot mirror” filter (Tiffen makes one, among others) and like you have by now guessed it blocks most (if not all) of the UV / IR spectrum. Theoretically this would mean that using the colored filters, along with a hot mirror filter you would be able to very accurately reproduce color similar if not identical to that of a color digital sensor.
Unfortunately for this preliminary test, I did not have a hot mirror filter so the tests were done with this UV / IR light effecting the filtered black and white images being captured. As we will see, this accounts for the color caste present in our images. Also all of these images were taken with the same exposure of 1/15th of a second, this resulted in images with different brightnesses.
There are a few different parts to the process of compiling a color image from a monochromatic black and white digital sensor. First, the RAW files must be processed through CaptureOne, then the images will be placed into their respective color channels in Photoshop, and finally the image will be colored balanced to further hone the color image that has been created.
Raw Processing: Once the images are imported into CaptureOne, there is at least one step that must be done to ensure that the best possible resulting color image is achieved. Under the “Color” tab we must select the “Linear Scientific” gamma correction curve.
If you are not familiar with what the gamma curve is, then this Wikipedia article can shed some light. In its most simple form, for our purposes, we only have to understand that the “Linear Scientific” curve selection, means that our processed image will be as close to what was captured, and straight from the camera without the software editing it at all.
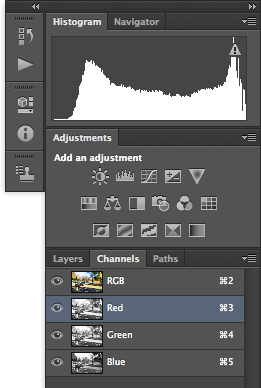
Photoshop: Now that we have the images out of CaptureOne we can open them in Photoshop. Then we will make a new document with the same dimensions as the pictures. This can be achieved by copying the entire area of the image (command+a then command+c) and then creating a new document. This will transfer the dimensions of your monochromatic sensor’s generated image into this new file.
With this new file created. We will then go and copy the individual Red, Green, and Blue images and place them into their respective folders. You will begin to set the image come together and once all three of the channels have been copied into the new file, you will have a color image. As an aside, you must make sure that your Photoshop file is the RGB mode for the channels to be available to paste the images into.
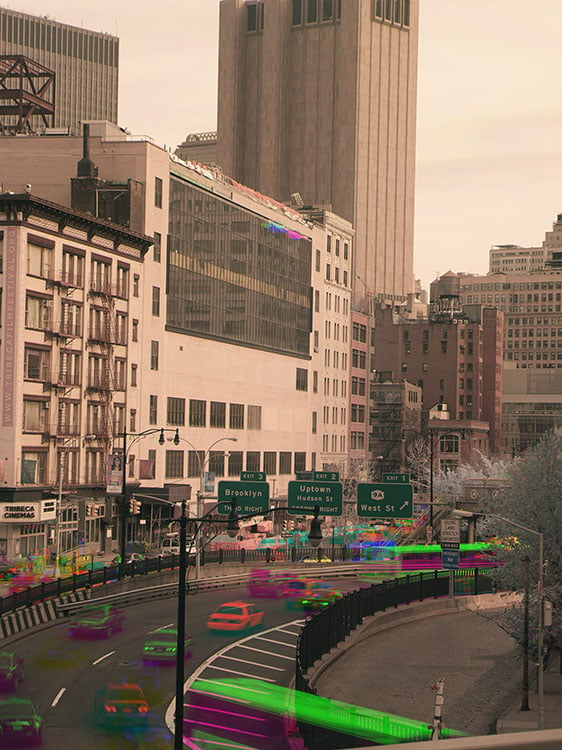
Now that we have compiled the color image we will have something that looks like the above image. We have our color image and there are a few different things that we can do to tweak it. Firstly, we can correct the color balance to attempt to get the reproduced colors to be as accurate as possible.
If you do not want to get involved in this you can use the “Auto Color” feature which does a pretty good job of correcting the color. You can also utilize the “Channel Mixer” to play with the way the channels are mixed (duh); this can also allow you to adjust the colors, and especially when objects have moved and the Harris Shutter Effect is present it will allow you to control the prominence of the colors of the ghosted moving objects.
Now we will look at three different methods of CaptureOne processing and the resulting images (click to view it in high-res).

The matrix above shows what happens when you process the files differently through CaptureOne. Shown left to right are the Red, Green, and Blue filtered black and white images from the PhaseOne IQ260 Achromatic. Then, the color images shown are the resulting images after having “Auto Color” applied in Photoshop.
“Auto Color” corrects the images white balance by analyzing the color channels and then remapping the channels to correct for proper color as it believes it should be. Each of these three different processed versions has a red caste to it “straight out of camera” (replace camera with processing in this case).
The files processed with the standard gamma correction curve of “Film Standard” still exhibit a very strong red caste. The Linear Scientific gamma correction curve gives my preferred rendition, though it is slightly under-exposed.
As noted above each of these images was taken with a shutter speed of 1/15th of a second. This is not the proper exposure of all three of these filters since they are of different filter factors (or strengths) and some eat more light then others. Consequently, balancing them to be approximately the same exposure results in not only a “better” exposed image but also a more accurately colored one.
“Auto Color” is very good and of course you can continue further with your color balancing after it or without it. The above image was taken and processed with the “Film Standard” curve and the manually corrected in Photoshop using “Color Balance” and “Channel Mixer” functions.
Using the PhaseOne IQ260 Achromatic for color imaging is one of the many scientific and artistic niche applications of this monochromatic medium format digital back which make it a very interesting and versatile tool.
P.S. Here’s a download link at which you can download the RAW files discussed above. Again these images are for personal use only and by downloading them you agree to the terms set above in this article. If you do not already have CaptureOne you can download a demo of it here.