How to Make a Video a Live Photo

A Live Photo can be made from a video, but this isn’t a built-in capability of the iPhone. Instead, a third-party app is required. Alternatively, an iPhone can capture a Live Photo if the camera app is set up to do so. The iPhone’s default setting of Live Auto, however, leaves the decision to an Apple algorithm that might choose to snap a still photo instead. Thankfully, this setting can be adjusted to force Live Photo to be recorded every time if preferred.
In this guide, we will walk through how to convert a video into a Live Photo and vice versa.
Table of Contents
How to Convert a Video into a Live Photo
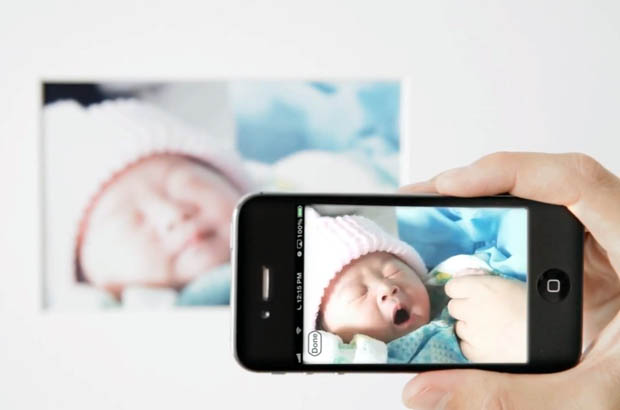
Apple doesn’t include an app or any other method of converting a video into a Live Photo but this is possible with a third-party app. The popular and free intoLive app serves this purpose well and can even create a Live Photo that is longer than the standard 3 seconds. The app is ad-supported, however, the current one advertisement per save tradeoff seems fair. For a few dollars, a one-time purchase enables Pro options and removes the ads.
To use intoLive to convert a video into a Live Photo, the user should open the app and browse their library to find the video to be converted.
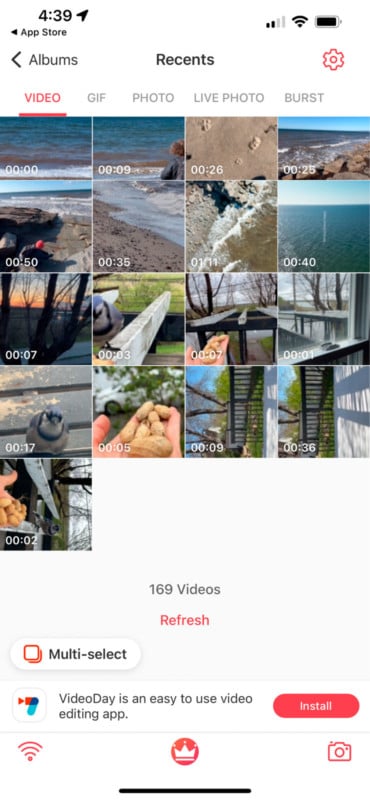
After opening a video, the filmstrip below the main video view can be dragged side to side to select the portion of the video to use, and handles at either end allow trimming to make a shorter Live Photo. Pinching allows zooming and dragging. Various effects are possible and appear at the bottom of the screen, including speed adjustments and filters, as well as adjusting the Key Photo. The video can also be edited in advance with any other app.
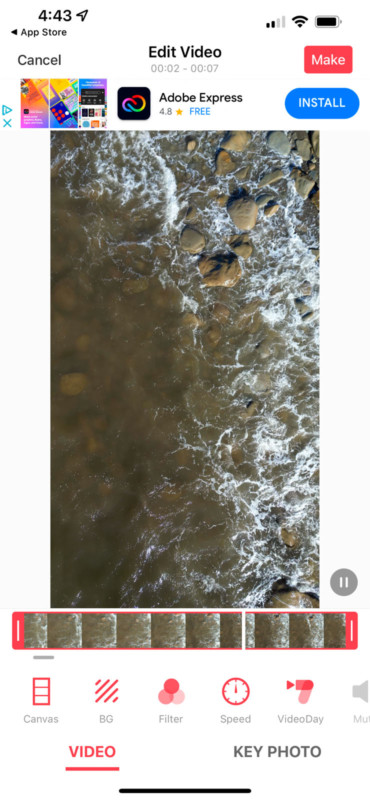
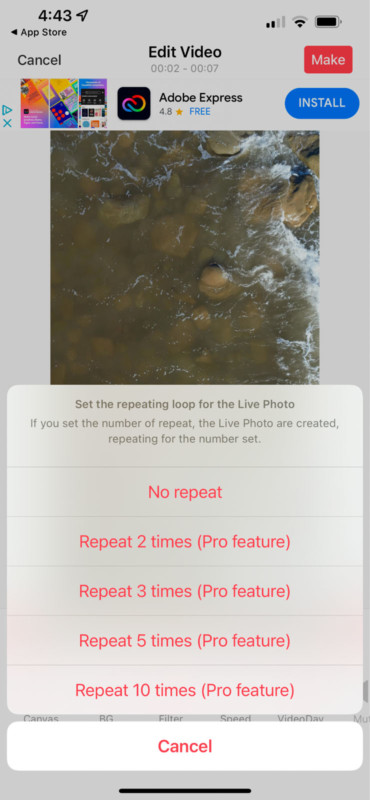
When happy with the video, tapping the Make button in the upper-right will bring up options for a repeating loop. The free version only has one choice, No repeat, but the Pro version can repeat up to 10 times.
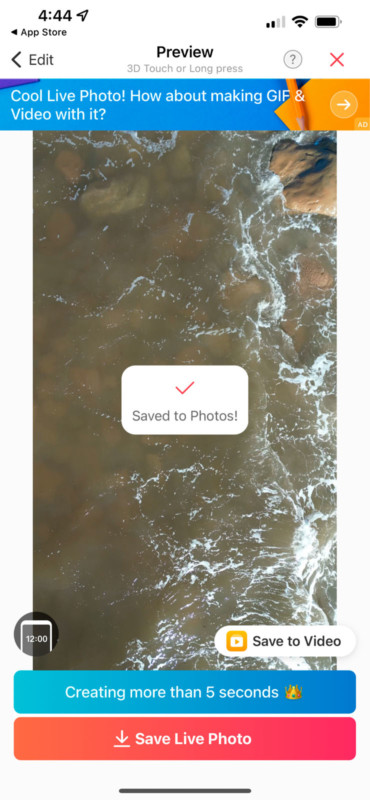
After choosing the repetition amount, a button appears to Save Live Photo, and tapping this will save the Live Photo to the photo library.
What is a Live Photo?
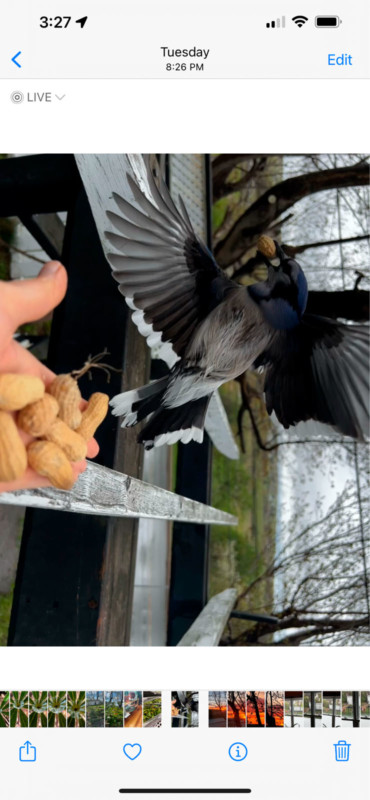
When a Live Photo is viewed on an iPhone or iPad with a finger held to the screen, a short video will play of that moment along with the accompanying sound. It’s as if the image comes to life with just a touch.
Apple created the Live Photo format in 2015, a fun addition to iOS 9 that helped to demonstrate the big performance gains made with the Apple A9 processor in the iPhone 6S. Having been around for several years, most iPhone users are familiar with this feature and the Google camera in Android phones has something similar called Motion Photo.
The iPhone records video continuously to a temporary memory buffer while the camera app is open in Photo mode if Live Photo is enabled. It only saves, however, when the shutter button is tapped. A particularly interesting detail is that the iPhone saves 1.5 seconds of video from before the picture was taken and 1.5 seconds of what happens after. This is easily verified by waving a hand past the iPhone’s camera and tapping the shutter, but only after the hand has passed. Pressing and holding this Live Photo will show the hand traveling by, even though the photo was seemingly taken too late.
A Live Photo shows a still that’s exactly in the middle, timewise, within the recorded video. It is possible to change the Key Photo, the still image that’s shown when not touching the screen, and sometimes a better moment or a frame with less motion blur can be found by checking the captured frames one at a time. This is quite easy to do on the iPhone.
How to Take a Live Photo with an iPhone
Apple has the Live Photo feature set to Auto by default in the iPhone. In this mode, a photo might or might not be recorded with the 3-second video snippet that’s needed to make it into a Live Photo, depending on how much movement is detected in the view and other factors, such as lighting and whether Night Mode is required for the picture. Unfortunately, Apple doesn’t share specific details about the algorithm used. The setting can easily be changed in the iPhone camera app to ensure that a Live Photo is always captured or that only a single still is captured.
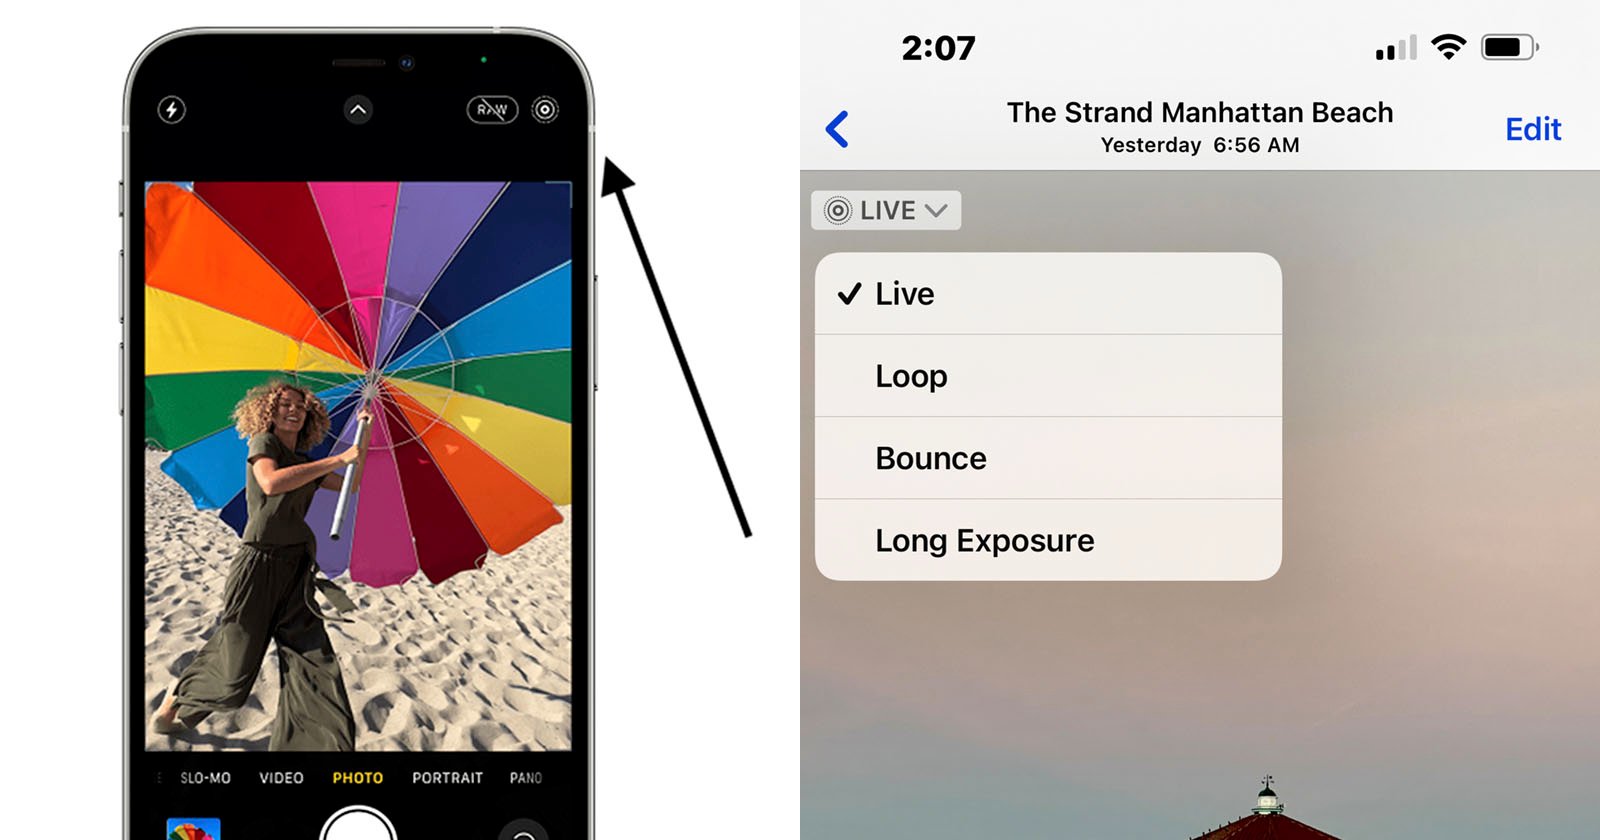
With the iPhone camera app open, the user should swipe up from the center of the screen to open the camera options bar. The Live Photo control looks a bit like a target or concentric circles with the outer circle dotted. After tapping this button three choices will be shown, Auto, On, and Off.
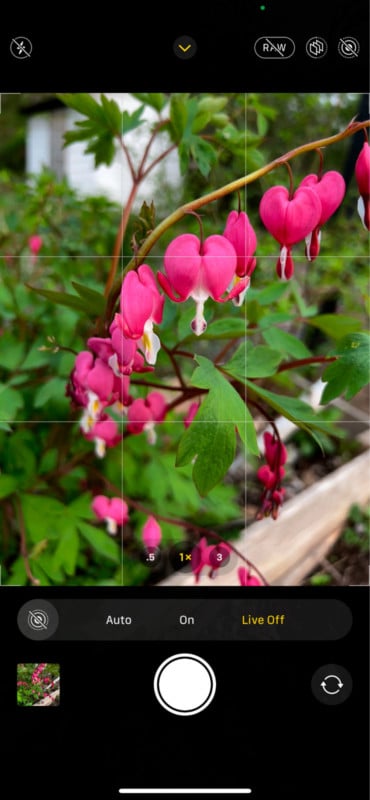
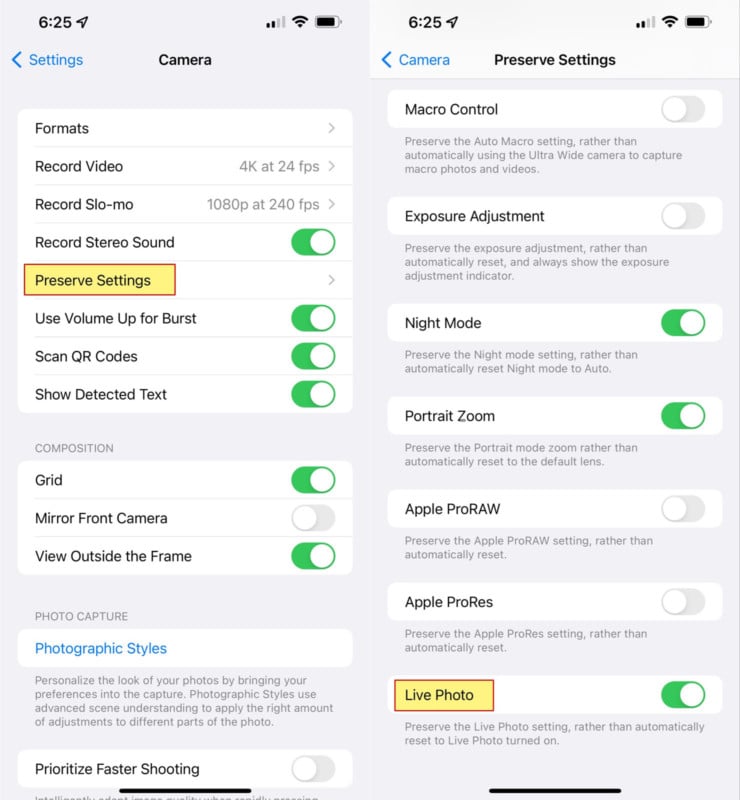
A Live Photo button is also available at the top right corner of the camera app, however, it only toggles between Auto and Off, with no way to force a Live Photo to be taken. It should be noted that leaving the camera app could result in the Live Photo setting reverting to Auto the next time a photo is taken. It’s possible to prevent this control from resetting by opening the Settings app, tapping the Camera tab then switching Live Photo on in the Preserve Settings section.
How to Use a Live Photo as Wallpaper
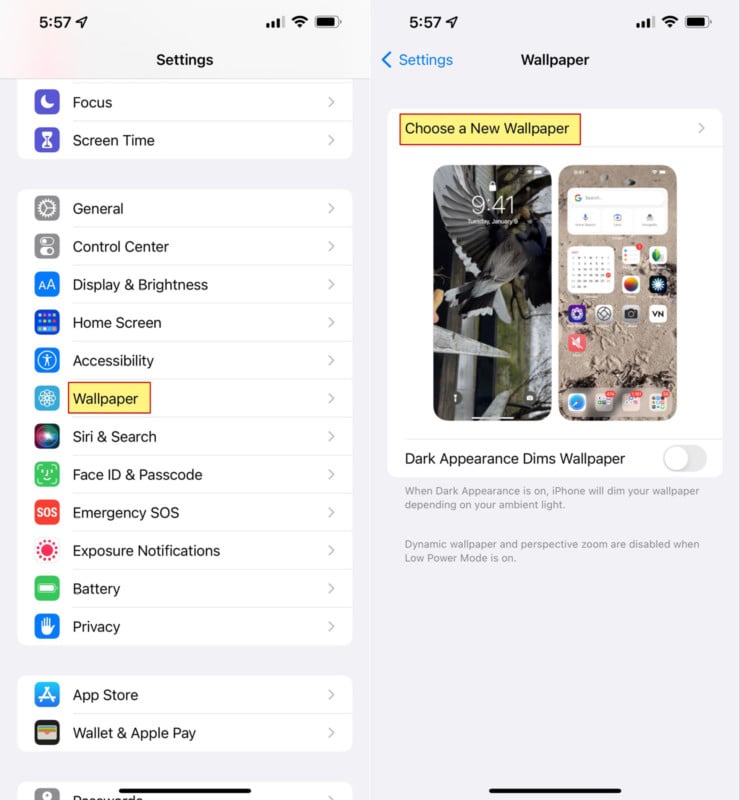
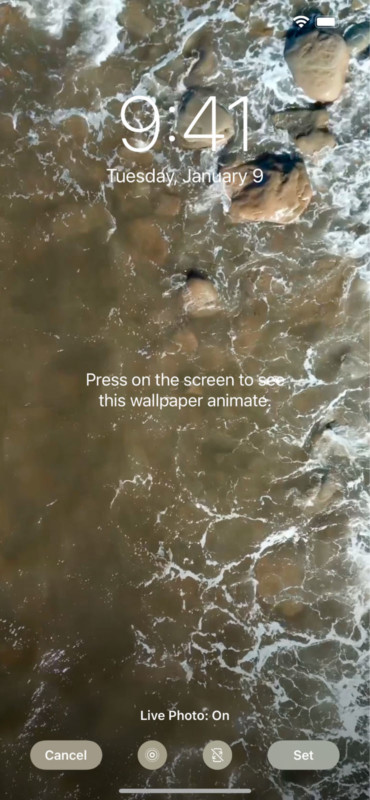
Any Live Photo can be used as an animated Lock Screen wallpaper on an iPhone. If chosen as a wallpaper for the Home Screen only the still image will be used. Simply pressing a finger to the Lock Screen and holding causes the video to play. It’s a fun addition to an iPhone and a way to instantly replay a favorite moment throughout the day. To change the iPhone’s wallpaper, the user should open the Settings app and tap the Wallpaper tab.
From there, tapping Choose a New Wallpaper opens up a gallery of images.
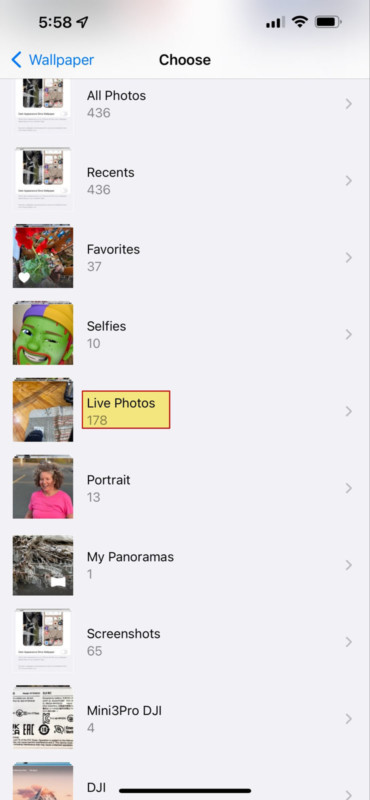
Scrolling down, the Live Photos album contains all images of this type and, after selecting one, the framing can be adjusted by pinching to zoom and dragging to reposition. If the Perspective Zoom effect is switched on, the Live Photo will not animate. Then tapping the Set button locks in the framing and settings.
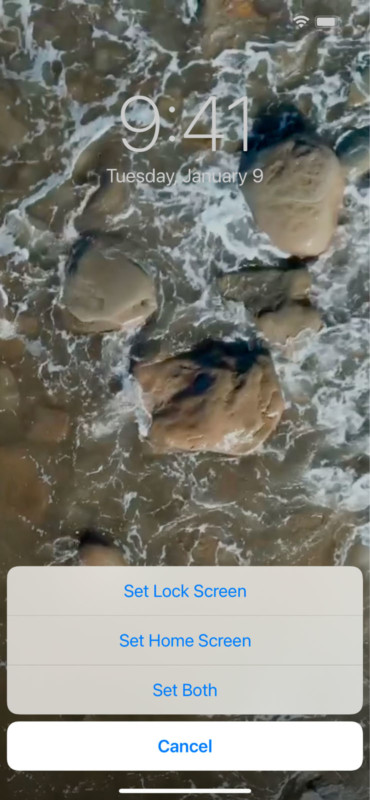
The final choice is whether to use this Live Photo on the Lock Screen, the Home Screen, or both. While motion will only show on the Lock Screen, the static picture might still be worthy of the Home Screen.
How to Change the Key Photo Of A Live Photo
While a Live Photo is generally appreciated for capturing movement and bringing a photo to life, it can also be used to enhance a still photo by allowing the photographer to shift forward or backward in time. The center frame is preselected as the main image or Key Photo, however, it can be changed to any other still frame recorded in the video. The quality of the video frames will be lower than the original Key Photo, however, being able to adjust the split-second chosen to freeze the action might be more important even if there is a slight loss of resolution. It might mean a leap is captured at its peak height or a person’s eyes are open rather than mid-blink.
To change the Key Photo of a Live Photo, the user should open it in the Photos app and tap Edit. The iPhone will start in the color and exposure adjustment mode. In the options that appear at the bottom of the screen, tapping the Live Photos icon, which looks somewhat like a target, will reveal the frames that are contained within the video.
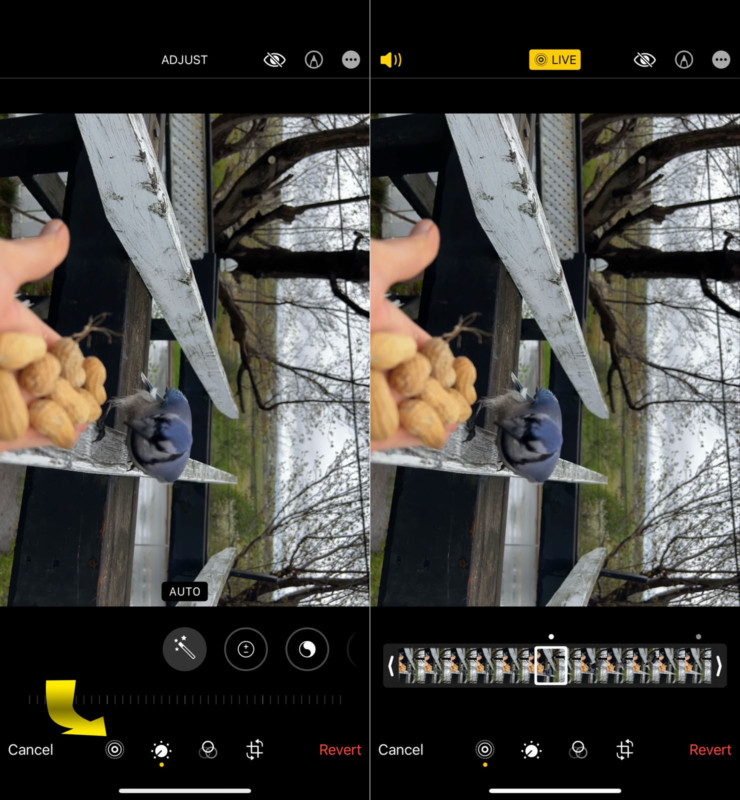
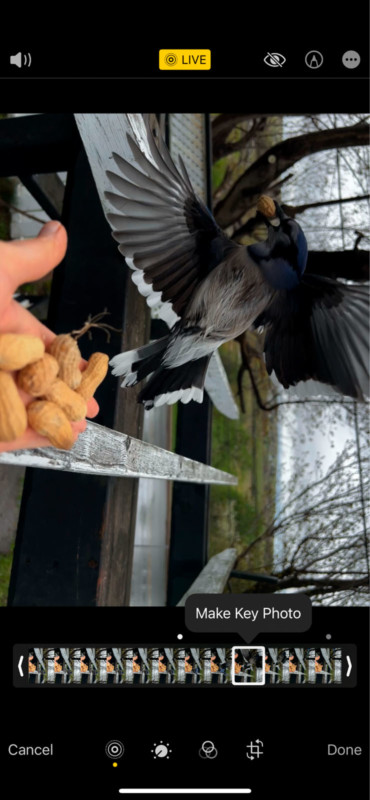
Tapping or dragging a finger over the filmstrip that’s below the large picture will switch between frames. If a better picture is found than the default, tapping Make Key Photo will set that as the still image that will be shown.
Pressing and holding the edited Live Photo will show the entire video as before. When released, it will return to the selected frame or Key Photo. A Live Photo can also be trimmed by dragging the ends of the filmstrip, shortening it to remove any frames that are distracting.
How to Make a Live Photo a Video
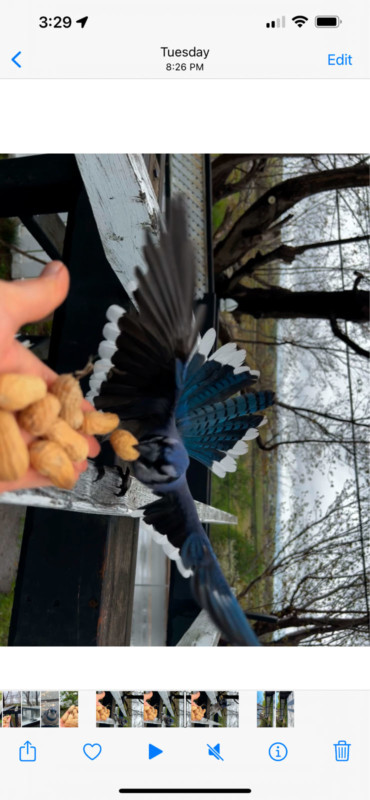
A Live Photo can also be converted into a video. It should be noted that this won’t result in a high-quality video, however, it might be easier to share in this form than as a Live Photo. To do so, open the Live Photo to be converted and tap the Share Sheet button in the bottom-left. For best quality, tapping Options at the top of the screen and enabling All Photos Data, saves in a slightly higher resolution.
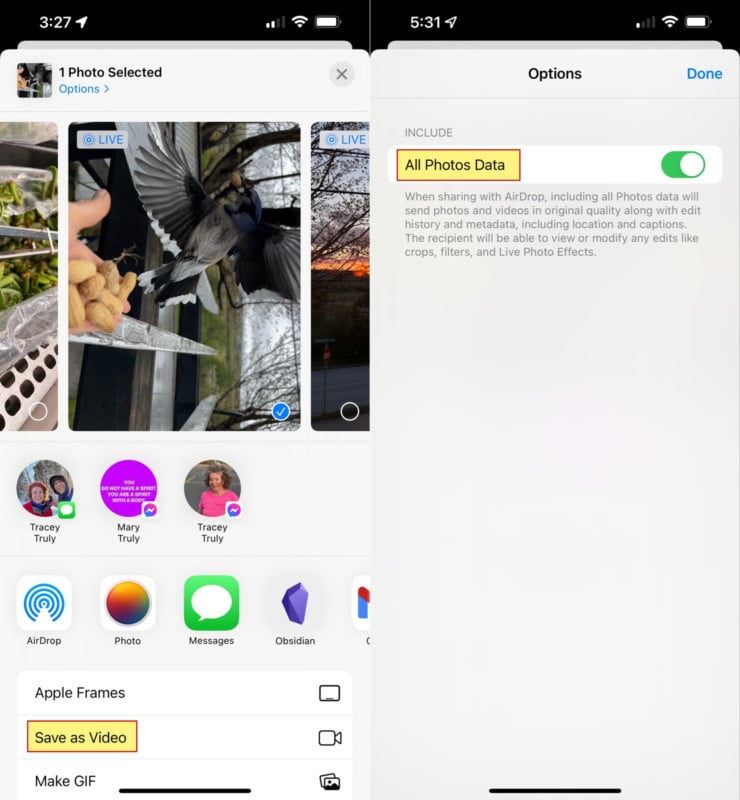
After closing the Options window, selecting Save As Video completes the process.
Conclusion
Apple’s Live Photo feature is a nice addition to the iPhone’s photography capabilities and apps provide a way to take this format even further, allowing videos to be converted into Live Photos for easy sharing with other Apple device owners or for use as animated Lock Screen wallpaper. Live Photos can also reverse time by one and a half seconds, turning missed opportunities into great catches. While some manipulations result in lower quality, the content is king and that tradeoff is a good one in many cases.