A Complete Guide to Creating and Using Texture Layers in Photography
Texture layers are photos that are normally blended with other images as part of a composite rather than being used on their own. They can be color, monochrome, detailed, or blurred. The idea is simply to add an extra level of interest to a picture. In this guide, we will look at various ways of collecting and using texture layers for your photography projects.
Table of Contents
Why Might You Want Texture Layers?
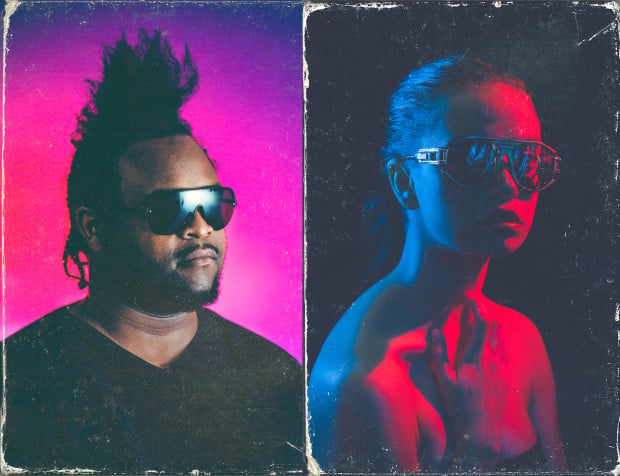
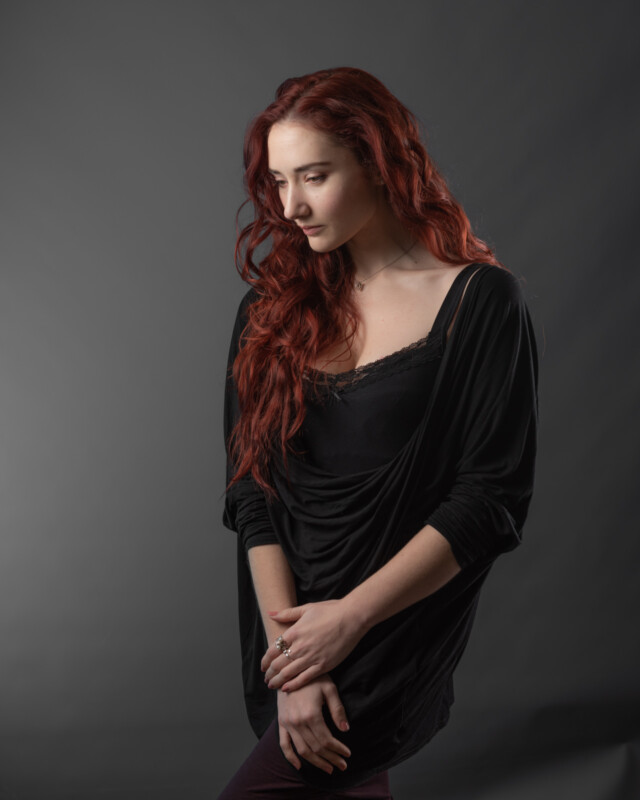
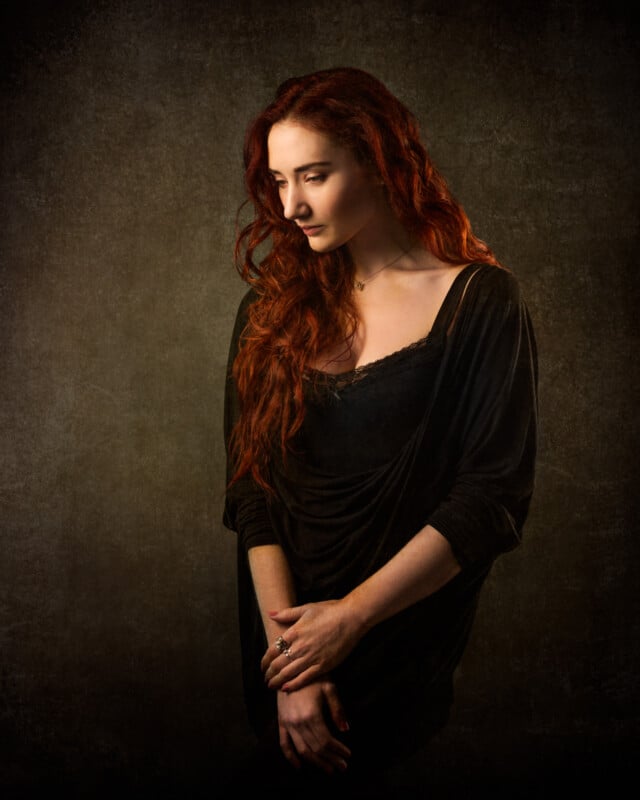
Just as a gradient going from dark to light is more interesting than a flat, even block of color, textures can add something extra to the image compared to a plain background. They can be used to turn a boring background into something with character. For example, we can transform a flat grey vinyl backdrop into something totally different by adding a couple of textures, as in this portrait of Bernadette below.
Portrait photographers in particular tend to buy a range of backdrops for this very reason. It makes life easier if you have something interesting to photograph your subjects against. Uniform colors, even with a bit of clever lighting can still become dull at times. So, not surprisingly, marbled and antique canvas effect backdrops are very popular. They tend to be in more exciting patterns than rolls of colored paper. You can simply swap them around and get a different feel for your portraits or fashion shoots. However, the downside is that this can quickly get expensive, you can need a lot of storage and you don’t want your whole portfolio on one single backdrop.
Texture Layers Can Save Cash
Using texture layers can enable you to get a wider variety of possible backgrounds for a lot less money. Also, as you are storing data rather than physical props, it suits a small studio very well too. With a little bit of effort, we can easily open up a range of creative possibilities for little or no budget. Yes, you need to know some editing techniques to add the textures in Photoshop. But it is well worth it for the results you can get. You can even get more value out of your existing backdrops by combining them with new textures to give a different look.
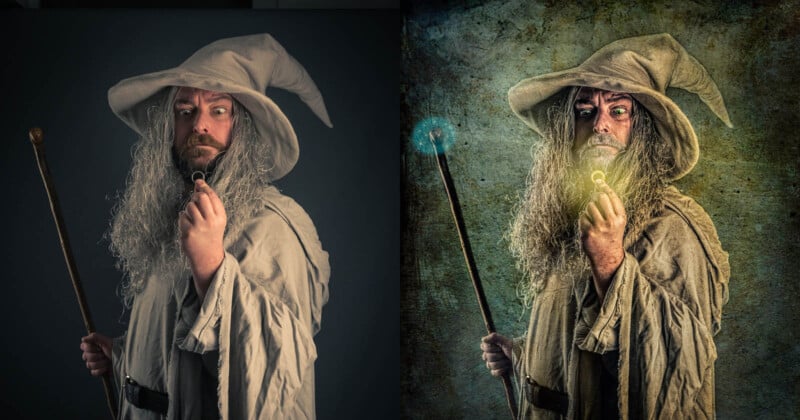
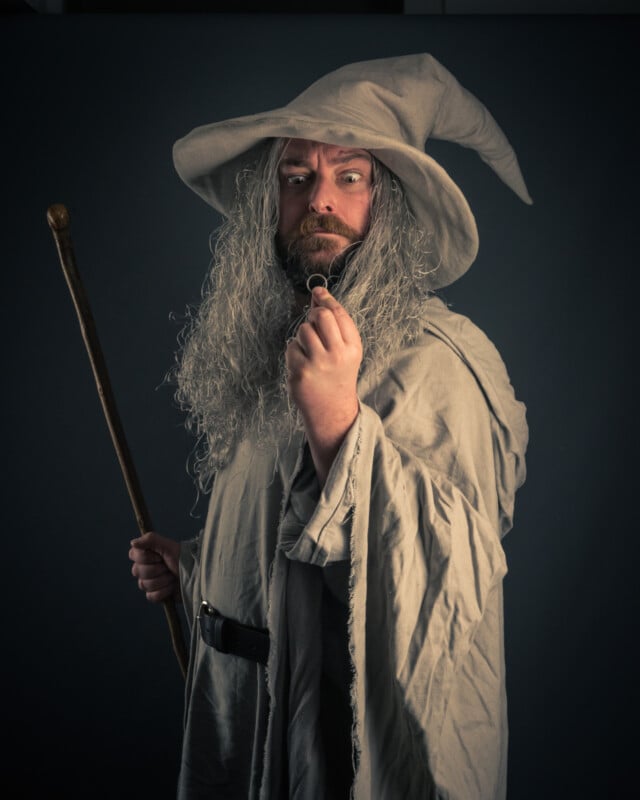
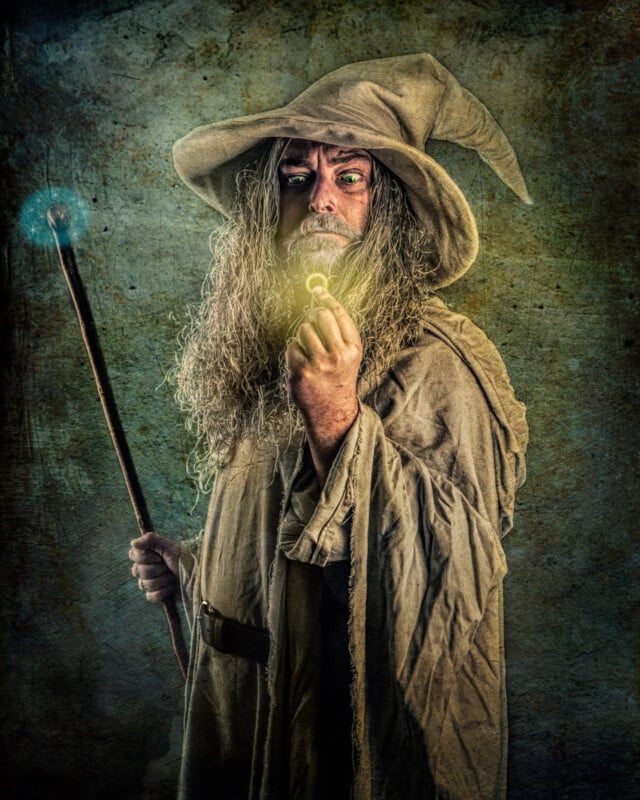
We can also use textures over the top of our subjects – for example, to give clothing an aged look as in the wizard image here (below). Once you start experimenting with them, you’ll soon realize the value of texture layers and the fun you can have with them.
How to Use Texture Layers
There is no single set way to introduce texture layers; it all depends on the effect you want to create. As a rule, however, you don’t want to obliterate the rest of the image or cover it all up! So, you will need to control the appearance of your textures using a combination of opacity and an appropriate blend mode. Layer opacity is set at 100% by default, but that of course means that you can’t see anything from the layers below. Lowering the opacity enables you to soften the impact of the texture and reveal more of the image underneath. Together with masking, this can help you to choose the extent to which the image is affected. However, we gain even greater flexibility if we add blend modes into the mix.
Blend Modes for Better Control
Layer blend modes are a great way to explore different effects very quickly. By scrolling through the various blend modes, you can drastically alter the impact of your texture layer. The ones that I mainly use are soft light, hard light, multiply, darken, lighten, and screen. The soft light and hard light modes basically use the texture as a contrast control with the dark parts darkening the image and the light parts lightening the image. Multiply and darken are two slightly different ways to darken parts of your image. They essentially let you ignore the lighter areas of your texture. Lighten and screen work the other way around – they focus on the bright parts of your texture, ignoring the dark parts.
You could also use the “blend if” sliders to manually mask out the brighter/darker areas of your texture, or a mixture of opacity and manual masking (or luminosity masking) to keep it from affecting the entire picture.
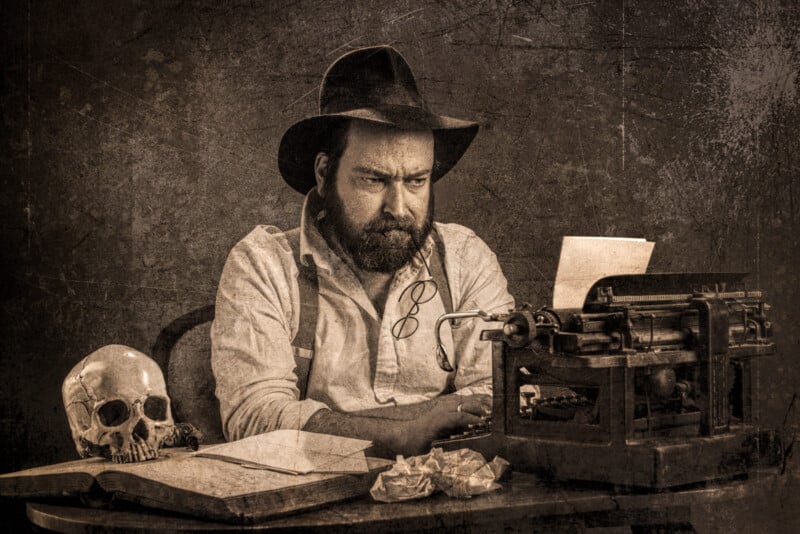
The sepia image of the man at the typewriter shows how you can use some of these blending techniques to add not only a backdrop but also suggest scratching on an old film or print. Textures can be used subtly or very obviously, depending on the desired effect.
Desaturation and Blur
Sometimes you might want some of the color from your texture layer to bleed through. This can be a useful way of toning an image. However, a lot of the time you want the pattern or the contrast effects without color changes. In that case, you simply desaturate your texture layer. If you are certain that you want it purely monochrome, then you can use the keyboard shortcut Ctrl+Shift+U (PC) or Cmd+Shift+U (Mac) to remove all color from the selected layer in Photoshop. Alternatively, if you want to retain the option of bringing back some of the color, you can clip a black-and-white adjustment layer to your texture to enable you to adjust it at any point.
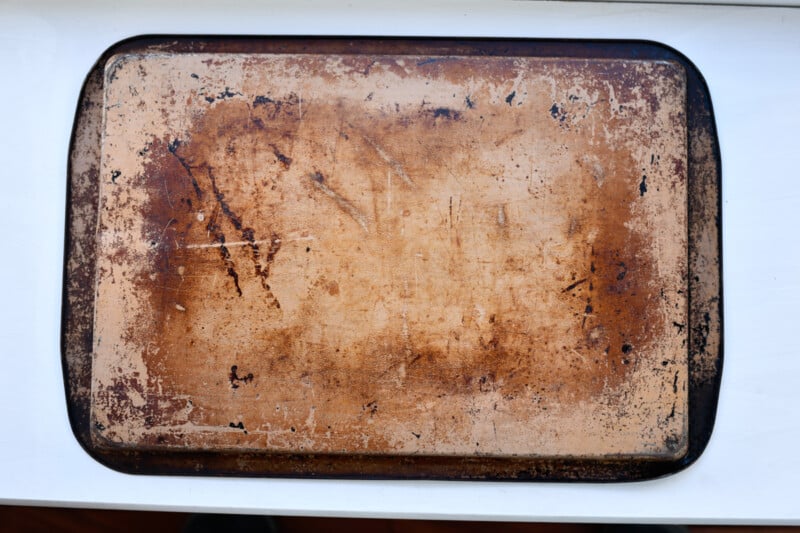
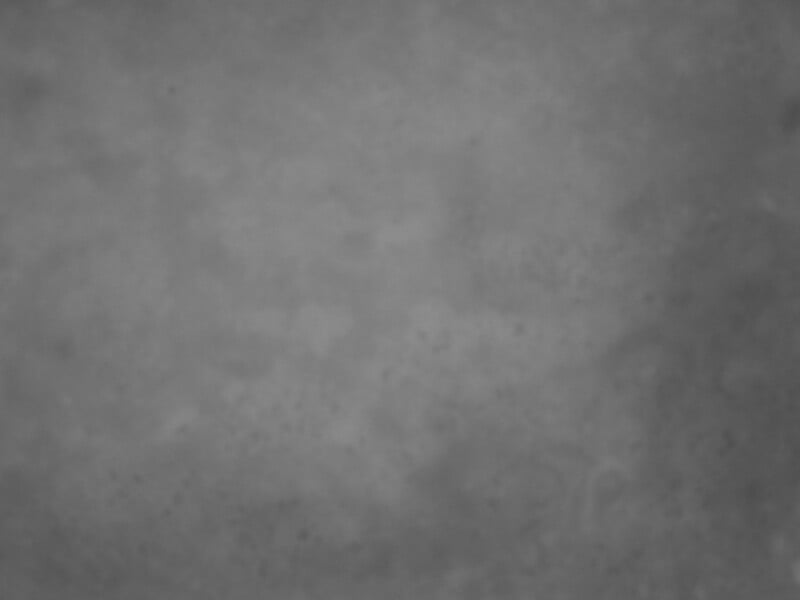
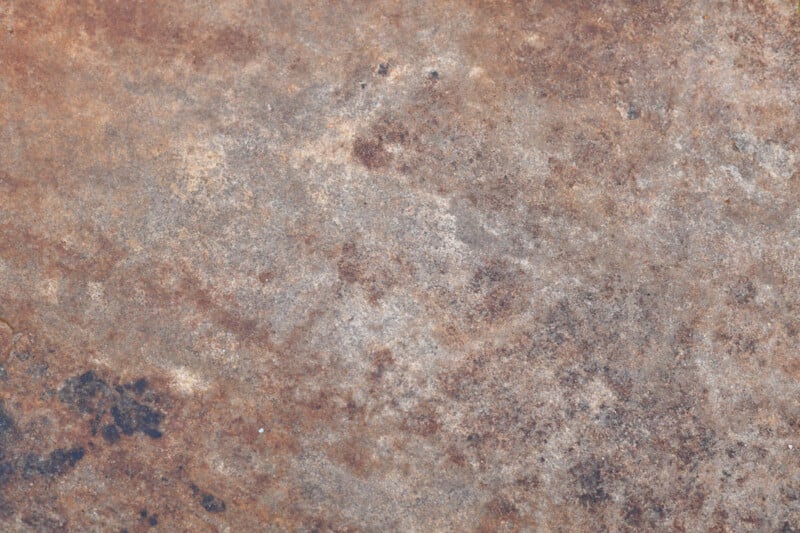
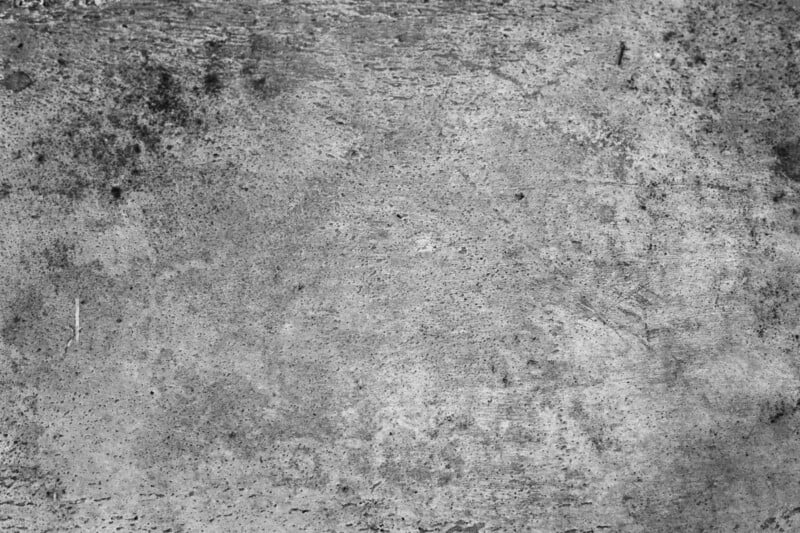
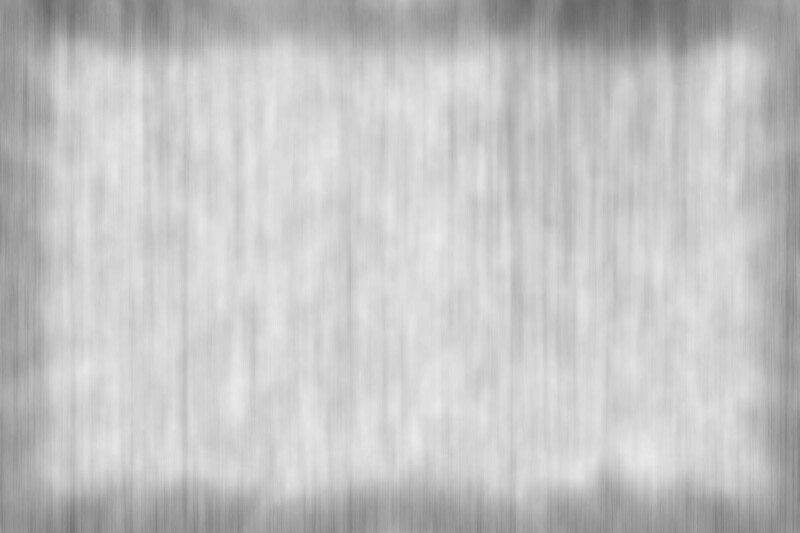
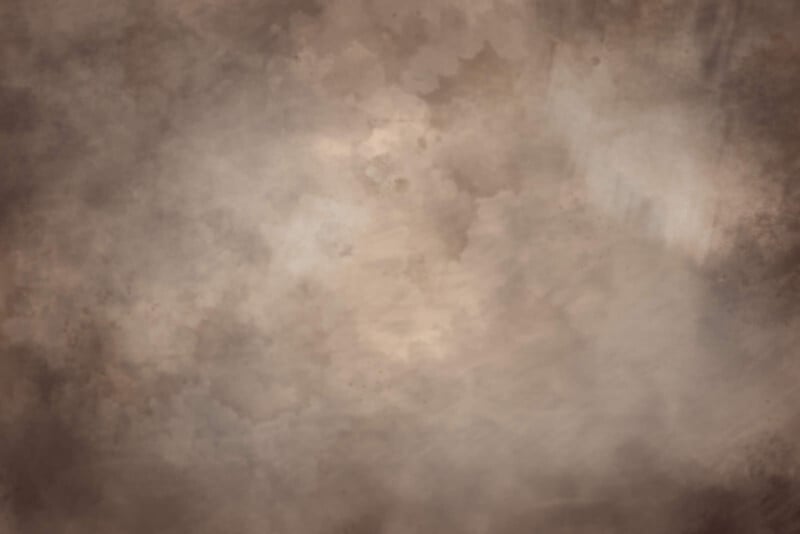
In the monochrome texture above, I have taken the original image of the back of an old baking tray, desaturated it, added Gaussian blur, and then blended it with a desaturated, blurred image of a floor tile. Stacking multiple textures is a great way to increase variety and find a new look. Adding blur to your textures also enables you to use them in different ways. You could use lens blur to suggest a slightly shallow depth of field for a backdrop, for example. Or you may just want the contrast without too much sharp detail, in which case something like a Gaussian blur might work well to soften the edges. Whichever blur method you choose, experiment with different settings for a whole new range of possibilities.
Photograph Your Own Textures
Although you can purchase packs of digital files to get you started, I would highly recommend building your own library of textures that you have created yourself. For one thing, this means that you will have no problem using them in competitions where purchased stock items would be banned! Also, it challenges you to look more closely at the world around you to try and find things that could be useful. Add in the fact that they are free and help you practice your photography skills, and it seems a bit of a no-brainer.
So, how can you find your own textures to photograph? Essentially, what you are normally looking for is what antique dealers and salvage dealers would call a “patina”. This is a slightly rough, worn look that you find especially on old items where the surfaces are no longer even and smooth. It could be rust, mold, rot, chipped paint, dirt, or all kinds of things. We want surfaces that have some interest to them, not plain or even colored. There are all sorts of places where you can find patina or textures. Here we will cover a few to get you started.
Metal and Rust Textures
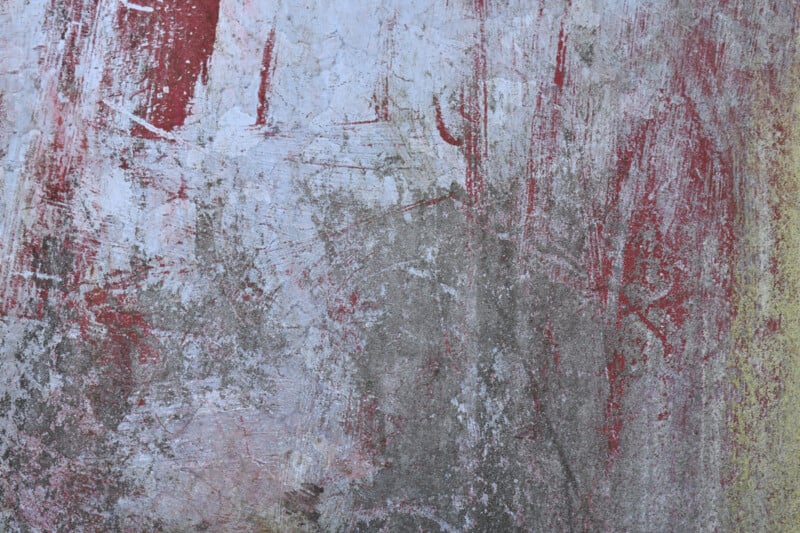
Old metal surfaces can work well as textures. Look for metal that is rusty and scratched or has damaged paint. For example, below you can see an old metal tank that is being used to collect rainwater. It has uneven wear on the surfaces, offering potential contrast between brighter and darker areas.
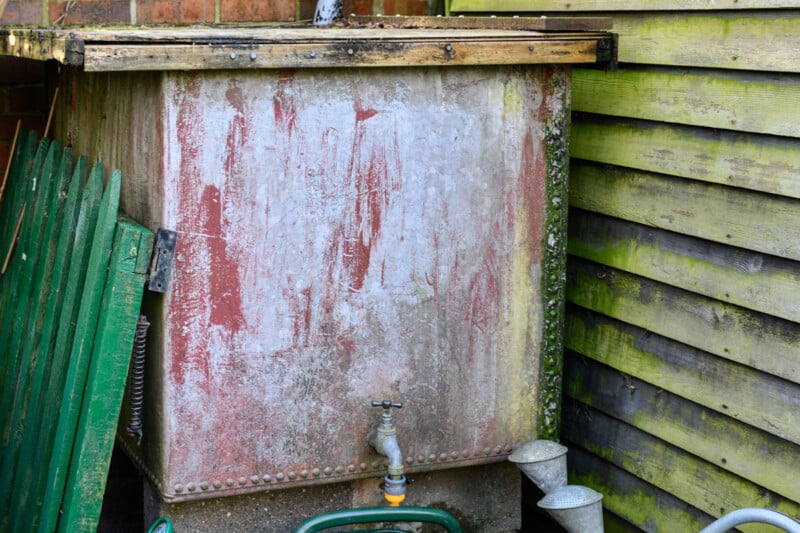
Try to get as square on as possible to the face you are photographing. That way your texture is more useable. I like to have the surface evenly lit so that I can keep flexibility in how I use the texture rather than being tied to a particular direction of light. You may need to use a tripod for this kind of object as it can often be stuck in the shadows somewhere.
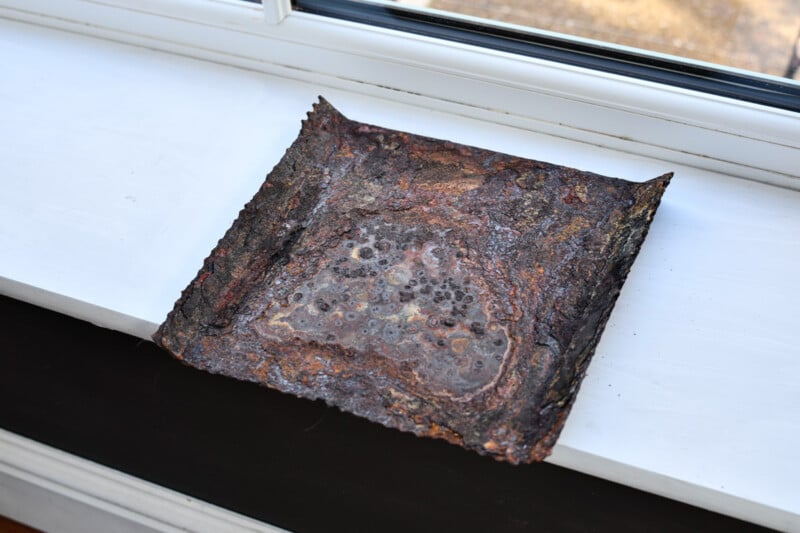
We recently had our boiler repaired and the plumber was about to through away this rusted old baffle (above). Scrap metal like this can sometimes make an interesting surface to photograph still life on as well as being a potential texture layer. Sometimes you can get worn-out old things for free or at next to no cost as others don’t see the same potential in them that you might. Keep an eye out for scrap materials. For a soft, even light I photograph this kind of thing on the windowsill on a cloudy day. You could also do it in the studio with a couple of soft boxes, for example.
Textures from Tiles and Stones
Another great source of textures is tiles. These can be floor tiles or wall tiles and indoor or outdoor ones. Old stone slabs tend to have a natural patina to them, and their uneven surface and coloring can give you some unusual options.
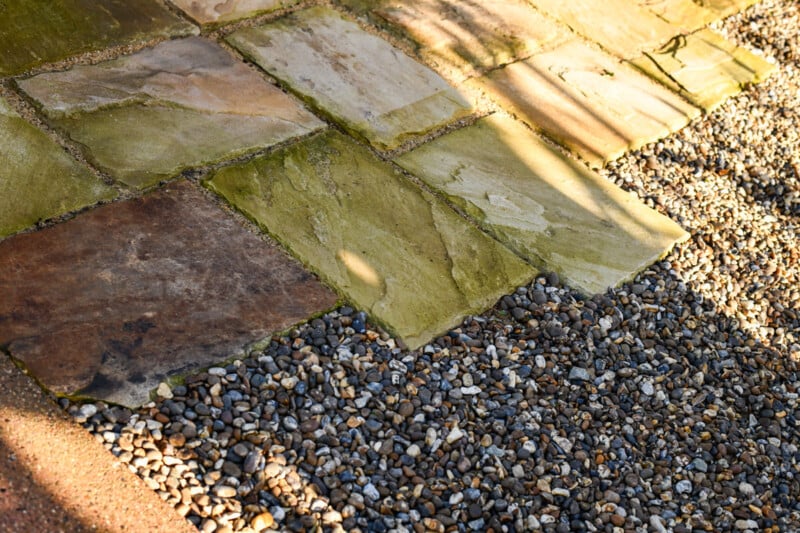
Some modern, relatively cheap tiles can also make good subjects as they might have faked patina or printed patterns on them that can be effective. If you can see that it is a printed pattern then consider using blur so that the details aren’t as obvious.
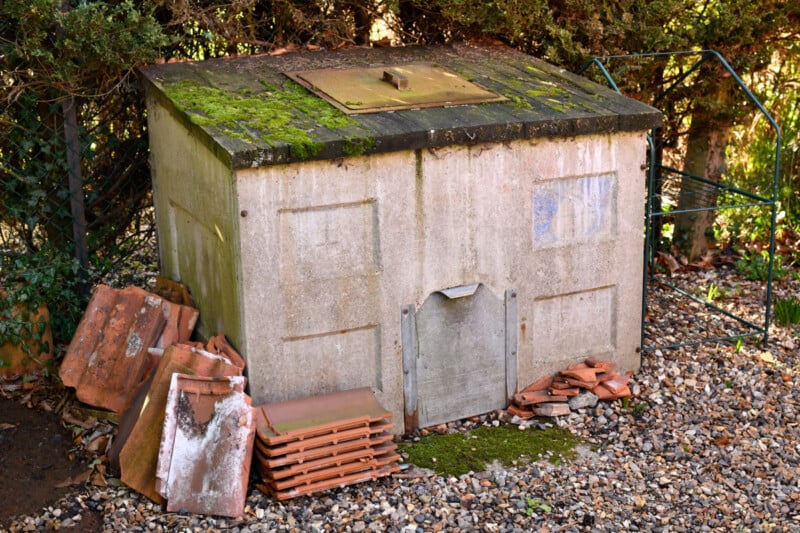
Old structures and even modern ones made to look old can have characterful surfaces that can make useful textures. Below you can see some shots taken from a mock stone bench and an old coal bunker.
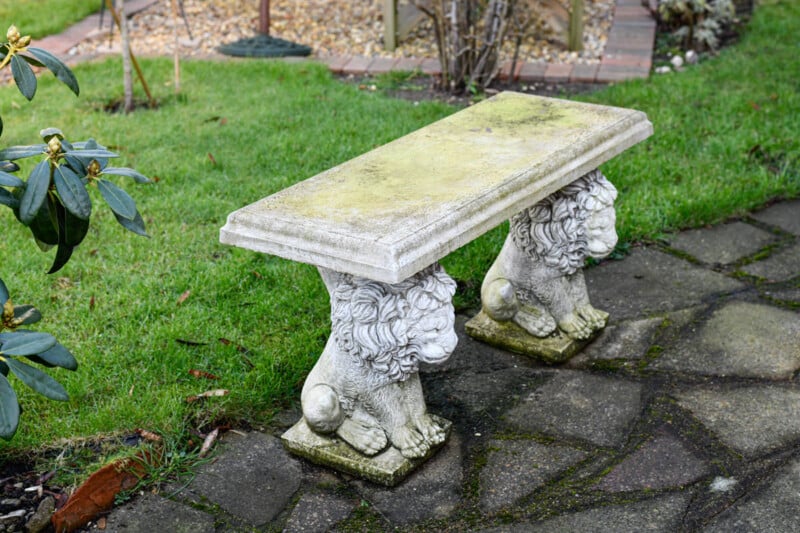
Duller, cloudy days can be good for hunting textures as you don’t have to worry about uneven light. If you are trying to do this on a bright, sunny day then it might be an idea to take a diffuser with you to soften the light and reduce the contrast to more manageable levels.

Finding these kinds of textures can be fun. Think about the sort of places that might have objects with wear and tear, giving them character. You might be able to use large areas such as a whole wall as well as small details photographed close-up. I generally tend to use a 50mm or 105mm macro lens for this kind of thing. But if you find that you have a go-to focal length for most of your shots then it may be a good idea to use that same focal length when capturing textures. Composites tend to look more believable if you can keep the focal length the same for each item shot.
Paper Textures
Paper can be a rich source of patterns, colors, and textures. You can buy a huge range of papers that you can photograph to make digital textures. Scrapbooking and craft suppliers often stock mixed starter packs, although not everything there will necessarily be useful to you. You may also be able to print out digital textures and photograph them off a piece of textured paper for an extra layer of interest. However, there is a danger that you could fall foul of copyright by using someone else’s designs as textures, especially if you aren’t altering them. So, I would recommend making your own if you can. Definitely don’t start selling anything that you don’t have a license to use for profit.
Creating Your Own Textured Paper
If you are able to make your own papers then this is the safest way to proceed as you don’t risk any copyright issues or any problems using them for competitions and qualifications. You can make more colorful and random-looking paper by blending together a mix of all sorts of used paper. Handmade recycled paper tends to be more naturally textured anyway, rather than smooth and pure white. There are tutorials available online if you fancy going down that route. However, for me, that would be just a bit too involved. So, here’s a much simpler idea using just tea, a baking tray, and an oven.
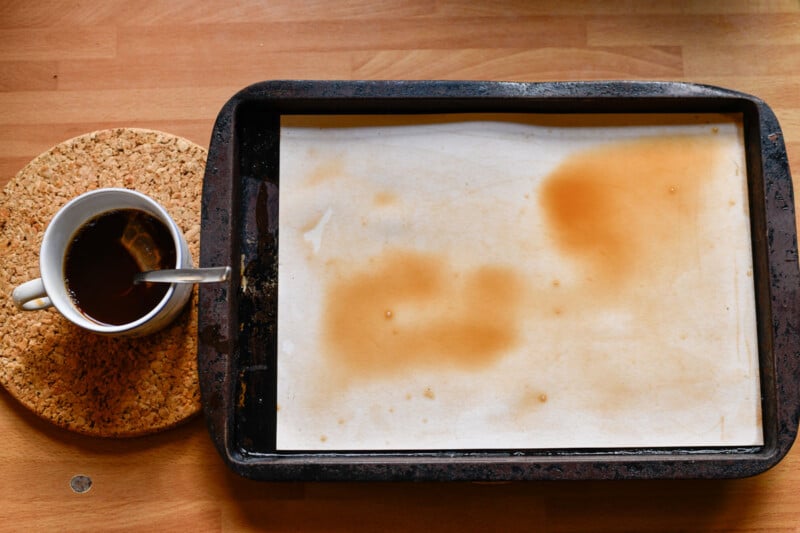
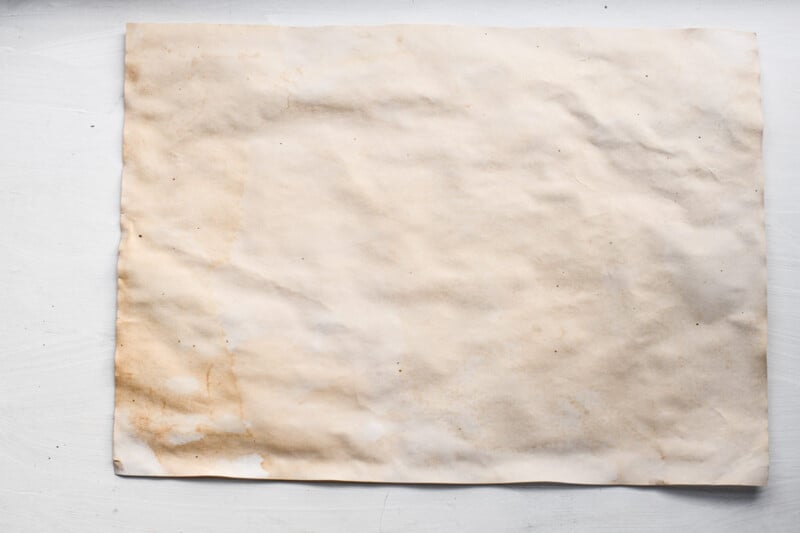
I put a sheet of paper in an old baking tray and then rubbed some strong black tea on it. This gives a bit of an aged look. Drying it in an oven (at a low temperature) helps to fix the stain and also adds a bit of wrinkling. Lightweight paper (I tried 80 gsm copy paper) is ok, but it can buckle quite a lot. A slightly textured card (I used 300 gsm) is a bit more robust and can take more tea and more heating in the oven. I prefer the heavier paper, but you can get usable effects with both.
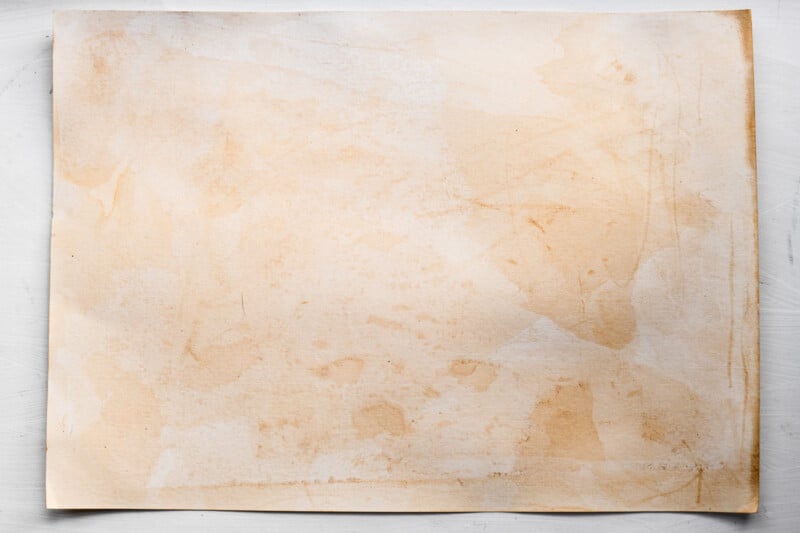
Charcoal dust or ashes from a fire can be used to add darker areas as well. In the texture below I’ve added some to a tea-stained paper. It could be useful if you want a much darker border that could act as a vignette for your image. Just remember to make sure any ash is cold before you use it.

New, shiny papers don’t tend to work quite as well. Ideally, use a slightly heavier-weight paper (thin card) that is matt. A slight texture on the paper itself is more useful than perfectly smooth. Glossy paper is difficult to age, and it tends to repel rather than absorb stains like tea or coffee.
Digitally Created Textures
If, like me, you are not used to doing lots of crafts or making things with odds and ends then you might find digital tools easier to get results with. In this section, we are going to look at a few basic methods you can use in Photoshop to create your own digital texture layers.
Using Rendering Functions in Photoshop
There is a set of tools under the “Filter” menu in Photoshop that comes under the section labeled “Render”. The ones that I have found to be useful are rendering fibers, clouds, and frames (although the frames are less easy to get good results from). You just need a plain color layer to apply the filter to. Don’t expect an amazing result straight away with one filter on one layer. Although the fiber filter can be tweaked to give a wide range of appearances, the cloud ones can’t. I find that it works best if you combine a few different layers using blend modes and differing degrees of blur on the various rendered textures. However, I think the results can be greatly improved by using brushes.
Using Custom Brushes
Custom brushes are a fantastic way to add unusual patterns and textures. You can find all sorts of grunge and art brushes available for free or as paid packs online. Or you can create your own, of course. Try creating marks on paper with charcoal, paintbrushes, or ink, for example, and photograph them. You can then make them monochrome and trim them to give you a shape to save as a custom brush.
Using several brushes helps to avoid repeating patterns and keeps things looking much more natural. You can also enable brush dynamics to avoid all strokes being the same size, rotation, or opacity, for example. Although it is easier working in monochrome, you can vary colors within a restricted palette to create something a bit more like one of the canvas-style photographic backdrops you can buy.
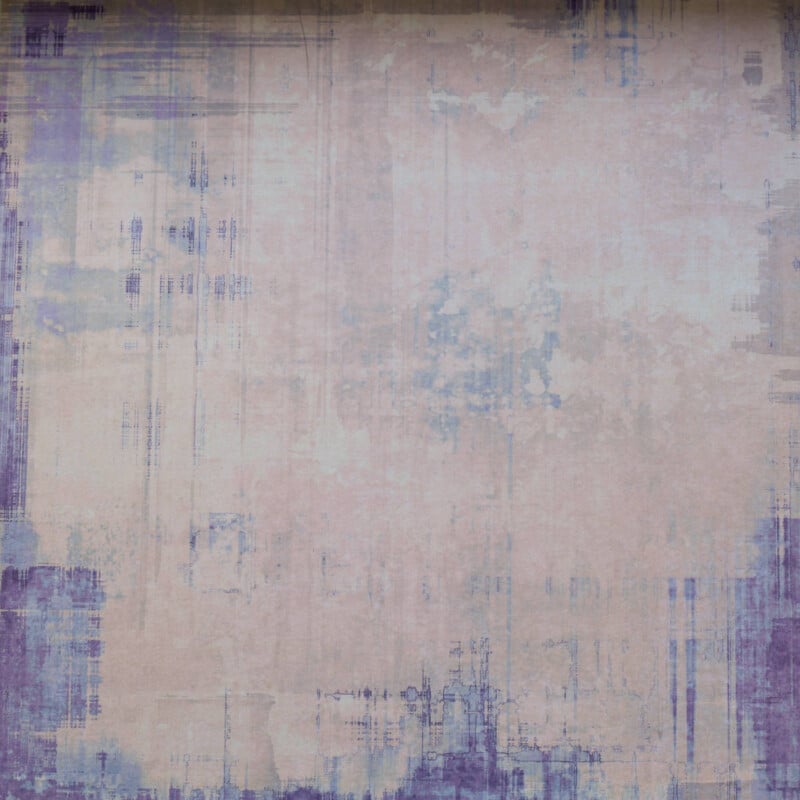
This texture (above) uses a photo filter to add a warm hue and a few layers of custom brushes at different opacities on Multiply mode. I’ve also grouped them all and masked some areas out slightly using a custom brush on the mask, which gives you the whiter areas.
Ready-Made Texture Layers
If all of this seems like too much work, then you might prefer to get hold of some ready-made digital textures instead. There are plenty to choose from, whether you want free ones or are willing to pay. You will need to consider whether the resolution is sufficient for your project and whether any licensing restrictions will be a problem. If you like to enter photography competitions, then you will most likely find that you cannot use any free or purchased texture files. So, don’t risk getting yourself disqualified! Make sure that you keep your homemade textures and the ones you acquire from others in separate folders, so you don’t accidentally confuse the two.
Image credits: All photographs © Joe Lenton