The Ultimate Beginner’s Guide to Bird Photography
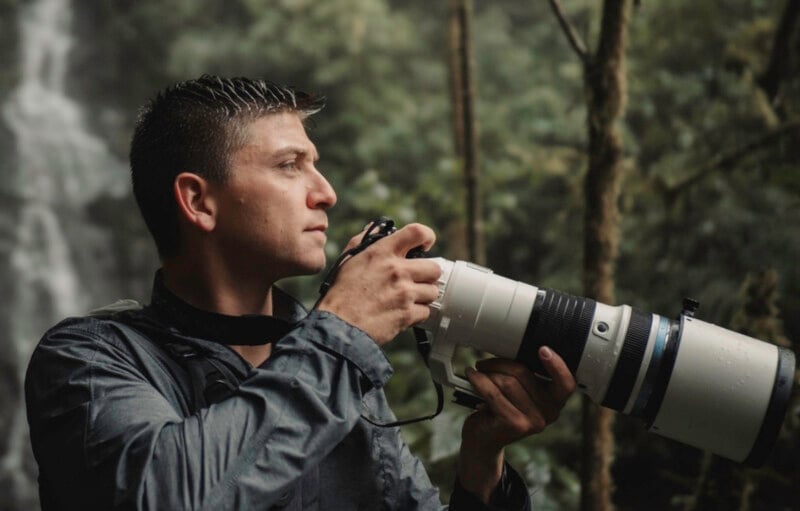
While birds inhabit every environment from remote wilderness to urban parking lots, capturing their beauty and behavior demands technical precision, patience, and skills that can challenge even experienced photographers. OM SYSTEM Ambassador Ben Knoot, who has spent over two decades perfecting his approach from backyard feeders to international expeditions, shares with PetaPixel his essential field-tested roadmap for beginners ready to transform fleeting encounters into portfolio-worthy images.
Full disclosure: This article was brought to you by OM SYSTEM
Ben Knoot’s journey began at age eight and evolved into a 21-year pursuit that has taken OM SYSTEM Ambassador from his Arizona home to remote corners of the world. Through his company, Experience Nature Tours and written guides, he now educates fellow photographers by documenting the stories birds tell through their behavior.
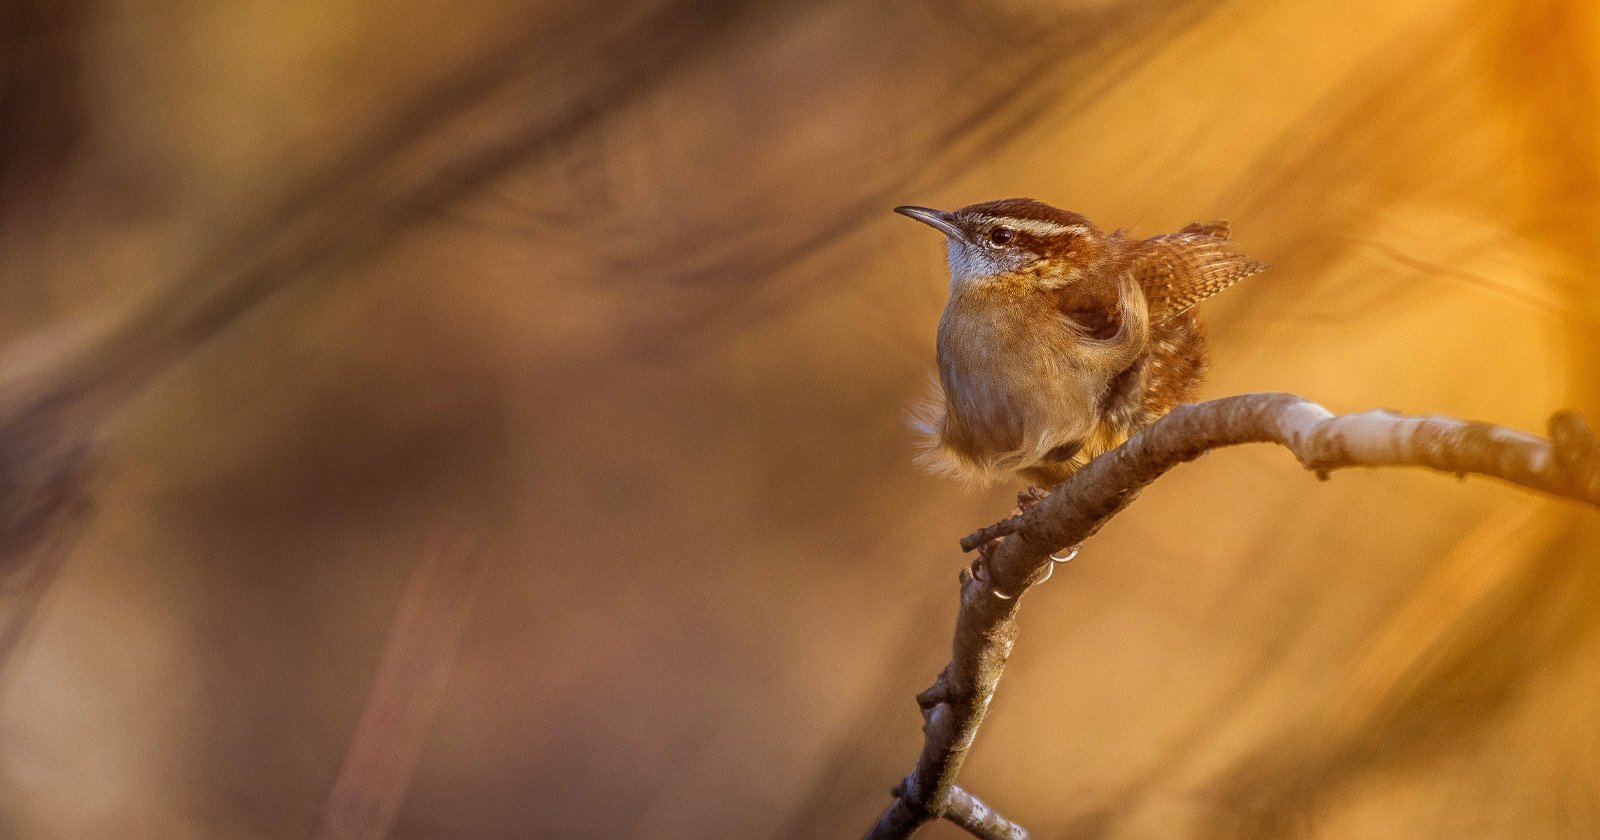
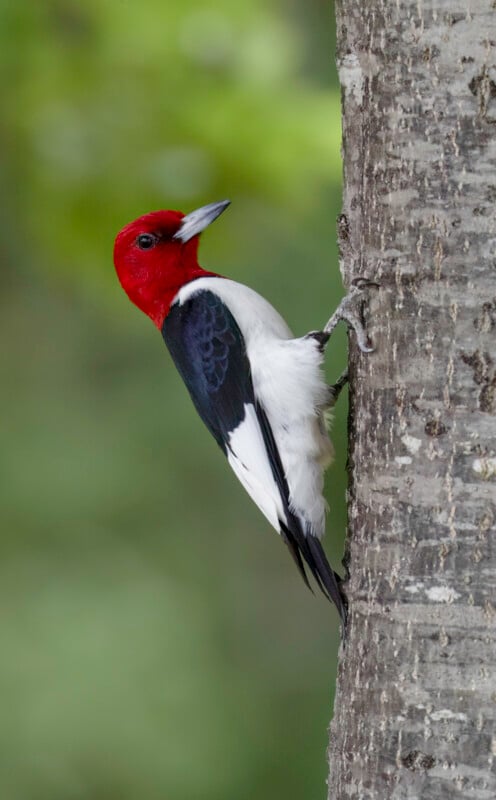
“Bird photography has this beautiful contradiction,” Knoot explains. “With all the places I have been, you would think all of my favorite photos were from a tropical rainforest or other incredible destinations. However, one of my favorite Red-headed Woodpecker photos came from a Cracker Barrel parking lot. I happened to get lucky seeing this bird in this location, but I still needed to utilize years of experience to capture the photo I was looking for.”
“Once you understand bird behavior and trust your camera setup, you stop fighting the equipment and start seeing the stories these creatures tell,” Knoot emphasizes.
At a Glance
Quick Start: Your First Week in Bird Photography
Day 1 Mission: Build Your Basecamp
Your first and most important step is creating a low-pressure practice space.
Read our Building a Backyard Setup section and get started today.This is the foundation for everything else.
This Week’s Mission: Master 3 Settings
Don’t worry about all the dials yet. Focus only on mastering these three core settings on your camera:
- Aperture: Set it to its widest opening (the lowest f-number) to blur your background.
- Shutter Speed: Start at a minimum of 1/1000s to freeze motion.
- Autofocus: Set it to Continuous Autofocus (C-AF) to track moving birds.
Essential Gear (No More, No Less)
Ignore the deep dive on gear for now. All you truly need to start is:
- A mirrorless camera (preferred, but a DSLR works as well)
- A lens with at least a 400mm equivalent reach (Note: We explain exactly what “equivalent reach” means in the Gear for Beginners section below)
- An extra battery
The Learning Path
- First, master taking photos of still subjects using our
Techniques for Static Birds. - Only after you feel confident should you move on to the
Techniques for Birds in Flight section.
Mindset and Locations
Knoot recommends mastering these mental foundations first:
- Patience is everything: Birds operate on their schedule, not yours.
- Start in your backyard: Familiar territory builds confidence without pressure.
- Observe first, photograph second: Watch behavior patterns before shooting.
The Foundation: Patience and Observation
The most critical skill in bird photography isn’t technical; it’s mental. Long-term success is determined more by mindset than any equipment choice. “Patience is absolutely key,” Knoot explains. “When you’re willing to sit and watch one subject, you’re rewarded with behaviors that others miss, like courtship displays, feeding, and unique interactions. That deeper connection builds the observational skills you need and leads to better images. The same patience with yourself while learning separates those who stick with bird photography from those who give up.”
Strategic Location Progression
Knoot advocates a systematic approach to locations that builds confidence and experience over time, avoiding the frustration that causes many beginners to quit.
Knoot’s 4-Step Location Progression
Your Backyard (Ideal Starting Point)
- Set up feeders for predictable subjects.
- No travel required, unlimited practice opportunities.
- Birds return regularly, giving multiple chances to improve.
- Zero pressure environment for learning camera basics.
Local Parks (Building Approach Skills)
- Birds are more skittish than backyard visitors.
- Learn basic approach techniques and reading stress signals.
- Look for areas with trees and water sources.
- Practice composition with varied backgrounds.
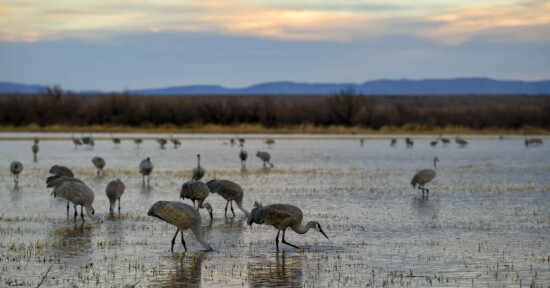
State Parks & Urban Wetlands (Expanding Species Diversity)
- More diverse species than local parks.
- Ponds and streams provide reflection opportunities.
- Longer shooting sessions build endurance.
- Introduction to seasonal migration patterns.
Destination Photography (Advanced Application)
- Apply skills from the previous three steps.
- Travel-specific challenges like unfamiliar species and climate.
- Advanced planning and research requirements.
- Portfolio-building opportunities.
Why This Progression Works
Each location tier teaches specific skills while maintaining manageable challenges:
- Comfort Zone Foundation: Backyard success builds confidence before facing field variables.
- Gradual Skill Building: Each level introduces new challenges without overwhelming beginners.
- Cumulative Learning: Skills from each tier compound for advanced location success.
- Sustainable Practice: Regular access ensures consistent skill development.
“The key is starting where you are,” Knoot concludes. “Every expert began by learning to photograph the birds in their own neighborhood. That foundation of observation and patience translates directly to success in the most exotic locations.”
Building a Backyard Setup
“A meticulously designed backyard setup is the ideal starting point for beginners and a perfect testing ground for experts,” Knoot stresses. “It grants you complete creative control to orchestrate the perch, background, and light. This creates the ideal laboratory for developing both technical mastery and artistic vision.”
Quick Start: Backyard Essentials
- Control every element: Choose branch positions, backgrounds, and lighting conditions.
- Match species naturally: Position birds on appropriate perches (Cactus Wren on cactus).
- Strategic lighting: Position feeders for optimal morning or afternoon light.
- Test safely: Perfect new gear and techniques without field pressure.
The Controlled Learning Environment
“When you control the stage, you can focus entirely on perfecting your camera technique rather than battling environmental uncertainties,” Knoot emphasizes. “This systematic approach creates a foundation that transforms how you approach every field challenge.”
Core Learning Benefits:
- Predictable subjects: Same birds return regularly for repeated practice.
- Controlled variables: Manage weather, location, and subject uncertainty.
- Pressure-free experimentation: No travel costs or time constraints.
- Progressive skill building: Master fundamentals before facing field complexities.
Creating Natural-Looking Setups
“I maintain absolute authenticity even while controlling every element,” Knoot insists. “Understanding your local birds and their natural behaviors is paramount. I would never position a Cactus Wren on a flowering branch; they belong on cactus. The goal is creating opportunities for natural behavior in predictable locations.”
Setup Strategy:
- Species-appropriate perches: Match materials to natural habitat preferences.
- Multiple distances: Create environmental shots and intimate detail opportunities.
- Lighting optimization: “Position feeders to work harmoniously with morning or afternoon light, and establish perches at different distances.”
- Reliability advantage: “If today’s light isn’t perfect, those same birds will return tomorrow, giving you another chance.”
Advanced Technique Development
“My backyard becomes my laboratory for experimentation,” Knoot emphasizes. “Different apertures, shutter speeds, and lighting angles that are fleeting in the wild. Since birds return regularly, I can attempt the same shot with different technical approaches until I understand how each setting affects the final image.”
Measurable Success Improvement
“My backyard experimentation revolutionized my field success rate,” Knoot explains. “Before practicing in my backyard, my keeper rate was low. After perfecting techniques on backyard visitors, it jumped dramatically. When you truly understand your camera, you stop second-guessing and start capturing the shots you envision.”
Equipment Testing Laboratory
“I test every new lens, camera setting, and accessory in my backyard first,” Knoot stresses. “There’s no pressure or uncertainty about finding subjects, so I can focus entirely on understanding my gear and discovering the creative possibilities it offers.”
Testing Advantages:
- Risk-free experimentation: Test gear without expensive field consequences.
- Systematic comparison: Compare lenses and techniques methodically.
- Technical mastery: Build equipment familiarity through repeated practice.
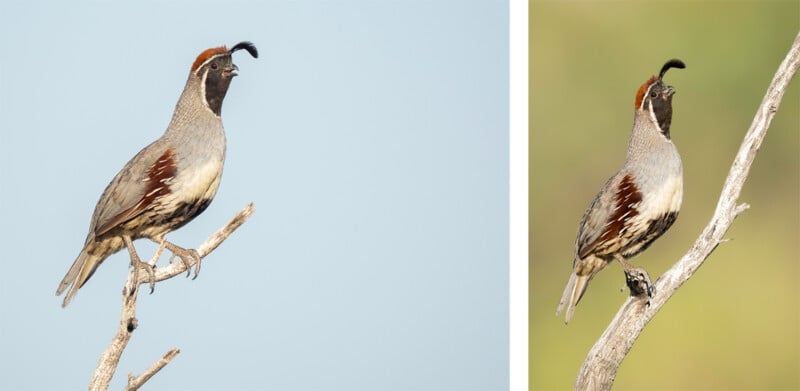
Seasonal Documentation Projects
“One of my most rewarding projects is documenting the same species through different seasons right in my backyard,” Knoot explains. “Male birds undergo incredible transformations during breeding season, and a controlled environment allows you to capture those changes systematically. You develop a deep appreciation for their life cycles that transforms you into a more patient, skilled photographer.”
Project Benefits:
- Systematic documentation: Track plumage changes through breeding cycles.
- Deep behavioral knowledge: Understand individual species patterns intimately.
- Enhanced patience: Long-term projects build an essential photography mindset.
- Skills transfer: Backyard knowledge directly improves field success.
Gear for Beginners
“I’ve seen too many beginners get discouraged by heavy, cumbersome gear,” Knoot explains. “The best camera is the one you’ll actually carry consistently. Building a kit that encourages you to get out and shoot longer matters more than having the most advanced equipment.”
A Quick Note on Focal Length
Before diving into specific gear, it’s important to understand how focal length is discussed in this guide. OM SYSTEM cameras use the Micro Four Thirds (M4/3) sensor format, which has a 2x crop factor. This means the effective field of view of a lens is doubled compared to a traditional 35mm full-frame camera. For example, a 100-400mm lens on an OM SYSTEM camera provides the same powerful telephoto view as a 200-800mm lens on a full-frame body.
To keep things simple and consistent, we will use a clear convention in this guide. General recommendations for telephoto reach will refer to the 35mm equivalent. So, when we advise aiming for “400mm reach,” we are talking about that powerful, zoomed-in field of view. When we mention a specific lens by its full name, like the M.Zuiko Digital ED 100-400mm F5.0-6.3 IS II, we are using its actual, marked focal length, which is the 35mm equivalent of 200-800mm.
Quick Start: Beginner’s Gear Philosophy
Consider these three principles before buying anything:
- Choose Mirrorless: Real-time exposure preview is transformative for learning.
- Prioritize Lightweight Systems: Heavy gear leads to fatigue and missed shots.
- Aim for 400mm Reach: Sweet spot for close-up shots without extreme difficulty.
The “Big Three” of Bird Photography: Camera, Lens, and Stability
Camera: Go Mirrorless from Day One
Knoot insists that for beginners, mirrorless advantages are too significant to ignore. “Seeing your exposure and depth of field changes in real time through the viewfinder is valuable for learning,” he emphasizes. “Look for camera specific features that are useful for bird photography, such as advanced subject detection. For instance, my OM SYSTEM OM-1 Mark II has professional-level AI Detection Auto Focus for birds, Pro Capture Mode, and weather sealing in a lightweight body, which is a huge benefit for me.”
Key Mirrorless Advantages for Bird Photography:
- Real-time exposure and depth-of-field preview eliminates guesswork.
- Advanced subject detection and tracking systems.
- Silent shooting modes prevent startling subjects.
- Compact, lightweight bodies reduce fatigue.
- Advanced stabilization systems enable handheld telephoto work, especially in low light.
Lens: Prioritize Reach Without the Weight Penalty
A telephoto lens is essential, but beginners face a challenge: you need reach, but the weight of traditional lenses can be overwhelming. “My first system weighed nearly ten pounds, and after a full day, my back would hurt,” Knoot recalls. “Something light, but around a 400mm equivalent, like the M.Zuiko Digital ED 100-400mm F5.0-6.3 IS II, which offers a 200-800mm equivalent field of view, is perfect for learning. A lens that has even higher magnification makes just keeping the bird in the frame much harder. A lightweight zoom gives beginners serious telephoto power without the physical demands that cause people to quit.”
Recommended Focal Length Strategy:
- Start with 400mm equivalent: Ideal balance of reach and handling.
- Avoid extreme telephoto initially: 600mm+ makes tracking much harder.
- Consider zoom flexibility: Variable focal length adapts to different situations.
- Plan for upgrade path: Start practical, upgrade to faster glass later.
When photographers are ready for faster glass, Knoot suggests a lens similar to the M.Zuiko Digital ED 300mm F4.0 IS PRO OM, which provides a 600mm F4 equivalent with exceptional quality.
Stability: The Built-In Advantage
Modern image stabilization has fundamentally changed what’s possible for handheld bird photography. “I rarely use a tripod because the combination of in-body and lens stabilization lets me shoot handheld at 1/13th of a second, or even slower, with sharp results,” Knoot says. “The freedom that handheld shooting gives me to move quickly is invaluable.”
The OM-1 Mark II’s 7.5-stop image stabilization provides a significant safety net, allowing slower shutter speeds in low light while keeping images sharp.
Benefits of Advanced Stabilization:
- Enables handheld shooting at very slow shutter speeds.
- Reduces need for heavy tripods and support gear.
- Allows quick repositioning when birds move.
- Provides flexibility in challenging light conditions.
- Compensates for telephoto lens magnification challenges.
Professional Weather Protection
Weather sealing gives beginners confidence when conditions become challenging. “I’ve been caught in heavy downpours, and my OM SYSTEM cameras perform the same whether wet or dry,” Knoot emphasizes. “The IP53 weather sealing means I can focus on photography, not protecting my gear.” This protection extends beyond rain to the dust, humidity, and temperature extremes that often coincide with great photo opportunities.

Critical Support Gear for Extended Sessions
Knoot recommends two essential items to improve comfort and reliability during long field sessions.
Essential Accessories:
- Camera Harness System: “I’ve used a Cotton Carrier G3 harness for ten years. It makes a significant difference in comfort during long days.”
- Extra Batteries: “This is non-negotiable. There’s nothing worse than your camera dying right before the shot you’ve waited hours for.”
Additional Recommended Gear:
- High-speed memory cards
- Lens cleaning supplies
- Weather protection for extreme conditions
Budget Planning and Upgrade Path
Starter Kit Priorities:
- Mirrorless body with bird detection.
- 400mm equivalent stabilized telephoto.
- Extra batteries and high-speed cards.
- Comfortable harness or strap.
Natural Upgrade Progression:
- Phase 1: Master fundamentals with starter telephoto zoom.
- Phase 2: Add faster prime lens for improved performance.
- Phase 3: Expand focal length options based on preferred subjects.
- Phase 4: Add specialized accessories for specific techniques.
“The most important thing is getting started with gear that won’t discourage you,” Knoot concludes. “Every piece of equipment should make bird photography more enjoyable and accessible, not create barriers to getting out and practicing your craft.”
Camera Setup and Essential Techniques
“Camera familiarity isn’t just knowing which buttons do what,” Knoot emphasizes. “It’s developing muscle memory that lets me adapt instantly without taking my eyes off my subject. When a bird does something amazing, I can’t afford to hunt through menus.”
Quick Start: Essential Camera Settings
Set these baseline settings before your first shoot:
- Autofocus Mode: Continuous Autofocus (C-AF) for constant tracking.
- Subject Detection: Turn on AI Subject Detection AF if available.
- Exposure: Wide-open aperture + 1/1000s shutter speed minimum.
- Custom Controls: Program essential functions to easily accessible buttons.
Strategic Control Customization
“The great thing about my camera is the customizable buttons and dials,” Knoot explains. “While learning, no matter which camera you have, I recommend turning off buttons you’re not using. If you accidentally hit something unexpectedly, it’ll confuse you and interrupt your flow. Start simple and add complexity as you understand exactly what you need.”
Building Muscle Memory Systems
Essential Button Programming Priority:
- ISO adjustment: Fastest changing variable in bird photography.
- Focus point selection: Switch between single and all-point modes.
- Exposure compensation: Quick brightness adjustments.
- Drive mode : Toggle between single and burst shooting.
“Build a camera setup that matches your actual shooting style rather than memorizing every possible option,” Knoot advises. “The goal is developing reflexive control that doesn’t require menu diving when opportunities present themselves.”

Reliable Autofocus Configuration
Foundation Settings for Bird Tracking
Core Autofocus Configuration:
- Continuous Autofocus (C-AF): Essential for all bird photography.
- Bird Subject Detection: A must activate, if your camera supports it.
- Focus Tracking Sensitivity: Medium setting for most situations.
- Focus Point Display: Always visible for precise control.
“I almost always recommend shooting in continuous autofocus,” Knoot explains. “Even static birds move their heads constantly. If you use single autofocus and the bird turns, you’ll miss focus on the eye.”
Advanced Bird Detection Technology
“If you’re using an OM SYSTEM camera, you absolutely want to turn on AI Detection AF for birds,” Knoot advises. “The AI tracks the bird anywhere in the frame, and a smaller box even tracks the eye. It’s pretty amazing technology that gives you capabilities that were impossible just a few years ago.”
AI Detection AF for Birds Benefits:
- Automatically identifies and tracks birds across the frame.
- Prioritizes eye detection for sharp facial features.
- Works effectively against challenging backgrounds.
- Maintains tracking even when birds move unpredictably.
Strategic Focus Point Selection
Scenario-Based Focus Strategies:
Static Birds (Single Center Point)
- Keeps subject centered for composition flexibility in post-processing.
- Provides maximum control over exact focus placement.
- Prevents background elements from stealing focus.
Birds in Flight (All-Point Focus)
- Uses the entire frame for subject acquisition.
- Accommodates unpredictable flight paths.
- Combines with AI Detection AF for optimal tracking.
Dense Vegetation (Single Center Point)
- Prevents camera confusion from competing elements.
- Allows precise focus placement on visible bird parts.
- Avoids focusing on intervening branches or leaves.
“It’s nearly impossible to keep a flying bird on one small focus point,” Knoot notes. “All-point focus gives the camera the entire frame to find and track the subject, which is crucial for flight photography success.”
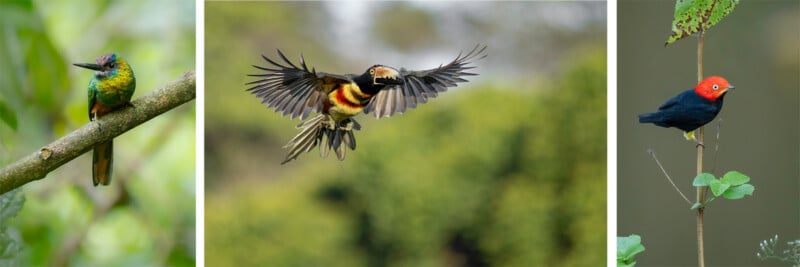
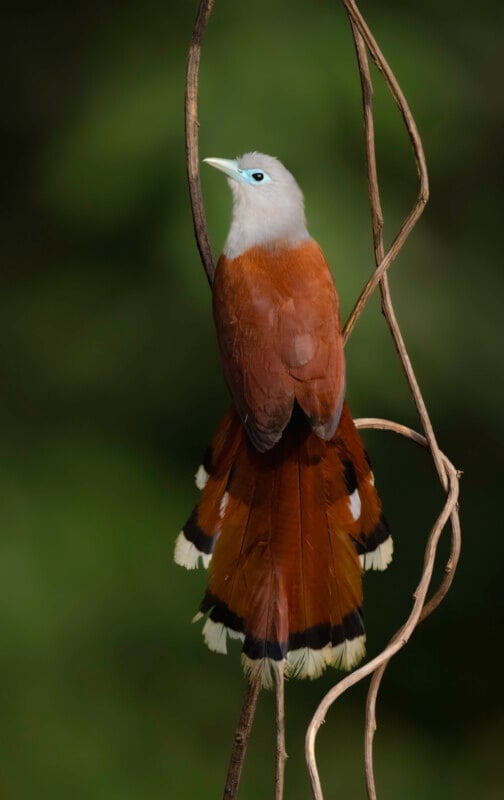
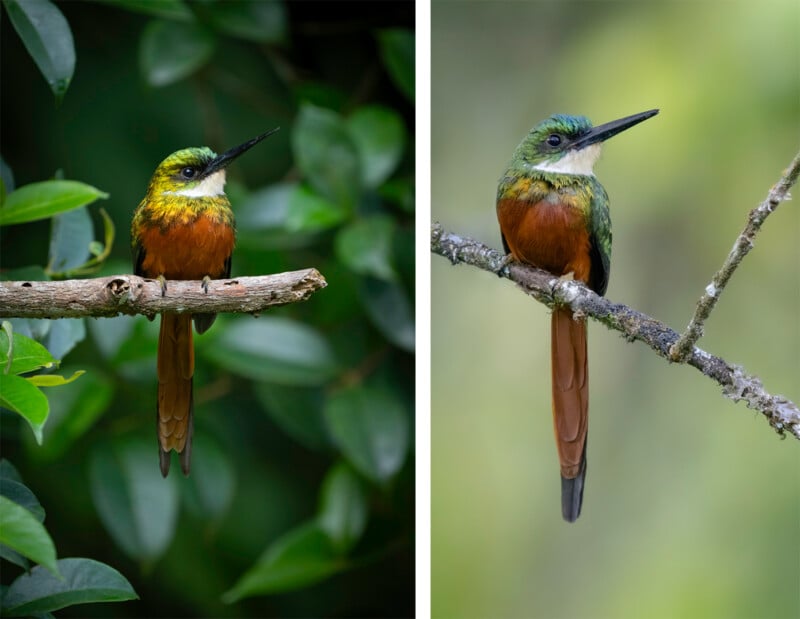
White-chinned Jacamar – Bosque Bavaria, Colombia: M.Zuiko Digital ED 150-400mm F4.5 TC 1.25x IS PRO • 400mm (800mm equivalent) • 1/100sec • f/4.5 • ISO 2000
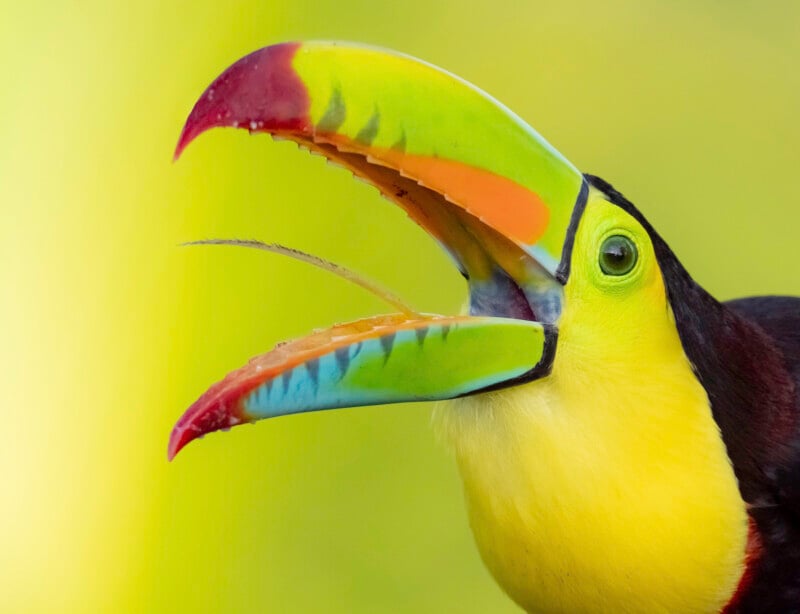
Collared Aracari – Boca Tapada, Costa Rica: M.Zuiko Digital ED 40-150mm F2.8 PRO OM • 150mm (300mm equivalent) • 1/8000sec • f/2.8 • ISO 1250
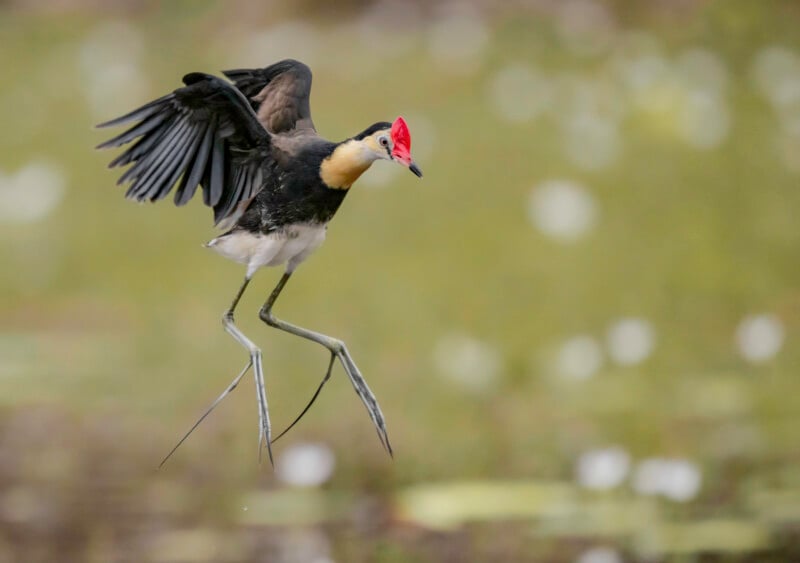
Red-capped Manakin – Boca Tapada, Costa Rica: M.Zuiko Digital ED 150-400mm F4.5 TC 1.25x IS PRO + 1.25x TC • 500mm (1000mm equivalent) • 1/320sec • f/5.6 • ISO 3200
Practical Exposure Control
The Mirrorless Exposure Advantage
“With a mirrorless camera, I’m seeing exactly what the sensor will capture,” Knoot explains. “I adjust my settings so I can see valuable information right in my viewfinder, like highlight and shadow clipping warnings and a histogram display. If I like how the image looks in my viewfinder, I take the photo. It removes the guesswork that made exposure challenging with traditional DSLRs.”
Real-Time Exposure Benefits:
- Instant feedback on exposure adjustments.
- Highlight and shadow clipping warnings.
- Live histogram display during shooting.
- Immediate depth-of-field preview.

Strategic Exposure Guidelines
“I maintain detail in both highlights and shadows by keeping overall contrast low,” Knoot explains. “If it’s bright, I underexpose slightly. If it’s dark, I overexpose slightly. This creates a flatter image that gives me more flexibility in post-processing.”
This technique ensures the initial image file retains the maximum amount of information in the scene’s brightest and darkest parts. In post-processing software like Adobe Lightroom or Capture One, this extra latitude allows a photographer to precisely control contrast and recover details in the highlights and shadows that might otherwise be permanently lost.
Dynamic Range Management:
- Bright conditions: Underexpose slightly to preserve highlight detail.
- Dark conditions: Overexpose slightly to capture shadow information.
- Mixed lighting: Prioritize subject exposure over background.
Beginner-Friendly Lighting Strategy
“While learning, put the sun directly behind you and point your shadow at the bird,” Knoot advises. “This is the easiest light to work with and avoids harsh shadows that create difficult exposure decisions.”
Progressive Lighting Mastery:
- Start with even front lighting for consistent, manageable exposure.
- Experiment with side lighting once comfortable with basic exposure.
- Challenge yourself with backlighting as skills advance.
Practical Priority Settings
“Keeping the camera on Aperture Priority Mode and being able to see the results of adjusting the aperture, ISO, and exposure compensation in your viewfinder is a huge benefit,” Knoot stresses. “Ultimately, photography is subjective art, but if you are able to see your art take shape before you press the shutter, that saves you time and helps you capture more dynamic images.”
Recommended Starting Points:
- Aperture Priority Mode: Provides creative control while managing exposure.
- Wide-open aperture: Maximizes light gathering and background separation.
- Auto ISO: Let the camera adjust sensitivity based on available light.
- Exposure compensation: Ready adjustment for immediate brightness control.
Building Camera Confidence
Practice Exercises for Muscle Memory
Daily Familiarity Drills:
- Practice changing key settings without looking at the camera.
- Time yourself switching between common setting combinations.
- Use different lighting conditions to practice quick exposure adjustments.
“The goal is developing camera familiarity that becomes completely unconscious,” Knoot emphasizes. “When you stop thinking about camera operation, you can focus entirely on capturing the decisive moments that define great bird photography.”
Advanced Custom Functions
As skills develop, additional customization options become valuable. “Start with the fundamentals and add complexity gradually,” Knoot concludes. “Every custom function should solve a specific problem you encounter regularly. Build your camera setup around your actual shooting patterns, not theoretical possibilities.”
Advanced Customization Options:
- Back-button focus for independent focus and shutter control.
- Custom shooting modes for instant setting combinations.
- Function button shortcuts for frequently adjusted parameters.
Finding and Approaching Birds
“The photographers who consistently capture compelling images understand that the work begins before leaving home,” Knoot stresses. “It involves researching your subjects, reading behavioral cues, and developing an intuitive sense for when to advance and when to wait. This knowledge separates photographers who get lucky from those who create portfolio-worthy images.”
Quick Start: Pre-Field Essentials
Before heading out, establish these foundations:
- Research with eBird: Identify current species locations and activity.
- Time for peak activity: Early morning and evening when birds feed actively.
- Learn pre-flight signals: Thin necks, head-bobbing, alert postures.
- Ethics first: Bird welfare always trumps getting the shot.
Strategic Species Research and Timing
Using eBird for Targeted Success
Knoot recommends eBird as the primary research foundation to eliminate guesswork. “eBird gives you real-time data about what’s been spotted where,” Knoot explains. “If you want to photograph a particular species, you can see exactly where other birders have been seeing them recently. This lets you plan shoots around actual bird activity rather than hoping you’ll find something interesting.”
Research Strategy:
- Species behavior patterns: Flocking vs. solitary species require different approaches.
- Location-specific activity: Check recent sightings for targeted planning.
- Visual familiarity: Study species identification to adjust approach techniques quickly.
Optimal Activity Windows
“Birds are most active very early in the morning and later in the evening,” Knoot explains. “This is when birds are feeding and exhibiting behaviors that make compelling photographs rather than just static perching. While learning, I recommend avoiding midday shooting because harsh light creates overwhelming exposure challenges. Not to mention the birds are less active, leading to less dynamic photos.”
Ethical Approach Framework
Bird photography ethics center on one principle: the bird’s welfare always takes priority. “I follow the American Birding Association’s Code of Birding Ethics as my foundation, but my ultimate rule is simple: look at the bird for signs of stress,” Knoot emphasizes.
Non-Negotiable Ethical Rules
Distance and Stress Assessment:
- Behavior-based distance: “A calm bird at 20 feet is more ethical than a stressed bird at 50 feet.”
- Never interrupt feeding or nesting: Survival needs always take priority.
- Avoid bird calls during nesting: Can disrupt critical behaviors and waste energy.
Movement and Approach Technique:
- Smooth, predictable movement: “Sudden movements trigger flight responses, but steady, flowing movement often doesn’t register as threatening.”
- Accept limitations: “You aren’t going to get the shot you envision every time. However, that’s part of the bird photography passion.”
Recognizing Stress Signals
Immediate Retreat Indicators:
- Rapid breathing or frantic head movements.
- Positioning body to flee.
- Stopping feeding or preening behaviors.
- Alert, frozen postures.
“If the bird looks calm, feeding, or preening without distress signs, I’m comfortable continuing,” Knoot explains. “The moment I see rapid breathing, frantic head movements, or positioning to flee, I back off immediately.”
Modern cameras with a silent shooting mode, like the OM-1 Mark II, support ethical practices by preventing noise from undoing a careful approach.
Species-Specific Approach Strategies
Different bird families require adapted techniques based on their natural behaviors.
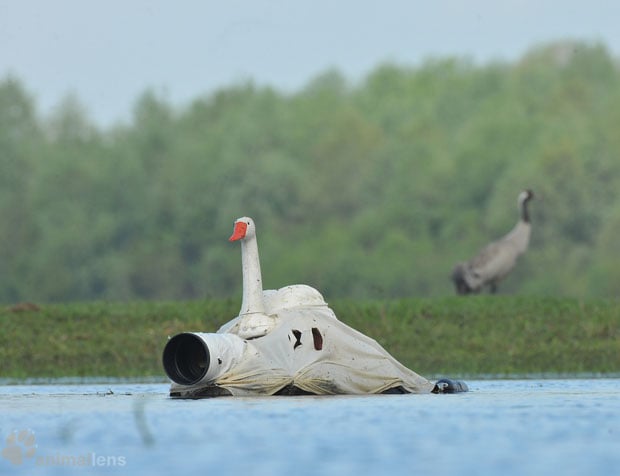
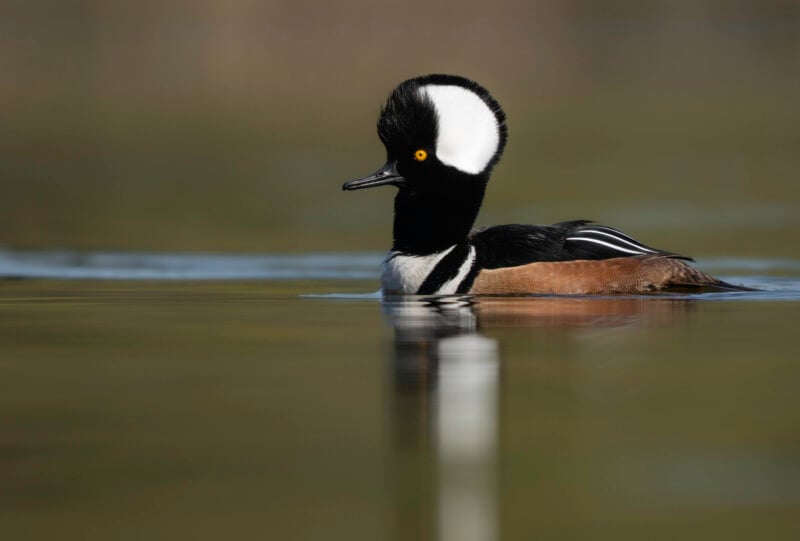
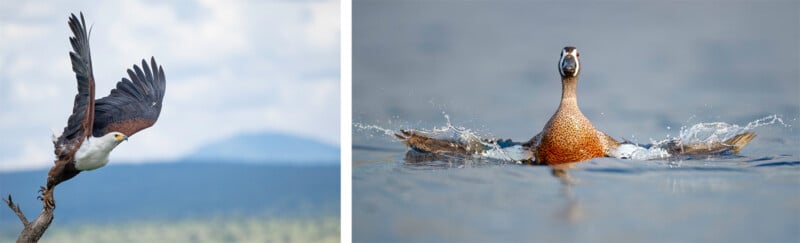
Diving Ducks: Timing Underwater Patterns
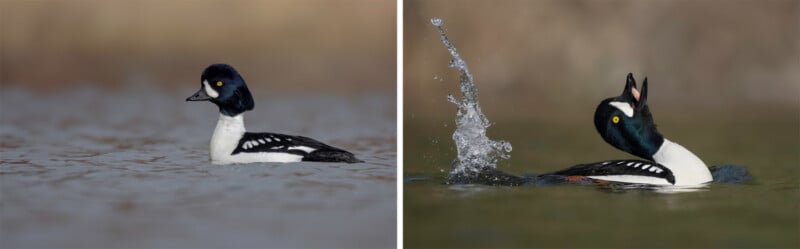
“Diving ducks are a perfect example of using behavior to your advantage,” Knoot explains. “Watch the duck dive, count how long it’s underwater, and see how far it travels. Once you’ve timed their pattern, you can move toward the bird while it’s submerged, then freeze or drop to the ground before it surfaces. I’ve used this with Hooded Mergansers and Buffleheads for much closer water-level shots.”
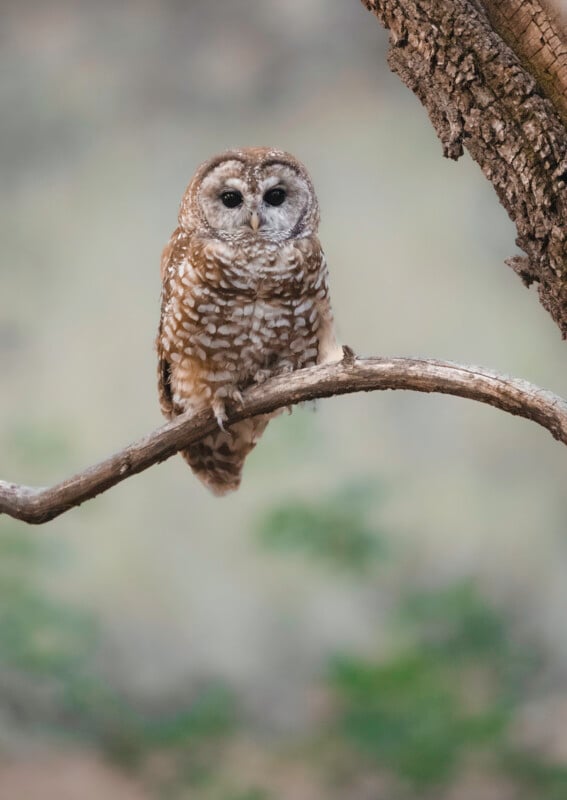
Raptors and Owls: Patience and Behavioral Reading
“We were watching a Spotted Owl and his family,” Knoot recalls. “When it was looking down and head-bobbing, I knew it was locked onto prey and comfortable with our presence. The moment it looked directly at us, we froze until it returned to hunting. Our approach took 15 minutes, moving from 75 to 30 yards in tiny increments, but the owl never stopped hunting and caught a vole right in front of us.”
Learning from Experience
“I’ve had plenty of approaches that didn’t work out, and you learn from each one,” Knoot notes. “Sometimes you get a skittish individual, sometimes the timing isn’t right. The key is understanding what went wrong so you improve next time. When you succeed in approaching a bird without causing stress and capture it engaged in natural behavior, those images are far more rewarding.”
Building Approach Skills Systematically
Progressive Development:
- Study individual behavior: Each bird has unique tolerance levels.
- Environmental factors: Wind, temperature, and time of day affect approachability.
- Species education: Understanding natural behaviors improves prediction accuracy.
- Failure analysis: Identify what triggered flight responses for future improvement.
“Once you start recognizing these patterns, you stop hoping for good shots and start positioning yourself for specific behaviors,” Knoot concludes. “That’s when bird photography becomes really rewarding, because you’re capturing the stories birds tell through their behavior.”
Light, Backgrounds, and Composition
A photograph’s visual impact depends as much on composition as technical precision. “The difference between a snapshot and a compelling image is strategic background selection, perfect pose timing, and understanding light,” Knoot explains. “It’s about creating separation and waiting for poses that show personality. These skills determine whether someone stops scrolling to look at your photo.”
Quick Start: Composition Essentials
- Distance creates separation: Farthest background + wide aperture = smooth bokeh.
- Match subject and background lighting: Avoid exposure nightmares from mixed lighting.
- Aim for 45-degree head angle: Creates engaging eye contact and natural pose.
- Wait for animated behavior: Action shots trump static perching every time.
Strategic Background Selection
The Mathematics of Background Separation
“Background selection is actually just simple math,” Knoot explains. “Choose a background that’s furthest away from you and has the most even color you can find. When your background is distant, your lens naturally throws it out of focus, creating that smooth, professional look called bokeh. Distance creates separation, but when backgrounds are close to your bird, you get distracting details that compete with your subject.”
Background Priority Checklist:
- Maximum distance: Farthest background from subject creates best bokeh.
- Even color tones: Smooth, consistent colors eliminate distractions.
- Earth tone preference: “I gravitate toward greenish-beige or brownish backgrounds because most birds look spectacular against those earth tones.”
- Focus-friendly options: Blue skies work well because cameras never hesitate on bird-vs-sky contrast.
Matching Light for Exposure Control
“I choose a background that has the same luminosity as my subject,” Knoot insists. “I rarely photograph a bird in full sun against a background in deep shade, or vice versa. That creates an exposure nightmare. If the bird is in shade, I find a shaded background. If it’s in bright sunlight, I position myself so the background is also well-lit. The OM-1 Mark II’s advanced metering helps, but good positioning prevents problems more effectively than technology solves them.”
Recognizing Compelling Poses
Optimal Angles for Engagement
“Most people think bird photography is about getting a sharp image, but the real magic happens when you capture birds expressing their personalities through behavior,” Knoot explains. “A bird just sitting on a stick, hunched over, isn’t what I’m after. I want animation and poses that show what makes each species unique.”
Key Elements for Engaging Poses:
- 45-degree head angle: “That angle gives you a beautiful eye glint and creates an engaging pose that draws viewers into the bird’s world.”
- Alert, active postures: Animation over static positioning.
- Species-specific characteristics: Research and capture what makes each bird unique.
Behavioral Moments That Transform Images
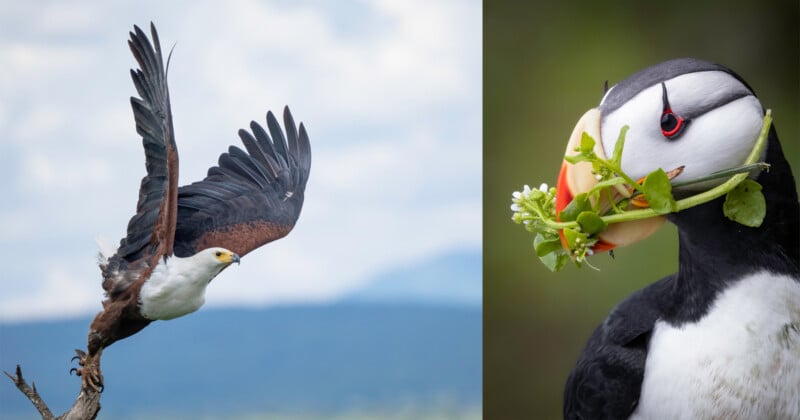
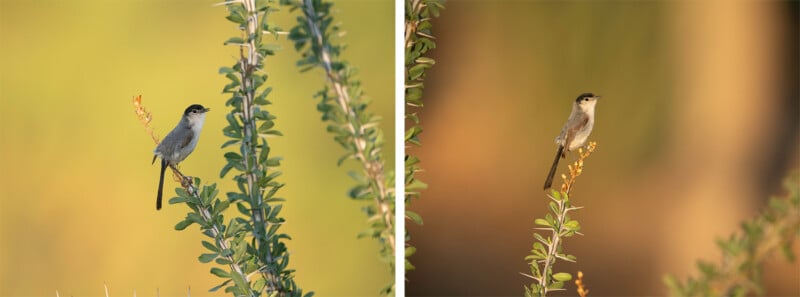
“The ideal poses happen when birds are at their most animated,” Knoot emphasizes. “A Black-tailed Gnatcatcher feeding is fine, but when it’s courting, it transforms. It goes to the top of a bush, raises its tail vertically, fans it out, throws its head back, and gives its raspy call. That’s a unique behavior I want to document.”
Premium Behavioral Opportunities:
- Courtship displays: Species transform during breeding behaviors.
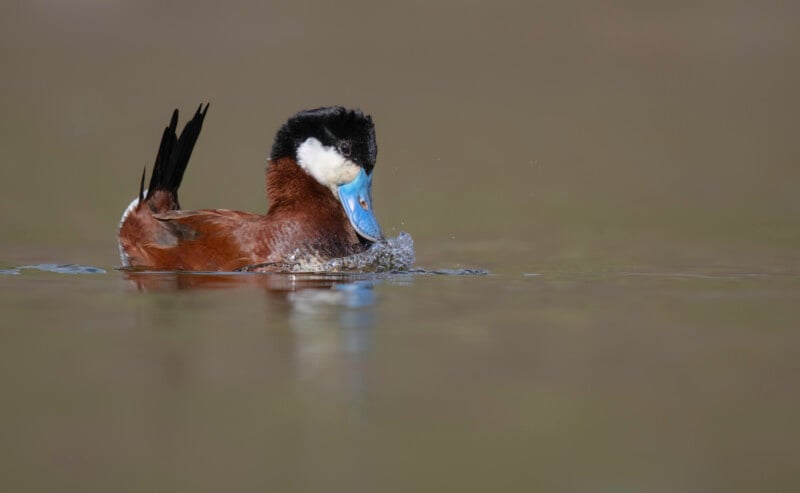
- Species-specific behaviors: “I’d rather photograph a Ruddy Duck doing its bubble display than just swimming by. During breeding displays, it beats its bill against its breast, blows bubbles from its feathers, and arcs its head back with tail straight up.”
- Feeding actions: Dynamic poses with natural purpose.
- Interaction moments: Birds engaging with their environment or other birds.
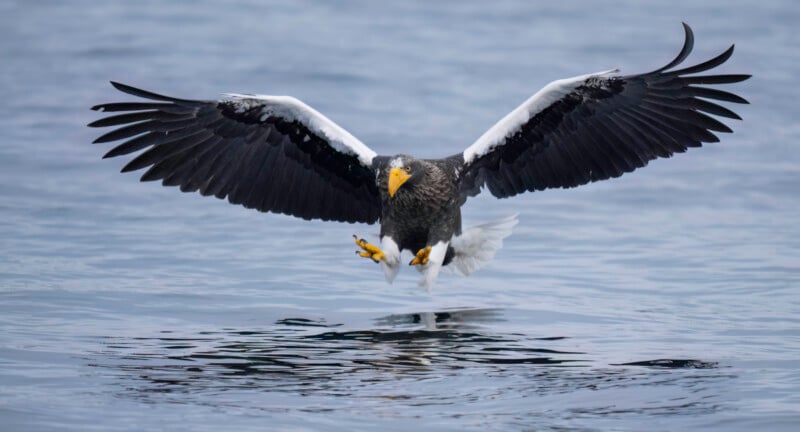
Flight Photography Composition
“For birds in flight, I want either a dorsal view from above or a banking pose from below,” Knoot explains. “Side views where wings are perfectly level work sometimes, but they’re much harder to make compelling.”
Optimal Flight Angles:
- Dorsal view from above: Shows back and wing patterns effectively.
- Banking poses from below: Creates dynamic diagonal composition.
- Avoid level side views: More difficult to make visually compelling.
Building Visual Impact
“When you combine strategic background selection with perfect timing for animated poses,” Knoot concludes, “you create images that tell the stories birds are constantly sharing all around us.”
Techniques for Static Birds
“Static birds are where you transform from someone taking pictures to creating photographs,” Knoot stresses. “They offer the perfect opportunity to master fundamentals. When you’re not scrambling to track movement, you can focus entirely on perfecting exposure, fine-tuning composition, and waiting for subtle behavioral moments that elevate a photograph from just sharp to compelling.”
Quick Start: Static Bird Essentials
- Optimize for quality: Wide aperture + adequate shutter speed over action-stopping needs.
- Master stability: Breathing technique + proper stance = sharp handheld shots.
- Explore details: Eyes, bills, and plumage patterns reveal species characteristics.
- Document seasons: Track plumage changes for deeper species understanding.
Camera Settings and Stability Fundamentals
Essential Exposure Strategy
“You cannot have too high of a shutter speed for static birds,” Knoot insists. “There’s only a shutter speed floor, which is the slowest speed you can handhold while maintaining sharp images. But there’s no ceiling. If light allows for 1/2000th of a second, use it. For static birds that aren’t moving their heads constantly, something like 1/160th or 1/200th works perfectly.”
Recommended Static Bird Settings:
- Aperture: Wide open to maximize light and blur backgrounds.
- Shutter Speed: 1/160th-1/200th minimum for perched subjects.
- ISO: “It’s better to have a high ISO image than a blurry image, as you can fix noise in post-processing, but blur is usually impossible to save.”
- Focus: Single-point for precise eye placement.
Professional Handheld Stability Techniques
“There’s a breathing technique that works for photography just like precision shooting,” Knoot emphasizes. “Take a breath, let half out, then hold steady while you shoot. This stabilizes your entire body and reduces camera shake significantly.”
Stability Fundamentals:
- Breathing Control: Inhale, exhale halfway, hold while shooting.
- Camera Grip: Wrist underneath lens, elbow tucked against body.
- Body Position: Stable, wide stance for maximum steadiness.
- Consistent Technique: These fundamentals never change regardless of technology.
Modern Image Stabilization Advantages
Advanced stabilization has transformed handheld possibilities. “With my camera’s 7.5-stops of image stabilization, I can consistently shoot at 1/13th of a second handheld, with static subjects and still get sharp images,” Knoot explains. “That gives me incredible flexibility in low light without needing a tripod, and I can adjust my position instantly if the bird moves.”
Creative Detail Photography Opportunities
Static subjects provide ideal opportunities to explore close-up photography.
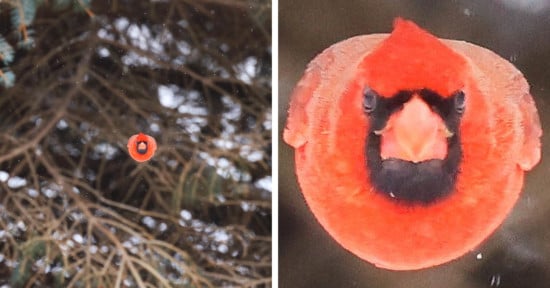
Facial Features and Character Studies
“When you have a cooperative perched bird, that’s your invitation to discover what makes that species extraordinary,” Knoot stresses. “Instead of always going for the full-body environmental shot, get closer and focus on details most people never notice.”
High-Impact Detail Targets:
- Eyes: “Bird eyes are incredibly expressive windows into their world. Different species have completely different eye colors, shapes, and surrounding feather patterns.”
- Bills and Beaks: “Bills offer particular creative opportunities because they’re so species-specific and functionally designed. Each one tells a story about how that bird makes its living.”
- Head and Shoulder Compositions: “A close-up that fills the frame with just the head and shoulders can be far more impactful than a distant full-body shot.”
Plumage Patterns and Textures
“When you get close enough to see individual feather details, you discover how incredibly complex bird plumage really is,” Knoot notes. “What looks like solid color from a distance might reveal intricate patterns, iridescence, or texture that makes for compelling abstract compositions.”
Detail Photography Benefits:
- Enhanced Observation Skills: Forces careful subject study and species familiarity.
- Individual Differences: Notice subtle variations between individual birds.
- Abstract Possibilities: Complex patterns create compelling non-literal compositions.
- Technical Skill Building: Close-focus work improves overall autofocus understanding.
Seasonal Documentation Projects
Static photography is excellent for documenting the dramatic seasonal changes many species undergo. “Breeding season transforms some birds so completely they look like different species,” Knoot observes. “When you start documenting the same species through different seasons, you develop a much deeper appreciation for their life cycles and behaviors.”
Long-Term Project Benefits:
- Deeper Species Knowledge: Systematic documentation builds comprehensive understanding.
- Behavioral Pattern Recognition: Seasonal familiarity improves field prediction skills.
- Enhanced Patience: Long-term projects develop an essential bird photography mindset.
- Portfolio Development: Seasonal series create a compelling body of work.
Skills Transfer to Advanced Techniques
“Spending time on details forces you to truly observe your subject and understand autofocus behavior,” Knoot concludes. “Photographing a bird’s eye at close range, for example, teaches depth of field lessons that are invaluable when tracking distant subjects in flight. You’ll start noticing subtle differences that make you a more patient, skilled, and knowledgeable photographer overall.”
Techniques for Birds in Flight
“Birds in flight represent the Mount Everest of bird photography,” Knoot insists. “This is genuinely difficult and requires extensive practice. Even with modern technology, there’s no shortcut to developing the ability to track fast-moving subjects through three-dimensional space. Conquering this challenge separates casual bird photographers from those truly committed to the craft.”
Quick Start: Flight Photography Essentials
- Master camera-to-eye technique: Track with eyes first, then bring camera to established motion.
- Start with large, slow subjects: Gulls and crows before attempting swallows or swifts.
- Program hot buttons: Instant camera reconfiguration (1/4000s, ISO 1000, all-point focus).
- Learn pre-flight signals: Duck neck thinning, head-bobbing, alert postures.
Foundation Skills: Tracking Movement
The Camera-to-Eye Technique
“Never bring your face to the camera when you start tracking a flying bird,” Knoot emphasizes. “Instead, lock onto your subject with your eyes while it’s flying. Move your head with the bird, then bring the camera to your eye while you’re already synchronized with its movement. Most people try to find the bird through the viewfinder first. By that time, it has moved, and you’re hunting to locate it, which is nearly impossible with super telephoto lenses.”
Camera-to-Eye Method:
- Track visually first: Lock onto a flying bird with eyes and head movement.
- Synchronize motion: Move head smoothly with the bird’s trajectory.
- Bring camera to established tracking: Add the camera to the already-synchronized motion.
- Maintain fluid system: Photographer and bird trajectory become unified.

Strategic Practice Progression
“Start with something slow and substantial,” Knoot advises. “Go to a beach with gulls, or find a parking lot with crows and ravens. You absolutely do not want to start with swallows or swifts. That’s the quickest way to get discouraged and abandon flight photography entirely.”
Proven Practice Sequence:
- Beginner: Gulls, crows, and ravens are large, slow, predictable.
- Intermediate: Ducks and medium songbirds have increased speed and are smaller targets.
- Advanced: Swallows, swifts, and raptors require expert-level tracking.
- Home practice: Quick target acquisition drills and living room tracking exercises.
Camera Configuration for Action
Hot Button Philosophy
“To succeed with flying birds, I need to control my camera without looking at it,” Knoot insists. “When a bird does something extraordinary, I can’t afford to hunt through menus. My camera is remarkable because almost every button is customizable, but the real power comes from programming ‘hot buttons’ that instantly reconfigure my camera for different scenarios.”
Flight Mode Configuration
“My flight mode ‘hot button’ instantly switches the shutter speed to 1/4000th, raises ISO to 1000, activates all-point focus, turns on bird tracking, and turns off image stabilization,” Knoot explains. “I don’t need stabilization at that speed, as a shutter speed that fast can always capture sharp images, even if my camera is in motion.”
Essential Flight Settings:
- Shutter Speed: 1/4000s minimum to freeze motion.
- ISO: Start at 1000 for adequate shutter speed.
- Focus Strategy: All-point focus for frame-wide tracking.
- Subject Detection: Bird tracking AI activated.
- Image Stabilization: Off to maximize frame rate.
- Drive Mode: Fastest burst rate available.
Focus Strategy for Moving Subjects
“For flight photography, I absolutely recommend an all-point focus strategy,” Knoot stresses. “It’s extremely difficult to keep flying birds on a small focus point. With all-point focus and bird AI subject detection, like on my OM-1 Mark II, the camera has the freedom to find the subject anywhere in the frame, and the AI tracking is remarkable.”

Pro Capture Mode Advantages
OM SYSTEM’s Pro Capture Mode helps capture action faster than human reaction time.
How Pro Capture Works
“Pro Capture lets you capture images from before you fully press the shutter,” Knoot explains. “You focus on the bird, hold the shutter halfway, and the camera starts buffering images. When the action happens and you fully press the shutter, you get the images from the moments just before you pressed the button.”
Pro Capture Process:
- Half-press shutter: Activates buffering without saving images.
- Camera buffers continuously: Stores recent frames in memory.
- Action occurs: Bird takes off or exhibits behavior.
- Full press shutter: Saves buffered frames plus new ones.
- Result: Images captured before human reaction time.
Dramatic Success Rate Improvement
“The difference in my takeoff success rate is dramatic,” Knoot notes. “Before Pro Capture, I might get one usable takeoff shot out of ten attempts. With Pro Capture, I get sharp takeoff images almost all of the time, often capturing that perfect moment where the wings are fully extended but the bird is still on its perch.”
Mastering Takeoff Moments
Reading Pre-Flight Signals
“Birds don’t just suddenly take off,” Knoot stresses. “Before takeoff, ducks go through a consistent sequence: their necks get thin and elongated, their heads pop up with alertness, and they start bobbing. For Red-winged Blackbirds in flocks, watch the sentry males perched higher than the rest, as they’re usually the last to take off, giving you the best opportunity for a clean takeoff shot.”
Universal Pre-Flight Indicators:
- Ducks: Neck thinning, head elevation, rhythmic bobbing.
- Flocking birds: Monitor sentry individuals for departure timing.
- General signs: Relief behavior often precedes takeoff.
- Alert postures: Heightened attention to the environment.
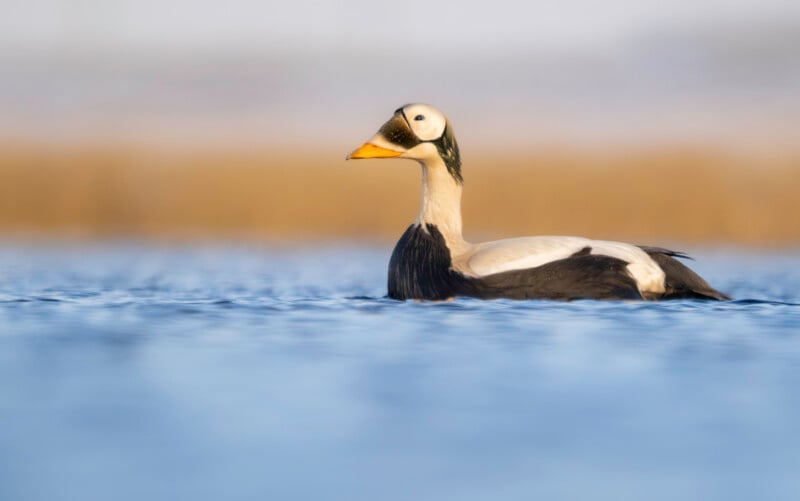
| Right: Blue-winged Teal – Methow Valley, Washington State:M. Zuiko Digital ED 300mm F4.0 IS PRO • 300mm (600mm equivalent) • 1/4000sec • f/4.0 • ISO 800
Strategic Positioning
“Positioning is crucial for takeoff photography,” Knoot notes. “If you see a subject showing pre-flight signals, get your settings optimized, lock focus, and find the best angle. For instance, water birds often take off into the wind, a pattern that allows me to position myself for the action.”
Technology vs. Traditional Timing
For photographers without this technology, Knoot emphasizes practicing traditional timing. “You have to rely on reading behavioral signals perfectly and starting your burst mode just before the bird takes off,” he explains. “Hold down the shutter and track the bird through the entire takeoff. You’ll get many unusable frames, but you’ll also capture moments impossible with single shots.”
While traditional timing relies on pure skill, Knoot notes that tools like Pro Capture are a game-changer because the technology provides a buffer that eliminates human reaction time from the equation.
Final Thoughts From A Professional Bird Photographer
“Bird photography remains beautifully unforgiving,” Knoot stresses. “Expect to be challenged every time you venture out. Expect to miss shots you desperately wanted. Expect birds to do exactly what you don’t want them to do. But also expect it to be one of the most profoundly rewarding pursuits you can embrace with a camera.”
“Every single day teaches you something new,” Knoot emphasizes. “I still encounter birds that outsmart me and weather that surprises me. That constant learning keeps me passionate about it. You’re never finished mastering this craft because birds never stop being unpredictable.”
“Bird photography forces you to slow down and truly observe the world,” Knoot notes. “You start noticing behaviors most people never see, and you develop a profound connection with nature that fundamentally changes how you interact with the world.”
“I never imagined that flipping through field guides as a kid would lead to capturing birds in Costa Rica and Ghana,” Knoot explains. “That’s the beauty of this pursuit: it begins with curiosity in your neighborhood and expands into a lifelong journey. The same skills that help you photograph backyard cardinals prepare you for quetzals in a cloud forest.”
“Tools like Pro Capture Mode and advanced image stabilization give today’s beginners capabilities I could only dream of when I started,” Knoot emphasizes. “This technology doesn’t replace skill and patience; it amplifies them, creating possibilities that seemed impossible just a few years ago.”
“Every bird photographer bears a responsibility to put the bird’s welfare above the shot,” Knoot insists. “When you follow ethical guidelines and respect your subjects, you become part of a community working to protect the species we love. The images we create can inspire conservation, but only if we create them responsibly.”
“Start exactly where you are and embrace the learning process, because skill is the foundation,” Knoot stresses. “The difference between photographers who persevere and those who quit isn’t talent, but persistence. The right tools will amplify that persistence exponentially as you grow.”
“Some of my most treasured memories are those breakthrough moments—my first razor-sharp flight shot, the first image that made me say, ‘I can’t believe I captured that!'” Knoot reflects. “Those moments make all the patience worthwhile. Bird photography will teach you patience, observation, and respect for nature. But more than anything, it gives you a reason to step outside and discover the incredible world that exists right around us. That’s a journey that never truly ends, and that endless possibility is exactly what makes it so profoundly rewarding.”
More from Ben Knoot can be found on his website and Instagram.
Full disclosure: This article was brought to you by OM SYSTEM
Image Credits: All photos by Ben Knoot.