Color Grading in Portrait Photography: From Finding Inspiration to Final Results

Color grading is a crucial creative adjustment that enhances storytelling and evokes emotions. In portrait photography, it plays a significant role in establishing the mood of the subject. This article explores how to craft color grading in portrait photography, from sourcing inspiration to achieving the final result.
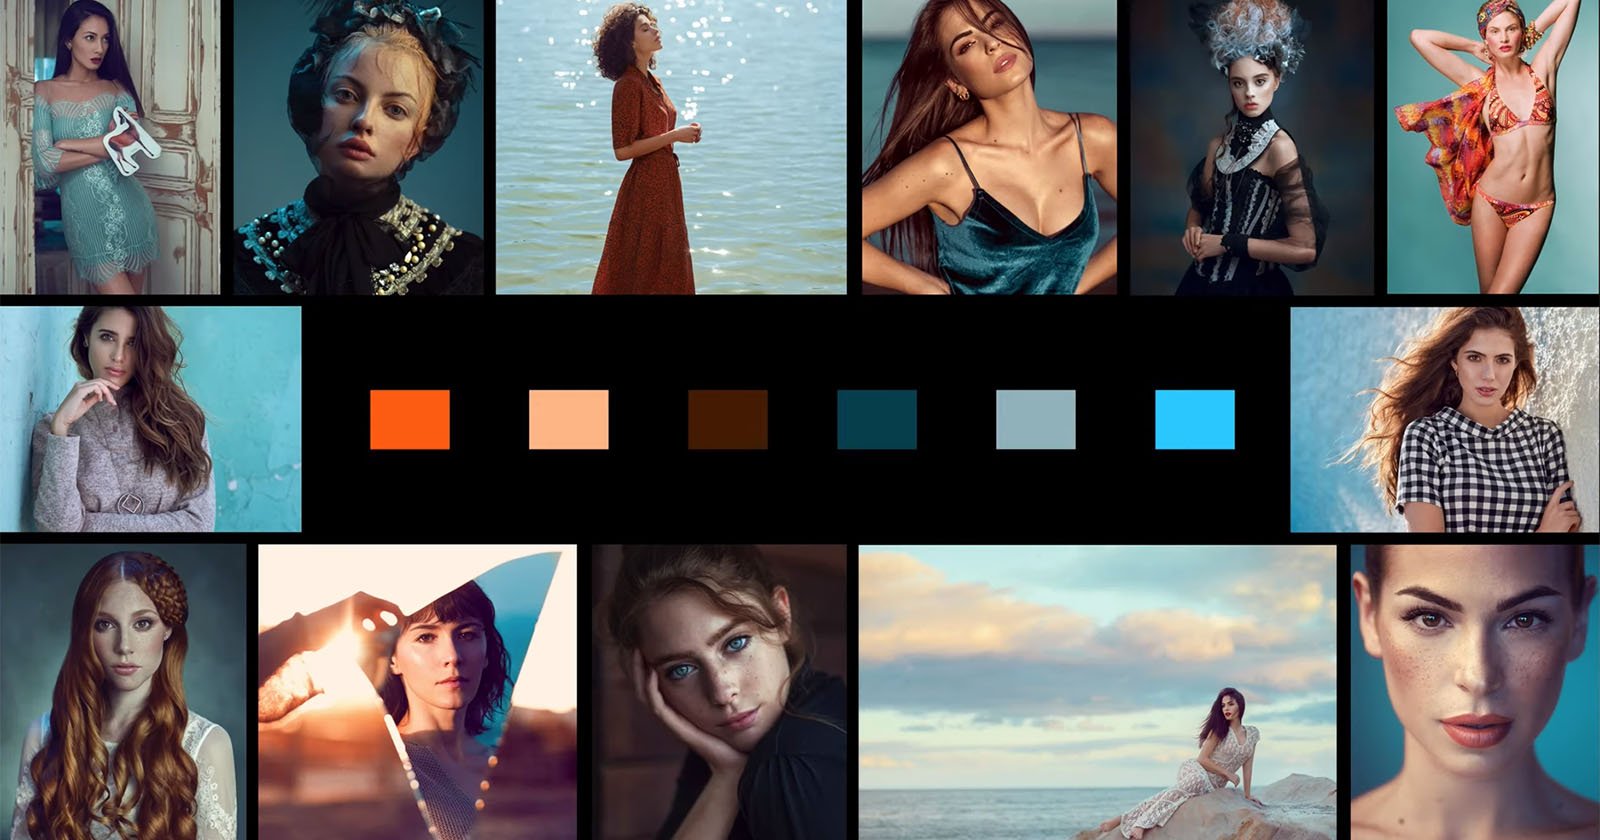
Mood Board
Before I photograph my shoot and organize my color grading process, I draw inspiration from a variety of sources, including movies, other photographers, and color palettes, to achieve the desired look. As an advocate of watching movies in the theaters, cinema has greatly influenced my development as a photographer, impacting me both visually and emotionally. The concept for this shoot was clear: an urban fashion portrait session set in Toronto while trying to mimic the look of Kodak Vision3 250 35mm film stock.

Additionally, I drew inspiration from the works of still photographer Atsushi Nishijima and NYC urban photographer Ricardo Calderon. I recommend looking beyond Instagram and finding photos from magazines, the app Behance, or even news outlets. Once you’ve gathered your materials, it’s time to go out and start photographing.
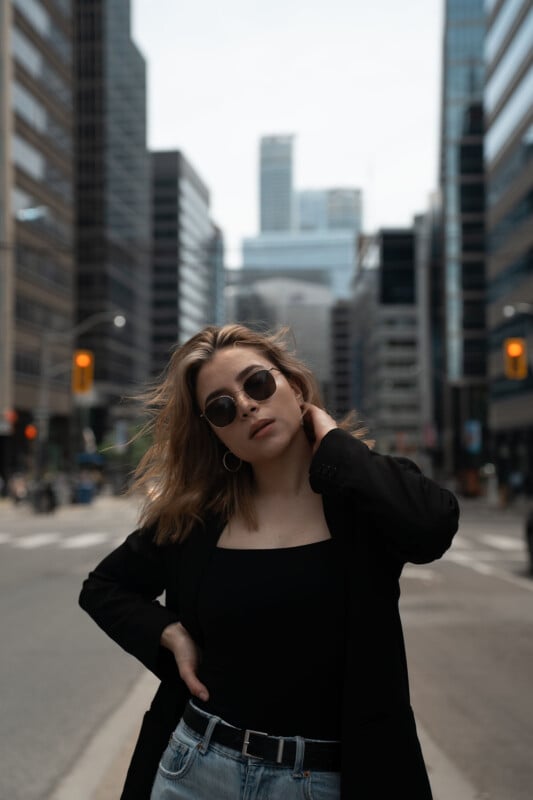
Once you have gathered all the photos, pick the best ones and drag them into Lightroom. We’ll use the photo above as an example to discuss key tricks for creating photos with character and vibe. Feel free to adjust the exposure, geometry (to make the subject centred), and tone curves to your liking. The main ingredient to achieving that cinematic effect is the color wheel itself.
Color Grading Wheel
To create a cinematic, vintage, urban look, it’s important to experiment with key elements: midtones, shadows, and highlights. When working with portraits, emphasize warm colors in the midtones with a yellow/green tint, while leaning towards cyan/green for the shadows. Though the shadows may appear cool in the photos, they contribute to a street photography and cinematic vibe. The highlights should also have a cyan tint, leaning towards blue, to represent the sky and reflective surfaces of buildings.
Ensure that the blending and balance are smooth, avoiding any harsh color separations. After achieving your desired color grading, experiment with film grain, dehaze, and texture to create an emotional impact in your photos. Here is the final result of the photo:
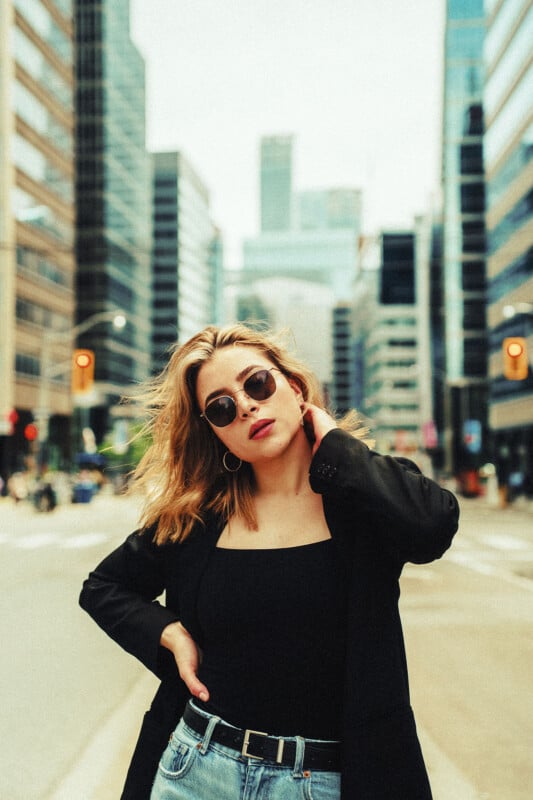
The color grading process significantly enhances the film-like tones, giving them a modern feel that resonates with contemporary viewers. By incorporating cool shadows, we achieve a harmonious balance with the warm midtones, which together brilliantly showcase the vibrancy of urban streets. This combination results in a visually striking, grainy look that lends the image a distinct cinematic edge, reminiscent of classic films yet fresh and engaging.
There is one more thing I want to share that I find to be a valuable bonus tip that may serve to help the color grading: camera profiles.
Bonus Tip: Color Profiles
Camera profiles can dramatically alter the way your image is captured and presented, allowing for greater flexibility in post-production and helping you to achieve the desired aesthetic effortlessly. It’s like using a LUT (look-up table) but for photos.

LUTS may be different for different types of cameras. In the example we used before, I used a custom-made profile to achieve the reddish shadows and light blue exposures. This was a way to mimic the use of Kodak Vision3 250D. Color profiles don’t matter, but if you’re very into colour grading, like me, take the LUT cube and put it into Lightroom Classic, then export it as an XMP to Lightroom CC.
About the author: Dylan Dufault is a professional portraiture and adventure photographer, creative director, and blog writer who has been involved with the art of photography since 2020. He has worked with Tamron, Adobe, and other brands. For more of his work, you can see his Instagram, Website, and Behance.