How Does Your RAW Processing Software Affect Your Images?

When shooting on a digital camera, it’s considered fairly standard practice to shoot in a raw format or raw + JPEG. The reasoning for this is simple: shooting in a raw format like Nikon’s .NEF, Canon’s .CR3, or Sony’s .ARW will record the full, unprocessed, unadulterated data from your camera’s sensor, preserving as much dynamic range and detail as possible allowing you maximum flexibility in post to push and pull the image before exporting it as a JPEG or PNG.
What you may not know, though, is that just about all of the major camera manufacturer also produces their own photo management and processing software, and, as far as I can tell, all of them are free (or are included with your camera). Nikon has its NX Studio, Canon publishes Digital Photo Professional, and Sony offers its Image Editing Desktop. Fujifilm produces X RAW Studio, but this is an oddball because the documentation seems to say that you’re required to tether your camera to your computer in order to use it, as if a desktop or laptop isn’t capable of handling the processing. I dunno, that’s really weird to me.
Lately, I’ve been getting increasingly frustrated with Lightroom Classic and how molasses-slow it runs (for reference, my workstation is running a Ryzen 5950X, RTX 3090, 32GB of RAM, and an entirely NVMe-based working storage system, so it’s definitely not the fault of the hardware), and I’ve been toying with the idea of moving the bulk of my raw processing to another piece of software, only using Lightroom for certain tasks related to publishing to my website.
This got me thinking, though: how much does your choice of software affect the images you can pull from your raw files? I mean, camera manufacturers generally don’t publish the actual specification of their raw formats, and so software developers essentially have to reverse-engineer the ability to decode and display the data from the files themselves, separately from one another. It would stand to reason, then, that A) the first-party tools available from the manufacturer ought to deliver the truest representation of the image you took in the first place and B) every other piece of software ought to do things slightly differently from the rest, and that could very well show up in the final images.
So I sat down to test this. As a representative sample of the software that’s available, I chose to try Nikon’s NX Studio, Adobe Lightroom Classic, Adobe Lightroom Creative Cloud, Affinity Photo 2, Capture One, and Darktable.
![]()
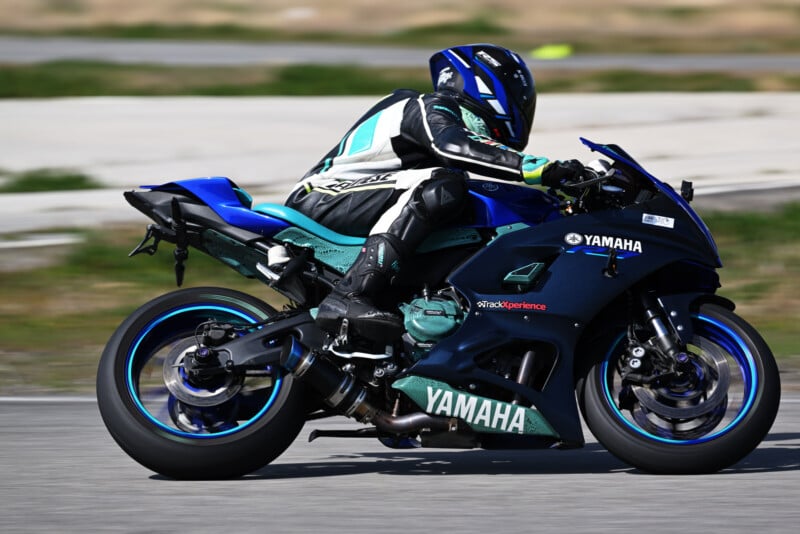
This is the photo I chose as the test basis. There’s lots of dynamic range and a ton of detail in the shaded areas of the bike. The above example comes from NX Studio, with all adjustments flat and calibration turned off, as were all of the upcoming samples, and exported as a 100% quality JPEG, coming in at 27.1MB. As we can see, this is a great neutral starting point, with no crushed blacks or blown highlights and modest colors. This is to be expected-it’s Nikon’s own software, so it’s the one that should give the truest representation of what came out of the camera.

This example comes from Lightroom Classic, and clocks in at just 17.2MB, nearly a third smaller than the file out of NX Studio. This is already significant, as it tells us that a large amount of data contained in the “control” JPEG has been discarded. Already we can see that the contrast and saturation have gotten a big bump compared to what I got from NX Studio. In fact, some of the shadow areas below the rider’s boot and inside the bike’s fairing have almost been completely crushed to black, and I had to move the shadow slider almost to +50 in the development tab to get a comparable level of shadow detail, which in a darker scene would increase the amount of noise and generally be a pain to deal with.

At first glance, this file from Lightroom Creative Cloud looks absolutely identical to the previous one from Lightroom Classic. It’s even almost the exact same size, at 17.9MB. However, here’s a half-and-half comparison between the two.
![]()
See that seam running from the bottom left to the top right? That’s a result of a lens distortion compensation profile being applied to the Creative Cloud version (the half on top), even though I specifically turned that option off. I have no idea what’s causing this, but whatever it is, it’s a change that I did not actively apply, and that rubs me the wrong way.

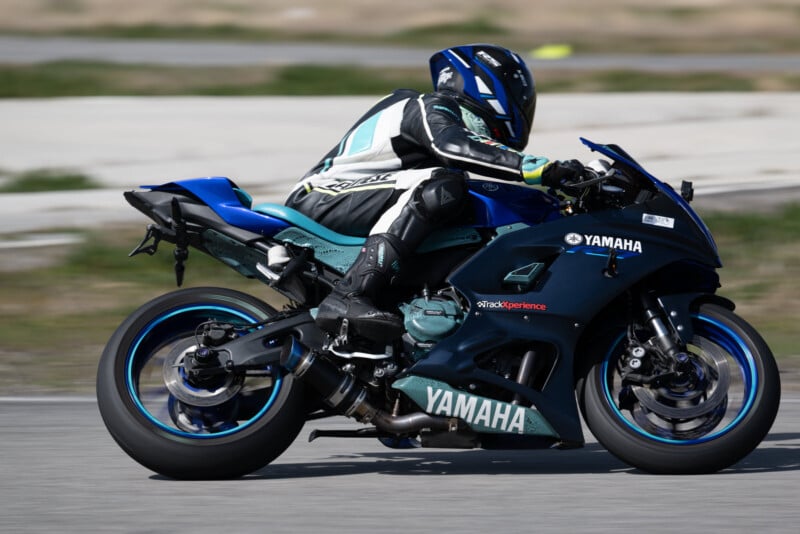
Next up is the result from Affinity Photo 2, surprisingly coming in at a bit larger than even the NX Studio sample at 27.2MB. Overall color and exposure handling are remarkably similar to what we saw from the two versions of Lightroom, but there does seem to be some roll-off in the intensity of the brighter areas. You can see this in the slightly duller white of the rider’s suit and “YAMAHA” lettering on the bike, as well as in the reflective metal parts around the exhaust pipe, rear brake disc, and even a bit in the white wrap around the rear brake reservoir (the fuzzy bit directly underneath the seat, above the rear wheel).
The concrete pad behind the rider in the infield of the track also loses a bit of brightness. Overall, there is a very marginal difference, but it certainly looks like it’s there. Inexplicably, I also seem to have gotten some “free” resolution here – rather than the 8256×5504 resolution of NX Studio, which I have to assume is the “real” resolution of the photo (especially since that’s also what both flavors of Lightroom gave me), Affinity’s export is showing 8280×5520. Nothing you would probably ever notice, but incredibly strange.

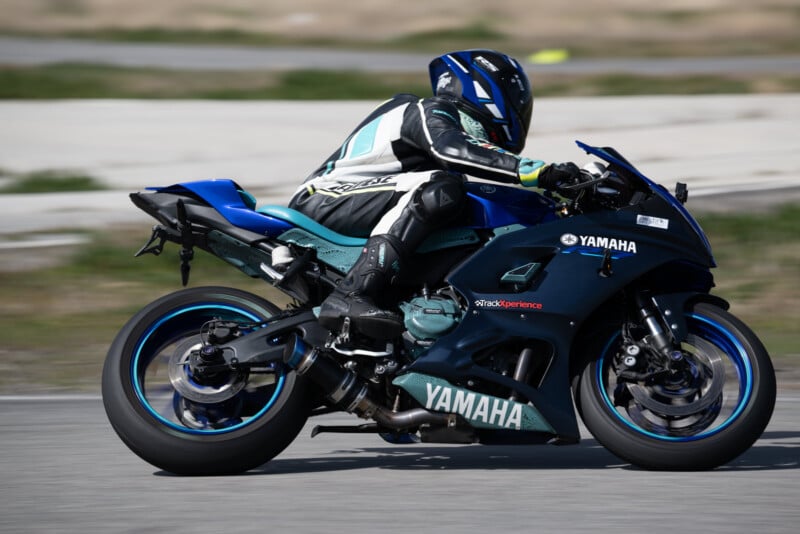
Capture One’s showing was the largest file of the lot, at 29.3MB. Clearly, it’s not as concerned with saving space, instead focusing more on preserving quality. Here we see a very noticeable bump in overall image brightness, including a marked shift in luminance of the blue colors of the tail end and seat of the bike, while still retaining the deeper shadows from the showings from Lightroom if not quite as severely. Funnily enough, this is actually probably the closest to what I would consider my style to be when I edit my images – vibrant colors, lots of texture in the shadows with deep blacks, and lots of general contrast. It did steal a pixel from me in both height and width though, at 8255×5503.

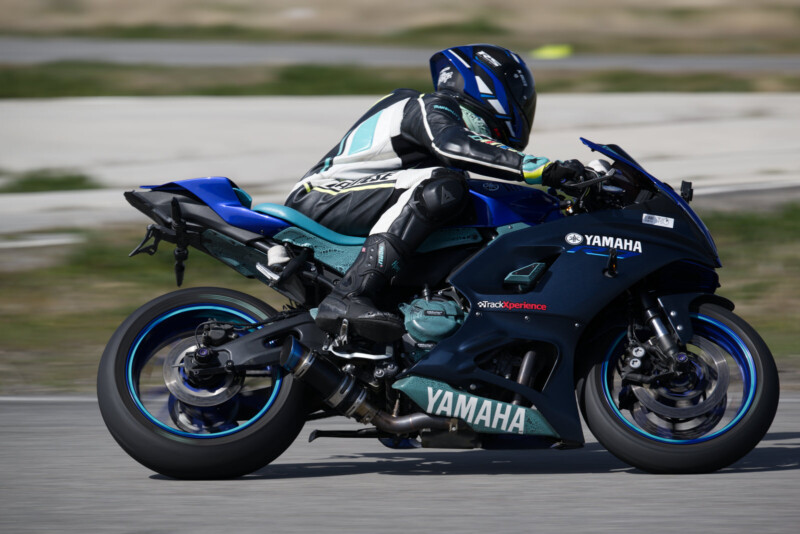
Lastly, and absolutely living up to its name, we have Darktable. It spit out 28.8MB of data and gave a really weird 8268×5520 dimensional rating, which isn’t even technically a 3:2 aspect ratio. As you can clearly see, it also pulled the overall image brightness way, way down, so much so that it’s difficult to even compare it to the other samples because it’s not even in the same ballpark. I’m sure you could dial this out before exporting, but having such a massive gulf in the results compared to the other offerings doesn’t really inspire confidence or trust. It is free, though, so I can’t complain too much, and the developers and community seem committed to the project, so I’m sure we’ll only see this improve.
Conclusion Time
I have to say, I was very surprised at how large of a difference I saw just by changing which raw processor I used. Given that it’s not really possible to have a fair test with fully edited images given that all of the different tools do different things and heck, even the sliders might be calibrated differently between them, it might not matter as much when you’ve applied your own look, but at the very least it shows that there is indeed a tangible difference.
I would advise you to experiment with your own images, no matter what camera system you’ve adopted, and see if you like the results, workflow, or performance from one over another. I’m absolutely going to be giving Capture One a deeper look since it seems far more modern and responsive than Lightroom Classic, but I’m absolutely going to be scrutinizing my exports from now on. But maybe that’s just the compulsive pixel-peeper in me talking.