Vision: The Most Important Skill in Photo Editing
I don’t know about you, but even though I’ve been photographing for almost fifteen years now, sometimes I feel stuck when deciding which editing direction to take with some of my images.
- Is the post-processing I’m doing appropriate for the image I’ve been editing?
- Should I use a different crop ratio?
- Does the subject really stand out?
- Is the message clear enough?
If you notice, none of these questions are about technique. I remember a quote from Henry Mancini, a legendary composer, who once said, “Technique is superficial. The method used in applying technique is what gives music its character.”
I’m not saying technique is not important. I believe it is really key. What I’m saying is that all techniques, both the use of the camera and the photo editing afterward, are a result of our vision.
And, when photographers prioritize their technique or the gear they use over the actual things they are photographing, it typically doesn’t lead to any good outcome and growth.
In this article, I’d like to share with you a few concepts about photo editing I love the most. I’m not talking about how to use a specific tool or fancy technique that you’ve probably come across in countless articles or videos already.
Instead, I’ll focus on two powerful strategies that you can immediately apply to your shots, and they will help you create better images and much more compelling stories that truly represent your vision.
Beyond the Technical Approach
In my personal opinion, half of the image creation process is photo editing, which extends beyond simply moving a bunch of sliders to fix shadows and highlights or boost contrast and saturation. You need to be thoughtful when deciding which, when, where, and how to apply a specific adjustment.
You might think there’s only one right way to edit a photo, but that’s not true. You can generally explore different editing options. It depends on what you want to say and how you want to make people feel with your photos.

In my photography workshops, we always make time for multiple post-processing sessions where we review the images we’ve captured together. So, before we even touch any sliders, I like to remind my students to take a few minutes to really look at the RAW material, the framing, lighting, and any issues or distractions in the image. This helps establish a clear understanding of the image’s elements and come up with an action plan before making any changes.
Now, why am I mentioning this?
It’s because I’ve noticed a common mistake among photographers: they often rush into editing without giving their shots a good once-over. Many people tend to mix up terms like ‘tactic’ and ‘strategy’.
So, the deep meaning of post-processing lies not only in its ability to enhance the aesthetic quality of images but also it playing a crucial role in shaping the viewer’s emotional response and interpretation of a photograph. You want to make changes to the image in a way that effectively conveys the story you want to tell.
One of my photographer heroes, Jay Maisel, once said: “When you shoot, that is opportunity number one to make a statement. When you edit, you have opportunity number two to make your statement.”
Adjustments for Emotional Impact
I want to give you two very effective ideas on how to approach photo editing from a different perspective.
The first one, perhaps my favorite, is inspired by an exercise I used to do with my guitar students back when I taught at the music academy, and it’s about trying to associate a feeling with each element of the photo.
Photo editing boils down to a few keystone elements:
- Exposure
- Contrast
- Color
- Texture
- Distortion
- Crop
Each of these elements influences how the viewer perceives and feels about the photo. Therefore, when you define the adjustments to apply to an image, you directly shape the way people will perceive that image. That’s why it is so important to be intentional about every adjustment you make.
So, the idea is to try to set aside post-processing as a collection of techniques for a moment, and instead think of it as evoking a range of visual emotions.
Let me give you a few examples:
Exposure and Contrast

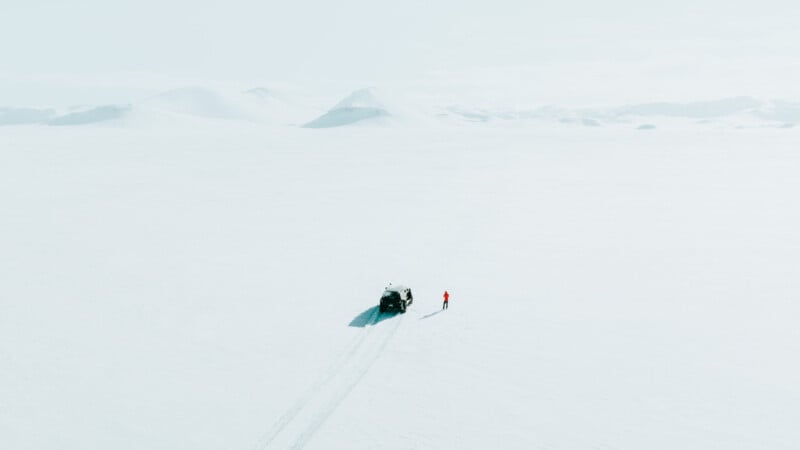
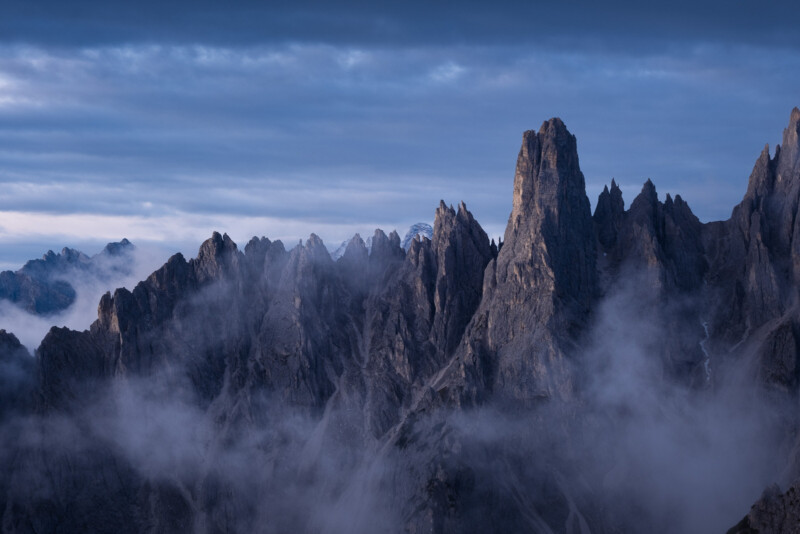
Exposure itself is a very powerful adjustment in altering the mood of a photo and subsequently the mood of the person viewing the image. This change can turn a picture of snowy mountains like this, which might give off feelings of calm and peacefulness, into one that conveys a more surreal feeling of drama, mystery, and power in the play of light and dark.

High-key photos, characterized by brightness and openness, usually convey positivity and are those images we often describe as bright, airy, and even dreamlike.
In contrast, low-key photos, with their darker tones and shadows, create a more somber atmosphere, more dark, and moody.

Colors
Color also plays a key role in influencing our emotions when viewing photographs. Different colors evoke different feelings like drama and power (red), serenity and peace (blue), happiness and optimism (yellow), and calm and refreshing (green).


Texture and Distortion
Texture is another critical aspect of landscape photography. Adding texture to a photograph can evoke tactile sensations. For example, we can describe images with rugged rock formations or rough terrain as ‘raw,’ and ‘wild.’


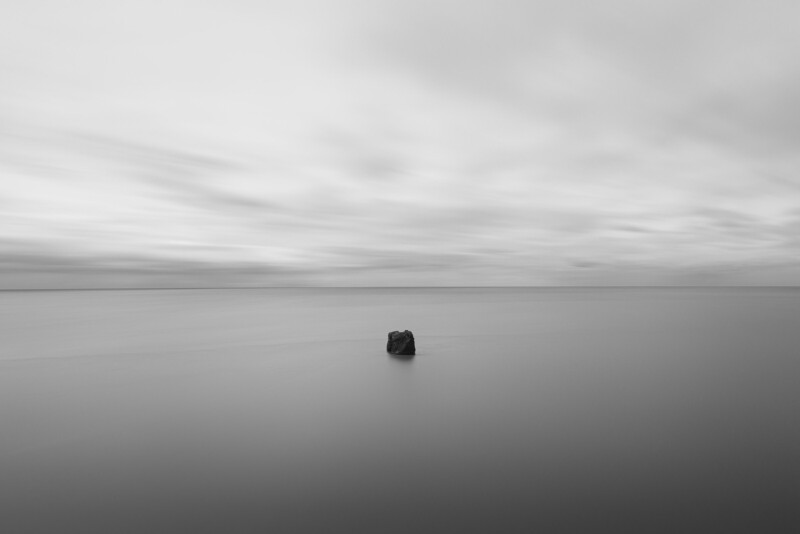
Conversely, smooth textures like calm water surfaces or soft clouds can evoke feelings of tranquility and serenity.

Distortions, on the other hand, can create unsettling or surreal effects.

Cropping
Cropping is another incredibly effective editing technique because it has the power to dramatically change the essence of a photo, its perceived meaning, and the emotions it evokes. The way these meanings and reactions shift depends on the specific type of crop used.

What you include or leave out of the frame can totally change how people see the photo. If you include something that complements the main subject, it really reinforces the message you’re trying to convey. On the flip side, cropping it out can totally change the story.

Even empty space around the subject can serve to change the feeling of the photo, offering a more expansive view, giving it openness and freedom, as opposed to if the crop is very tight, creating a restrictive and confinement feeling.

I highly recommend checking out the article and video I made about visual balance where I’ve covered more of these concepts.
Refine Your Vision with Variants
The second idea I want to share with you is very practical and super effective, and it’s more related to the workflow I adopt to refine my vision during the editing process of an image.
When we edit photos, in Capture One or whatever software you prefer to use, it can be hard to tell if the changes we make actually improve the picture. So, to streamline the process and reduce guesswork, we can utilize something called “variants”.
Unlike physical copies that take up additional storage space on your hard drive, ‘variants’ are simply variations of the same image metadata, allowing you to experiment with different editing adjustments without creating multiple files.


They are very convenient to try out different edits without messing up the original. By making these copies, we can compare the different versions of the same shot and see which one looks best, making the editing process smoother and less confusing, and helping you refine the changes that truly enhance the storytelling you envisioned.
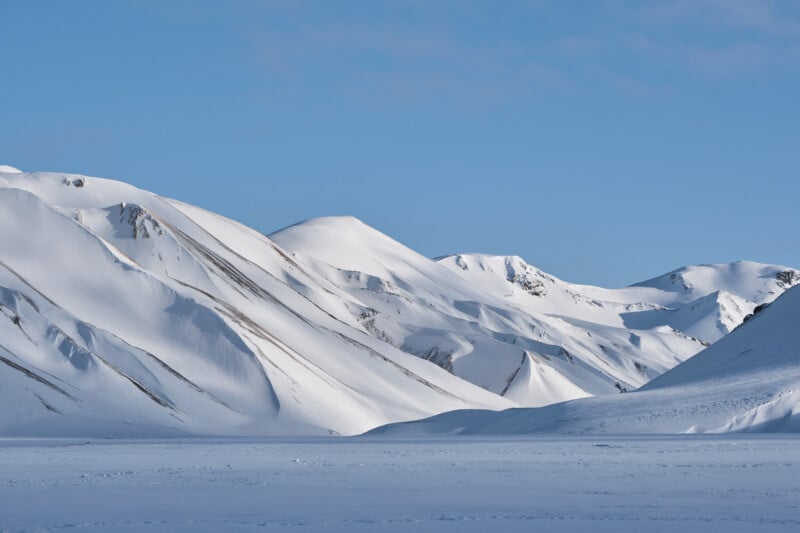
Let me pull up this example image of an Icelandic winter scene. This is the RAW file straight out of the camera, without any editing.

I won’t cover the entire editing process, that’s not the point of this article, but I’d like to show you a practical application of how generating multiple versions of an image can greatly assist you in determining the optimal approach for editing that better aligns with your personal vision.
In Capture One Pro, we have two nice handy functions: ‘New Variant’ and ‘Clone Variant’.
‘New Variant’ is useful when you want to explore a completely different edit. So, it creates a virtual copy of the file using the default settings regardless of any adjustments that have been applied already.
The ‘Clone Variant’, as opposed to a New Variant, creates an exact copy of the selected image variant, including any adjustments that have already been applied.

Here you can see that we have three different versions of the same file. The tiny number at the top is the variance position, which can be used to set the image that holds the winning position.
The darker color bar, instead, tells me that all these variants are associated with the same raw file.
Now, circling back to the main focus of the video, this fantastic feature proves to be incredibly helpful in guiding your decision-making throughout the editing process.
Here is the original RAW file with no edits:
The second variant is the edited version, where I applied some basic adjustments like exposure, contrast, and white balance.
This is an example of very minimal and simple editing that can be perfectly fine for people who enjoy getting a natural look and don’t like to play around with sliders too much. Try asking yourself: how does this image and editing move you? What’s the perceived feeling?

Another idea is to crop out a bit of the blue sky. This will help draw more attention to the snowy mountains and make the scene feel even more expansive.

On the third version, I’ve cropped the top of the frame even more, using a different aspect ratio to create a pronounced panoramic feeling.
Notice how just the crop factor can dramatically alter the feeling of the image and our perception of it. The tone and color adjustments remain the same; we’ve only changed the aspect ratio.
Moving on to the next variant, I took a different approach by desaturating the blues significantly, reducing the contrast, and slightly increasing the exposure.

As you can see, it’s the same shot, the same scene, but with a completely different interpretation.
Is this version better than the previous one? There is no right or wrong answer. They’re both okay, and they simply convey a very different feeling.
Let’s explore a different direction for the image.

This version is totally different. I used the same panoramic crop, but it’s much darker and moody, with a higher level of contrast. I played with the Levels tool and some Luma Masks to target shadows and highlights separately in order to make the light more dramatic.
And to really enhance that wintery vibe, I went for a desaturated cold color grading.

Next, I converted the image to black and white, removing the color element to shift the viewer’s focus to the interplay between shadows, highlights, and shapes, rather than the sensation of coldness.
In this next example, I took the image in yet another direction by significantly reducing the contrast to get a sort of oniric interpretation of the scene with these soft pastel blue tones.

How does this version resonate with you? It evokes a completely different feeling compared to the previous contrast-rich and stylized versions, doesn’t it?
Wrap Up
People react very differently to the various forms of edited changes. The same adjustment can be seen as pleasing to one person, and completely off for another. The same adjustment can be noticed by a person and at the same time it goes completely unnoticed by another one.
We don’t edit for perfection; we edit for connection. And when people look at your images, they’ll feel the impact of your unique vision.