Minimalist Photography Using Long Exposures
Sometimes there is too much going on, in which case simplifying a scene can make it easier on the eye. We can choose to highlight particular shapes or colors and leave out or remove others.
We might not all completely agree on when an image is or isn’t minimalist, but the principles are nevertheless helpful for composition. It is about simplicity rather than complexity. This doesn’t mean that there will be no details, but it does mean that potentially competing elements will often have been discarded. Clean lines and shapes may pop out at us and there might be a strong use of geometry. There tends to be a sense of elegance to the way the author has stripped back the composition to include only the essential elements.
In this article, we are focusing on how long exposures can help to give a minimalist feel. There are plenty of other aspects to explore, but for now we will take a look at a relatively easy way to dip your toe into the world of minimalism with landscape photography.
Table of Contents
Landscape Photography Using Long Exposures
Around 2010, there was a huge trend that sprung up in landscape photography and it remains with us today. It involved blocking out most of the light from our cameras with very heavy ND (neutral density) filters – most notably using the now infamous 10-stop filter. This was mainly for seascape images to give a very different feel to the water, turning it at times into little more than a mist. Rocks, piers, and other structures are then left in stark contrast, offering strong lines and shapes for your composition.
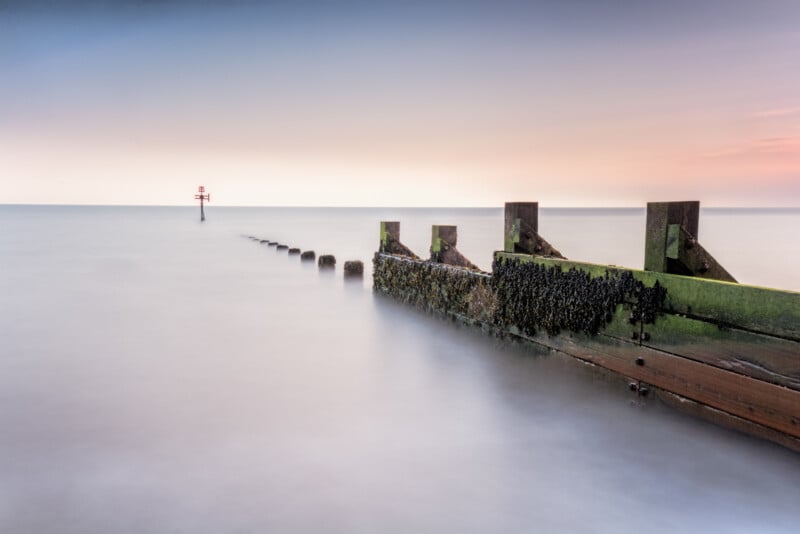
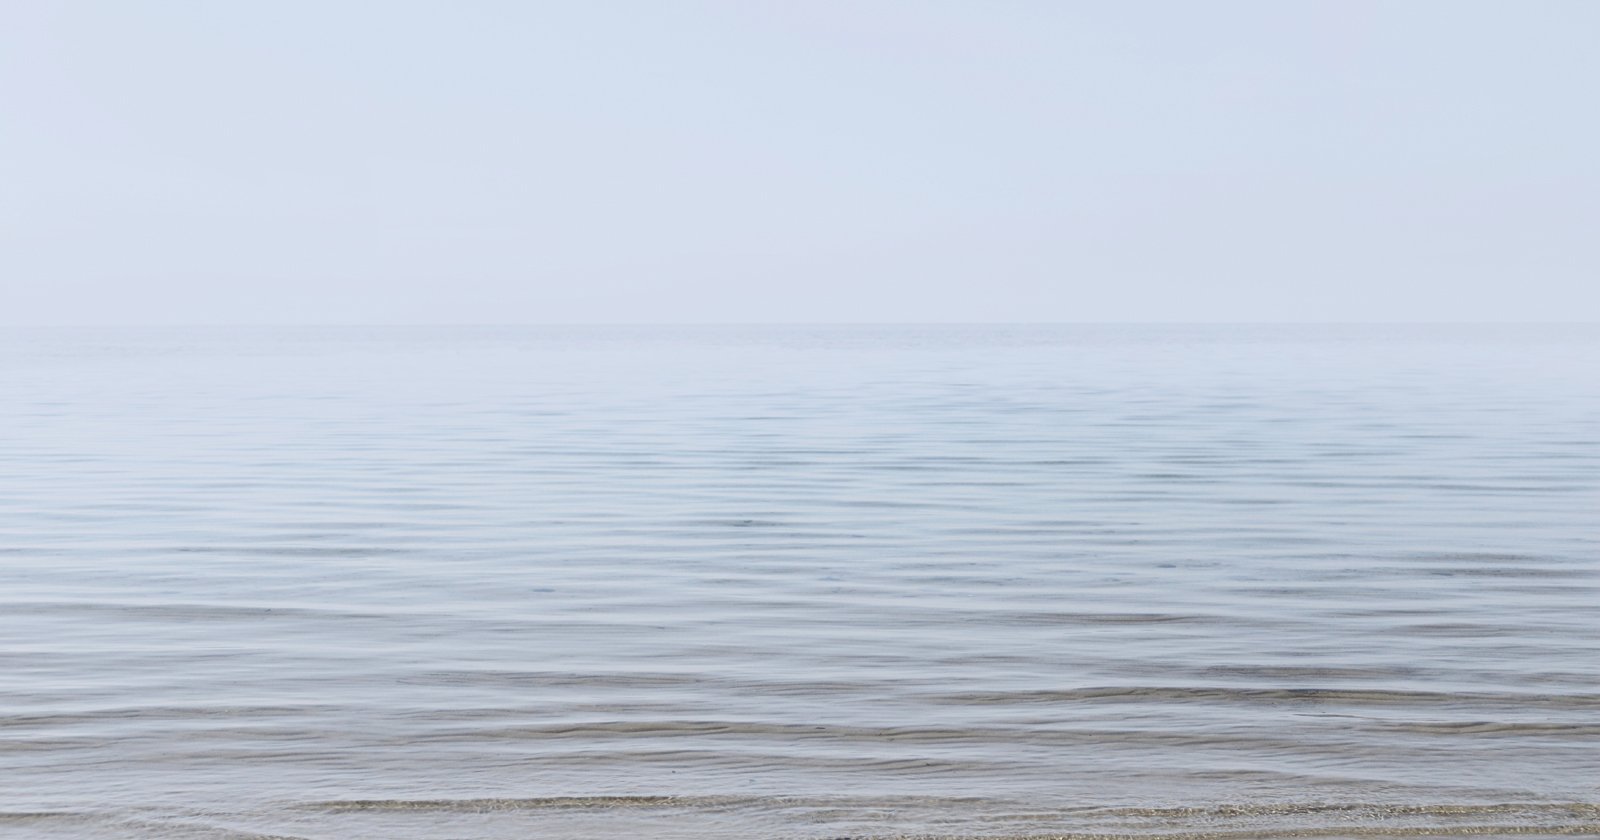
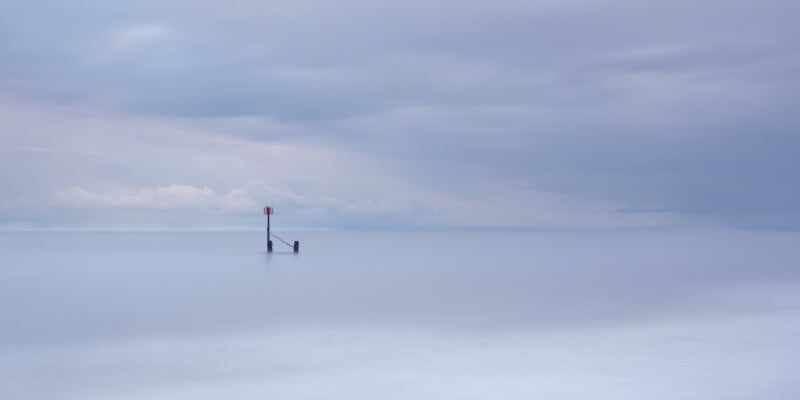
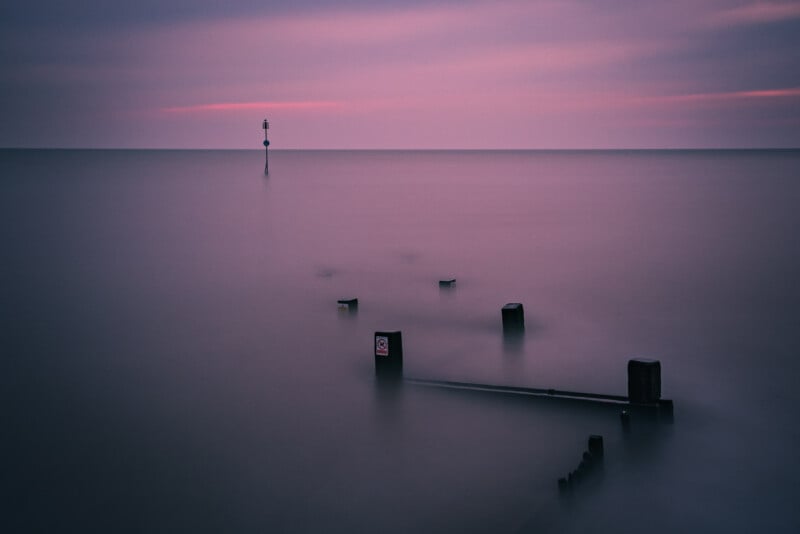
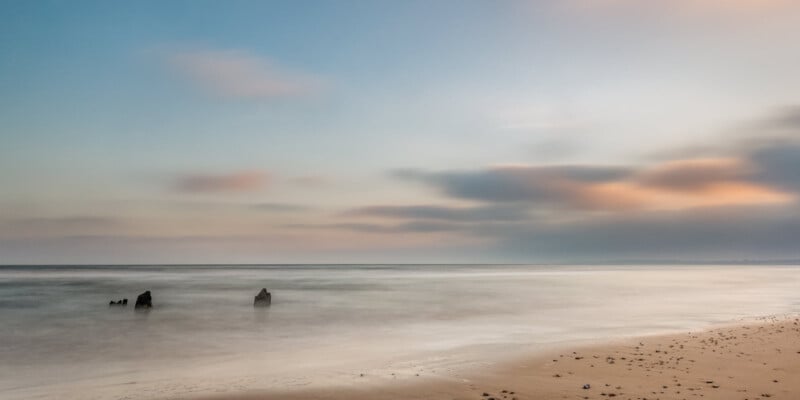
Long Exposure Minimalist Seascapes
Waves can create a lot of interest in landscape photography, but at times they can seem to clutter up a scene. We don’t always want pin-sharp details all over the water as it can distract from other areas in the image. It also restricts the mood that we are able to convey. Using long exposures of various lengths gives us great freedom to sculpt the look of water in our photos. From softening the edges of the waves to creating a milky or misty look, there is a lot we can do with water to change the mood and look of a composition. The more extreme end of this is particularly handy for drastically simplifying a scene.

Piers and sea defenses suddenly stand serenely and boldly, carving out strong lines in an ethereal soft landscape. Adding very strong Neutral Density filters in front of the lens allows you to keep the shutter open for longer. These can be screw-on filters or rectangular/square sheets that go into a filter holder system. I have used a few of each and one thing that is worth bearing in mind is that you will get a slightly different color cast on your images from strong ND filters as they don’t tend to be truly “neutral”. So, expect to have to correct the white balance afterward. Weaker ND filters have less of a noticeable effect. But, if you are after the extreme movement blur then you will normally need something like a 6-stop or more during daylight hours and that tends to affect the color.
How to Shoot Long Exposure Seascapes
For long shutter speeds you will, of course, need to put your camera on a tripod. It is also worth using either a timer or a remote shutter to avoid any wobbling of the camera when you take a shot. I sometimes take a bag with me to fill up on-site with sand or stones to use as a weight to stabilize the tripod more securely. The benefit of this is you don’t need to hike along the beach with weights. Just fill a bag with sand or pebbles, then empty it when done.
Cover up the eyepiece on a DSLR to avoid any light creeping in there during very long exposures. Make sure that if you are using a filter holder system there isn’t anywhere for light to leak in. Some filters have foam fittings to help with this.
It tends to be easier to work out the exposure by finding a good exposure without the filter and then making the necessary adjustments afterward. So, if the scene would suit a shutter speed of 1/100th of a second and you are going to add a 10-stop filter then you know that you need to change that to 10 seconds (double it ten times or x1000). You can get free and paid apps for your phone that can do the calculations for you.
It is much easier to compose your scene without the ND filters in place and to add them only when ready to take the photo. Otherwise, you may struggle to see sufficiently well to focus accurately.
Minimalism with Monochrome
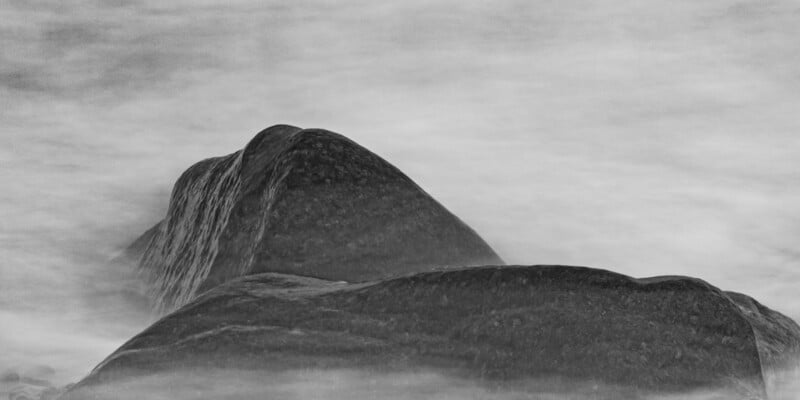
Another technique commonly used for minimalist approaches to composition is converting to monochrome. It is another way to reduce the competing elements in a scene to get the viewer to focus more on shape. This can also make it look more abstract as we no longer have the color to guide our interpretations. The image below of the sea swirling around rocks at the beach almost looks like it could be mountain tops in the clouds.
Using Long Exposures to Simplify Land and Sky
As well as changing the appearance of water, long exposures can be helpful for simplifying things like clouds and blocks of plants. Clouds can be stretched across the sky, creating a smoother look, or forming lines. You can use this to your advantage when the wind is blowing in the right direction to create leading lines going towards or emanating from your subject or area of interest.
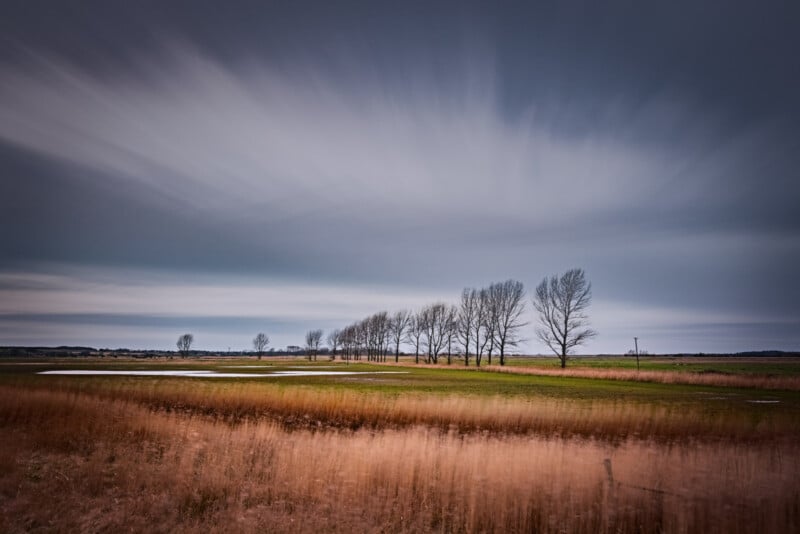
You can also see in the image above how plants can be blurred over time, recording their movements in the breeze. Larger trees (particularly if they have bare branches) normally move less, so they can become the sharper, static elements of your composition. Instead of distinct individual plants being visible as details, you can create something that looks more painterly or impressionist. This can be anything from almost just a smudge of color to something that looks like loose brush strokes. For more blur, it really helps if you have a strong breeze to create the movement for you.
Camera Settings
In terms of camera settings, you will need to respond to how strong the wind is when choosing your shutter speed. The image above needed around 5 minutes as the clouds were moving slowly in a more gentle wind. By contrast, the image below needed just over 1 minute. If you need the shutter open for a long time in order to get movement and end up with the image being over-exposed, then use an appropriate strength ND filter to cut down the light so that you can get a good exposure.
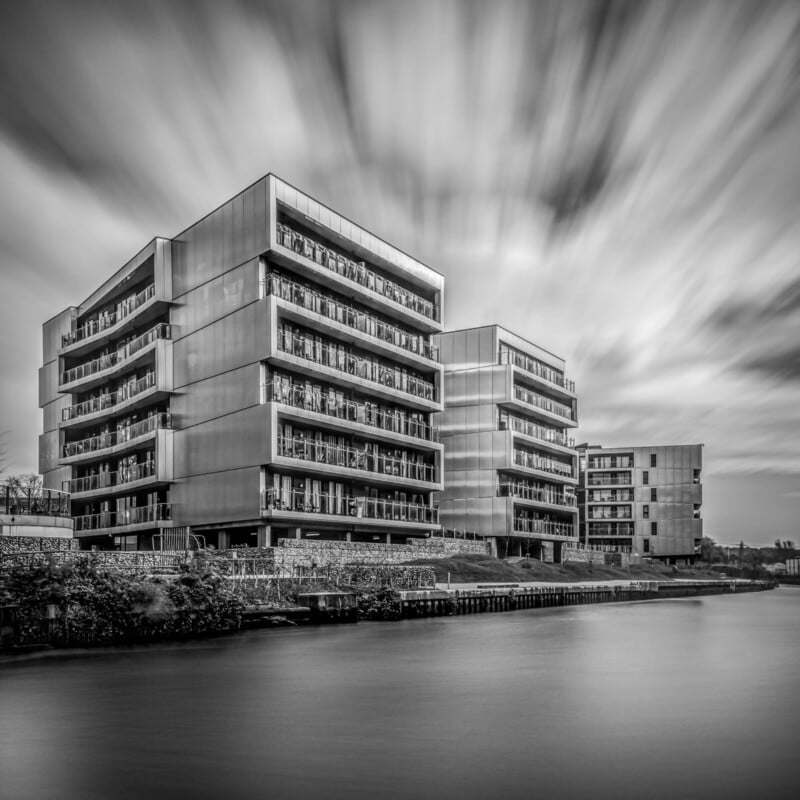
Here the time has also smoothed out the water in the river to some extent, giving us softer reflections of the buildings. Monochrome conversions such as this can be a good way to over-emphasize the details in cloud movement as you can push the contrast harder than you can with a color image.
ICM: Intentional Camera Movement
Another way of creating more extreme blur is to move the camera during the exposure. This can be a gentle or rapid side-to-side or up-and-down movement, for example. You may still need to use an ND filter to avoid over-exposing the capture as you will need to have the shutter open long enough to register the blur clearly. The image below shows a side-to-side technique used around sunrise at the coast. I tend to avoid getting the sun itself in the frame as it leaves a very bright streak that rarely looks good.

ICM can be a good way to drastically simplify a scene down to bands of color. It can also give a more abstract painterly appearance, especially when there is a lot of blur.
Other Uses for Long Exposures
In the image below I used a long exposure to remove detail from the shoreline and create stripes of color with the water and foam. This is an alternative to using a shallow depth of field. Sometimes you may want a large depth of field to keep a lot of detail but still wish to control the appearance of the water.
Long exposure techniques are useful to know as they can work with most moving subjects. For example, if you find yourself in a city and want to take architectural shots it can be very difficult if there are people around. Sometimes you can use a long exposure with an ND filter to make the people invisible or ghostly. Provided they keep moving and your exposure is long enough, they can vanish completely.
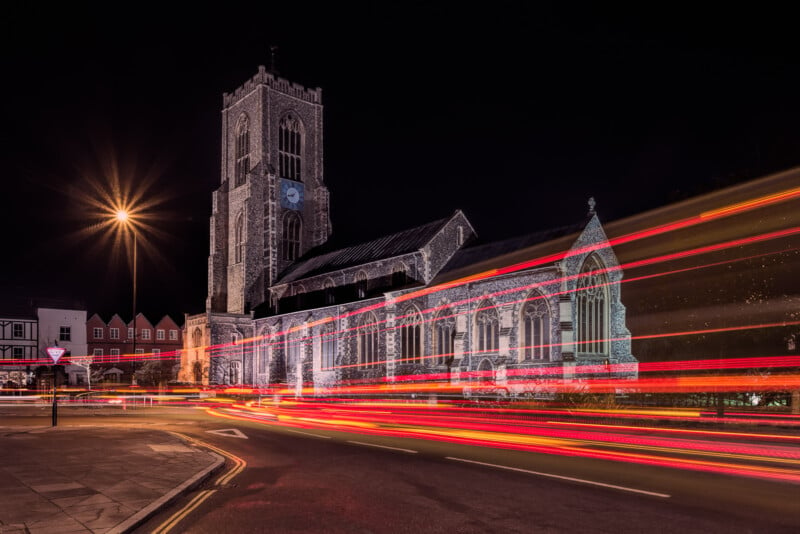
If you don’t have any ND filters and still want to try long exposures, then I’d recommend having a go at light trails. These are easiest to do in cities where the traffic is moving freely. Traffic jams don’t work so well! The low light in the evening means that you need a longer shutter speed anyway and the brightest bit of the cars are their lights, so that tends to be all that registers. Then you can create flowing trails of color through your scene – provided that the traffic plays along!
You can apply these techniques to various genres – even studio portraits – for a creative effect. Sometimes the blur created actually makes things more complex, so it isn’t always going to give you an automatic minimalist feel. You need to pay attention to other aspects of your composition if you want minimalist images. These final images above are obviously not as simplified and clean as others in this post. But they do show that techniques can be re-applied for all sorts of purposes.
When a long exposure can help you to achieve simplicity, clean lines and shapes, elegance, and a focus on just a few essential elements then it can help you create minimalist images. It obviously doesn’t always work, and the extent of the effect can vary. But, for seascapes at least it can be extremely effective.
Image creditsAll images © Joe Lenton, used here with permission. Not to be reproduced without permission from the author.