The Value of Vertoramas
I created my first vertorama on the 20th of June 2007. While strolling around Cape Town with my camera early one morning, I noticed some beautiful light reflecting off the smooth polished cobbles in Greenmarket square.
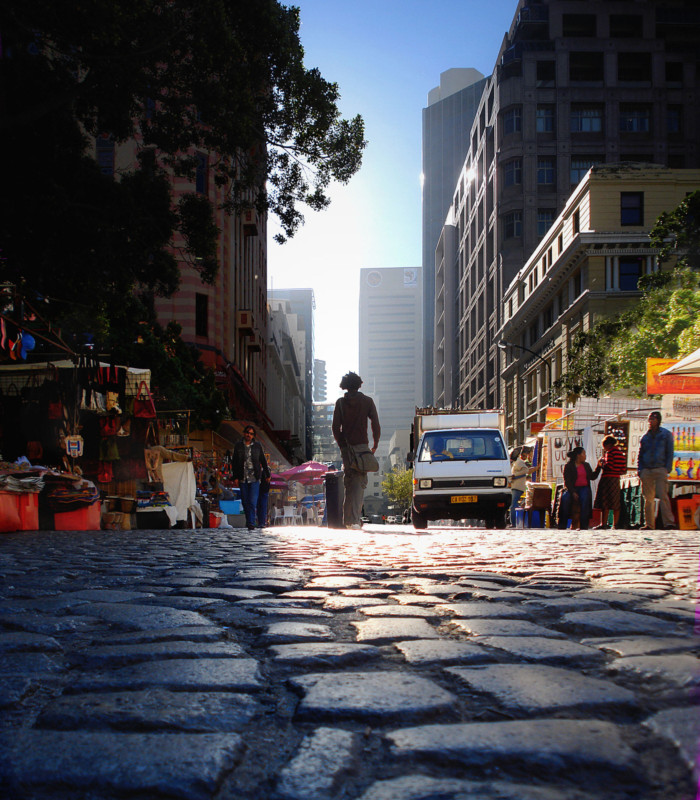
Then suddenly a thought occurred to me. I’d already attempted (with some success) to stitch photos together horizontally, so surely the same principles would apply when they were assembled vertically? So I lowered my tripod as low as it could go, tilted my lens downward, and focussed on the cobbles. I then waited patiently for some people to walk into my frame. As soon as I’d taken a few decent images of that, I tilted my camera upwards to capture the buildings and the source of the light.
I won’t ever claim to be the first person to create a vertorama or to call it that, but for many years I only ever shot vertoramas (and I always called them that).
So what exactly is a “Vertorama”? It’s nothing more than an abbreviation for the words “Vertical Panorama”. Most panoramas that you’ll see are horizontal (long and narrow), but a vertorama is vertical in orientation, and quite often square. The word vertorama didn’t exist in the English language in 2007, and a Google search of the term returned zero results.
The word Panorama was coined by the artist Robert Barker who exhibited his unique paintings in London in 1792. His paintings were attached to the inside of a cylinder and could be viewed from within. This exhibition was entitled “The Panorama”.
The word Panorama also has a historical significance in photography and is clearly defined in the English language as: “an extensive unbroken view, as of a landscape, in all directions”. By “all directions,” this obviously implies both horizontal and vertical.
The word Vert also has a clear and existing definition, namely “green undergrowth or other vegetation growing in a forest, as a potential cover for deer”. So joining “vert” with “orama” to form the word “vertorama” is ambiguous and inaccurate, especially since “panorama” is already a perfectly acceptable word to describe the technique.
However, the English language is not a static thing and new words are added to our vocabulary every year. The Cambridge Dictionary now has this entry for the word ‘vertorama’: “A photograph in which the image is shown in a tall vertical view.”
Typing the word vertorama into Google search now returns 64,400 results. Many of those links will take you to photos that I’ve shared online, but it would appear that the word has now finally been accepted by most of the photographic community.
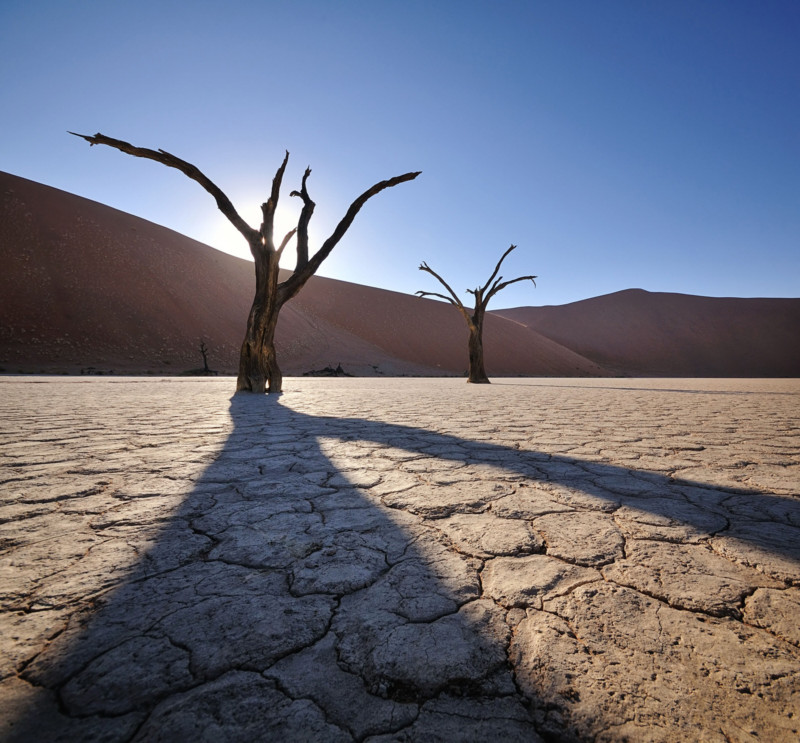
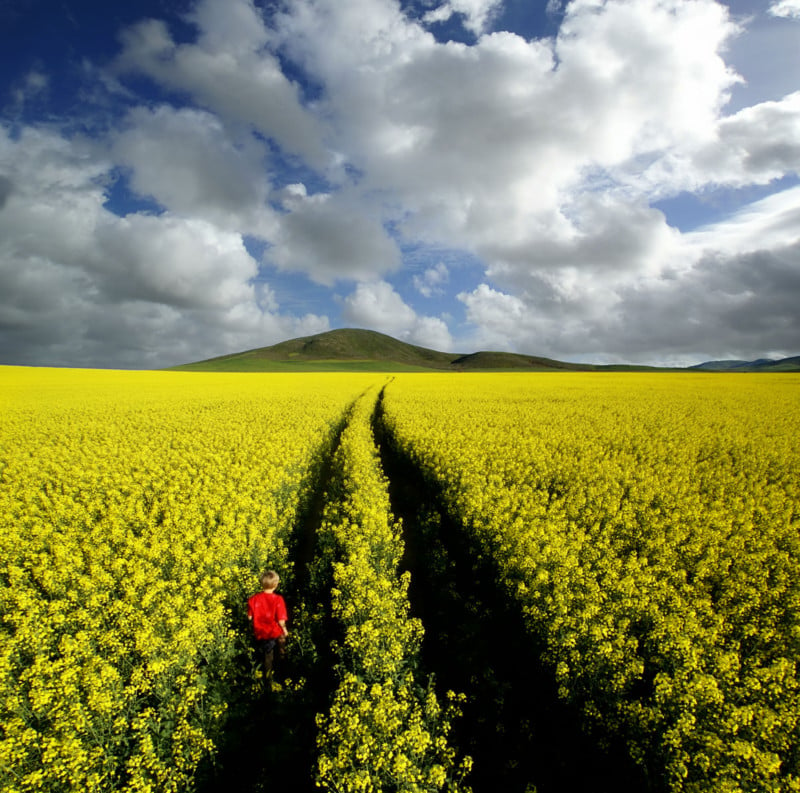
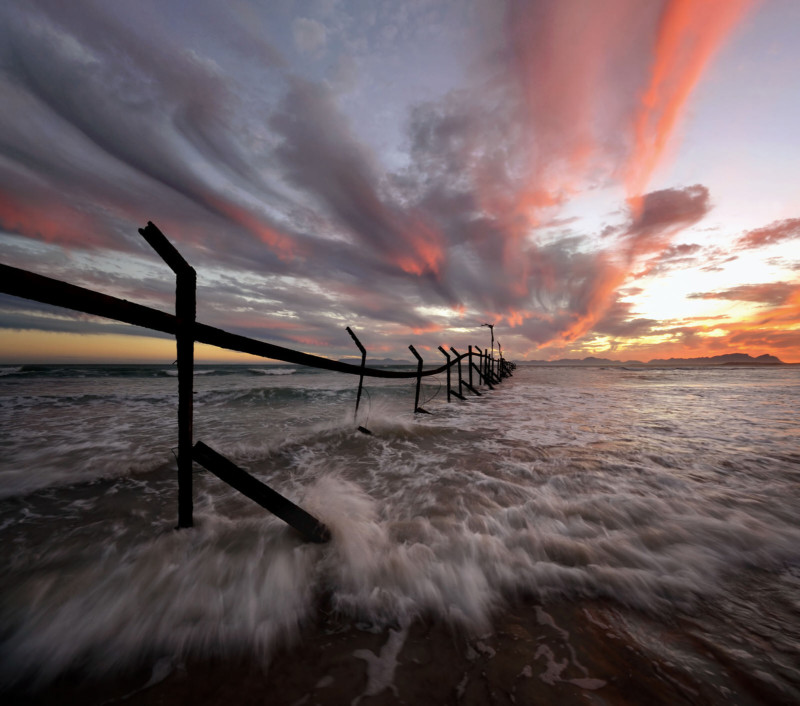
I really enjoyed the visual impact of vertoramas consisting of only two photos taken with my 10mm ultra-wide lens and with my camera in the landscape orientation. When these two photos were stitched together seamlessly one above the other, the resulting image felt much more immersive to me than any single-frame image ever could – almost like my eyes were being sucked into the photo.
Of course, I realized that in most cases I could just step back a bit and capture both the foreground and sky in a single shot and then crop my photo square afterwards, but somehow those photos never provided the same visual impact as an ultra-wide double-image vertorama. My favorite phrase at the time was “my vertoramas capture more than my eyes can see”.
However, as much as I loved their visual impact, the process of creating perfect vertoramas was not without its challenges.
Anyone who has ever used a wide-angle lens will understand lens distortion. As we tilt our cameras either up or down, all the vertical lines will converge either inwards or outwards. Since all my vertoramas consisted of one photo with my camera pointing downwards and one with it pointed upwards, any verticals in my compositions would almost certainly never remain vertical.
Photo-stitching software was not very advanced in 2007. The programs that did exist at the time didn’t include any profiles to correct lens distortion, so they almost always failed to stitch ultra-wide photos that included any converging vertical lines. Fixing the vertical lines with Photoshop’s lens correction tool before attempting to stitch the two photos did improve the situation slightly, but in most cases my stitching software failed miserably.
This was when I learned everything there was to know about Photoshop’s “layers”, “masks” and the “free transform” tool.
By creating a new canvas and pasting my two photos into it (as separate layers), I was able to rotate, straighten and twist them until they fitted together seamlessly. It usually took a fair amount of tweaking to get them to align perfectly, but the resulting image was always worth the time spent editing it. The masking process was effortless when the alignment process was successful, and compositions without any vertical lines were always much easier to stitch.
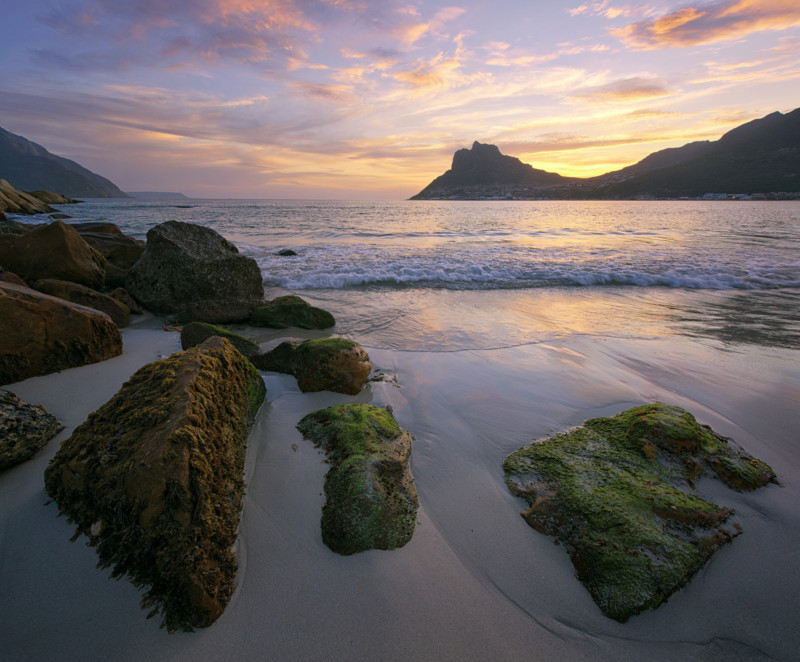
But while I was able to learn some cool new Photoshop tricks that would help me to create my vertoramas, I also realized that no amount of trickery would ever improve a bad photo of a boring subject. If I wasn’t able to find strong compositions including both an interesting foreground and an interesting sky, then my vertoramas probably wouldn’t ever seem interesting to anyone.
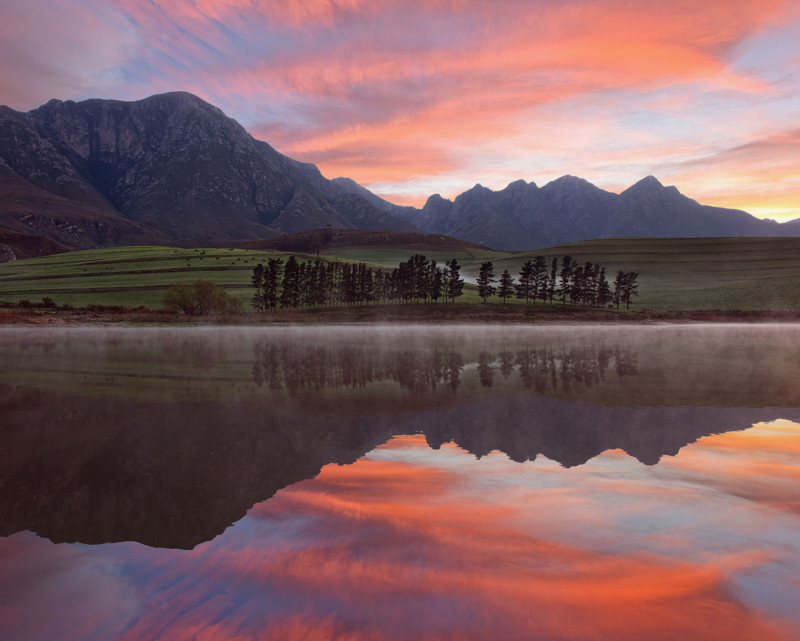
Over the next few years, my strategy developed into one where I’d try to find the most interesting foregrounds, and then wait for the most interesting skies (and light) before attempting to capture everything. Creating successful vertoramas is all about planning and patience. If you already have a good mental image of your final result, then it will be much easier to capture the photographs for your vertoramas.
One of the best reasons (in my opinion) for creating panoramas and vertoramas is that they help us to think outside the frame. Although it’s not necessarily a bad thing, whenever we compose single-frame images we usually do so by looking through our viewfinders. This means that our compositions will always be restricted by what we can fit into our frame. It’s a much better practice to compose our photos in our minds, thinking carefully about what we want to include and exclude, before looking through our viewfinders. In most cases, we’ll be able to include everything in one frame if we used an ultra-wide (or fish-eye) lens. We could then carefully crop the photo afterwards to suit our desired composition (square, 16×9, etc.). But there will invariably be times when our subjects don’t fit into our viewfinders or when it would be more appropriate to use a slightly longer focal length lens to capture the scene.
Photo-stitching technology has vastly improved in the 15 years since I attempted to stitch my first ultra-wide vertorama. These days most stitching software is (almost) always able to join multiple images together seamlessly, so a process that used to take me hours, can now be completed in mere seconds.
Another obvious advantage of stitching (instead of cropping) is that the final image will always be bigger (in megapixels) than a single-frame image. More megapixels usually implies improved image quality.
Some will argue that since the lens distortion corrections required to seamlessly join the photos in ultra-wide vertoramas will always stretch and compress the pixel data, the image quality of our vertoramas could never be better than with single-frame images. That is a valid argument and in some cases I wouldn’t disagree.
While this is mostly true for panoramas and vertoramas captured with an ultra-wide lens, nobody is restricting us to only using wide lenses to capture them. As the focal length and number of images increase, so does the final image quality.
Others could argue that ultra-wide vertoramas will never be an accurate reflection of reality. We might be able to capture “more than our eyes can see”, but our subjects usually end up appearing so distorted that they don’t look anything like what we saw with our eyes. I would argue that any photo taken with any wide or telephoto lens is a distortion of reality since it is not how we view the world. The human eye has a focal length of roughly 50mm (on a full-frame camera), so anything longer or wider should also never be considered an accurate representation of reality.
But all of this is just nit-picking and pixel-peeping.
Since most of our photos will only ever be viewed on the Internet (and usually on a phone), I’ve always believed that visual impact is more important than image quality. The only people who will ever notice that our subjects (and pixels) don’t look exactly as they appear in reality are those who are intimately familiar with that particular subject. The more unique our subjects, the less chance that anyone will notice that our photos aren’t perfect representations of those subjects.
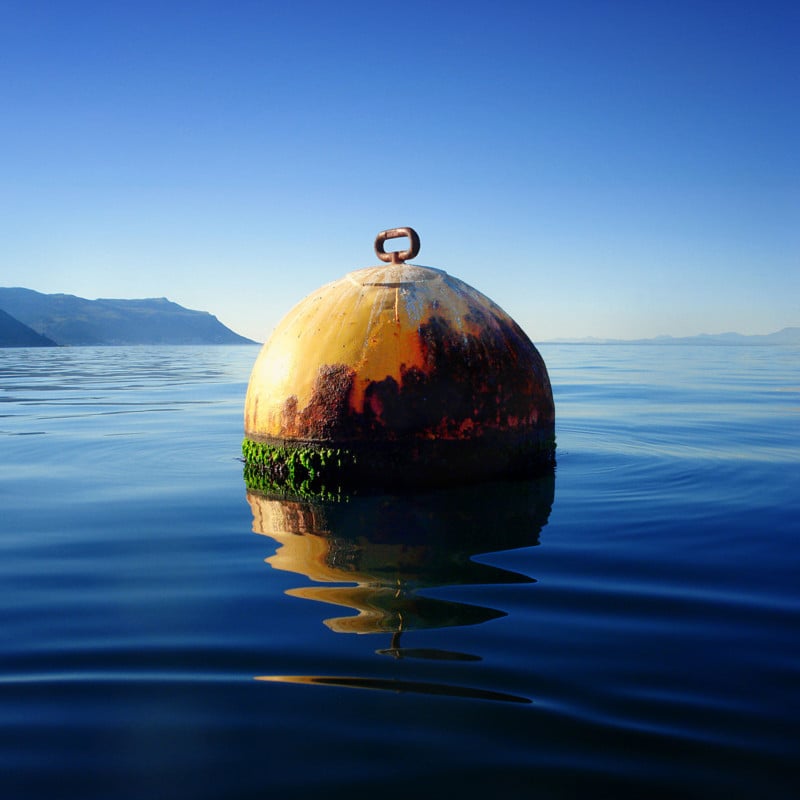
This leads me to my next (and most important) reason for pursuing vertoramas with such passion; to create completely unique images of popular (shot to death) subjects.
These days everyone has a camera and the most photogenic locations on our planet are visited by thousands of people every day. Is it still possible to capture new and interesting compositions of those popular locations? Of course we can! All we have to do is start thinking outside the frame.
Here are a few more things that I’ve learned over the years that will make it much easier to capture and stitch your own ultra-wide vertoramas.
- Always use a tripod and always ensure that your horizon line is 100% level in each of your photos.
- Always use exactly the same camera settings (focus, aperture, shutter speed, and white balance) for all your photos.
- Always remember, the wider the lens the greater the depth of field. Vertoramas captured at longer focal lengths might require focus-stacking for perfect results.
- Always shoot a bit wider than the composition requires. This allows for lens corrections that might stretch your subjects out of the frame.
Another excellent reason for trying something new (and difficult) is because the best way to improve as photographers is to continue to challenge ourselves on every level. All the easy shots have already been taken. Our photos are much more likely to be noticed these days when they look completely different from everyone else’s photos.
The more difficult something is… the fewer people will have ever perfected it.
But inevitably, after many years of practice, everything became a lot easier and I started to feel a bit bored with the square format of my vertoramas. This aspect ratio is great for representing subjects that are perfectly balanced both horizontally and vertically, and usually when our primary subjects are placed exactly in the center of the frame. But if you’ve ever heard of the “rule of thirds” (that was a joke), then you will know that a perfectly centered subject is seldom ideal.
I am much more adventurous in my approach to composition these days, only occasionally capturing scenes as square vertoramas. It might be a good thing to make something our thing for a while, but it should never become our only thing.
I now realize that it doesn’t make any sense to always try to squeeze round pegs into square holes. Although some landscape compositions might work best when they’re perfectly square, often (most of the time) they just don’t.
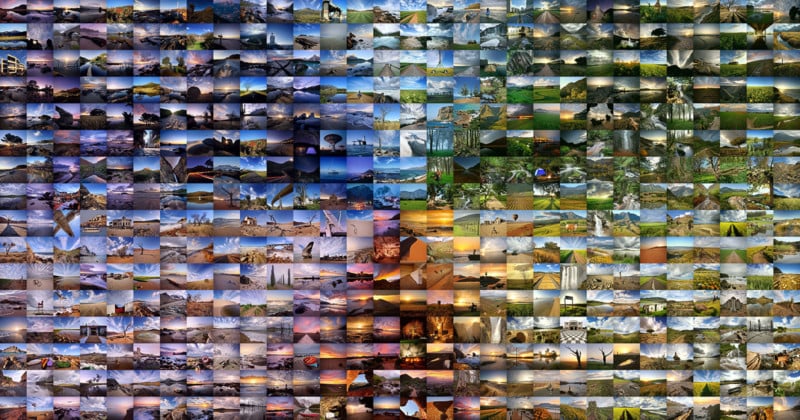
So a few months ago I counted and discovered that I’ve now captured, stitched, and edited (and shared on social media) more than 1,000 vertoramas. This made me wonder if I could somehow exhibit all of them at the same time.
Many of my early vertoramas look like complete crap. And since re-editing anything would take too much time and defeat the purpose of this exercise, I decided to narrow down my selection to my favorite 900 vertoramas.
Here’s what I managed to come up with:
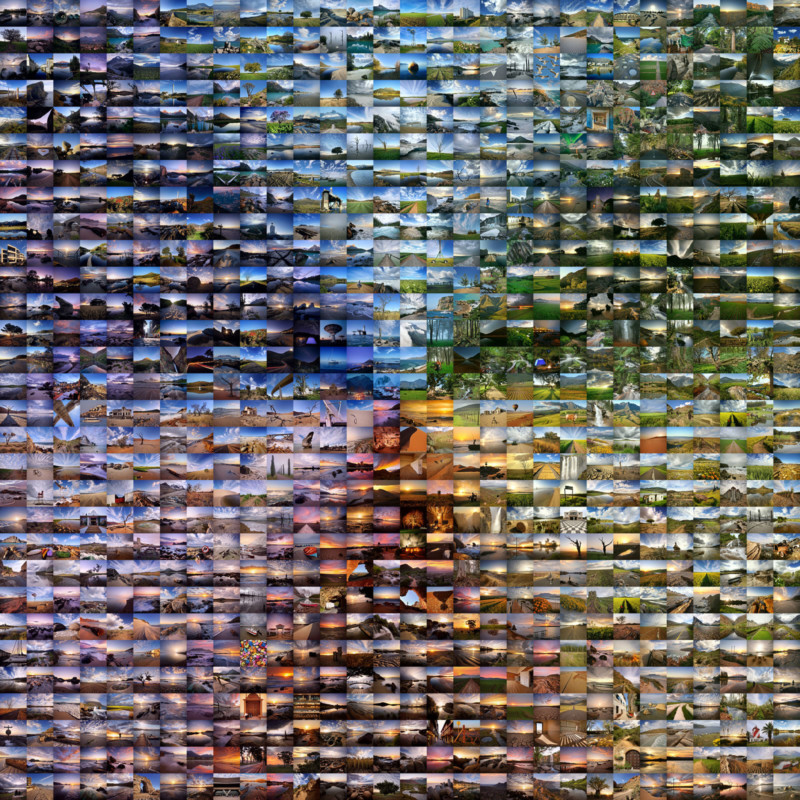
This mosaic is made up of 30 rows of 30 photos. I used an amazing free program called AndreaMosaic to arrange all my best vertoramas according to the colors of the color wheel.
The final image is 12,600 x 12,600 pixels and can be viewed full-size here.
About the author: Paul Bruins is a semi-retired South Africa-based professional landscape photographer. The opinions expressed in this article are solely those of the author. For the past 20 years, Bruins has worked to explore and photograph every corner of his hometown and country. He has organized and hosted a number of photographic exhibitions, workshops, and tours around the world. His photos have also won numerous competitions and awards and have been published in calendars, magazines, and books. You can find more of his work on his Flickr and Facebook.
Image credits: All photographs by Paul Bruins.