Creating Cosplay and Superhero Inspired Photo Portraits
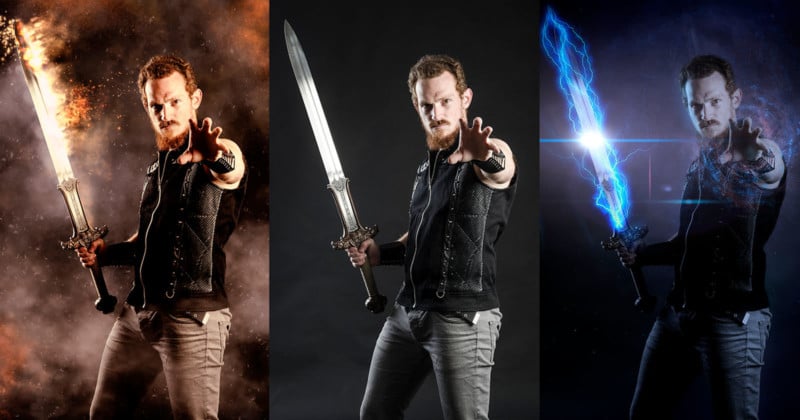
Creating compelling sci-fi and fantasy inspired images was once a task that required either awesome practical effects and lighting, dexterous digital paint skills, or a mastery of complex 3D animation software. Recently, Boris FX, an Academy Award-winning software company that has developed film and television visual effects tools for over 20 years, has leveled the playing field with the introduction Boris FX Optics.
Optics is a standalone application and a plugin for Adobe Photoshop and Lightroom that brings Hollywood style lens flares, cinematic lighting effects, and feature film processing looks to the photo editing community. In this informative tutorial, VFX industry veteran, Ross Shain shows how to easily turn portraits into epic poster frames — without resorting to stock footage or overlay assets.
Video Tutorial
Watch the video tutorial here. If you’d like to take Optics for a test drive, you can download a free, fully working 15-day trial here.
A special discount for PetaPixel readers!
For a limited time, take 25% off the list price of Optics. Offer is good for new purchases or the annual subscription plan. Offer expires, June 15, 2022.
- Visit the Boris FX webshop and add Optics to your cart.
- On checkout, enter coupon code: petapixels-optics.
Getting Started
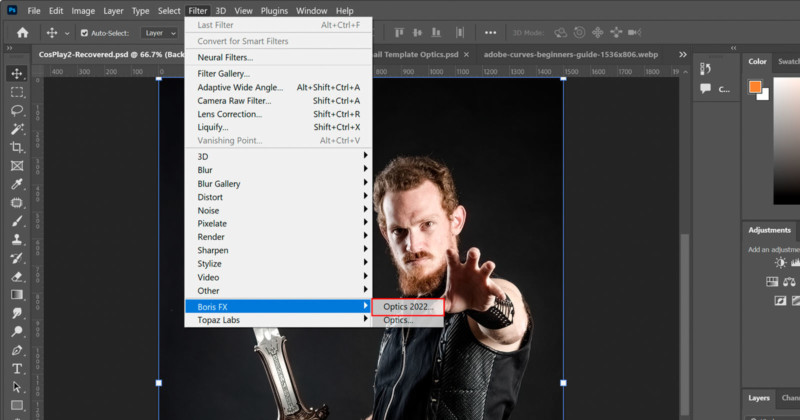
The Optics plugin can be launched directly from Photoshop or Lightroom. If you are using Photoshop, we recommend converting your layer to a smart object, then select your layer and go to Filter > Boris FX Optics 2022.
If you use Lightroom, launch Lightroom Classic, select your image, and go to Photo>Edit In Boris Optics 2022. We recommend applying Optics to a copy instead of the original.
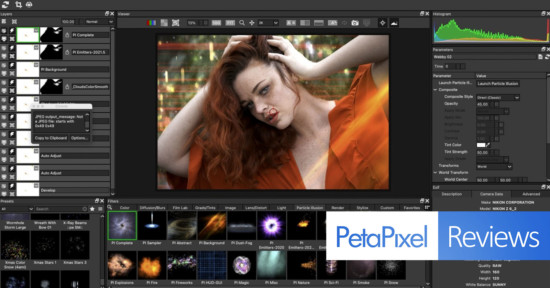
And if using the Optics standalone application, simply go to File>Open and open your photo. Whether you are using the plugin or standalone, working with Optics is the same. The interface is divided into a few key areas. Underneath your image, find hundreds of Filters broken in 10 categories:
Color, Diffusion/Blurs, Film Lab, Grads/Tints, Image, Lens/Distort, Light, Render, Stylize, and new Particle Illusion.

When you choose a filter, the selected filter Parameters are displayed on the right and the available Presets are on the left. In the upper left, you have the Layers window where you will find opacity and layer blend modes.

Lighting and Render Effects
Optics is packed with creative lighting filters and special effects generators that come from Boris FX Sapphire, a plugin collection that is regularly used on big budget films and TV shows. In the Render category, we can find useful background generators like Night Sky (star field), Luna (photorealistic moon generator), and even abstract background generators like Cautics and Tiles.
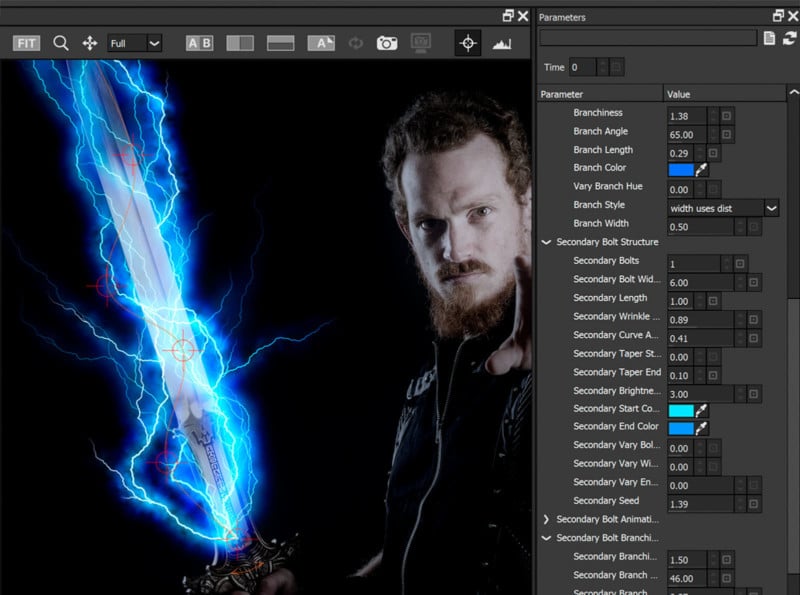
We can apply UltraZap which is an advanced lightning filter. You are never limited in Optics. In the Parameter window, you can control UltraZap options including the bolt position, color, branchiness, taper, glow, and so much more.
Masking Made Easy
Optics can import masks from Photoshop or use the built-in masking tools which offer a streamlined, simple way to isolate effects.
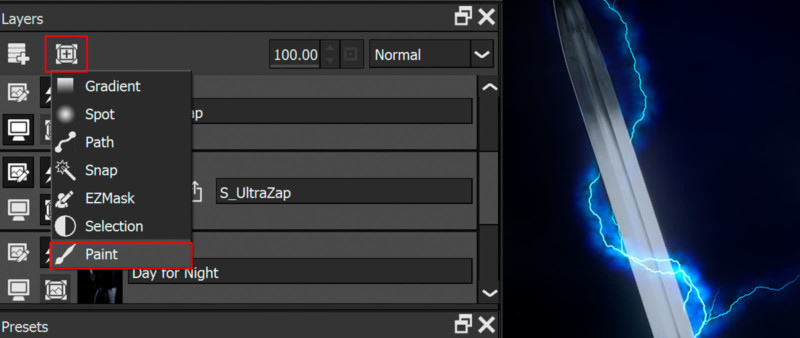
You can apply various mask types to every layer in Optics. For example, if we want to wrap the lightning effect around the sword, in the Layers window, we can add a Paint Mask and paint out the areas where the effect should not be shown. Other mask tools include Gradient, Circle, and Path as well as masking by luminance and color values.
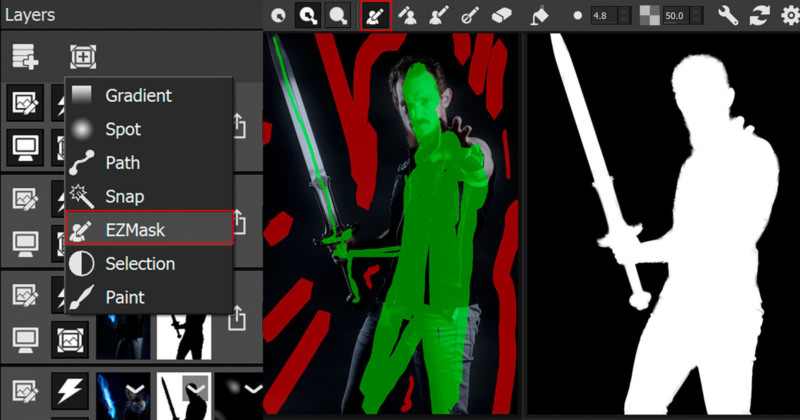
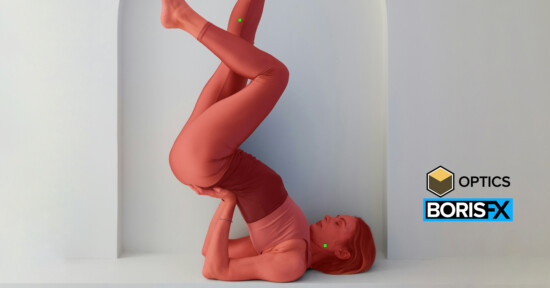
The EZMask tool is one of Optics users’ favorite tools. Using the Foreground Brush (green) and Background Brush (red), with a few simple loose paint strokes, we can identify the image’s foreground and background. Select the Enter Key (or hit the process cog icon) to generate the mask. Select M (or hit the matte icon) to view your mask as black and white. Masks can be softened and inverted for quality. With the EZMask in place, we can add more layers and reuse the mask for each layer by dragging it up to the new effect. In this manner we can change the background.
Cinematic Lens Flares (the J.J. Abrams Effect!)
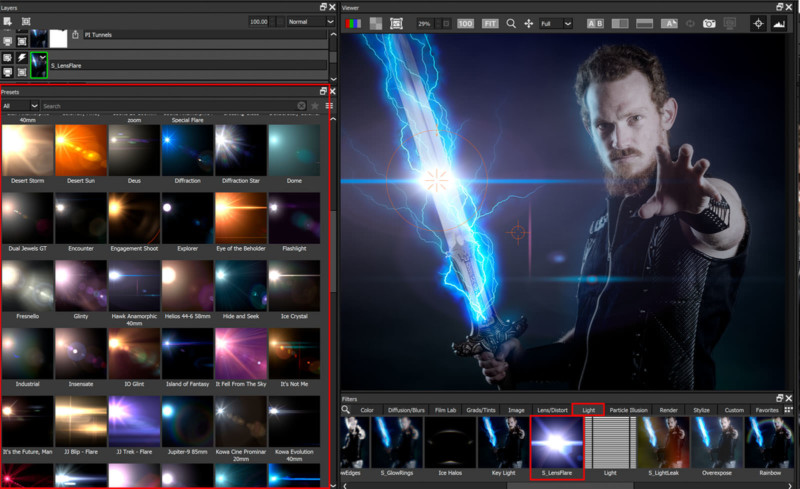
One of the stars of Optics is the Lens Flare effect, again coming from Sapphire. Optics comes with 125 beautifully designed lens flares to add depth to every kind of shot. You can find realistic lens effects presets to match your favorite lens as well as the bigger, J.J. Abrams style flares found in your favorite Star Trek and Marvel films.
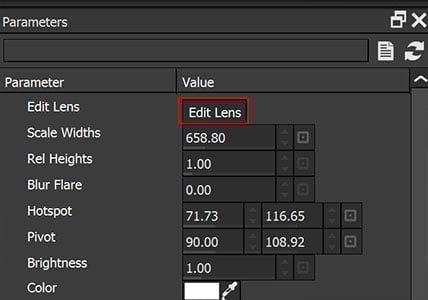
For complete customization, you can also open the Flare Designer to design and build your own custom flare library. In the parameter window, choose Edit Lens.
Particles for Photoshop
The most unique thing about Optics is the Particle Illusion category which brings over 1700 particle-based emitter presets to photo editors. Particle Illusion is a powerful animation and motion graphics software from Boris FX and now the entire library of emitters is included inside Optics. You can find realistic assets generators broken into categories like Smoke, Fire, Water, Sparkles, Explosions, Dust, Sci-Fi, and many more.
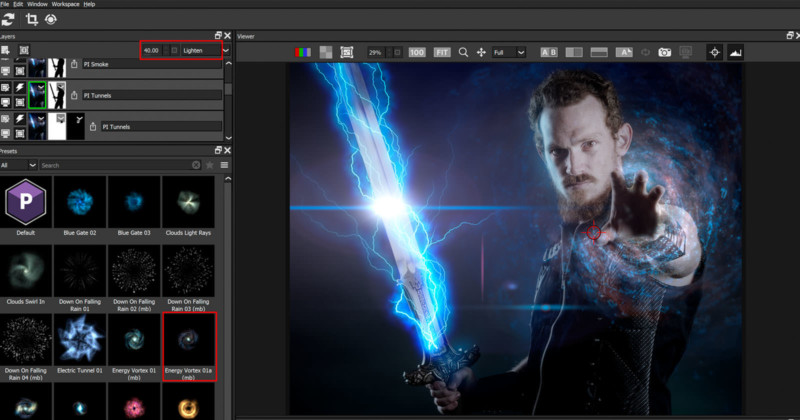
The effects found in the Sci-Fi and Tunnels categories are perfect for these types of magical portraits. We can add multiple layers of vortex emitters with full control over parameters like position, number, velocity, and weight. And for advanced control, we can launch the Particle Illusion interface and design and build complex 3D particle effects.
Master particle creation! Watch the dedicated Particle Illusion training series.
Blending it Together with Film Lab
As you can see, we can endlessly stack effects layers in Optics to build unique looks. In our video tutorial we added some more elements including Warp Waves from the Lens/Distort category to add a time bending effect.
When we are done with the effects, we typically use the Film Lab category for a final color grade, grain, and processing. The Film Stocks filter features over 600 historical film stocks and color processing effects to choose from.

For inspiration, we can select from the Movie Looks category. These are presets that replicate color grades and grain profiles from classic Hollywood films like Alien, Blade Runner, or Harry Potter. As with all Optics layers, we can edit the opacity and blend modes to our desired result.
Conclusion
We hope you enjoyed this project video tutorial and introduction to Boris FX Optics. While this article focuses on “sci-fi and fantasy” aesthetics, the reality is professional photographers are regularly using Optics for all types of projects including landscapes, weddings, portraits, product shots, and more.
Optics is available now for macOS and Windows and comes with three purchase options:
- New standard license: $149
- Annual subscription option: $99/year
- Monthly subscription option: $9/month
Links
Here you can find useful links to help you learn more about Optics and find training resources:
- Download Optics here
- Optics product page
- Optics Quick Start Video
- Lens Flares
- Light Effects
- EZMask Tool
Full disclosure: This article was brought to you by Boris FX